


How To Print Images On Fabric Without Transfer Paper

Are you tired of the same old store-bought wall art and looking to add a personal touch to your home decor?
In this step-by-step guide, you will learn how to turn your favorite prints into beautiful DIY tapestry wall art by printing them directly onto fabric, without the use of transfer paper.
This post was transcribed by a member of the Hometalk editorial team from the original HometalkTV episode.
Whether you're a seasoned DIYer or a beginner, this project is easy and accessible for everyone. So, gather your materials, and let's get started on creating one-of-a-kind wall art that is sure to impress!
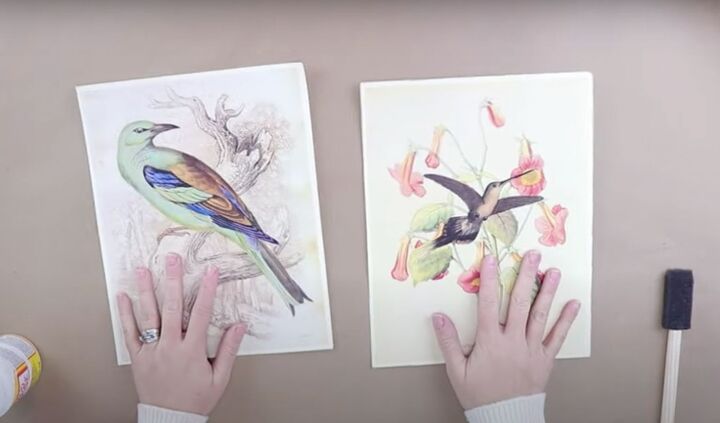
1. Print images
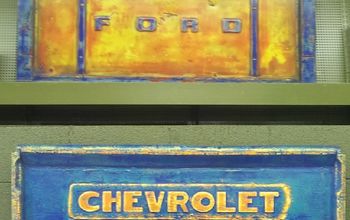
To start, I found two copyright free images on Google and I printed them onto some cardstock using my laserjet printer.
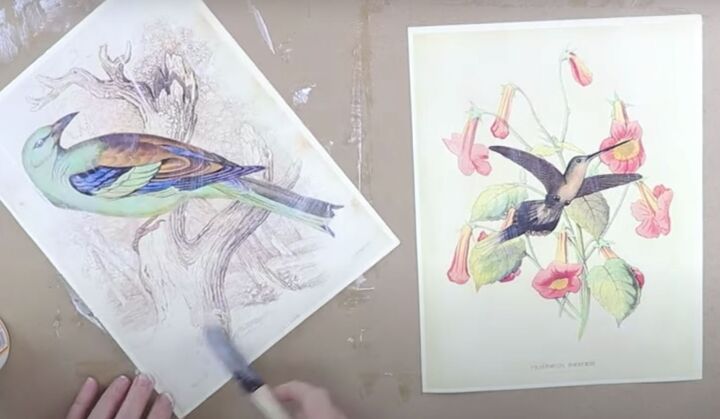
2.Cover the images in Mod Podge gel medium
After that, I covered the entire image with a layer of matte Mod Podge. It is important to cover the entire surface of your pictures making sure they get a nice, even coat of the gel medium.
To ensure that the Mod Podge dried completely, I let it sit for a few hours before continuing with the next step.

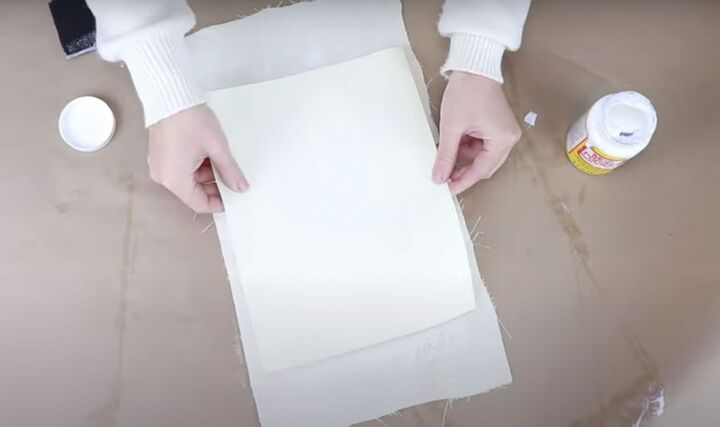
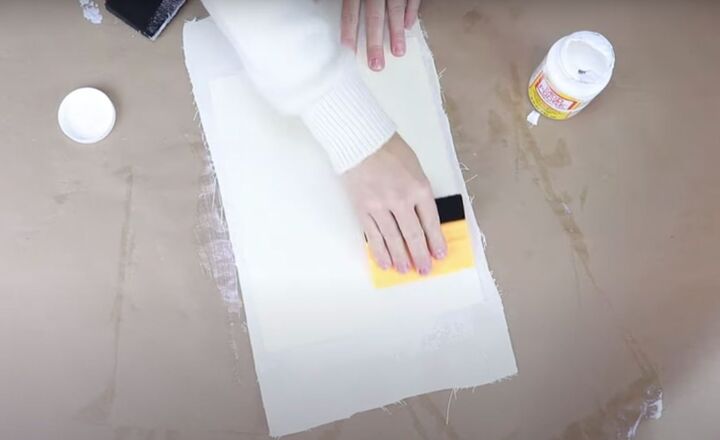
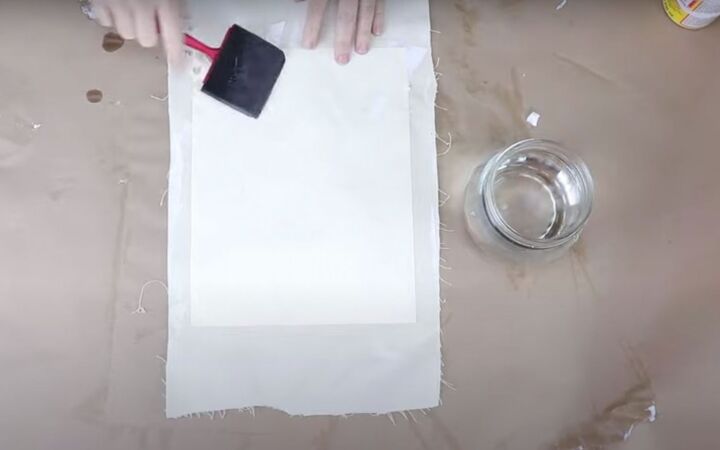
Next, I took a lightweight canvas material and brushed the matte Mod Podge over its surface, anywhere the sheets of paper with my images would touch once I placed them on the fabric.
The Mod Podge was easier to apply if I poured it directly onto the canvas and then spread it with a foam brush. You want to work rather quickly with this step because you don't want the Mod Podge to dry.
4. Place images on the fabric
I placed the paper, image side down onto the canvas fabric.
I then squeezed out all the extra Mod Podge and air bubbles with a flat squeegee. If you don't have a flat squeegee, you could always use a credit card or a heavy piece of cardboard. Just make sure that you squeeze out any excess Mod Podge and air bubbles so that the image is nice and flat.
I let it dry for 24 hours.
5. Remove the paper from the fabric
Now that everything is dry, it is time to transfer the artwork to the fabric by removing the paper. I did this by saturating the paper with water using a foam brush. The paper needs to be completely wet.
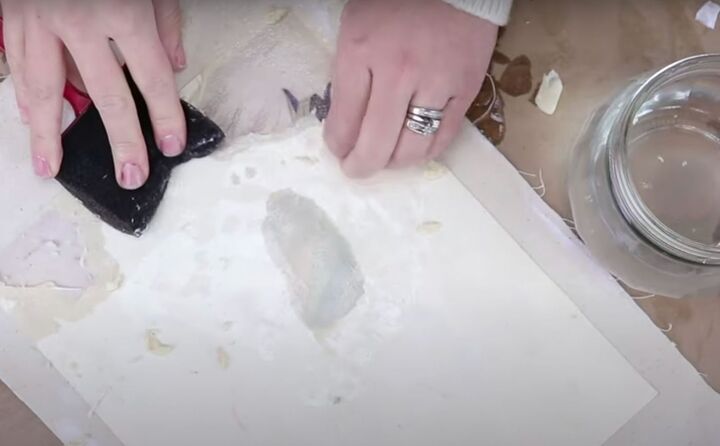
Once I had the paper all wet, I began rubbing it away. This step does take quite a bit of time and is a little labor-intensive, but it is totally worth it when you start revealing the image.
You will see how crisp and clean the transfer is and that all the ink and even the finest details have transferred onto the fabric.
You can actually even run the whole thing under the tap to get rid of the rest of the paper residue. You will be left with a beautiful image on your canvas fabric.
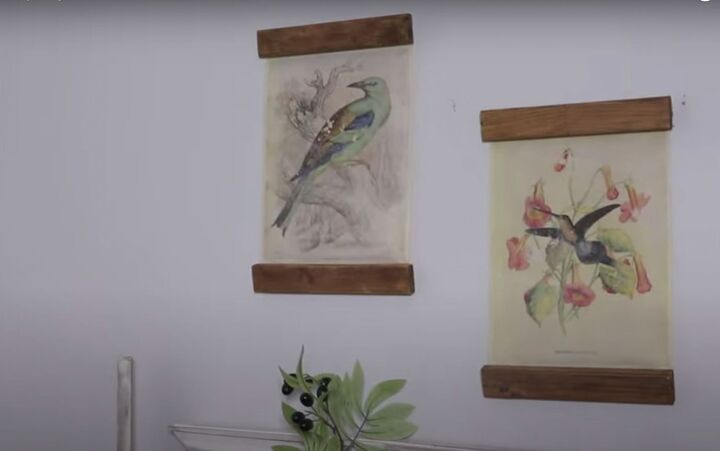
6. Create the DIY wall hanging tapestry
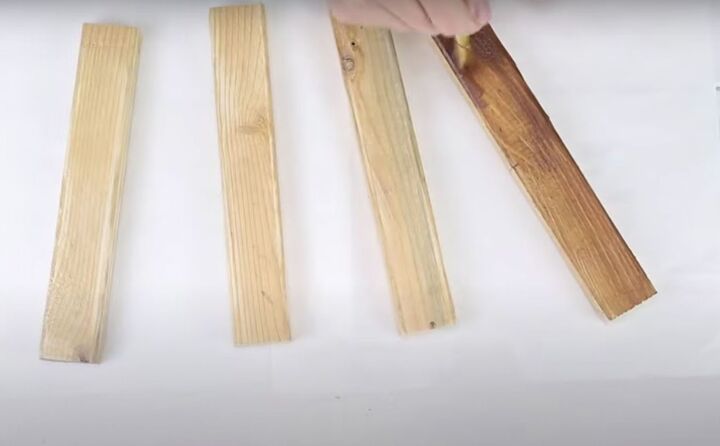
Now it's time to make this into a DIY tapestry. I took four pieces of 1’ by 2’ that I had pre-cut to the size of my paper and used some vintage effect wash from Deco Art to stain them.
Make sure to stain all the surfaces, and do not forget the very ends of the wood because you will see these as well.
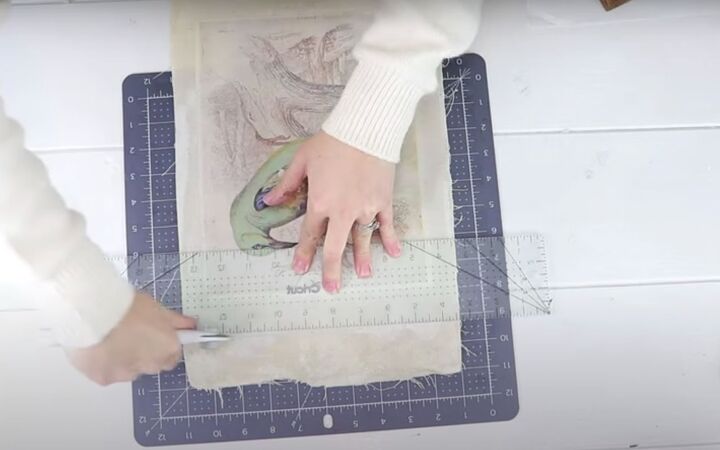
Once everything was dry, I cut my canvas fabric to fit. I just used my rotary cutter to cut it down to fit my piece of wood.
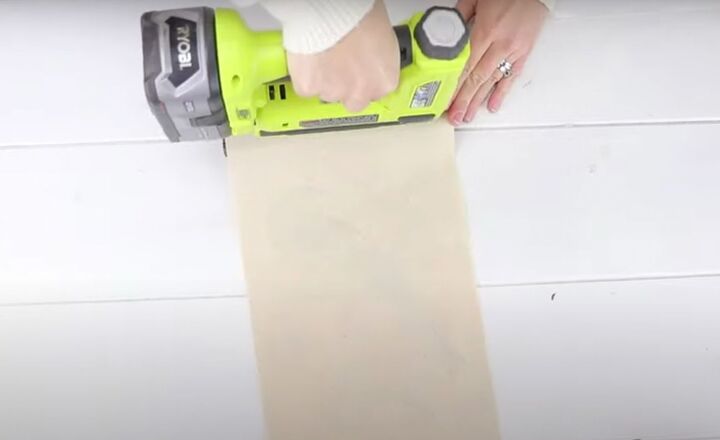
When it was all cut and ready to go, I attached it to my pieces of wood. I just laid it on top, held it in place, and used my stapler to attach it directly to the back of the wood.
More wall art projects
How to transfer a picture onto fabric without transfer paper
When it was complete, I hung my gorgeous DIY tapestries on the wall. I love the vintage effect they add to my home. These look like they were purchased at a high-end home decor store and you would never know that I just printed them out and made them myself.
I really hope that you enjoyed this tutorial on how to print images on fabric without transfer paper. It is a fun and creative way to add a distinctive touch to your space. Go ahead and experiment with different images that reflect your style and personality.
Don't forget to share your thoughts and creations in the comments section.
Till next time, bye!
Resources for this project:
See all materials


Comments
Join the conversation
-
I have an inkjet printer and modpodge causes any pink or red color to run when I use it.
-
Amazing and so elegant!


Frequently asked questions
Have a question about this project?
Great idea was it just the basic modge podge please
With text on the photo don't you want to mirror the image so the text is not backwards?