


How We Used Wood Flooring to Create a Fabulous Shiplap Feature Wall

Today I’m going to tell you all about how we used wood flooring to create a fabulous shiplap feature wall in 1 afternoon!
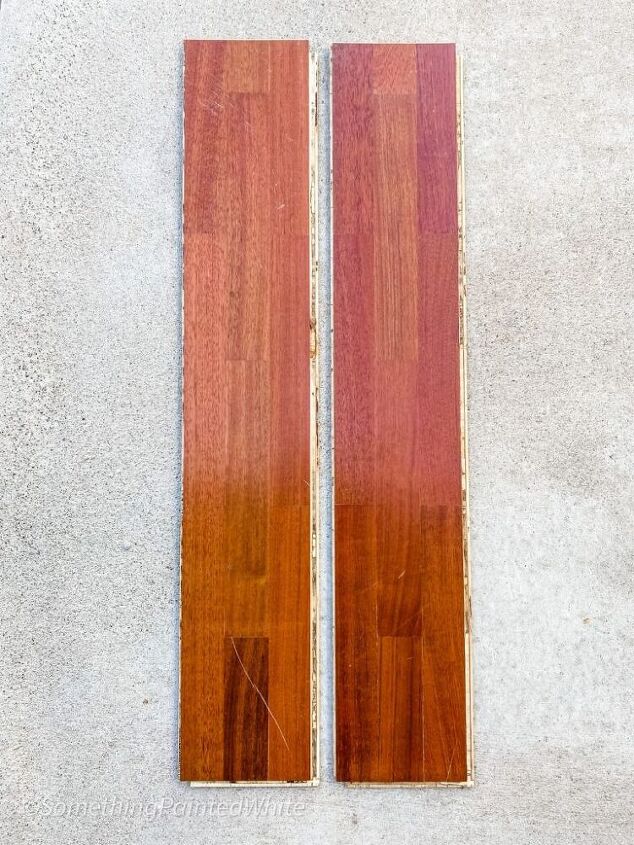
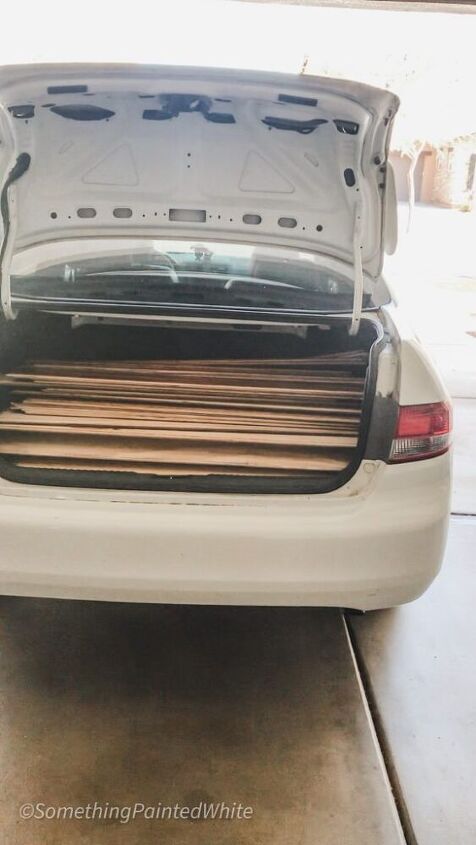
A couple of years ago a friend of mine had a tragic event when her home flooded from a plumbing issue and her wood flooring was ruined. Well…most of it! She knows I’m a DIY’er so she called me and said they were going to put new flooring in the entire house and if I wanted any of the undamaged old wood floorboards, I should come and get it. I was off in a flash! At the time I drove a Honda Accord and I had convinced it over the years that it was a truck and could all anything it put its mind to. I went through the pile of wood flooring in my friend’s front yard and picked all the undamaged pieces I could find and filled up my trunk with them. I had no idea what I was going to do with them at that point, but I knew something would come to me so I headed home happy.
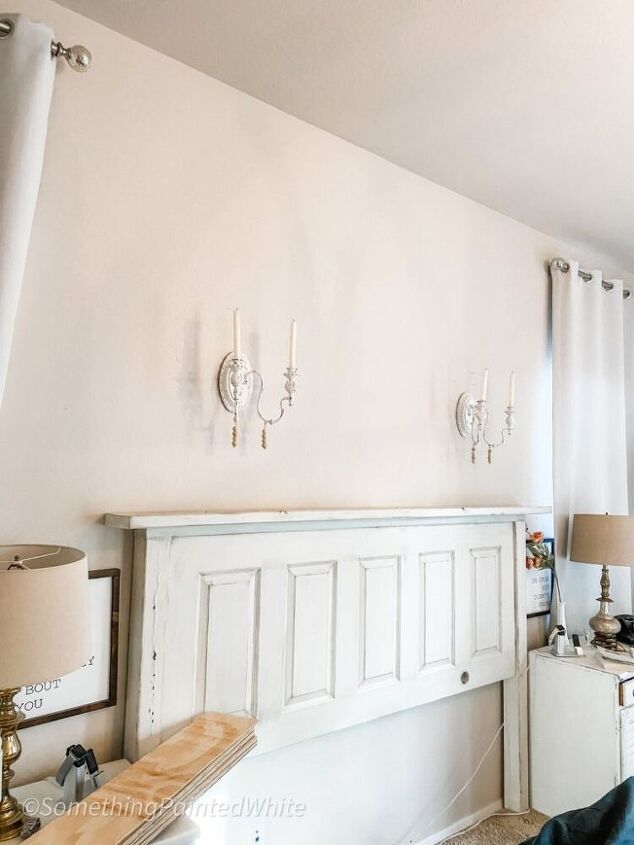
That stack of wood flooring sat in my garage for just over 2 years when I finally realized what to do with it. Shiplap! I’ve been a bit bored with the wall above my headboard for quite some time now and one day it occurred to me that I could use that wood flooring as shiplap above my headboard. If you follow me over on Instagram @somethingpaintedwhite you may know that I tend to get ideas for DIY’s and just run with them. This was one of those times.
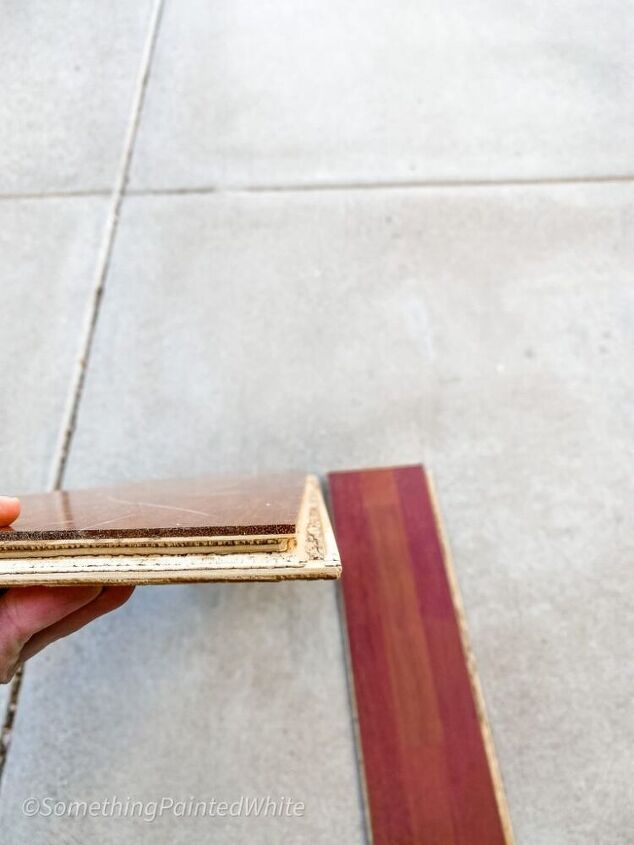
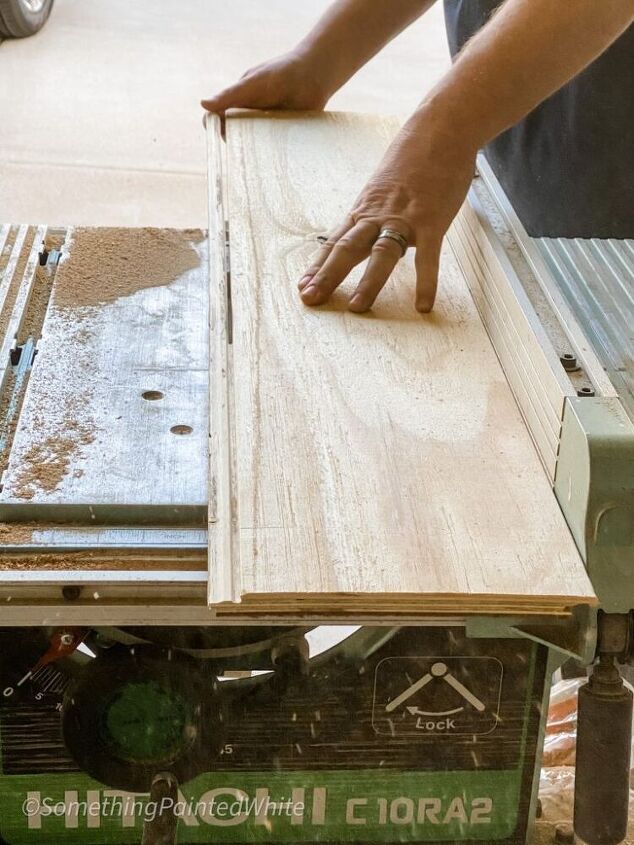
Because it’s actually wood flooring it has tongue-in-groove edges on the sides and we quickly decided that we didn’t need, or want, that feature, so Dee ran the 18 pieces that we needed for this project, through the table saw to remove the lip on the edge as well as the end.
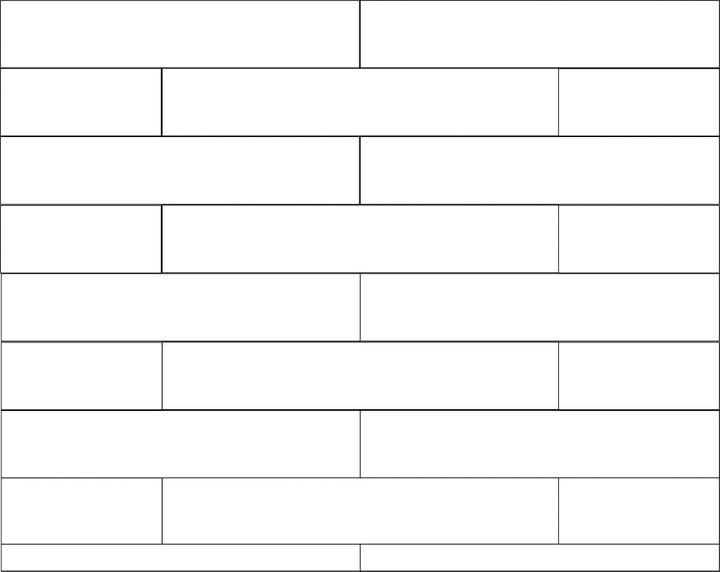
Dee laid out a pattern on his computer to decide just how we wanted to attach them to the wall.
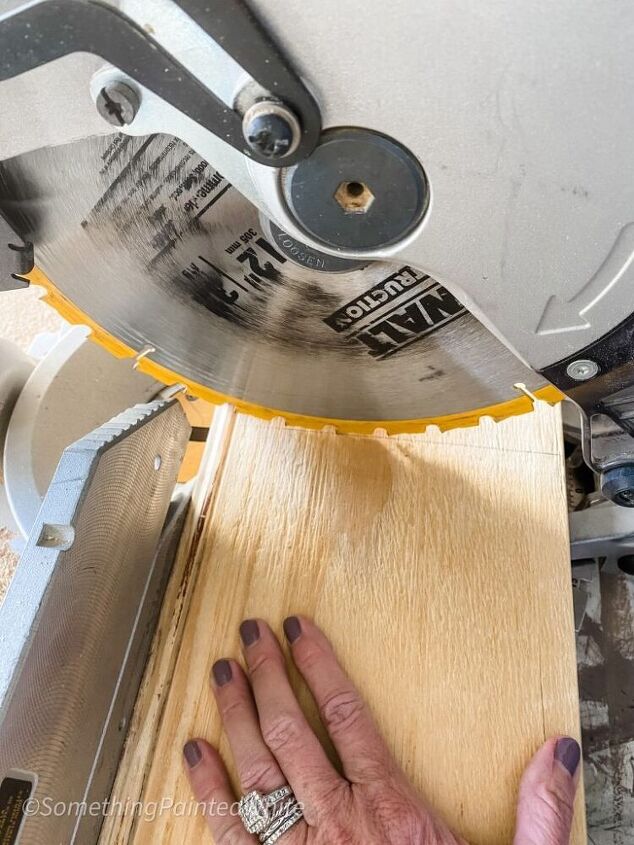
Once the pattern was decided, I was tasked with cutting a few boards down to 17 inches. No problem…I like using our miter saw, the table saw still scares me a bit.
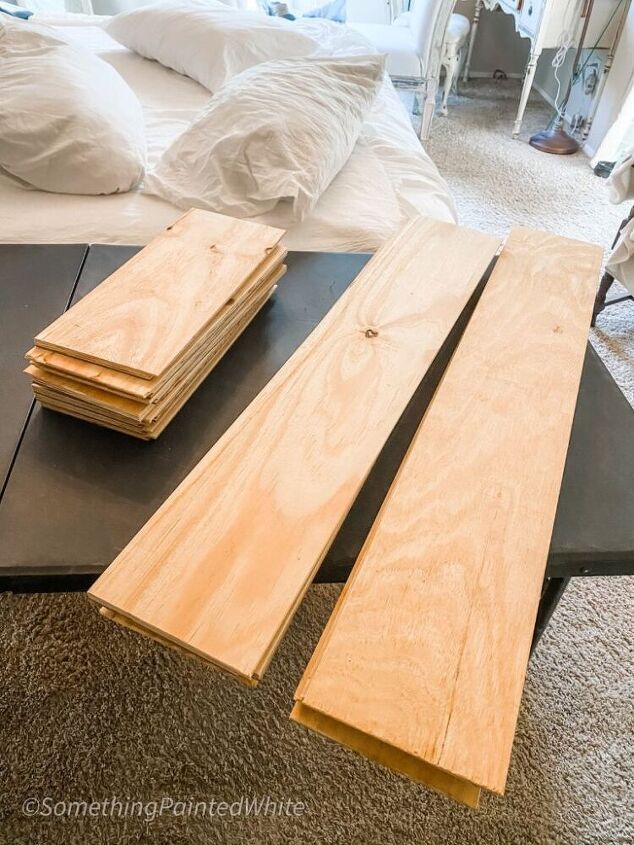
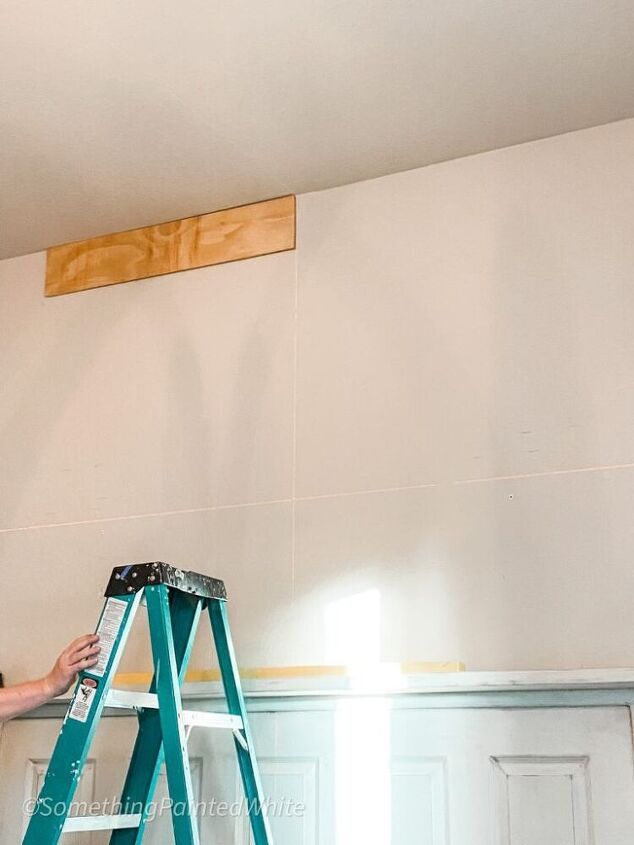
Now that our cuts are all made it’s time to start attaching the wood flooring to this shiplap feature wall.
Dee started at the ceiling and attached the pieces of wood flooring to the wall using our finish nailer and compressor. I sat and watched, and took pictures, my part comes later!
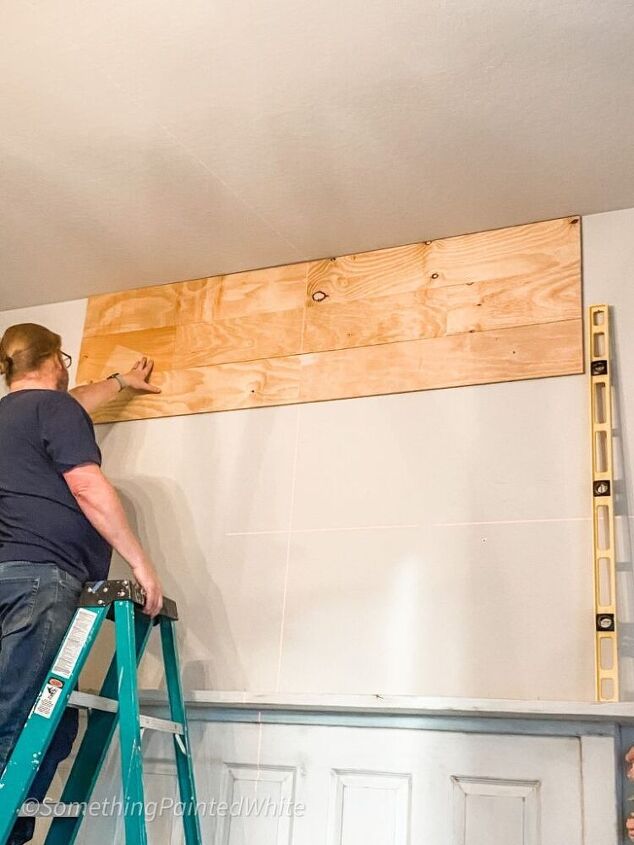
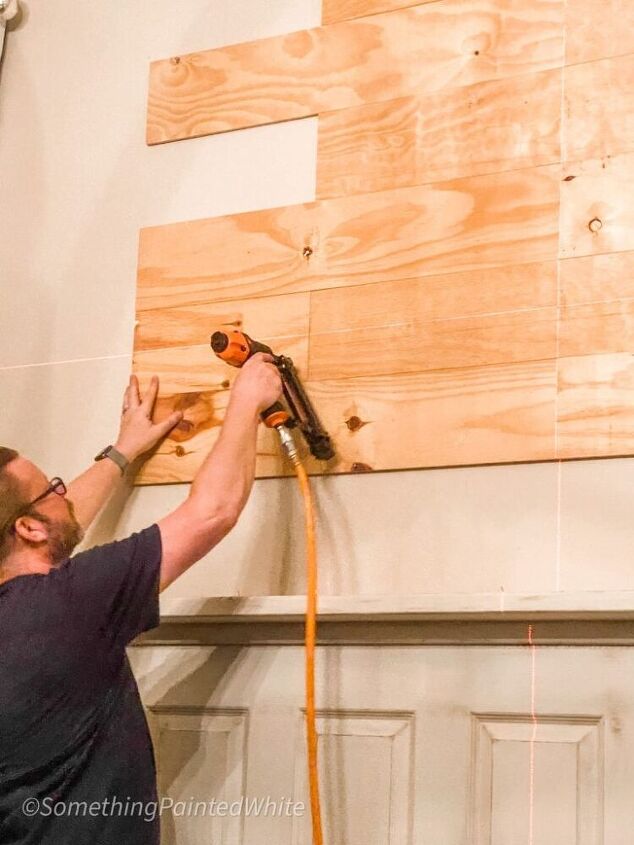
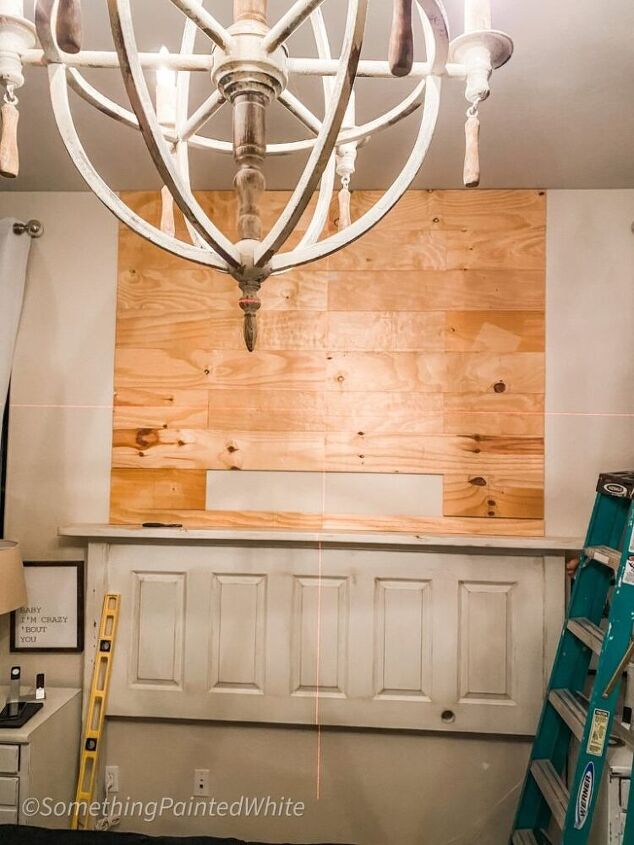
We didn’t worry about… using any kind of spacers…we just butted them all together! (he did…I was sitting) 🙂 When he got down to the bottom, (the top of the headboard) he had to cut the boards down lengthwise to fit. No worries, as that will always be decorated and won’t show anyway!
To make it look neat and tidy we trimmed each side with 1×3’s, (he did, I was still sitting)
I apologize for not having a photo of that at this point in the process. It really didn’t take long at all to get all the wood flooring on the wall, even less than an hour.
Once he had finished his part… it was my turn!
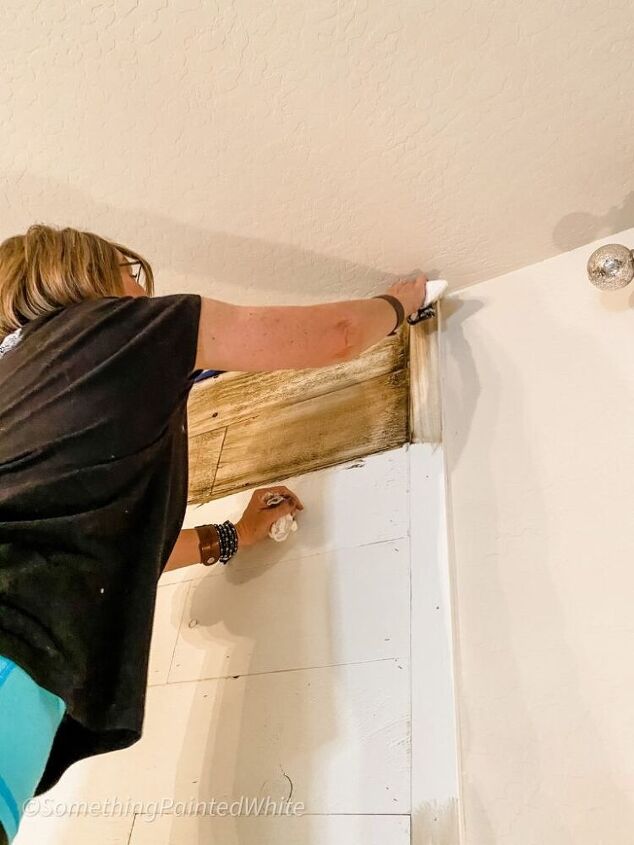
I decided to paint it white! I used my favorite wall color, Westhighland White, by Sherwin Williams, mixed by Home Depot in their satin Behr paint. (again I didn’t get a photo at this point, I really need to work on my photo-taking skills!)
By the time I was finished with the first coat I realized that I wished I had allowed more of the natural wood to show through, I liked the way that looked. But some spots were completely covered so it was too late for that! I thought about sanding it to allow more of the wood to show through but that seemed like a lot of work and a big mess, so I had another idea…
What if I GLAZE it???? I’ve been on quite the glaze kick lately and figure why not glaze the wall above my headboard which is now covered in upside-down wood flooring? I love the way glaze transforms white to a raw wood look!
So I got out the glaze and a sponge brush and started brushing the glaze on and then, using a lint-free rag, I wiped the glaze back off. The glaze does a great job of getting down into all the cracks and crevices. It really makes the wood grain pop and it just looks amazing.
I LOVE how it turned out! I’m so happy with my decision to glaze this upside-down wood flooring which is now a fabulous feature wall.
As soon as the glaze was dry we hung the wall sconces back up and put this fabulous mirror on the headboard, Dee made sure to attach it to the wall so that it’s secure and I don’t have to worry about it falling on us during the night!
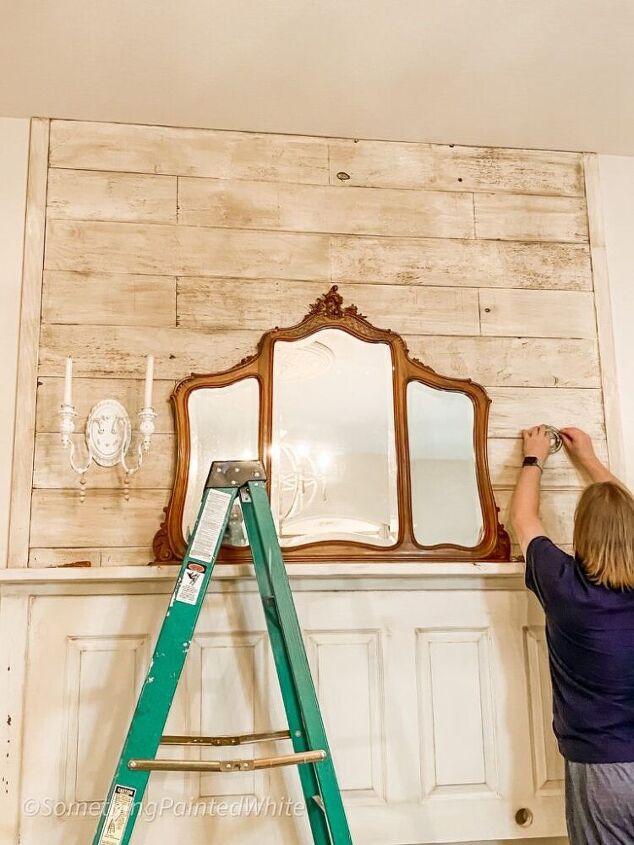
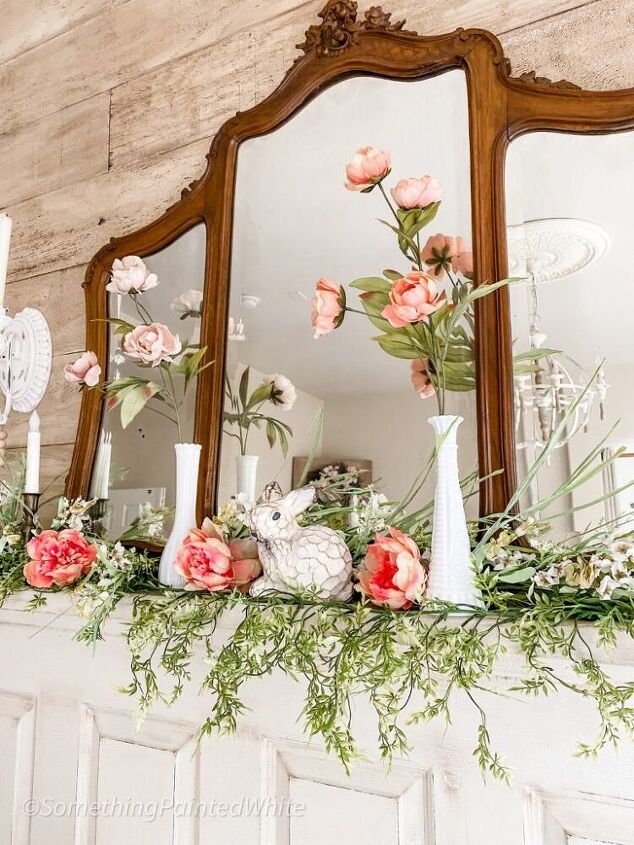
The very first thing I did was decorate the headboard for Spring/Easter! I love having this space to decorate for the holidays and seasons! I don’t have a fireplace mantle to decorate so my headboard takes the place of that!
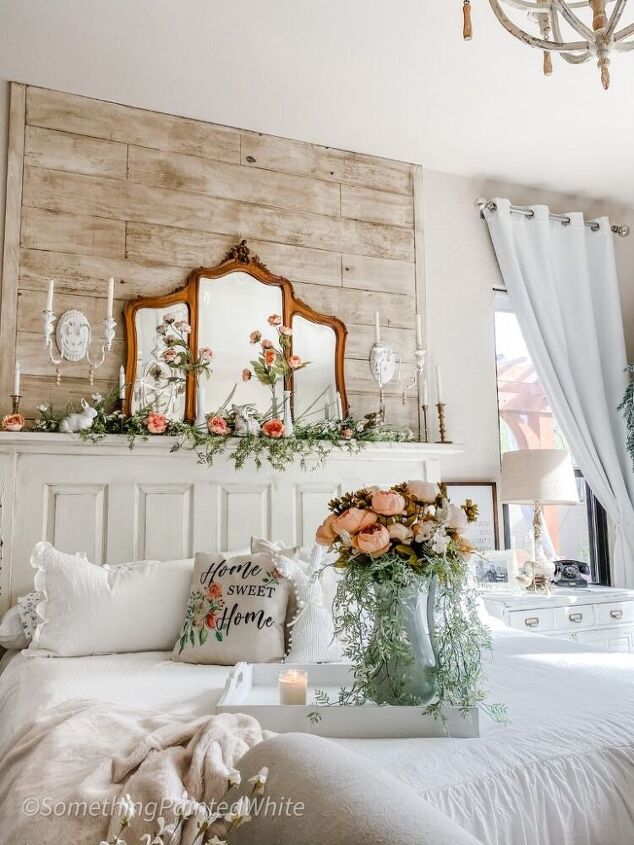
This beautiful mirror was a FB marketplace find and I’m so in love with it! The nice old man said it was his grandpa’s so I know it’s very old. I love the way my chandelier reflects in it!
I still have quite a large stack of wood flooring as we only used 18 pieces for this project, so I’ll be sure to let you know what we find to do with the rest of it. I have a few ideas floating around. 🙂
Happy DIY’ing,
~Cindy~
Comments
Join the conversation
-
Love it! Love it!
-
It’s very pretty, and girly, kutos to your husband to not balking at such a feminine touch.


Frequently asked questions
Have a question about this project?
Didn't the flooring have cork on the back?
I love this look; however, I'm a bit confused. The sizes of the flooring shown in the 1st photo doesn't look at all like the same size (width) in the subsequent photos. Maybe I missed something?
I love to be creative but never though of that idea of using the reverse side of flooring planks. Awesome! Wow! But I would like to know which glaze you used? I sanded a shelve that was all white and it was hard to get to the wood tone. I tried staining it but didn’t ended the way I wanted. It really impressed me how you got the light wood look after painting it white.