


Enlarge a Room With a Photo Mural
Is your space disconnected? Open plan rooms don't flow together? Why not hang a large wall mural!
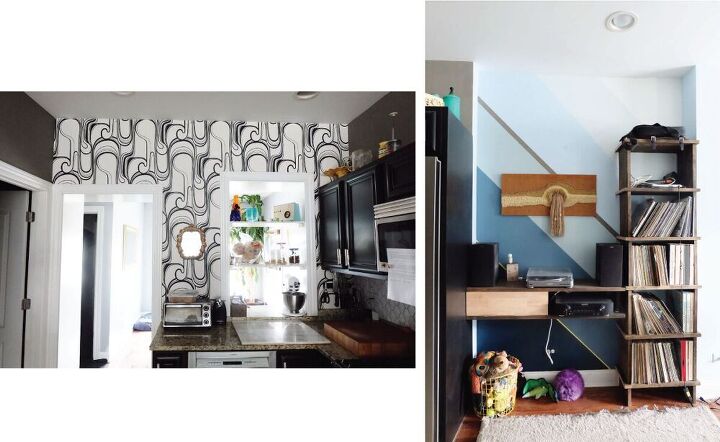
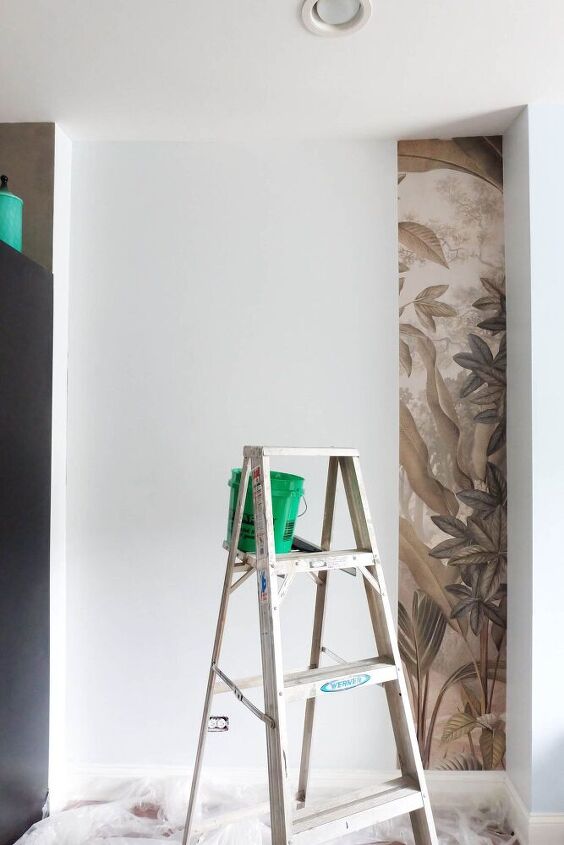
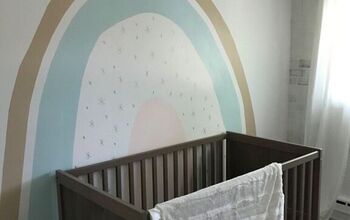
Before
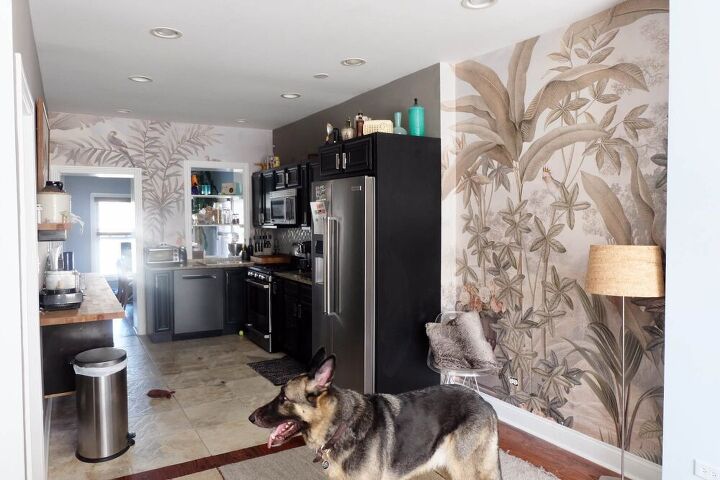
So I've had a major itch to redo our first floor which, yeah, is good and bad, right? The spaces don't really connect and despite my major major major love of the kitchen wallpaper, it was time to make these two neighboring areas flow together better.
Bonus, and one of my three hot tips for small spaces in this blog post, it will make the whole area feel larger.

Order wall mural
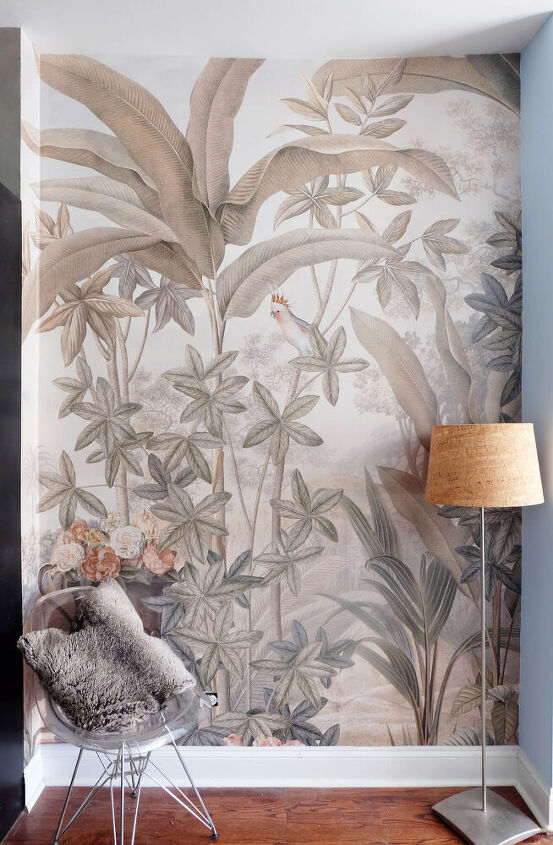
Photowall sent this big giant wall mural and it's pretty amazing. There were actually 11 panels and yes, obviously that's too big for one spot so come to the blog post for another hot tip!
The hardest part of this project? Picking the artwork for the mural! Oh my, there are so many fantastic options available! And if you don't see what you want, you can create your own. How cool is that?!
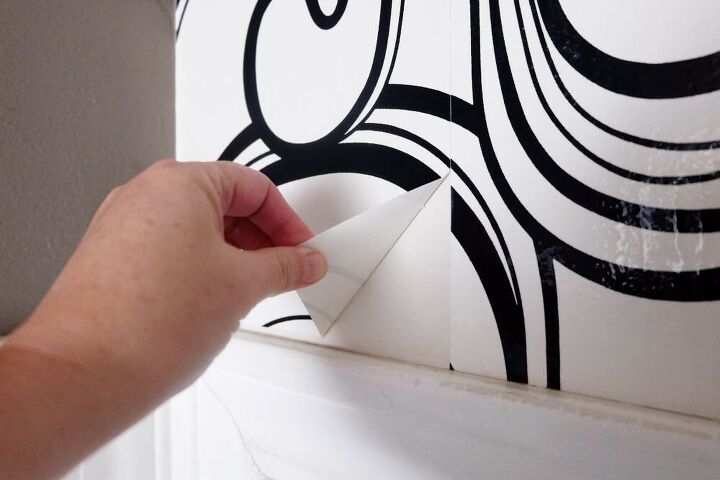
Prep, patch, prime
I'm a big proponent of wallpaper and if you follow my suggestions, you'll never hate wallpaper again! See how easy this came off?!
Before you get going on a wall mural or any wallpaper, be sure to prep your walls, patch them if needed, and prime them if you can see the wall color through the paper as I could.
You'll also want to use a great product called adhesive primer which you can read more about in the blog post.
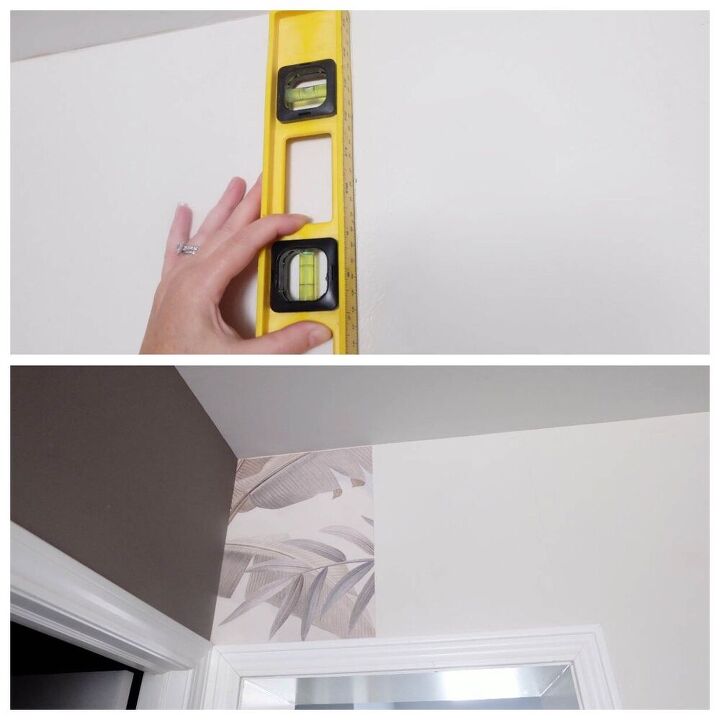
Mix and measure
Time to mix up the enclosed wallpaper paste and measure out for your first panel.
The first panel is the most important panel -- make sure it's plumb, straight, level and square otherwise your whole project will be off kilter and no one wants that!
Spread the glue evenly, line up your panel, and smooth it on, cleaning up any paste spurts right away.
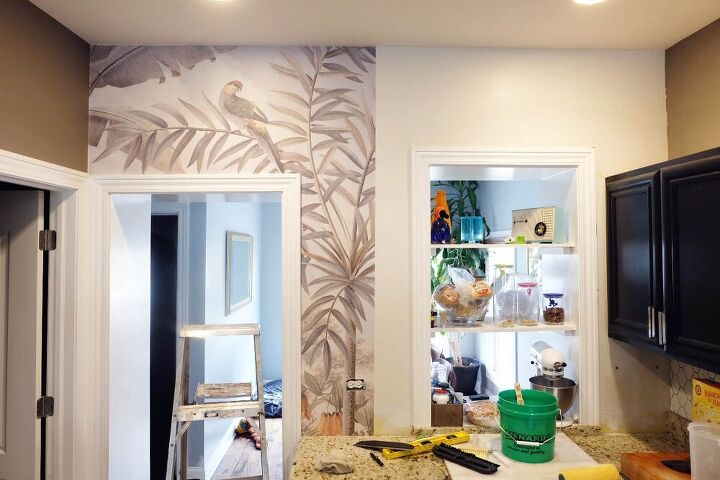
Keep going
Then just keep going!
And going!
After the kitchen was done, it was on to the record player area which was much easier, nothing to cut around, haha!
Relax and enjoy
For all you Finn lovers out there, here he is cruising through!
If you've been to the blog post and read my hot tips, you'll see my grand over-arching concept here and it'll all make great sense.
All one space now, right? Feels much larger, right? Yay!
Enjoy some more
All it takes is a few short hours in a day and you've got a whole new, well-designed interior going on! Shout out to Photowall, they're awesome!
Swing by Flipping the Flip for more!
Resources for this project:
See all materials


Comments
Join the conversation
-
They're beautiful panels. I love the look of a wall mural but when I went to price the size I'd like for a bedroom wall from numerous different vendors/sellers, I couldn't afford any of them. Even a 36" square wall mural is ridiculously priced at some vendors. And what happens in a few years when you grow tired of what's on the wall or the "trends" change and you want to change the look of your room, too. There goes $600 or more bucks down the drain, cha-ching! Cheaper to just buy regular old-fashioned wall paper from a discount vendor online or stick with paint. No patience to do stencilling myself.


Frequently asked questions
Have a question about this project?
Not a question. Looks great. Love Finn.
What is the name of that particular mural that you used? It’s beautiful.💕