


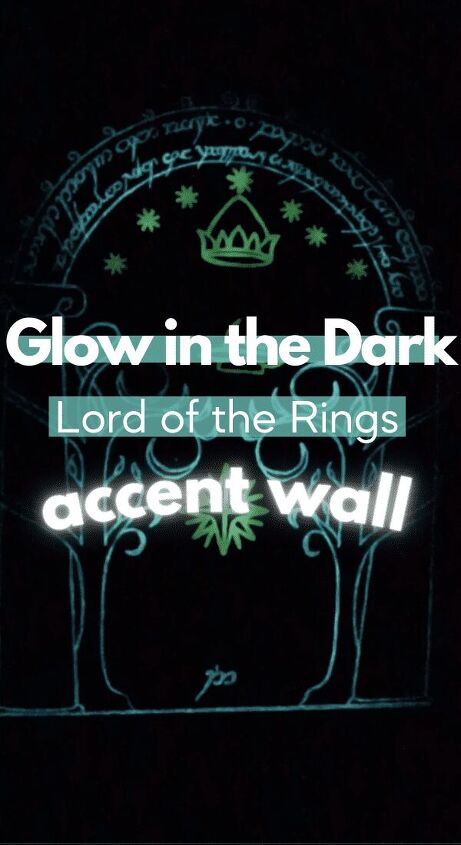
Lord of The Rings Inspired Glow-in-the-Dark Feature Wall
Want to add some magic to your kid's bedroom? Take a cue from J.R.R. Tolkien and add your very own Mines of Moria doorway complete with glow-in-the-dark paint!
I know what you're thinking.
Really, Lord of the Rings? That is so 2001.
Try 1954.
If you want to get really technical, The Hobbit came out in 1937.
If you know, you know.
The books are incredible. My five-year-old son can barely read, but I wanted him to get excited about the series. I always knew I would incorporate something amazing in his room from LOTR.
Here's how I did just that.
Tools
Materials
- Scrap 1/4" plywood
- Rare earth magnets
- Glue sticks
- Fairy twinkle lights
- Command hooks
- Faux ivy and other greenery (Hobby Lobby tends to have good discounts!)
- Glow in the dark paint
- UV LED black light
- Rustoleum Magnetic Paint
- Cleaning gloves
- Rustoleum Chalkboard Paint
- Rustoleum Glow in the Dark Spray Paint
- Chalk markers
- Tracing paper
- Black graphite paper
- Paint brushes
- Paint roller + nap
- Acrylic paints in various shades of brown + white
- Chicken wire
- Staple gun + staples
- Tin snips
- Paper towels (dollar store for the win)
- Pool noodles
- Masking tape (I used a mixture of frog tape and contractor tape)
- Glue + Water + Joint Compound powder for paper mâché
- 3" screws
- Styrofoam board insulation sheeting
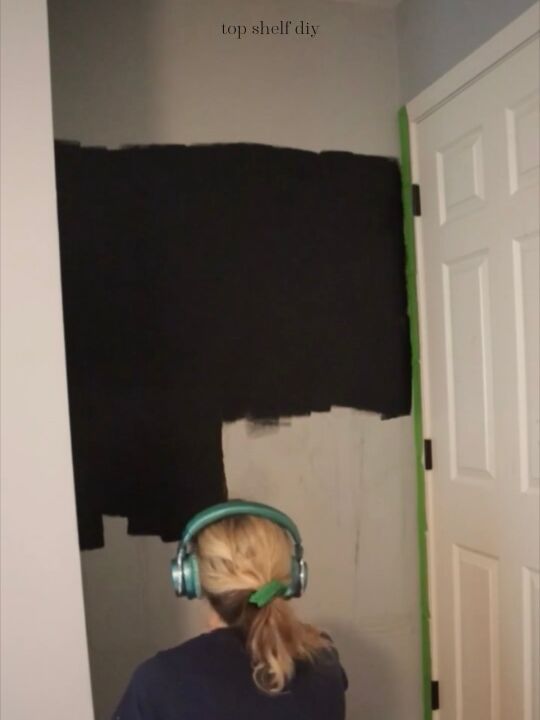
Preparing your Wall
Make sure your wall is clean and free of defects. Fill any holes with spackle or pre-mixed joint compound and sand your walls smooth.
Tape off any areas that you don't want covered in tiny flecks of metal/paint.
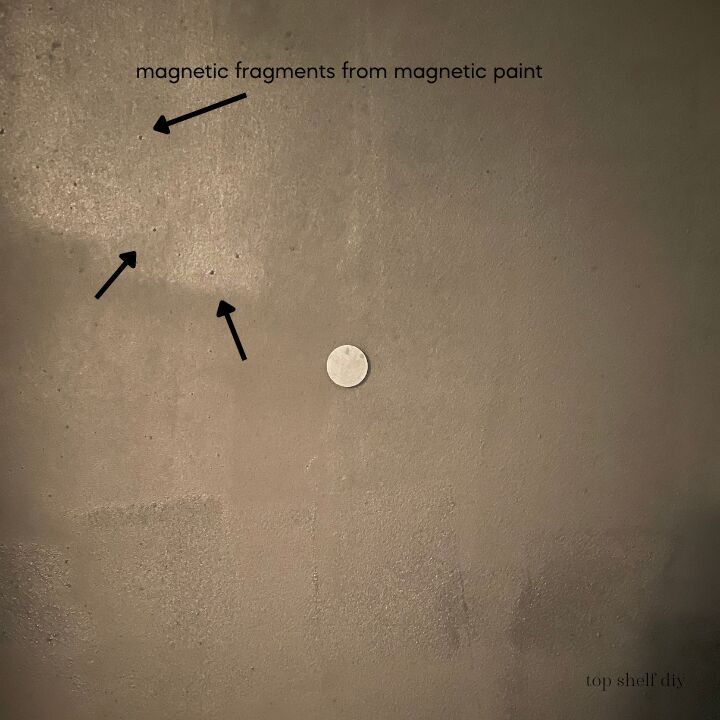
Start with your magnetic primer. I painted three coats on my accent wall. Stir well between coats to make sure you mix all the components.
Definitely wear gloves! This stuff is thick and messy.
Magnetic paint has more of a chemical odor to it, but you'll find that the smell dissipates after 24-48 hours.
Sand between coats in case you get any large clumps that have dried.
Now you're ready for chalkboard paint! Apply 2-3 coats of chalkboard paint over your magnetic paint. Don't worry, you won't lose the magnetism underneath.
You'll want to "cure" your chalkboard wall 48 hours after the last coat was applied. Rub a thin layer of chalk across the entire wall so that whatever gets drawn on it doesn't leave a permanent mark.
Adding your Mines of Moria Doorway
Find the image you want to use for your wall design.
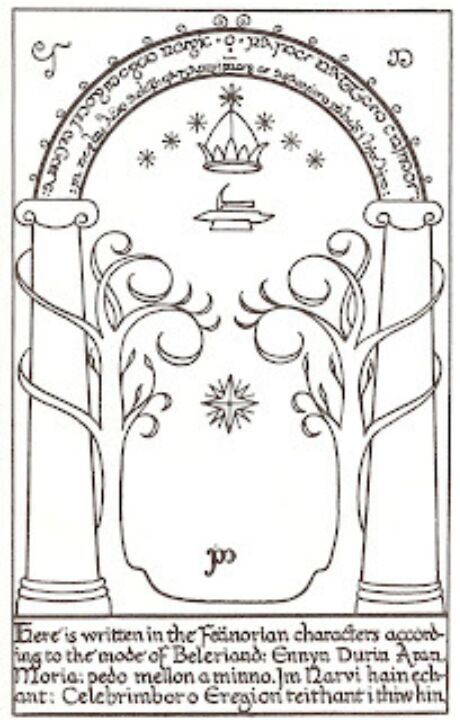
Measure your wall and mark the exact midpoint with a piece of chalk. I added an X and Y axis to my projector image so that I knew where the exact midpoint was located. Then all you have to do is line up your midpoints.
Connect your movie projector to your laptop using the cords provided. Get your projector positioned such that your image fills the wall horizontally.
Note: you probably won't be able to stretch it to fill the wall vertically without majorly distorting the image.
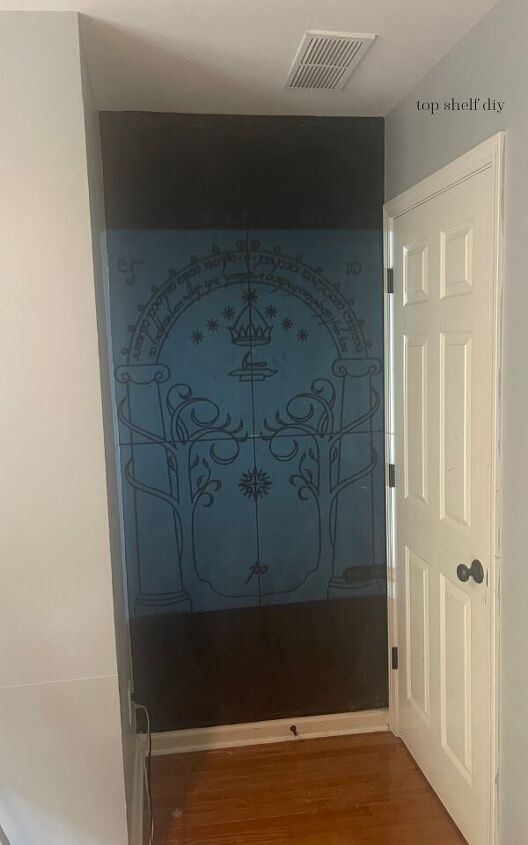
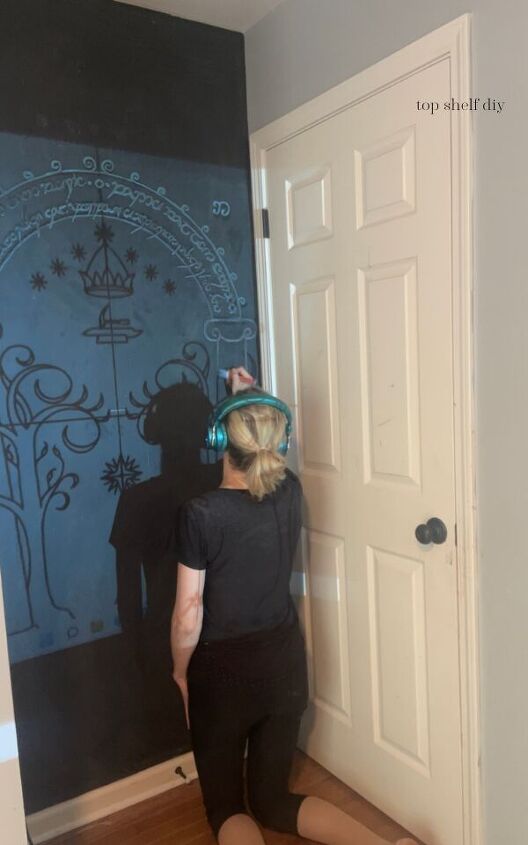
Now the magic happens. Using a chalk marker, trace the image being projected on your wall. Once you have the entire image traced, you're ready for glow in the dark paint!
Carefully add your glow in the dark paint to your design using a fine tipped paintbrush. I waited for the first coat to dry and added a second thick coat the next day.
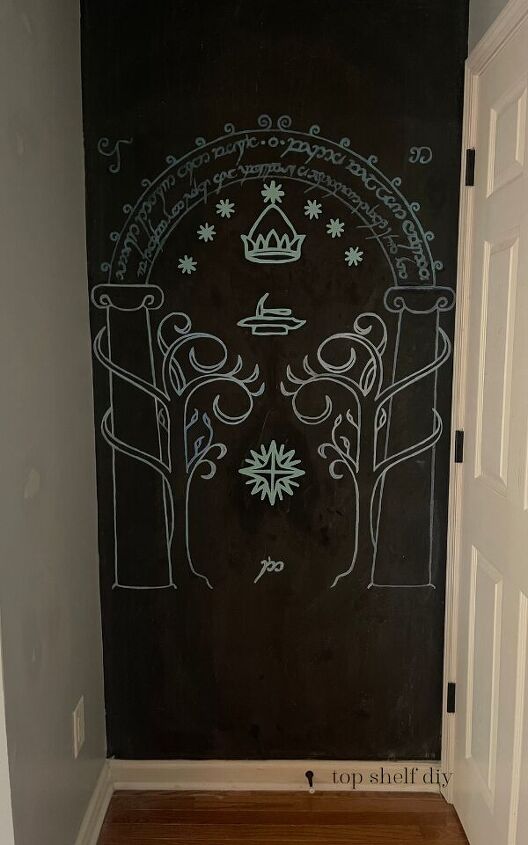
To "activate" your glow-in-the-dark paint you'll need to shine a black UV light on your painted design for a 10-15 seconds prior to turning off the lights.
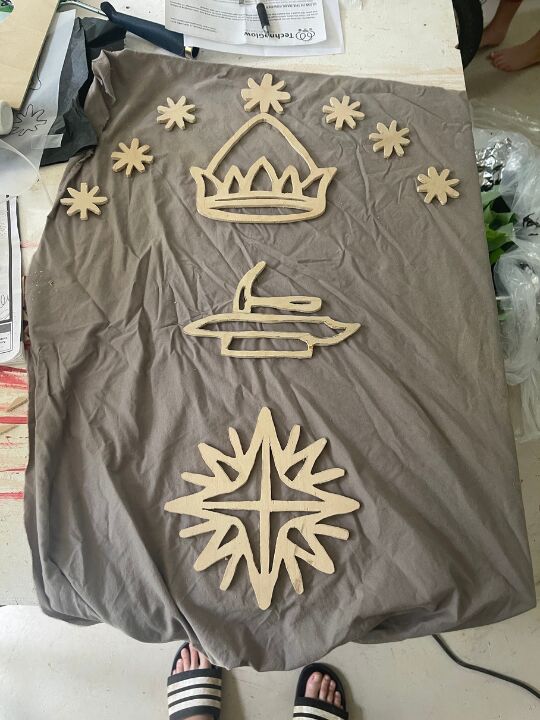
While my wall designs were drying I cut out the stars, crown, and anvil with my scroll saw. I traced the designs onto some scrap plywood I had lying around.
Once the images were cut out with my scroll saw I sprayed them with the Rustoleum Glow-in-the-Dark paint. I attached a rare earth magnet to the back with hot glue.
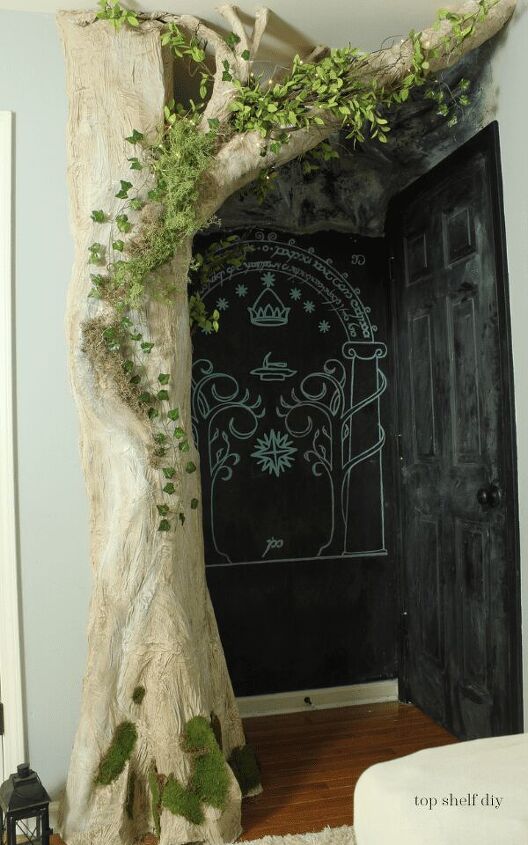
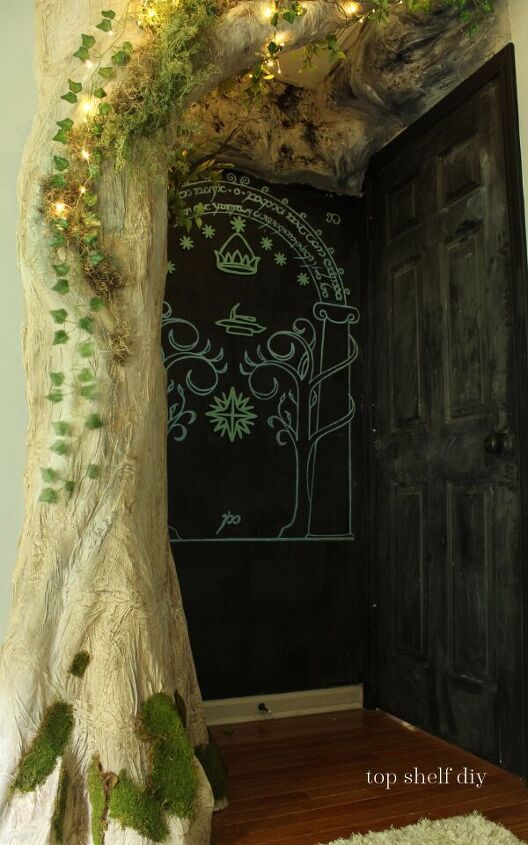
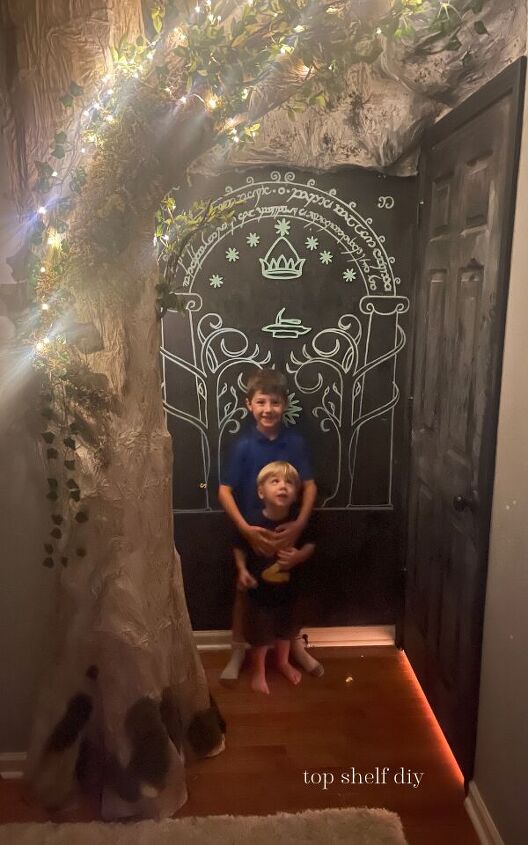
Instantly, my Moria door had some depth to it!
Constructing the Tree and Mountains
Next came the "Arts and Crafts" portion of this build.
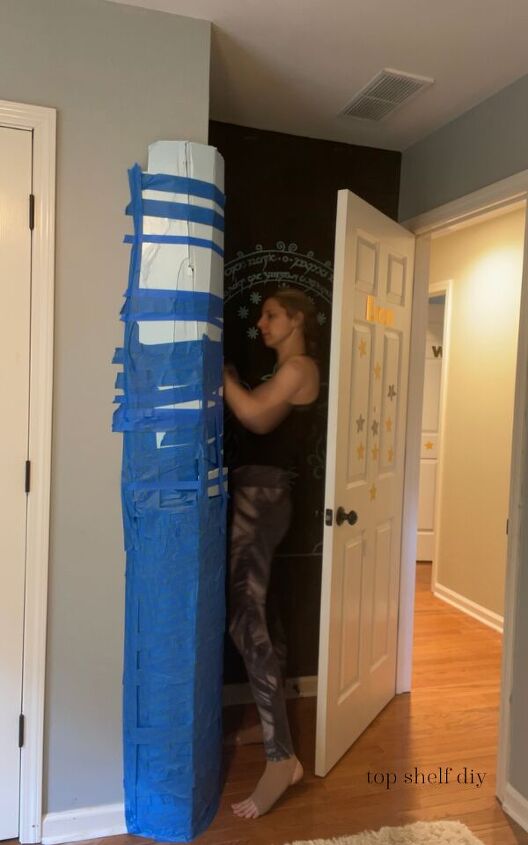
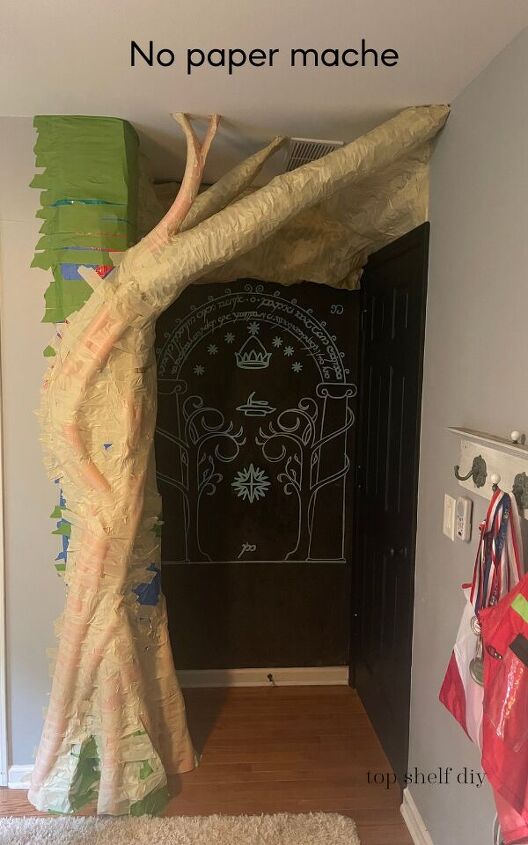
Essentially what I did was build a tree and mountains using some leftover insulation, chicken wire, and a whole lot of paper mâché.
Start by taking your sheets of insulation and gently snapping it so that you can bend it into a circle. Then, cover the entire surface with tape.
The tape provides not only a way to keep the tree attached to the wall, but it provides a surface for the paper mâché to adhere.

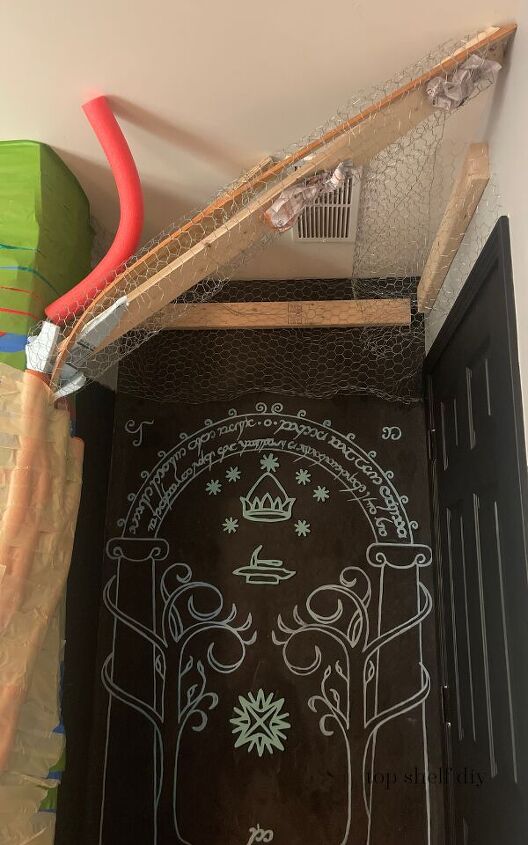
I poked a few holes in the insulation and added tree limbs made from scrap pieces of wood. One end was secured via the hole in the tree, and the other end was screwed into the ceiling joists* using 3" screws.
Just in case my kids get the bonehead idea to try swinging from these tree limbs, because, KIDS.
Next, I wrapped the tree limbs in chicken wire. I also bent and secured the chicken wire above the doorway using staples so it would look like a mountain.
I ripped several pool noodles in half and taped them around the tree to give it the effect of roots.
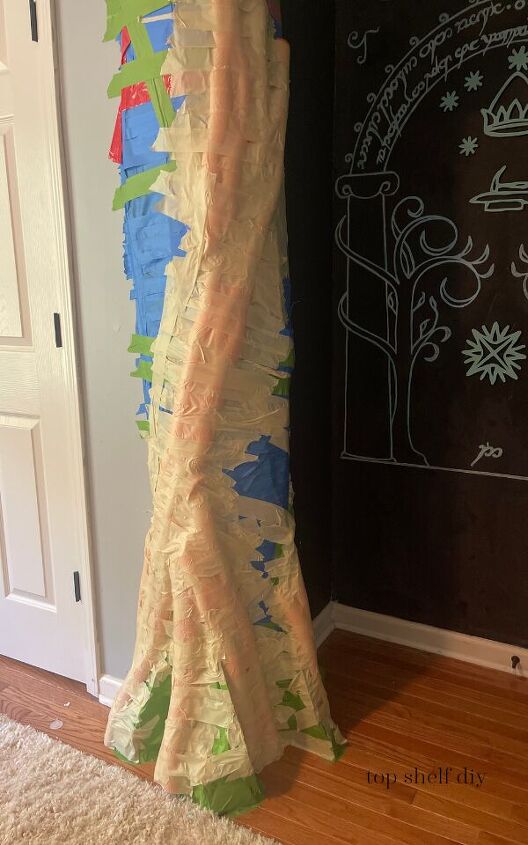
Once everything was covered in tape it was time to paper mâché!
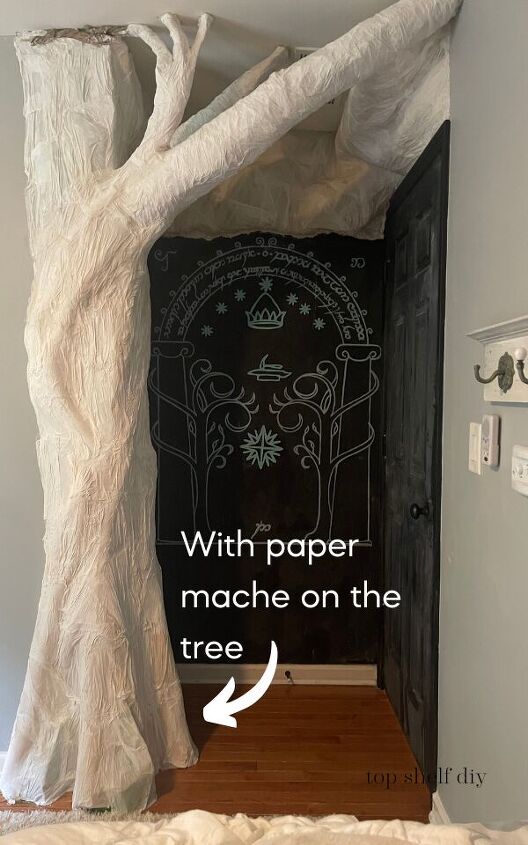
Now I didn't follow a specific formula for the paper mâché; I simply mixed water, glue, and joint compound powder in a bowl until it seemed to reach the right gooey consistency. I coated my strips of paper towel in the gooeyness, removed some of the excess, and then plastered it on my base.
Once the layers of paper mâché dried (about a day) I added various shades of brown and white to emphasize where the light would fall.
At this point all that was left was to add the vines (secured with clear Command hooks) and twinkle lights!
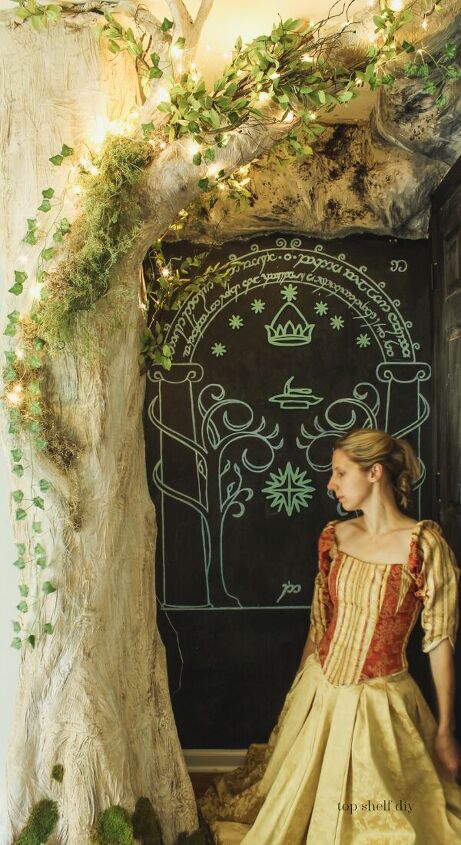
Of course I needed to play up the drama by posing in my old prom dress. The princess must reign again!
My kids absolutely love the tree and twinkle lights. My oldest is still afraid of the dark, so this helps him feel a bit more comfortable at bedtime.
Until the next project!
Cheers,
Erin
Resources for this project:
See all materials


Comments
Join the conversation
-
This is outstanding! I did something similar for my youngest son back in the day although not quite as elaborate, he still talks about it as your boys will when they are grown. Very impressive!
-
WOW!!
I'm sure your children are going to enjoy this for years to come. You're very talented.
Love it!!


Frequently asked questions
Have a question about this project?
I am a Lord of the Rings fan! This is amazing!