


Making a Texas Star...from a Leftover Box
Back in the fall...I had the honor of getting to decorate a lamp from Lamps Plus and The Hometalk Team. I couldn't believe it when I got the email that told me I won! My prize? $500 gift certificate to shop at lampsplus.com. If you know anything about me...you know, that another lamp...was not something I needed...but to my surprise...lamps plus had so much more to offer. I snooped and snooped and tried to figure out what I needed...and it came to me...but would they have them? I don't know....but YES...there on the monitor...was my new patio furniture cushions! (Our boxer chewed all of our up several years agao.) I've looked into replacing the cushions...but just didn't feel justified in spending that amount of money on new ones...when you can almost replace the whole set for the price of replacement cushions. Then the day came...boxes...and boxes, upon boxes pour out of the delivery truck! Excitement poured through my veins as I opened one box after the other...giddy with pleasure. So strange to see all my chairs with cushions again. But...it wouldn't be long lived....Mother nature didn't want my followers to see my furniture all dressed up...and she wouldn't cooperate with me. So...I go ONE small instagram shot...and in I went...but the boxes called for me....they called and called. So, out into the wind and cold I sent my hubby to retrieve the boxes. This my friends...is what those humble cardboard boxes became. This is only part of the story. There WILL be more to this saga. So...this is MY for the week. There are some instructions here..but more on my site...there are several steps to this project. Don't throw those old cardboard boxes out... Rust technique...here: http://www.livecreativelyinspired.com/rust-technique/
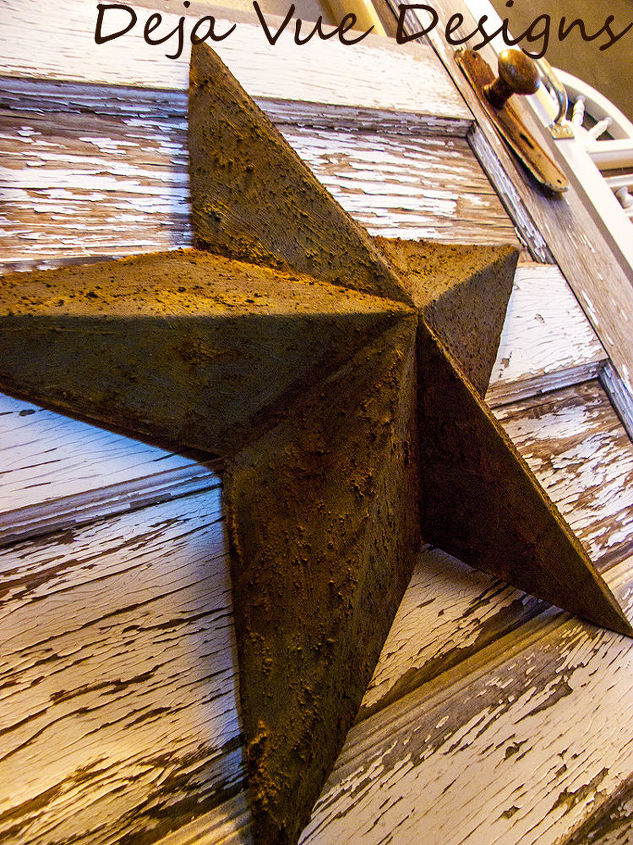
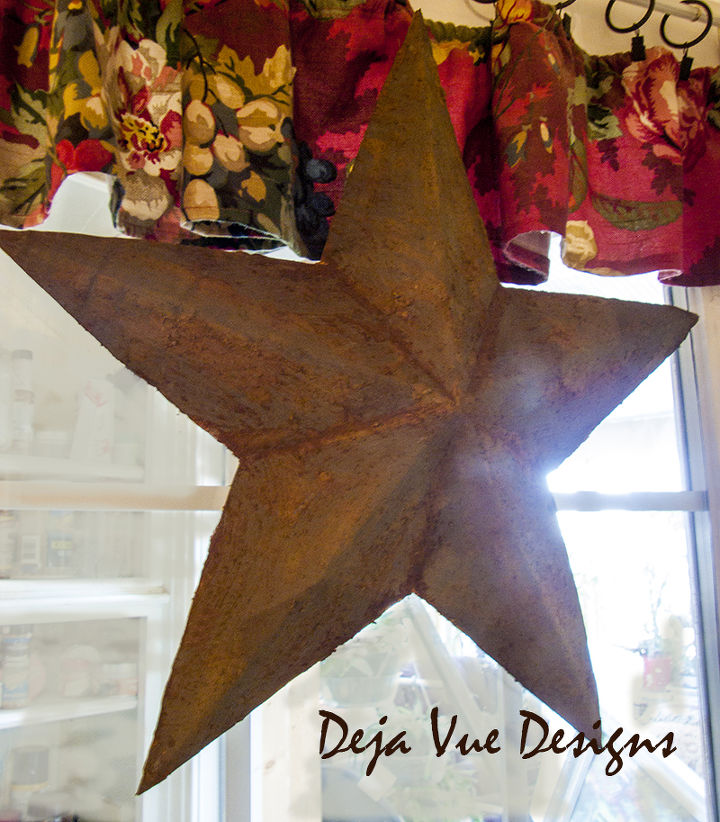
By looking at this star...you would think it were metal
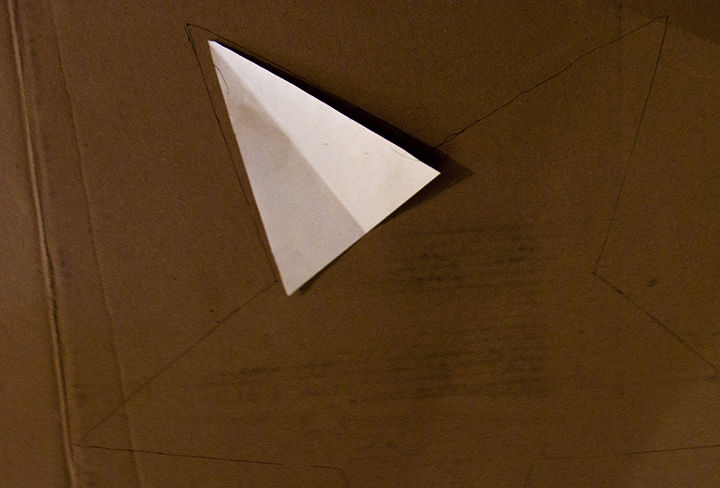
By using a triangle...anyone can make this star. I have this triangle to download on my site.
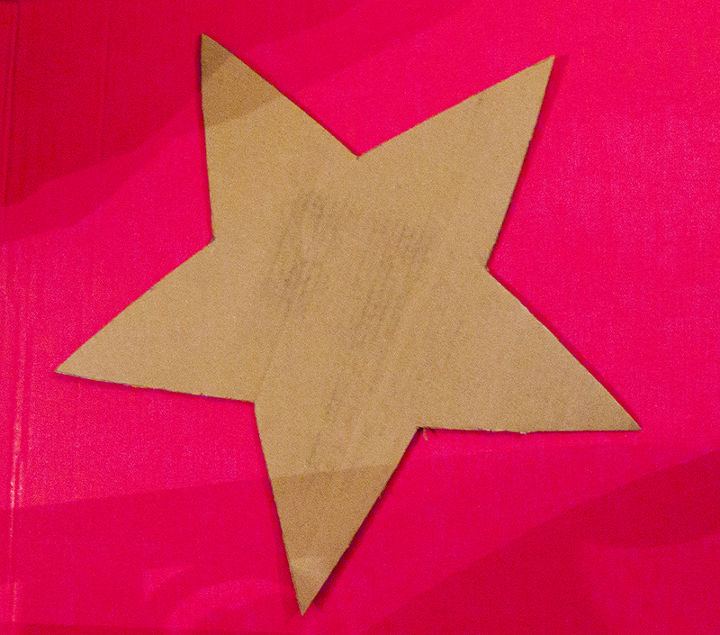
But no...it's a humble cardboard box
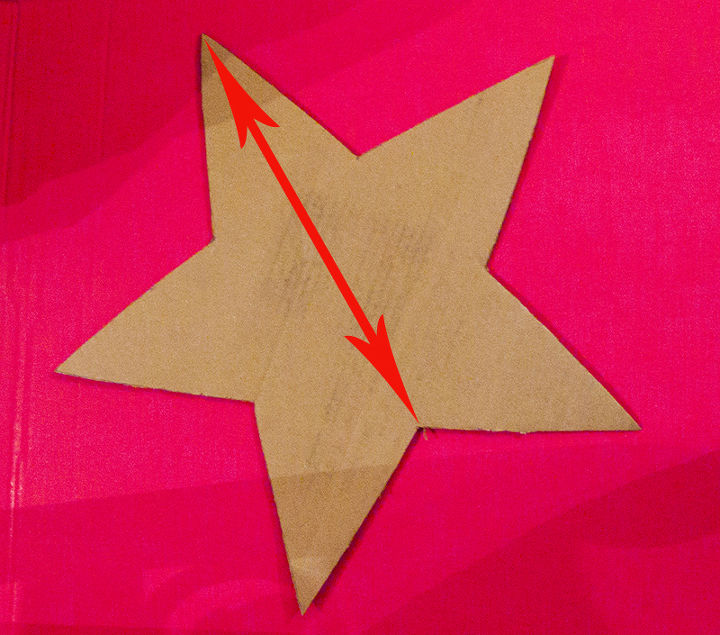
cut into a star shape...I mark a line from the points down to the inverted portion of the star.
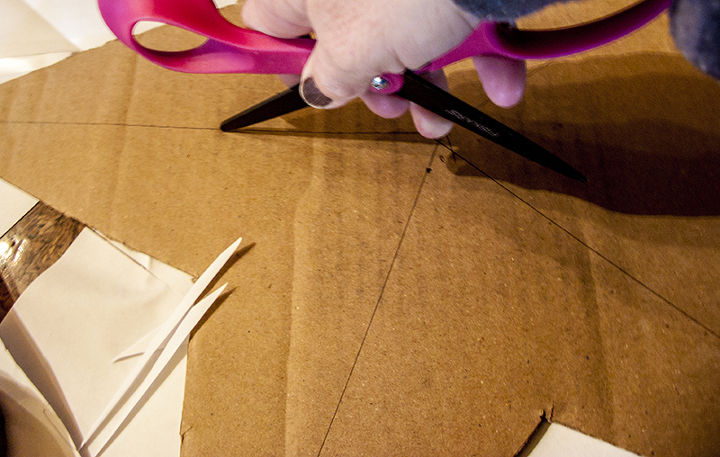
Now score down the line
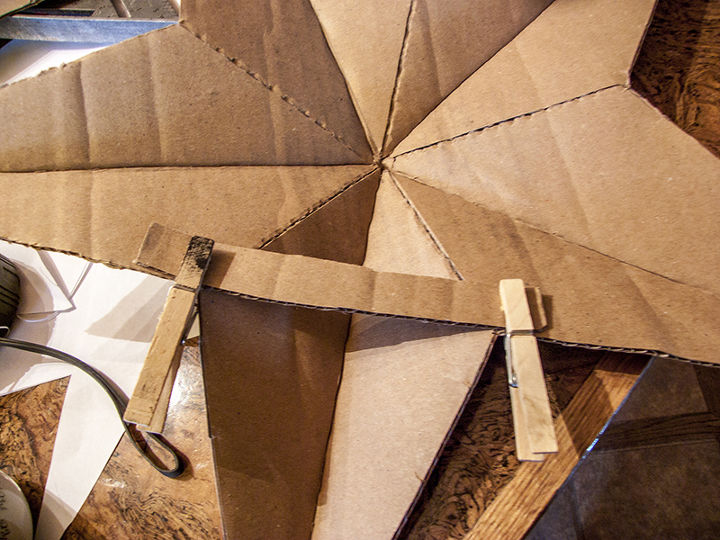
Bend the point half of the line outward...and below each point inward...secure each point with a scrap of cardboard.
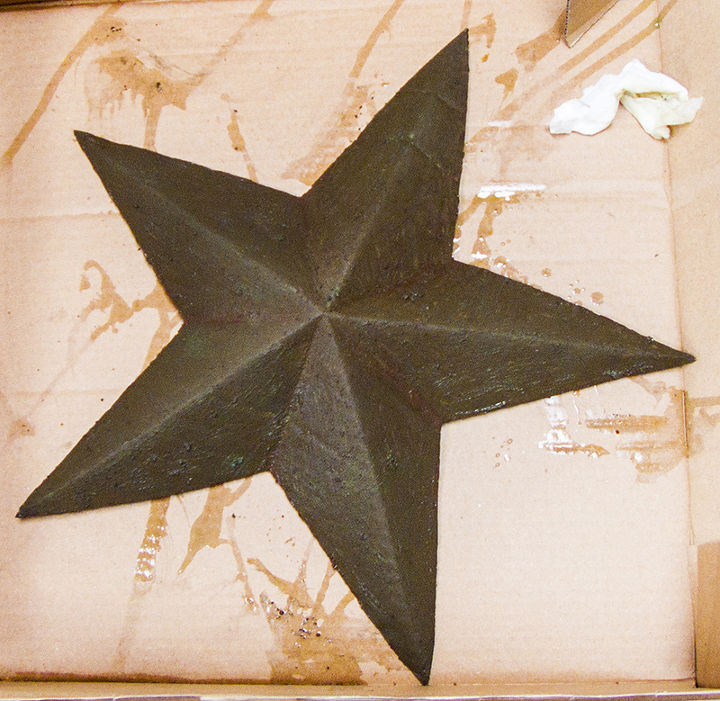
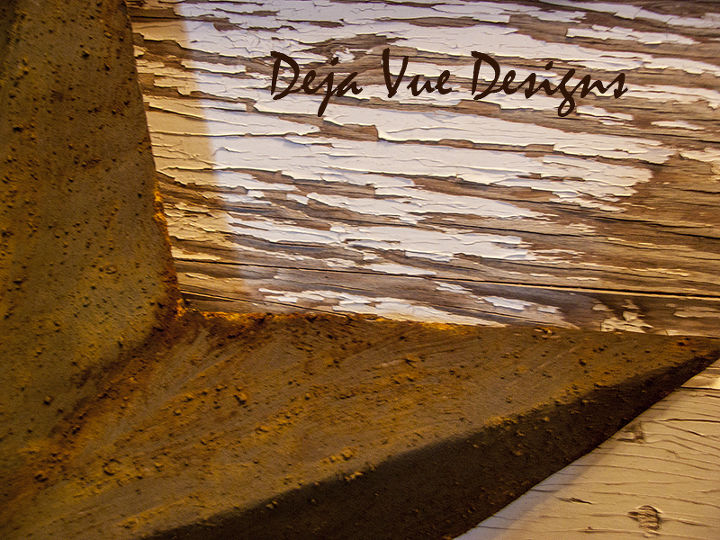
This forms your star. Now you can finish it...anyway you choose. I made mine a rusty star. This is the "iron" layer of the rusting technique
I have this technique in detail on site. but basically it's two liquids that you layer onto the star.
Give your chemicals enough time to rust...and Bob's your uncle....you have an awesome rusty Texas Star
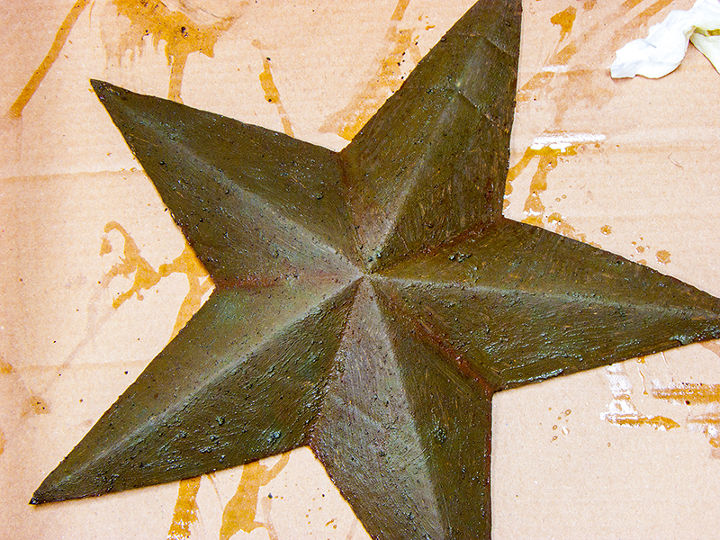
Okay..so not everyone calls them a Texas star...but us Texans do...you can call it a five sided star too. Look at that rust detail!
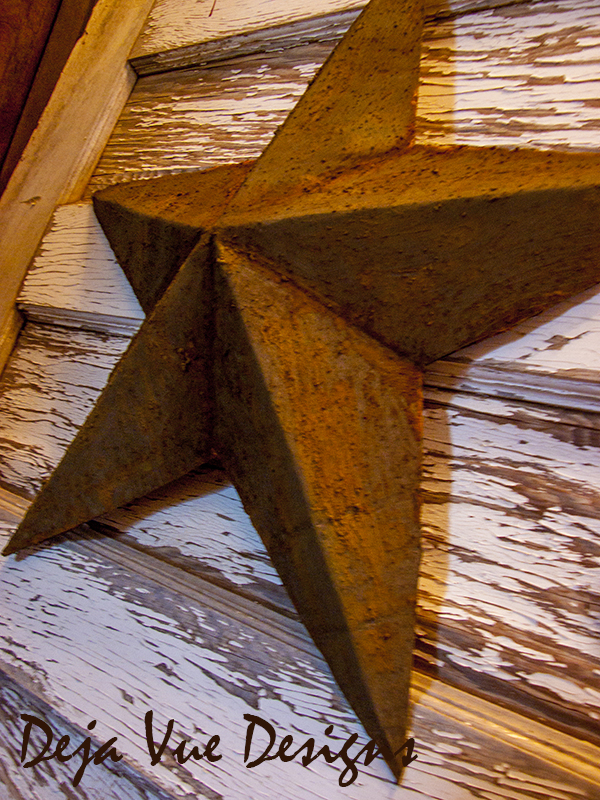
I love the way she looks hanging on my old chippy door.
The one shot I got...before the wind got ridiculous! Hopefully I'll get to show these off soon!

Want more details about this and other DIY projects? Check out my blog post!
Comments
Join the conversation
2 of 23 comments
-
@Tammy@Deja Vue Designs - CONGRATULATIONS - what a wonderful honor and then to be featured in an article in HP. You have 'arrived' girl!!!
-
I've been wanting a Texas star for years but they are just too expensive. Your design is amazing!! Now I have a use for all those Amazon boxes! Thanks for sharing, Tammy !


Frequently asked questions
Have a question about this project?