


Mama's Jar Craft Kit - With Photo Insert!
I love a good craft kit. And luckily, I get to help design them (and play with them every day). This mama's jar board is giving me all the summer vibes, just in time for summer to unofficially start 
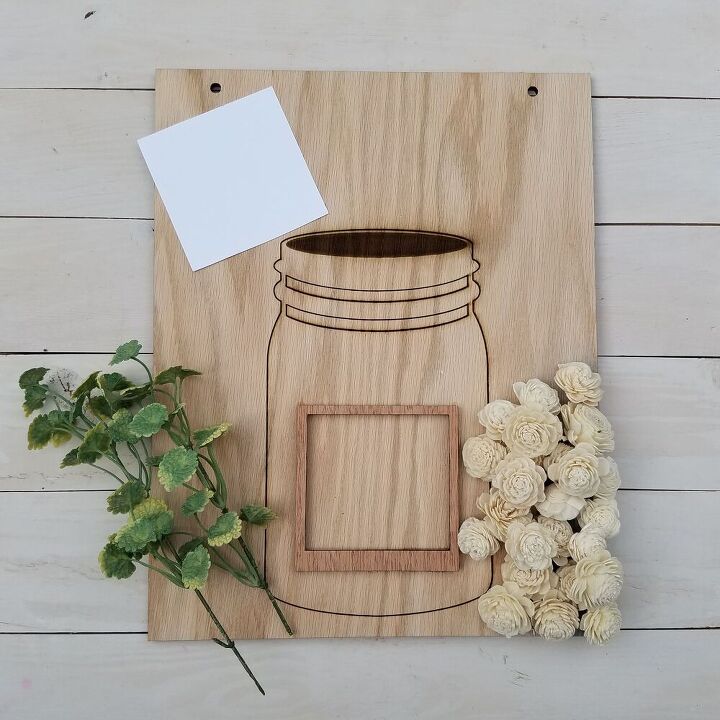
This craft kit includes:
- One mama's jar wood cutout
- One dozen 1" marigold sola wood flowers
- One dozen 1.5" marigold sola wood flowers
- Two stems of greenery
- One piece of white paper (this is cut to the size your photo should be to slide into the center frame)

You can leave the cutout and the flowers in their raw form but if you would like to bring in some color, you will need:
- Craft acrylic paint or wood stain for the mason jar piece
- Craft acrylic paint/water mixture for the wood flowers
- Hot glue
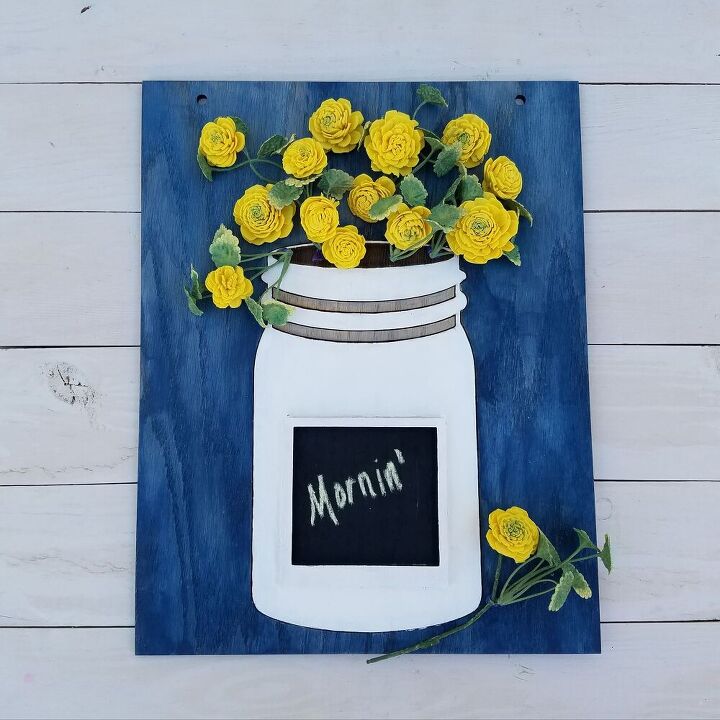
For the blue section on my board, I used craft acrylic paint and wiped it off with a paper towel before it dried (so the wood grain really pops through). The white is just two coats of regular craft acrylic paint. And that center square, I really wanted to test out some chalkboard paint!
For the flowers, I used the dip dye method for the yellow and hand painted a little green for the centers of half of the flowers. I was going for a yellow marigold and/or dandelion type of look 
Once all of the paint is dry, it is time to design! There are so many different options to how you can make this piece unique. From paint colors chosen to where you place the flowers and greenery (just now I'm thinking how cute it would be if all the greenery was used as grass/leaves on the bottom of the wood board!)...just so many ways to customize it to your liking!
My inspiration was from being out in the garden with my kiddos and all the hand picked bouquets I've been lucky to have received over the years!
Since I used chalkboard paint for the center section, I grabbed some chalk and wrote a little message. But there is something really cool about the way this board was created by my business partner...you can slide in a photo into that center frame!
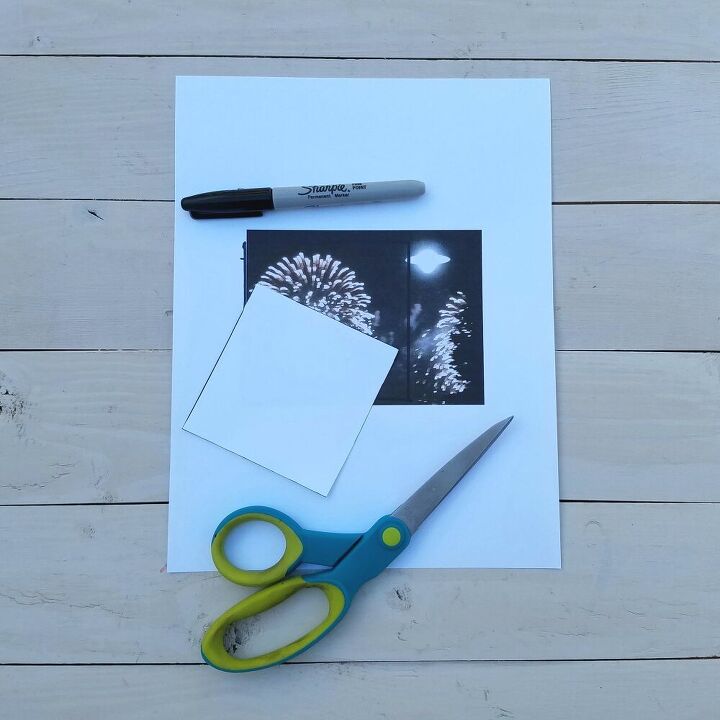
Remember that white piece of paper that was included in the kit? It's time to use it!
First step is to figure out what photo you want to place in the frame. I like to print photos onto cardstock or another thick paper. It gives you the same effect but is a cheaper option than photo paper.
Then take your white piece of paper that was in the kit, put it over your photo and trace around it with a sharpie or pen. Since most photos aren't square, you'll want to make sure your favorite parts of it are under that white paper!
Cut the picture along the lines you've drawn.
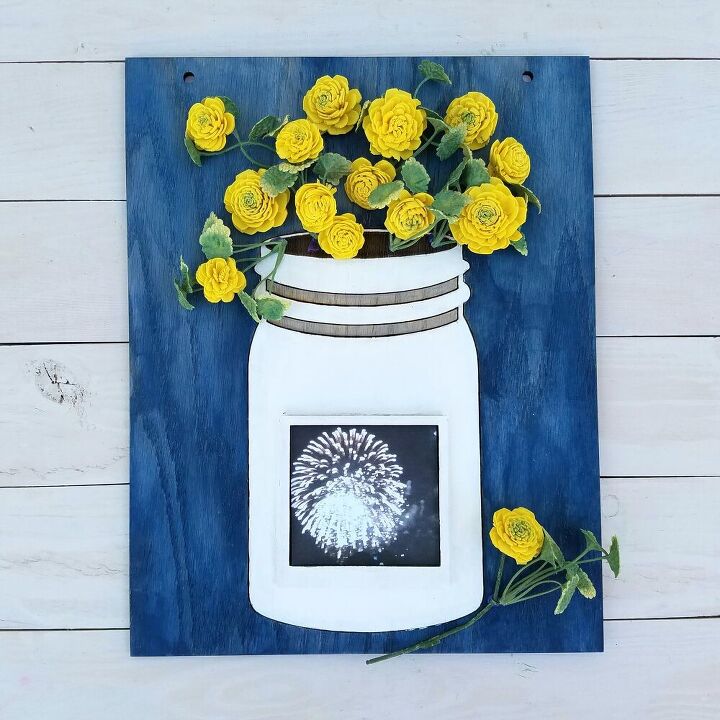
The final step is to take your photo, slide it into the framed opening and you have a very unique picture frame complete!
Now my big question - how long until I switch up the photo or the chalk message?!


Frequently asked questions
Have a question about this project?
Wouldn’t the acrylic paint run during rain? How could you seal it?