


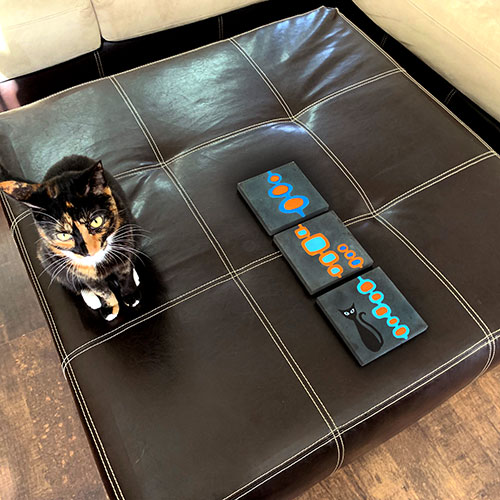
Midcentury Modern Concrete Wall Art
Here’s how to make cool concrete wall art decor for your walls. Create a triptych of wall tiles, MCM style with cement!
I am a big fan of modern design and yet, other than my furniture, I have very little modern décor. So, I figured it was time to change that. I wanted to create a sort of triptych for wall art and have been wanting to use concrete or cement as a canvas which essentially became wall tile decor.
Since I love the atomic shapes and retro colors I have seen in Midcentury Modern wall paintings, I used that style as my inspiration. It also helps that I’m a cat lover and that black cat was iconic during the Mid Century Mod period. This ended up being really easy to make and I think the contrast of the brighter paint with the dark grey colored cement wall tiles is really pretty.
Do you love making crafts with concrete and cement? I have a handy Free Pocket Guide you can download, where I compare the different concrete and cement mixes for making crafts! 
Decide what design you will paint or draw onto your tile. If you want to prepare your design first on a computer, rather than hand draw, then in Step 7, you can print it out and use the white transfer paper to transfer it to the tile.
Otherwise you will just draw your design straight onto the tile, no need to use transfer paper between or pre-draw it and use the transfer paper- again, the drawing will be for Step 7.
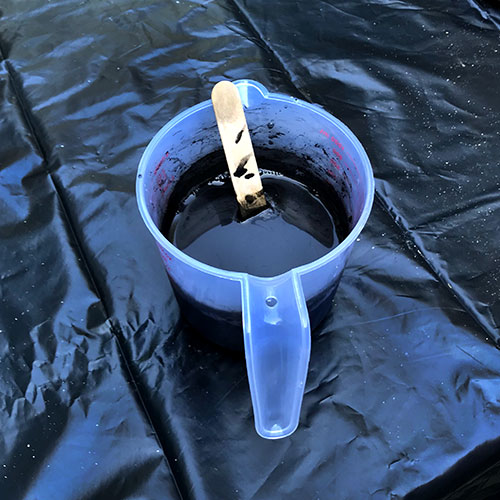
Mix up the powder colorant. You’ll do the mixing in the disposable bottle, but first lightly mix 12oz of water with about 1/8 cup of colorant powder in the disposable measuring cup.
You can add more or less colorant than this, depending on how dark you want you wall tiles to be. The charcoal colorant stains everything, so this is why you are using a disposable measuring cup.
You’ll have more liquid colorant than you’ll need for this project, so you’ll be able to use the left over for another project. After combining in the measuring cup, pour it into a water bottle. Shake it to mix up the coloring.
Make sure to re-shake this well just before adding it to the cement because the colorant will keep separating from the water.
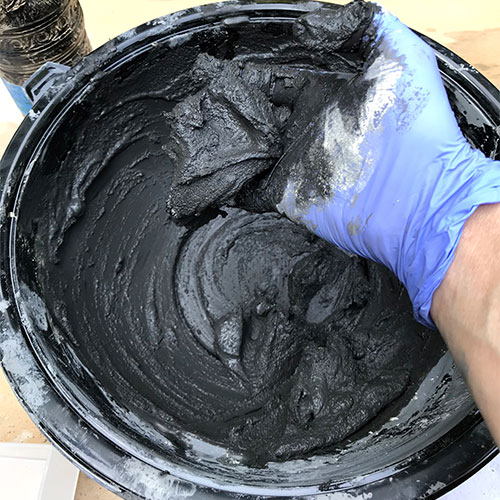
You’ll need about 2 scoops of the cement to make one tile if you are using the 6×6 container and want it ½” thick. Add the colorant to the mix little by little. There should be no lumps and it should look like a thick milkshake.
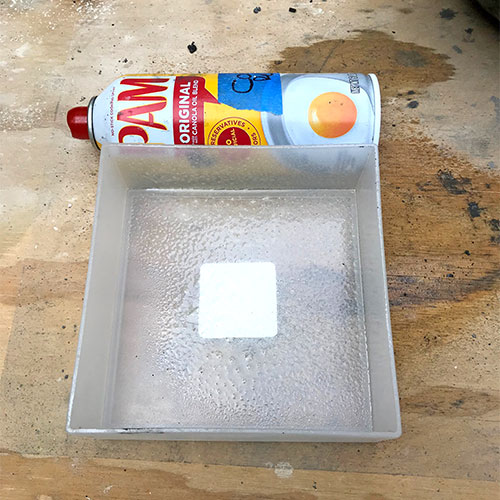
Spray the vegetable oil into the container, then pour in the cement.

After letting it sit about 15-20 minutes, create the hole for hanging. Just flip over the tile and mark out the center, and about 1” from the top.
Take the screwdriver/chisel and scrape away some space at the center. Make sure the top of the hole is flat to better hold a nail or screw. Make the hole it about ¾” wide. In case your hole isn’t perfectly centered, this will give you flexibility when hanging it.
**If you like this tutorial, then it may be helpful to read my post Making Cement & Concrete Crafts, and see what I learned from my cement tests.
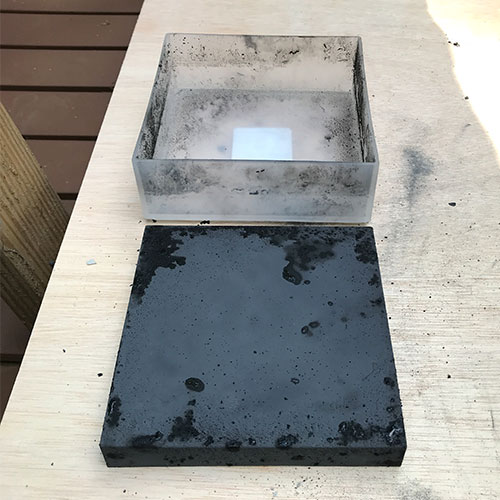
After about an hour, you can de-mould the cement. Flip it over onto a soft towel to protect it and gently shake and tap, it should slide right out of the mould.
Be careful with the residue from the vegetable spray from the container. If it gets on your fingers and you touch the cement, you will get a darker oil spot where you have touched it. I got a spot on one of my tiles, but I don’t mind it.
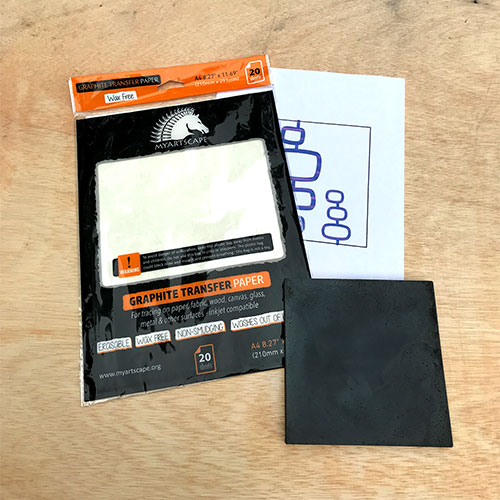
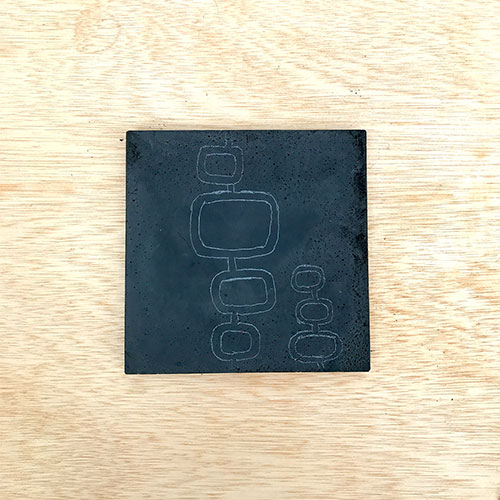
Once you have all three tiles, go ahead and transfer the design to the tile. Just tape the transfer paper to your tile, then tape your design on top of that. Use a pen to trace over your design. When finished, remove the transfer paper and the paper print out.

Paint the tiles using the Sharpie paint markers and hang your new DIY wall art.
Resources for this project:
See all materials


Comments
Join the conversation
-
Love the richness the colorant added. Great idea!
-
Great rendition on MCM!


Frequently asked questions
Have a question about this project?
This looks like such fun! Can’t wait til the holidays are over so I can do this!
One question though, is there a lighter cement one could use, if you know. Thx