


My Tips on How to Stencil a Wall
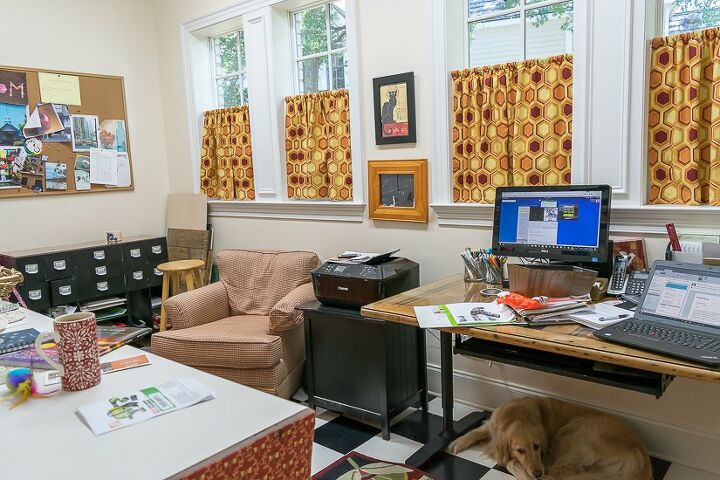
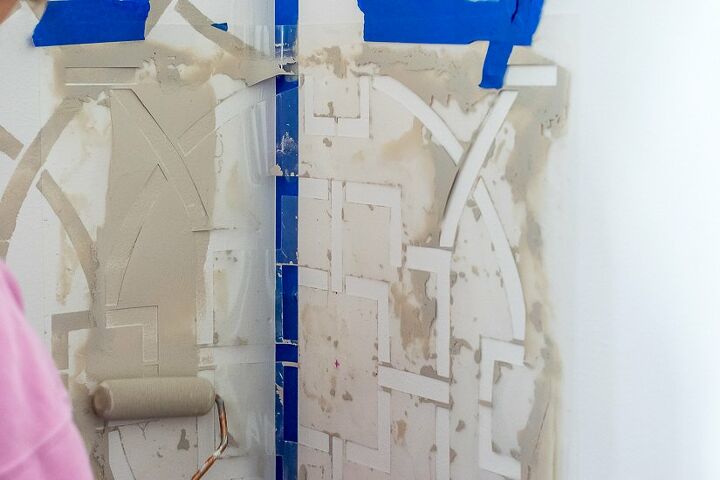
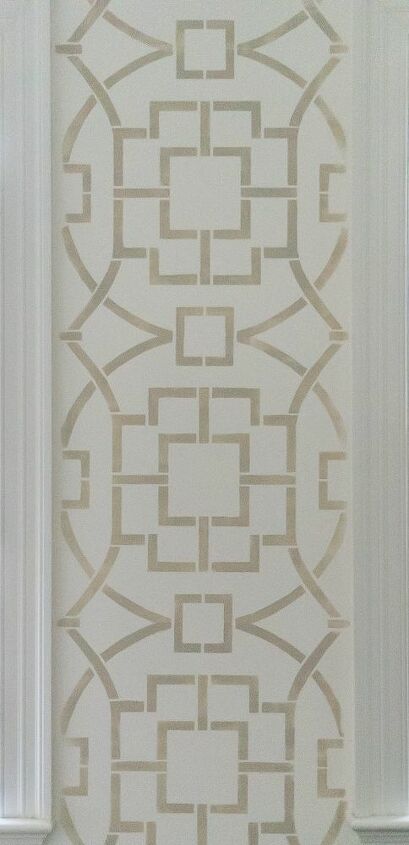
My office seemed the perfect room to give a little stencil love to. Only one of the walls in my office has windows…but it has 4 of them. In my infinite wisdom and propensity to make everything harder than it has to be, I chose that one wall (with the 4 windows) to be the wall that I would stencil.Helpful Hint While not impossible, it is certainly harder to stencil a wall with windows. For your first time, I’d try a simple wall with very few interruptions.I chose the Tea House Trellis Allover Stencil by Cutting Edge Stencils l which I thought would be lovely in a tan against my newly white walls.Here's the BEFORE of the wall that I decided to stencil as a part of my office makeover
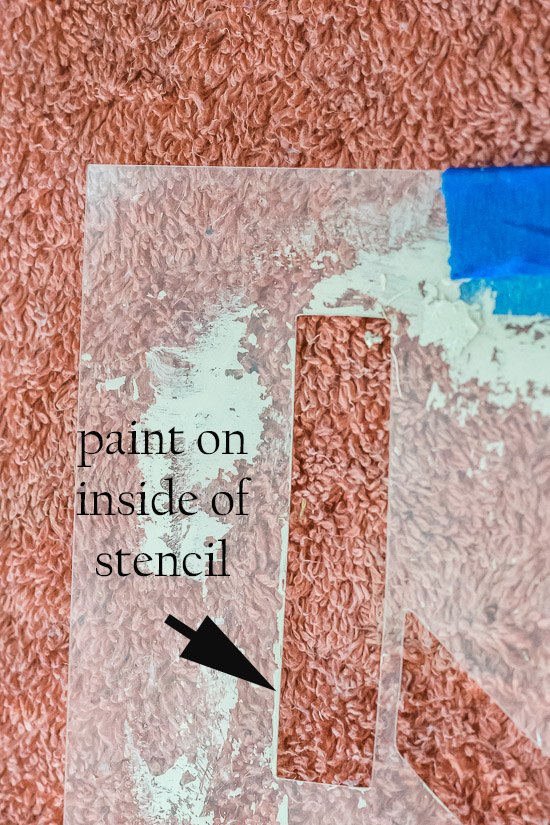
1.MAKE SURE YOUR STENCIL IS LEVEL Get a stencil kit that comes with a little level too l that slides onto the bottom of your stencil to make sure it’s level.2.Sometimes you will be unable to use the level if you have to bend the stencil on a corner. In such a case, you need to MEASURE! When you come to a corner, measure the edge of your stencil against a fixed edge of your wall and make sure you get that same measurement as you go down the wall. This is particularly important when you can’t base your stencil off of the previous stencil, like on a side of a window. I measured when I went down the side of one window and it came out perfectly. I didn’t measure when I went down the side of the second window and ended up repainting that side because the stencil didn’t line up where it should have when I came to the bottom of the window. When it doubt, MEASURE against a fixed line.3.GET THE RIGHT PAINT So, story of my life, I didn’t read the directions that came with the stencil before I started stenciling. In the directions, Cutting Edge specifically recommends Aura by Benjamin Moore. I had purchased my paint before reading that, but will definitely use that recommended paint the next time I stencil. I ended up having to wash my stencil after every 2 applications because the dried paint would peel off of the stencil and get on my roller and wall. That process of having to wash and dry the stencil after every 2 applications really added to the length of time it took me to do the project.4.KEEP YOUR STENCIL CLEAN. You would think that because of my stencil would have been clean. However, while I was keeping the majority of the stencil clean I wasn’t getting the edges of the design clean. In the picture below, you can see the buildup of paint along the edge. When this paint builds up, it’s impossible to get the nice, crisp and clean edge you want.
5.MAKE SURE YOUR BASE WALL HAS DRIED FOR 24 HOURS. Remember when I said I had to repaint an area because I didn’t measure and it came out wonky? Well..several hours later I couldn’t get the tape to stick on that portion of the wall. Even though it felt dry to the touch, there was still too much moisture for the tape to adhere.6.TAPE OFF THE CORNERS AND TOP/BOTTOM OF THE WALL unless you feel like painting that area again.
7.AND…PERHAPS THE MOST IMPORTANT… KEEP YOUR ROLLER AS DRY AS POSSIBLE After you’ve loaded your sponge roller evenly with paint, run it over a paper towel until it’s almost dry. This is the secret to avoiding drips and runs behind the stencil. Even if you have to repeat that process again before you move the stencil, it’s a critical piece. I was really pretty good about it 95% of the time, but the 5% when I didn’t clean my roller enough I had goopy edges that I then needed to go back and clean up.
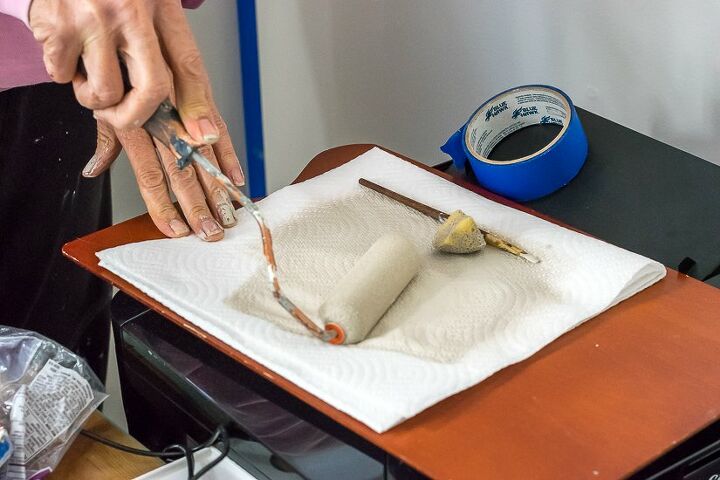
8.NUMBER 7 IS SO IMPORTANT THAT IT BEARS HAVING A NUMBER 8 THAT SAYS THE SAME THING.
So, do I love my stencil wall? Why, yes I do, thank-you very much!
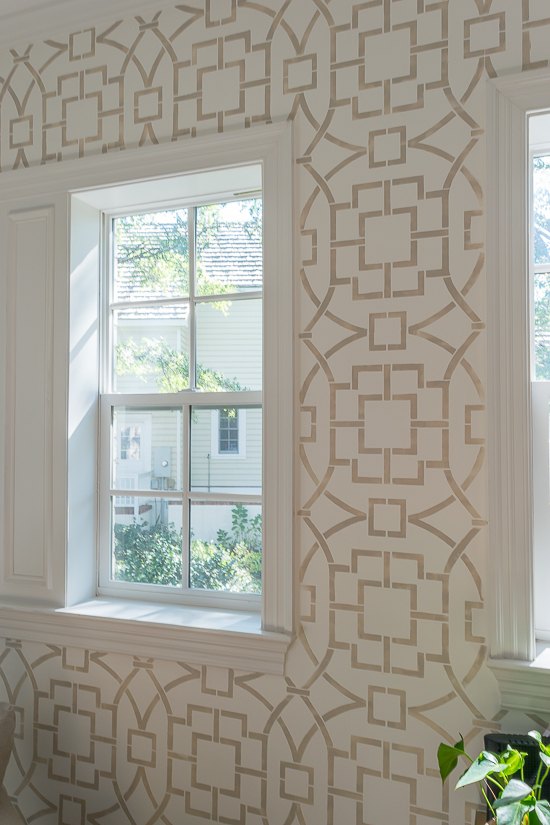
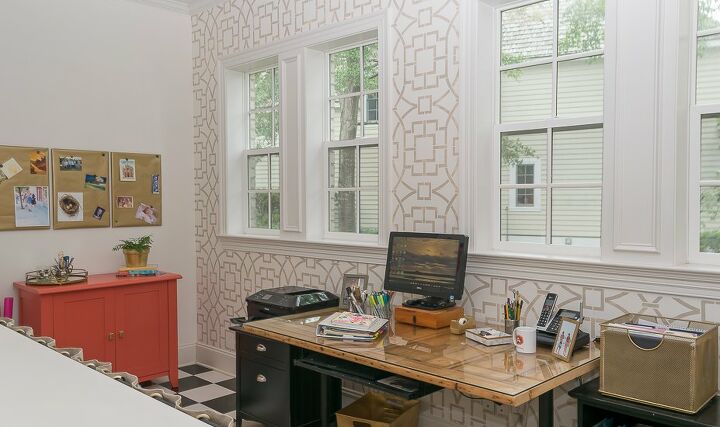
The clean and crips feel to my office is just what I was looking for.
I hope these tips help you when you decide to give wall stenciling a try!

Comments
Join the conversation
-
Nice!
-
Lovely!


Frequently asked questions
Have a question about this project?