


Not Your Grandma’s Festive Wreath

We live in the Southern hemisphere and it’s as hot as Hades in December. I just can’t relate to traditional Christmas decor anymore. So I made an alternative wreath that you've probably never seen before but which makes perfect sense given the atmosphere around here this time of the year.
December is summer beach vacation time in South Africa and everyone is counting down the days. Whilst we are melting away in the heat, not one but two of our electric fans broke! The one was used as parts for the other and you can just imagine the arguments over who got the working one.
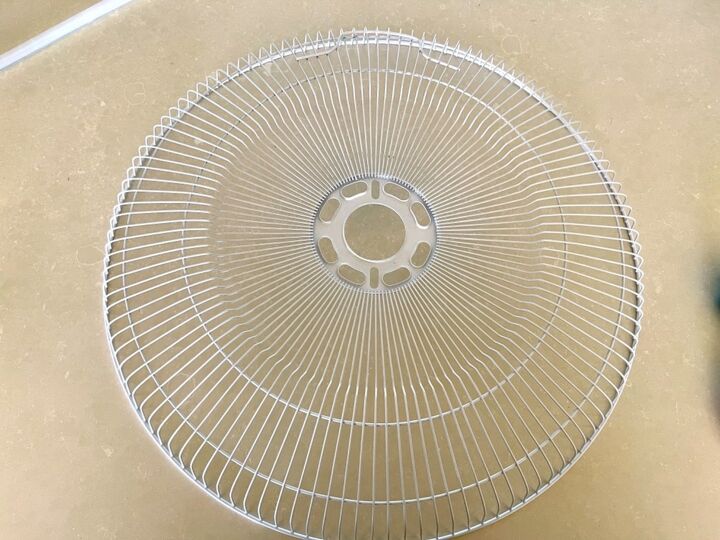
I was quite happy with the broken one because in my mind it is a very appropriate base for a summer wreath. In the beginning I was only going to stick a couple of bits and bobs to the fan cage but one thing lead to another and my project kept on growing and growing as my longing for the beach grew. I can't even say how long I worked on it because I just kept going.
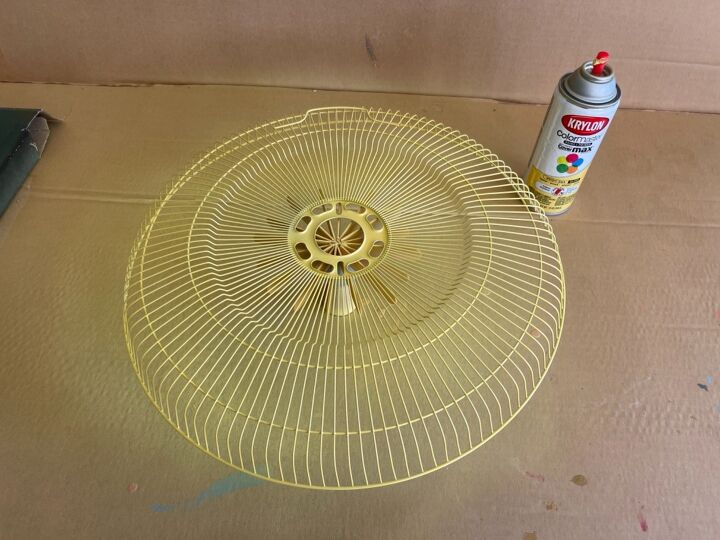
I sprayed the cage yellow. That's a pretty easy start. But then ...
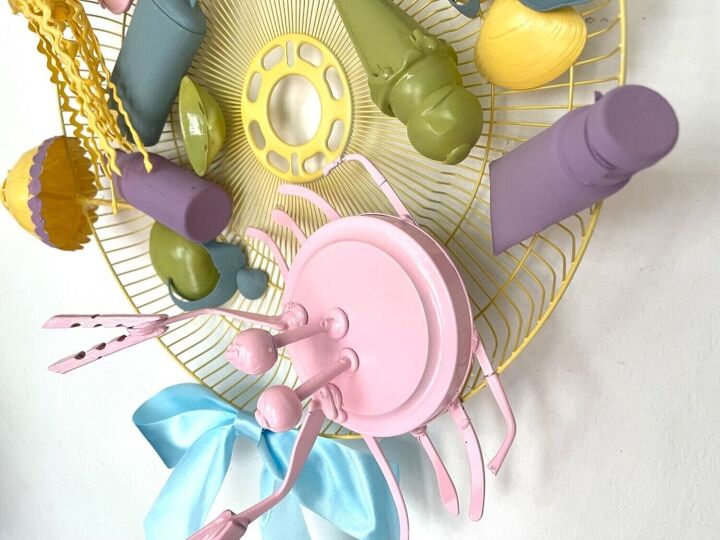
"I know, let's make a crab!"
The crab
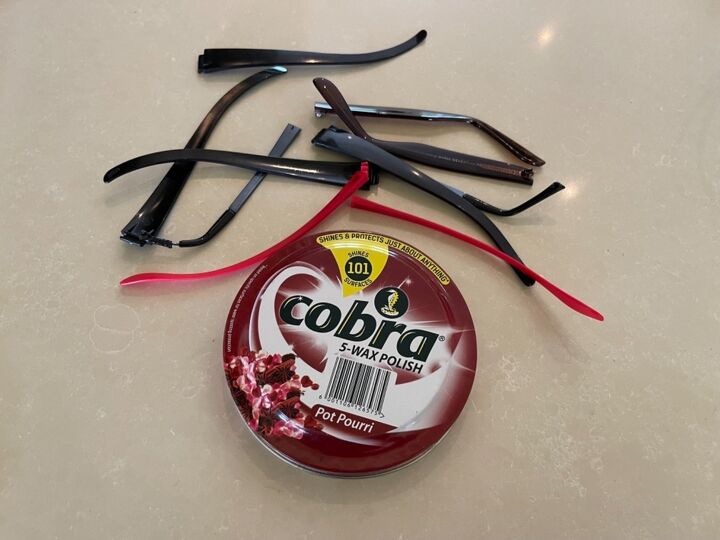
The crab started out as 5 sets of eyeglass arms and a flat tin lid. Before I get tut-tutted for wasting eyeglasses that should have gone to a charity, let me metion that some of them were cheap sunglasses and plastic 3-D cinema glasses and that we don't have those type of recycling schemes around here.
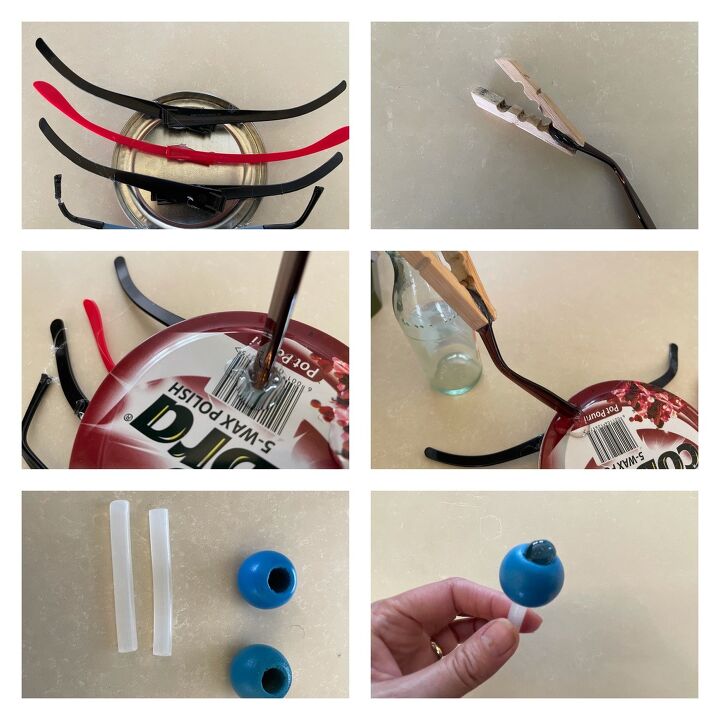
For the legs: 4 sets of reading glass arms were glued to each other and then to the bottom of the tin lid. Claws: The fifth set was cut a bit shorter and a separated clothes peg stuck on each. The pincers were stuck to the top of the tin with a glue gun. Eyes: These consist of pieces of glue stick and beads. The glue sticks were stuck inside the bead holes and an extra blob of glue was added to resemble eyeballs. Everything was then spray painted.
"And ice-cream, we gotta have ice-cream."
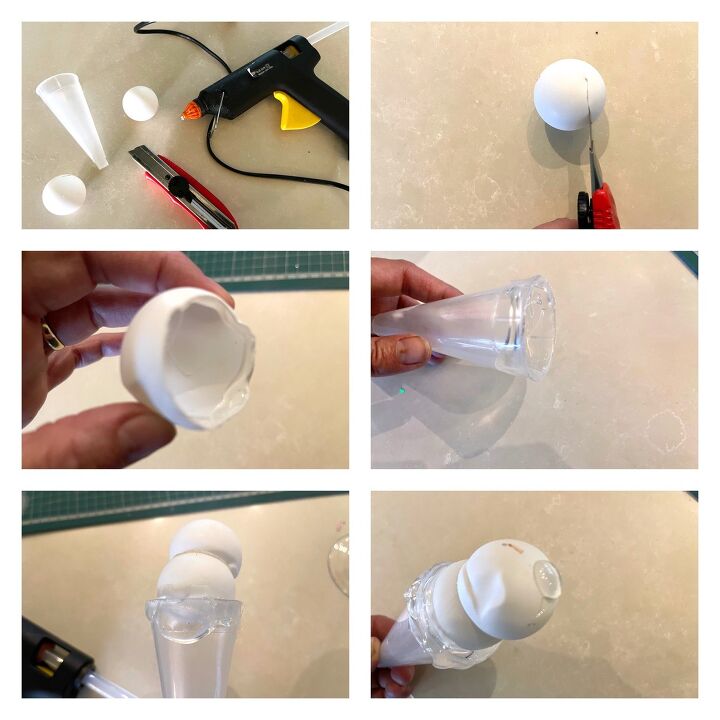
The ice-cream cone
This is made from a plastic cone (a bamboo one that finger snacks are served in would also work) and two ping-pong balls. One ball was cut at the 2/3 line and stuck to the whole one and then they were in turn stuck to the cone. The hot glue melted the ping-pong balls a bit but I thought it made everything more realistic. You could use another alternative. I added some drips and a cherry with the glue gun. The ice-cream was spray-painted and left to dry.

"And a beach umbrella for mom to sit under."
Beach umbrella
I used the domed lid of a disposable plastic cup (one with a hole for the straw) and stuck some paper dots around the rim. I then repeated the row on the inside of the lid so that the paper was reinforced. I used the extra bit of ping-pong ball that was left from the ice-cream cone and stuck it to cover the hole. This made a nice base for a thin chop-stick to be stuck to as the umbrella pole. Remember that the ping-pong ball doesn't like the hot glue, so drop it from a bit higher or use an alternative (Sugru?). The seams of the umbrella were done free-hand with the glue gun. You could also stick pieces of rope if you wanted them more exact. Once again, the umbrella received a coat or two of spray-paint.
I found that the paper wasn't quite covered, so painted the scallops by hand with chalk paint. I generally stuck to one colour and didn't add too much detail so my creations wouldn't look too much like a grade school project.
"And a jelly-fish, not that we want to find those whist swimming.”
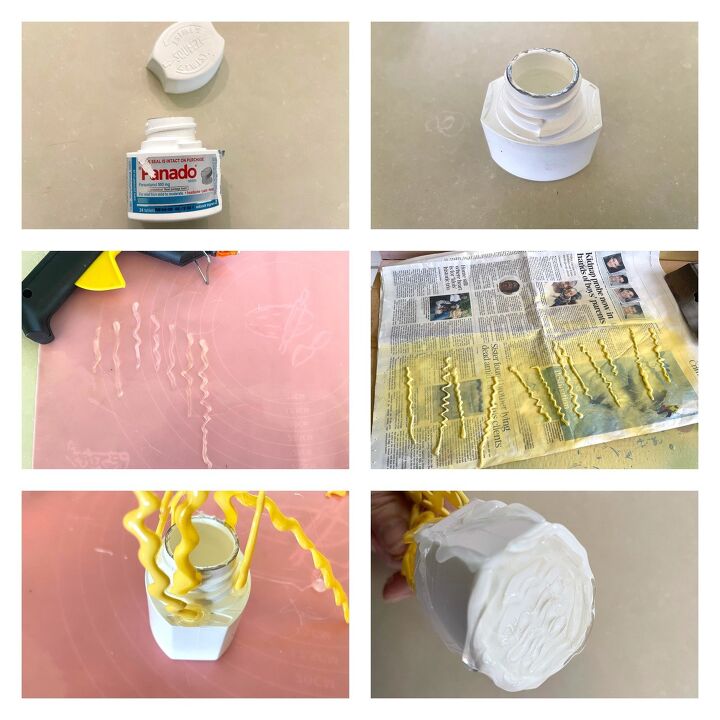
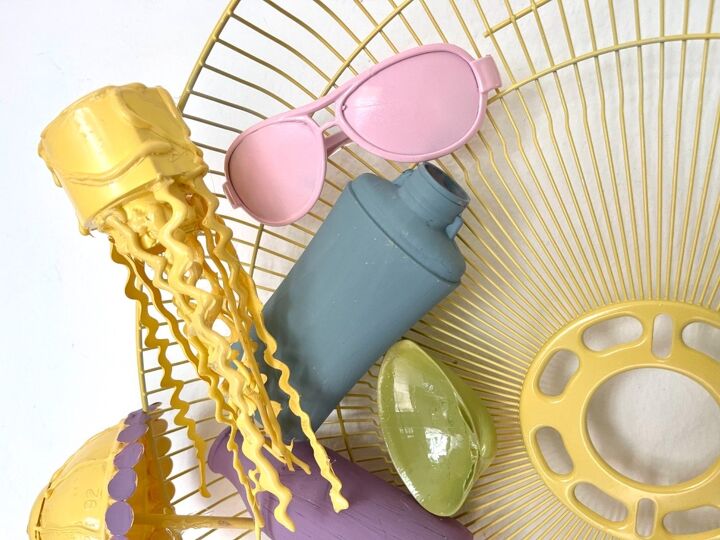
Jelly-fish
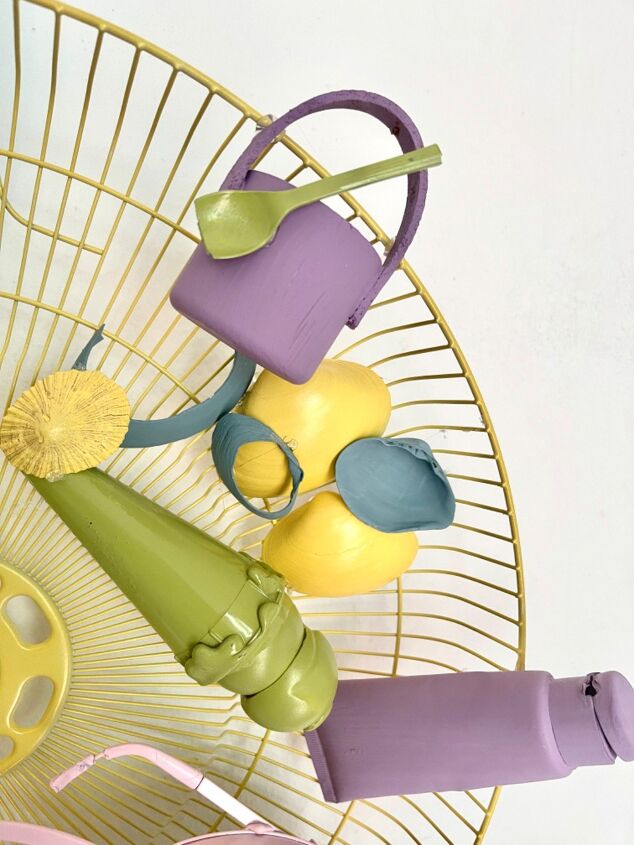
I adore crafting jelly-fish tree ornaments and have made a couple throughout the years. This one was made from a plastic pill bottle from which I removed the label and as much of the tinfoil as I could. I made some glue squiggles with the glue gun on a silicon mat and then spray-painted them because I figured it would be easier to paint them before sticking them. Then, still using the glue gun, I stuck them to various surfaces around the neck of the bottle, including inside the neck. Some extra squiggles of glue softens the outline and camouflages the bottle's thread. Finally, everything was spray-painted.
The rest of the items such as lotion bottles, sunglasses and shells were found objects that I painted with chalk paint. And one can go absolutely mad.
"And of course.."
(Add your favourite beachy items here)
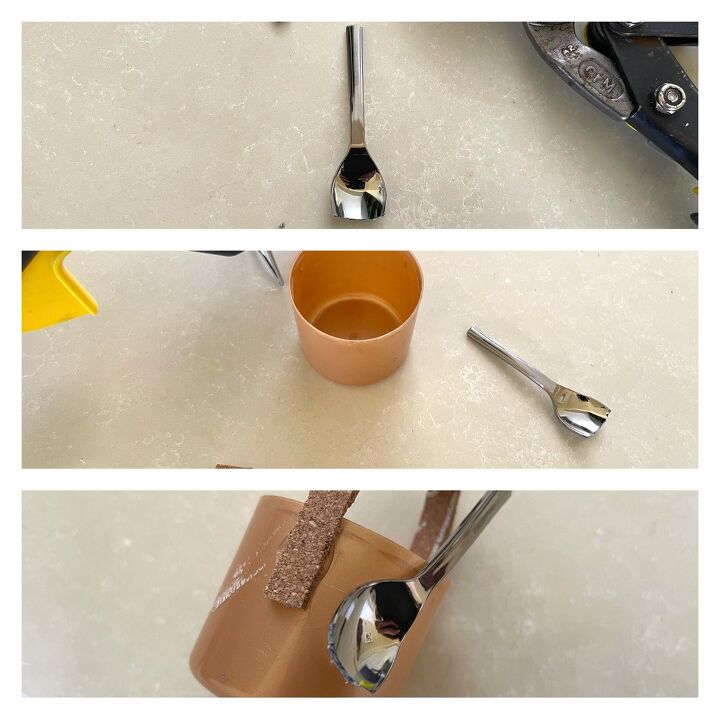
Bucket and spade
The bucket is made from a plastic spray can lid to which I added a little cork handle. The spade is a very small plastic spoon of which I cut off the rounded part to make it look more realistic. Getting the scale right is very important. Once again, everything was painted.
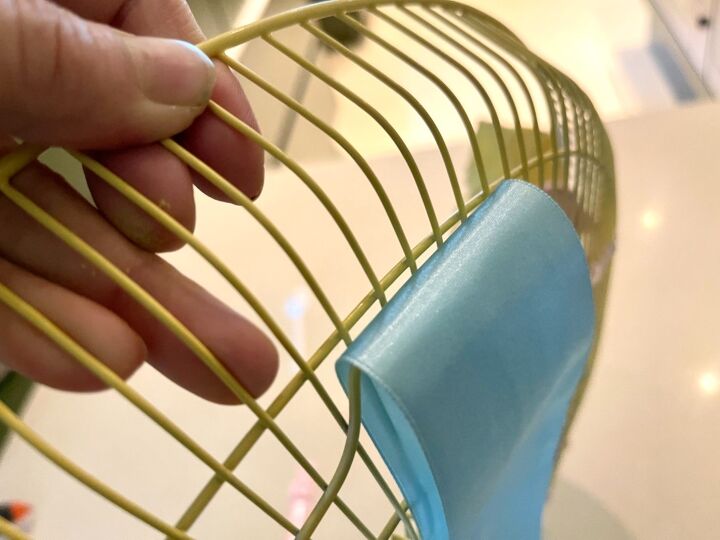
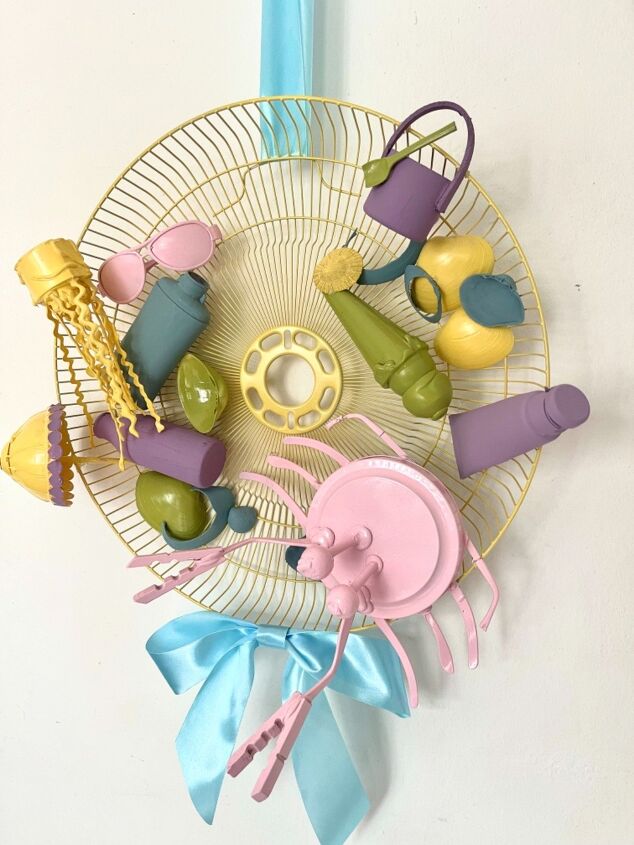
Now I know that traditionalists are going to argue with me that this creation cannot be construed as a wreath. But what is your definition of a wreath? Something that is round (check) and hangs on the wall or door (check) by a ribbon (!). So just to elbow my way firmly into the wreath category, I added a pretty blue satin (classy, not?!) ribbon and bow. Case closed.
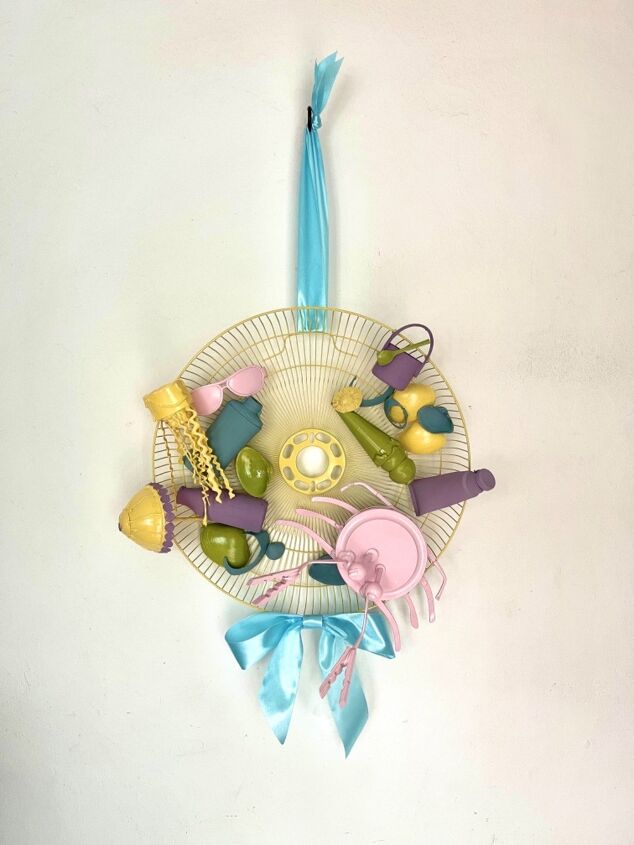
Isn't it fun?
Comments
Join the conversation
-
I adore the whole thing!!! Now I can’t wait to try something like this here. And what will be more fun is I’m going to make it to hang here during winter… to remind me it’ll get warm again… someday.
-
This fan upcycle is perfect, I have been trying to figure out what to do with an old standup fan, thanks so much for the share! Stay cool by the pool!


Frequently asked questions
Have a question about this project?