


Planked / Reclaimed Wall Treatment With Picture Frame

by
Jim Cox
8 Materials
$33
1 Hour
Easy
Dressing up a bathroom wall with a picture and rustic wall treatment. I just added a 'before' photo of this very ugly wall prior to paint.
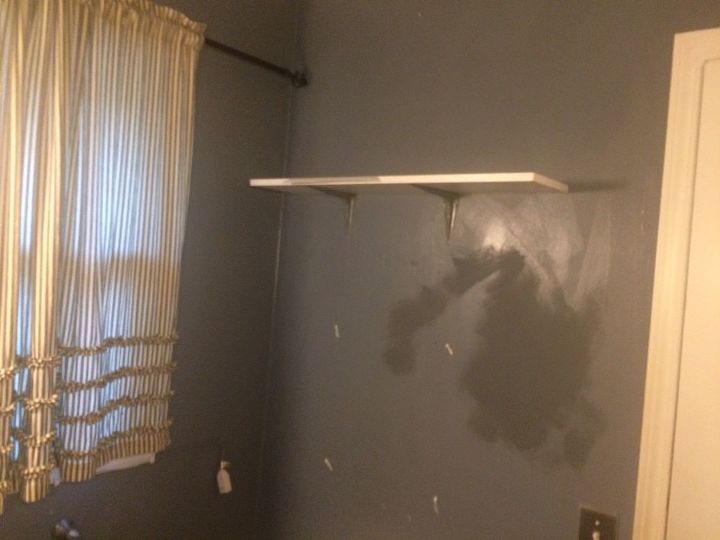
Before :/
This wall was hideous. The previous owners used such big holes I needed caulk to fill them. An extension cord was stapled to the wall for a lamp that sat on the toilet. I brushed some flat gray on it to hide some repairs I had just started.
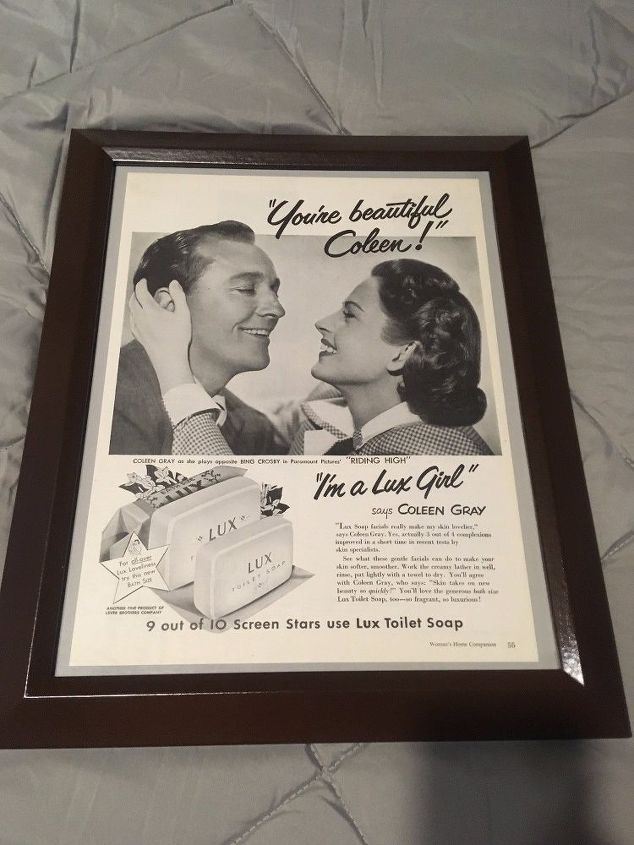
Here's a vintage 1950 Soap ad (featuring a couple of stars from an upcoming film). I disassembled the frame and painted it Rustoleum Kona Brown, which I had on-hand
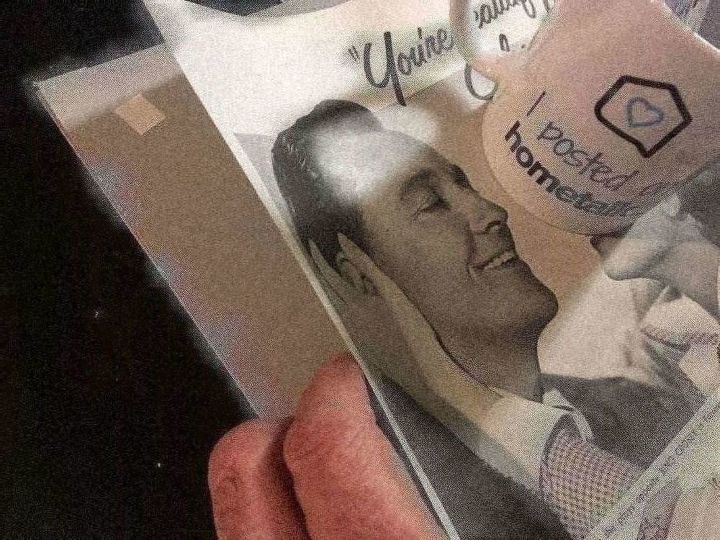
Stick the picture down with photo squares
The magazine ad was nearly 11x14 and a matte wouldn't do, so I cut some gray posterboard 11x14 and centered the ad. (note the paperweight : ) I added some photo squares to keep it in place. The gray was to compliment the wood being used.
Donated!
A friend saw my headboard on Facebook and asked if I wanted some fence. I thought he had eight boards, he had eight sections of boards. I prefer fence to pallets, cedar is lighter than oak, and easier to work with.
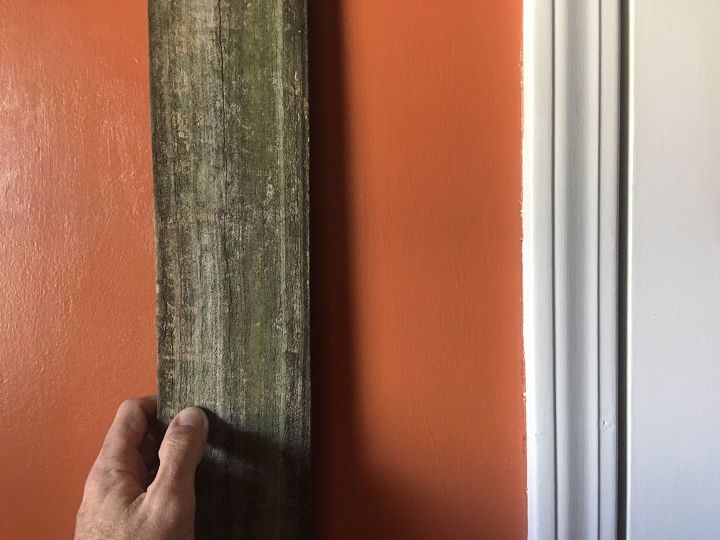
Here's the new color, S-W "Red Cent". I grabbed a board and decided how much color I wanted showing. The wall behind my toilet was 42" wide. I decided on 5" of color showing each side, so the boards will be 32" long
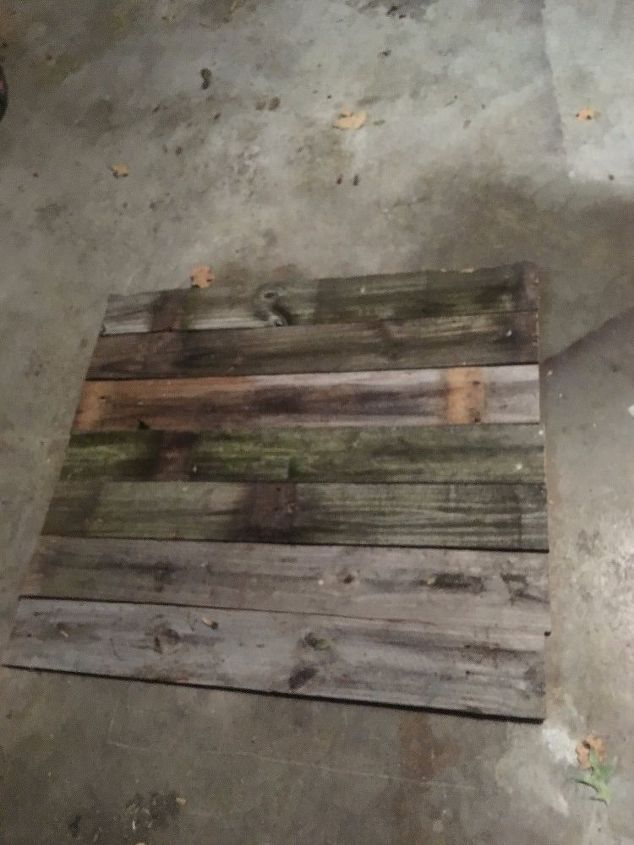
I cleaned the boards with a wetted green scotchbrite sponge to get most of the dirt and icky stuff off. It's a good idea to measure your boards thoroughly. These had a bit of taper, so I ended up rotating and flipping to keep things lined up. "Square" became more of a direction than a goal. WATCH FOR NAILS - your hands, tools, etc; but don't be afraid to leave a few in the wood for the rustic look.
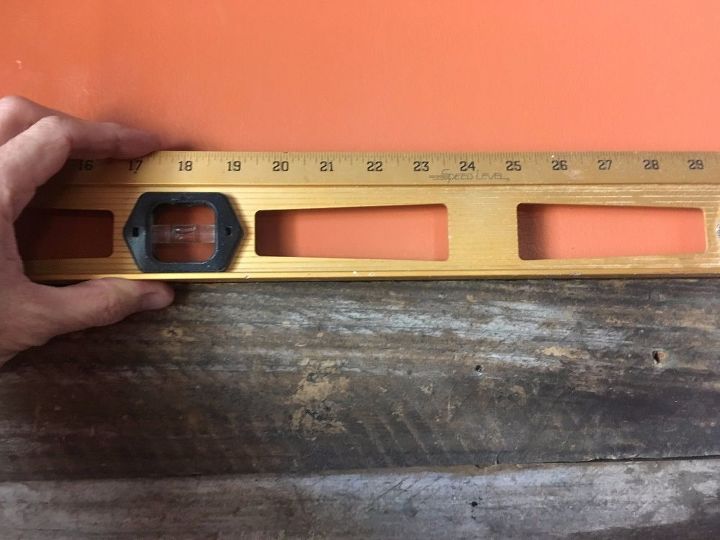
As I put each board up I checked for level on the top edge. Two trim nails for each panel was plenty.
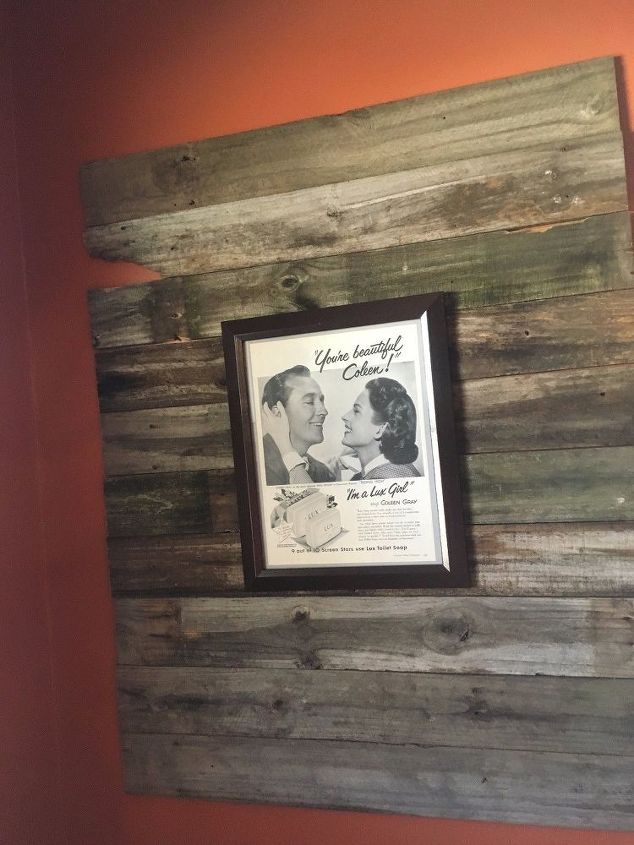
When I had the coverage I wanted, I roughly centered and hung the pic. (All the pics in my house are the same height for a more uniform look - 70" at the top) I measured the space on either side, as well as top and bottom. I decided I'd have plenty of room on the outside if I left 2" on all sides of the pic.
Aged to perfection ; )
Here's the tomato stand I built last April from cheap furring strips. I specifically put these boards outside untreated so I could use them later for a project.
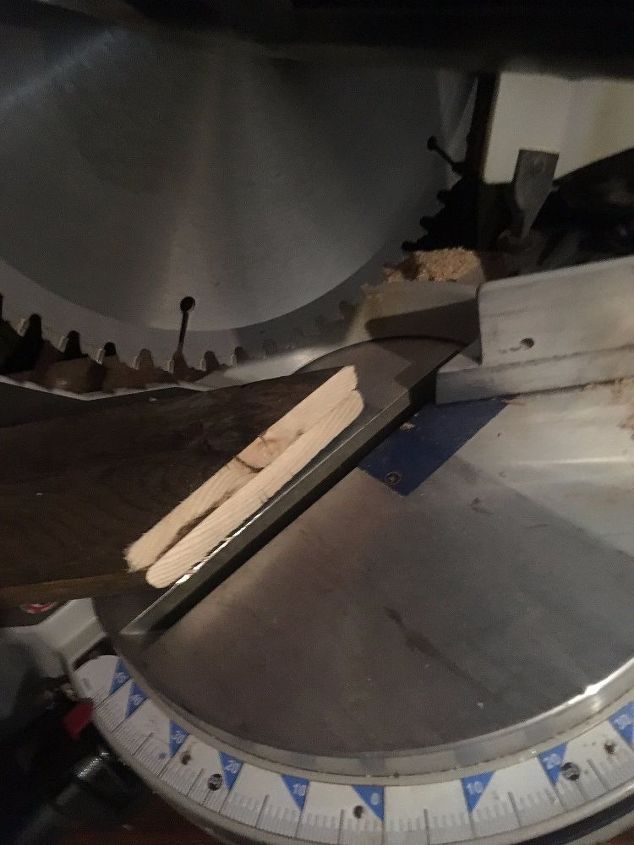
To get the spacing I needed I measured the frame and added FOUR inches to each dimension for the inside of my frame boards (2"+2", for top/bottom and left/right) This frame is approx. 16"x20" on the inside. I measured the inside edges and cut 45° on my miter saw. This was the only 'pro' tool on the whole job (which I got used for $50 from Facebook)
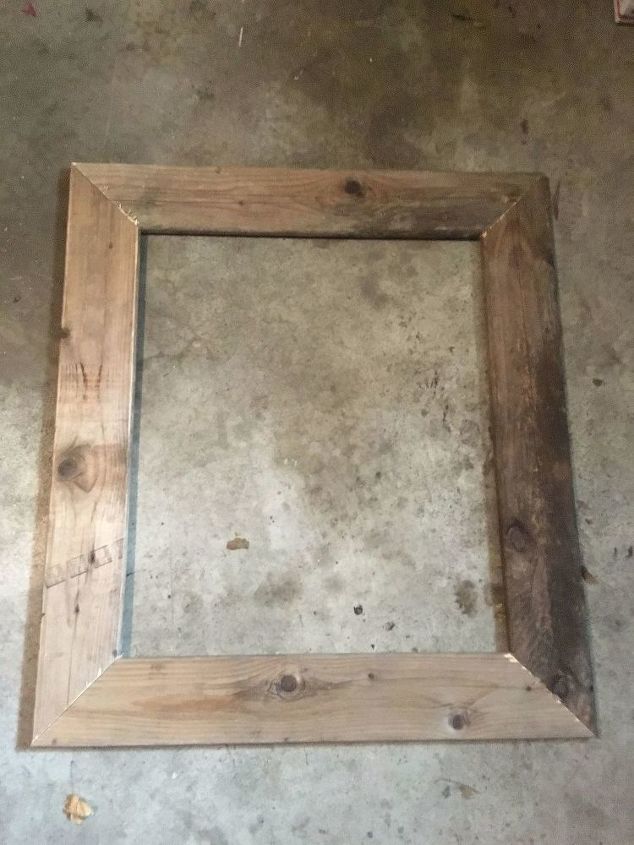
I lined up the pieces into a frame shape, flipping and rotating until I liked how the wood character showed, then I carefully flipped everything on my garage floor so the BACK side was up. It doesn't hurt to write 'back' on the back side of a project before you assemble it.
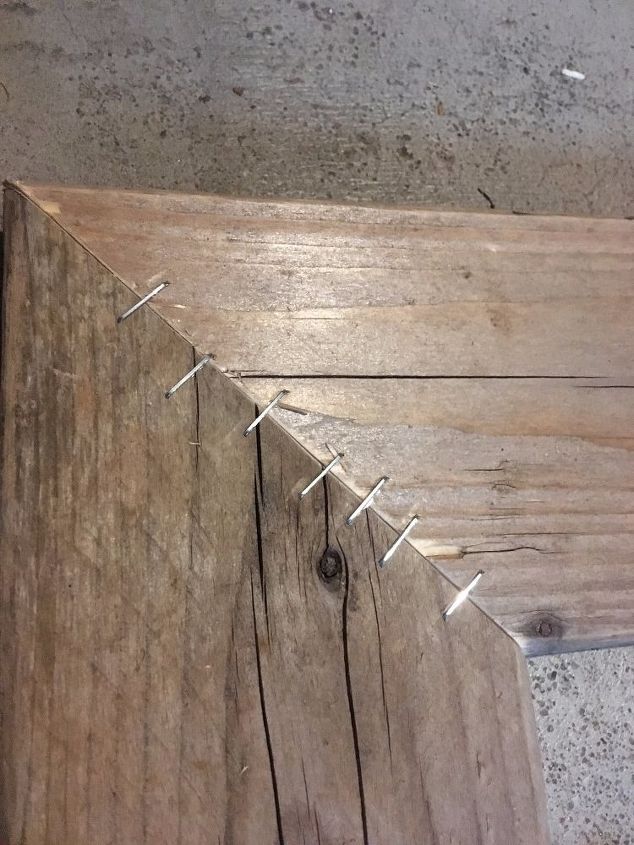
A quick run down the back side of each corner seam with a staple gun. This was so easy I wish I had thought of it years ago.
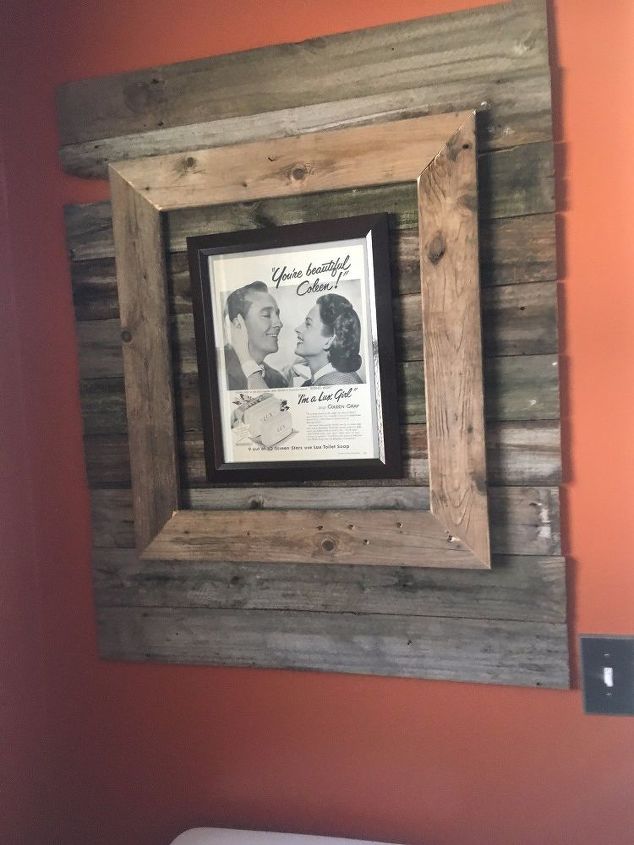
I centered and hung the frame with one nail. Super simple. Here's the finished project behind my toilet. At the bottom of the frame you can see holes from this board's previous duty outside. Plenty of character and color, and the project was cheap, easy, and fast. I already had the staples, nails, board, and spray paint. The other bathroom will probably get a similar treatment.
Comments
Join the conversation
2 of 15 comments
-
Beautiful! Great idea! I will be trying this!
-
Super idea. Love thi.


Frequently asked questions
Have a question about this project?