


Quilt Wall Hanging – Retiring an Heirloom and Adding a Shelf
5 Materials
$50
1 Hour
Easy
Quilt wall hanging including a shelf! I have quite a bit of trouble when it comes to adding “art” to my rooms. I just get kind of stuck creatively, its just not my thing! My living room needed a makeover REALLY BADLY and also lost all of its previous artwork to the gallery walls in my entryway. With the room nearly complete I was left with two big blank walls and absolutely NO idea what I was going to put on them.
Out of desperation I did some searches online for farmhouse DIY artwork etc. What I ran into was a “quilt” made out of wood and tacked to an office wall. It was really cool! It was also way too complicated a build for this wood working novice that has no patience. (And I really feel like I have enough wood in my house as it is…)
Out of desperation I did some searches online for farmhouse DIY artwork etc. What I ran into was a “quilt” made out of wood and tacked to an office wall. It was really cool! It was also way too complicated a build for this wood working novice that has no patience. (And I really feel like I have enough wood in my house as it is…)
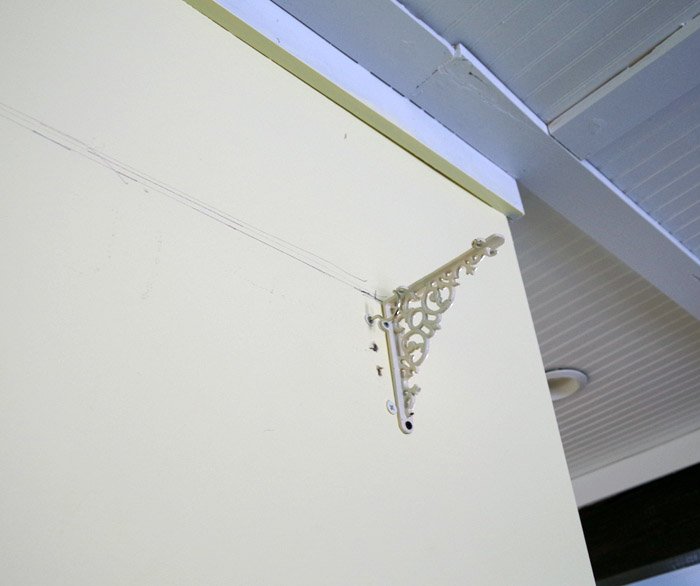
However, I most certainly had a REAL quilt I could hang!I looked up quilt hangers on Amazon and what I found gave me a real: OH THAT’S AWESOME! Moment. Not just a hanger but a shelf above it too!Of course I wouldn’t be buying one of them though, I got to planning my project immediately! First I purchased a rod, hooks for hanging and the same shelf brackets I used above my kitchen sink. (I made sure to get an extra long rod so it would be double the strength because I would only be using it at half its possible length.)

The wall width itself is right around six feet so I decided to make the span 48 inches which was perfect because that was literally the shortest length the curtain rod I purchased would go.
With that done I marked out where the shelf brackets would go (right on the outside of the hooks) and then I put everything in. I wanted the hooks to be hidden so that it would look like the rod was supported by the pretty shelf supports and not the hooks at all.I used heavy duty sheet rock hangers for all of this.Quilts weigh a lot!
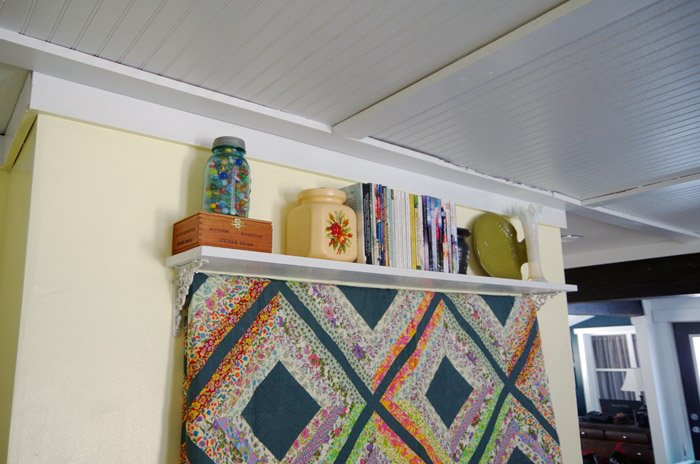
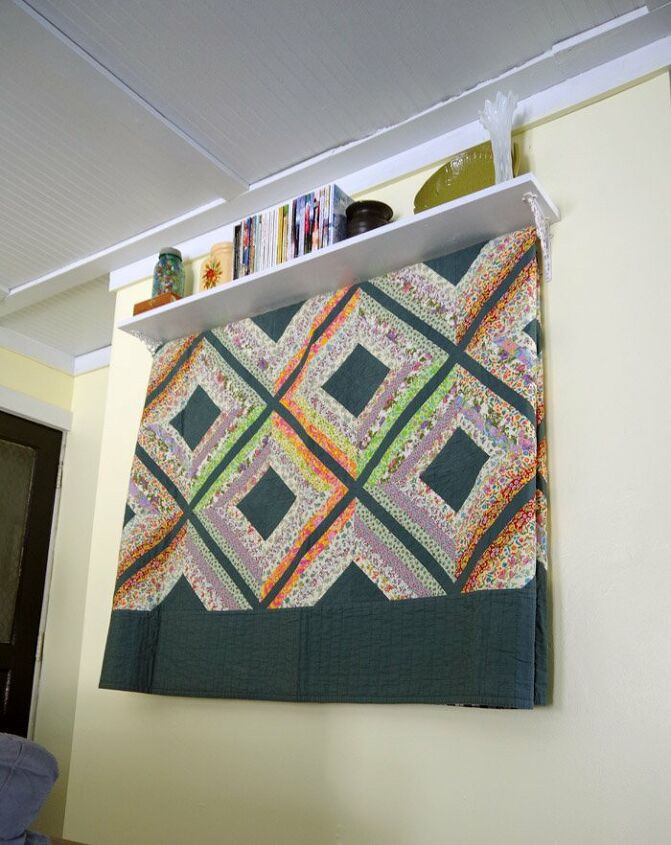
(YES I slaughtered my poor wall with holes adjusting exactly where I wanted the quilt to be, it wasn’t a good time and I don’t want to talk about it.) With that done I put up my shelf. (My shelf is a pine 1×8 that I painted white.)I had planned to use the quilt off of my guest bedroom bed for this but when I told my mom about it she said, “I have something I’ve been meaning to give you!”Kept safely by her for over thirty years was a quilt that came into my family through my Dad’s Mom.
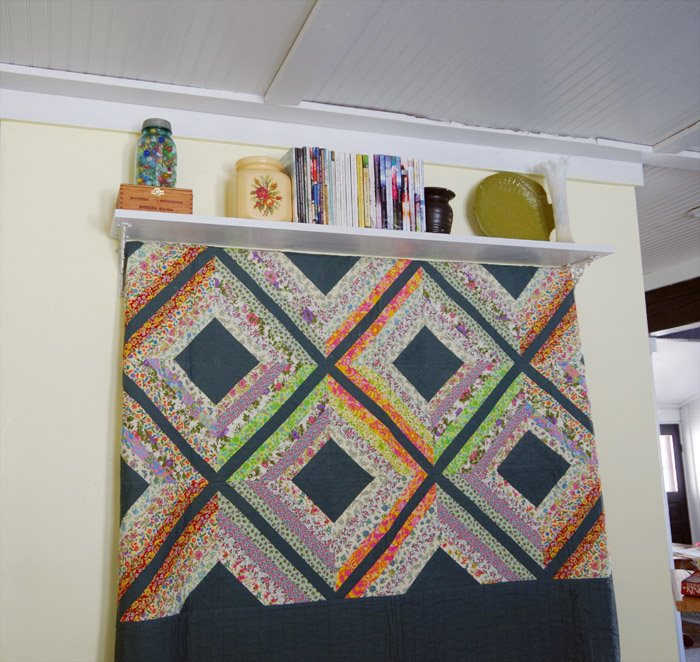
My mom recognized the work and beauty of it and handed it over to me in reverence.Every single stitch was put in BY HAND. This quilt didn’t just take hours it took WEEKS (if not MONTHS) to make. I promised it would be hung safely in a place absolutely no sun would ever touch it!With the reorganizing I did of the shelves above my kitchen sink I had some decor and things to put up on my new shelf here too! Besides that I had already decided my guest bedroom and library will no longer be a library so a section of my books found a new home here too.I love how versatile this whole idea is.I could easily change the blanket to a different afghan or quilt anytime or even put up several for lots of different looks etc. During the holidays I will definitely be hanging blankets in festive colors!Moving on to just a few more projects to complete my living room!NOTED: The quilt needs to be ironed I recognize this however I have yet to find anyone who is willing to put an iron to this beautiful old quilt… someday I may get up the courage but I’m not worrying about it.
Resources for this project:
See all materials


Any price and availability information displayed on [relevant Amazon Site(s), as applicable] at the time of purchase will apply to the purchase of this product.
Hometalk may collect a small share of sales from the links on this page.More info

Want more details about this and other DIY projects? Check out my blog post!
Comments
Join the conversation
2 comments
-
Great idea! Thanks for sharing!


Frequently asked questions
Have a question about this project?