


Repurposing Bee Boxes
I picked up almost 150 shallow bee boxes for a big spring market that I would be a part of back in May.
Kyle: “What are you going to do with all them?!”
Me: “Trust me. They’ll sell.”
You can checked out just how many bee boxes I hauled to Lucketts in the video as well as a short version of their repurposing!
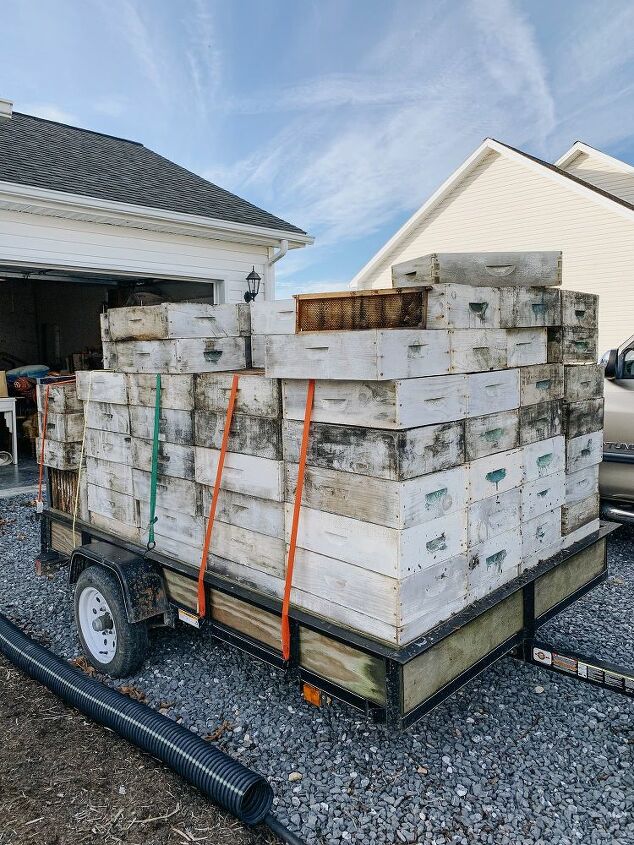
It didn't look like that many on the trailer but after putting them on and taking them off.... It felt more like 1,0000.
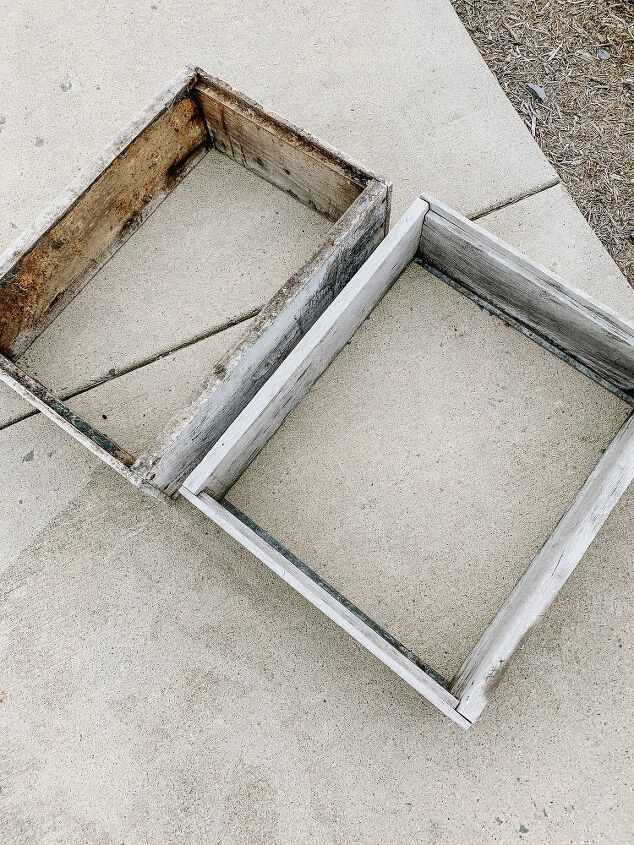
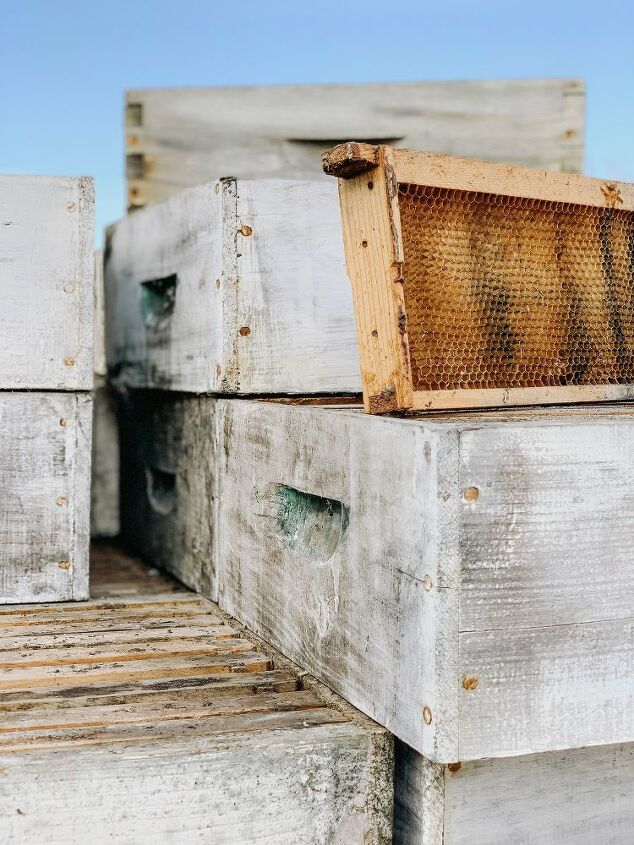
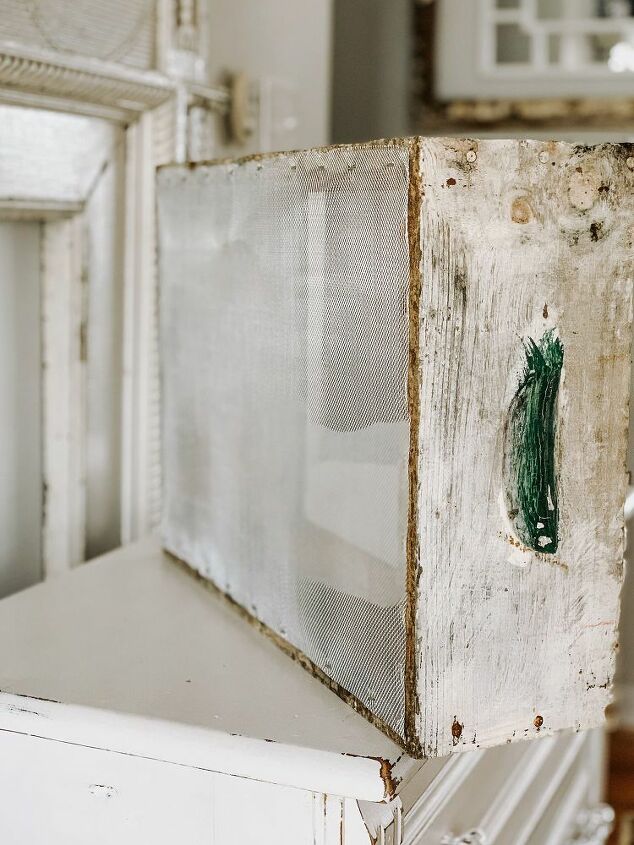
The thing about most bee boxes is that they don’t have a bottoms. It’s just 4 sides with a lip for honey comb trays.
They were still cool as-is but I wanted to add something to one side so that they would feel more like actual boxes.
The original plan was to take the time to cut down thin boards and nail gun them all on. That wouldn’t have been very cost effective and would have taken up A LOT of time. PLUS, it wouldn’t have worked for my final display idea.
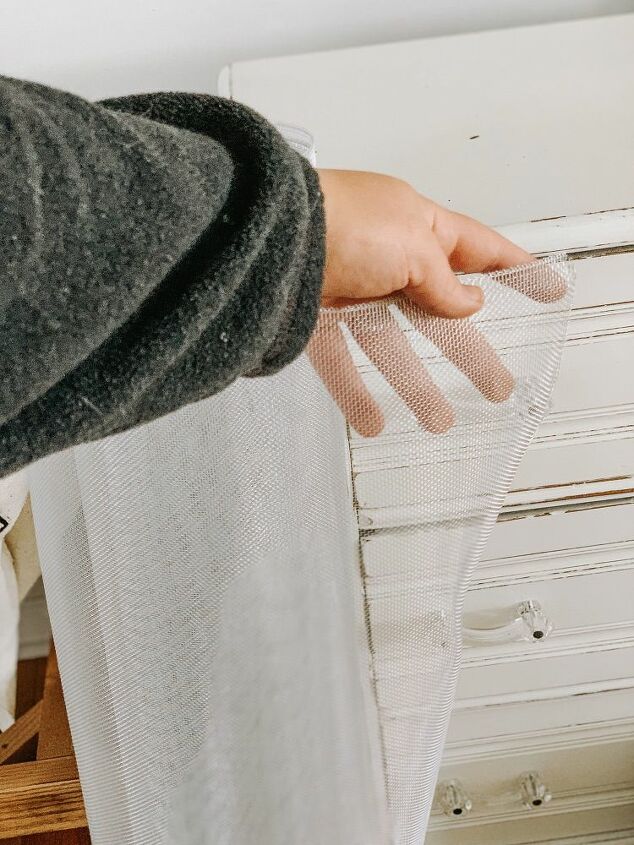
My solution? Add a strong screen material so that I could actually be used as a box BUT with lots of utility. It was much cheaper in material cost and could easily be done inside or outside and without any power tools (unless you use an air compressor for your staple gun).
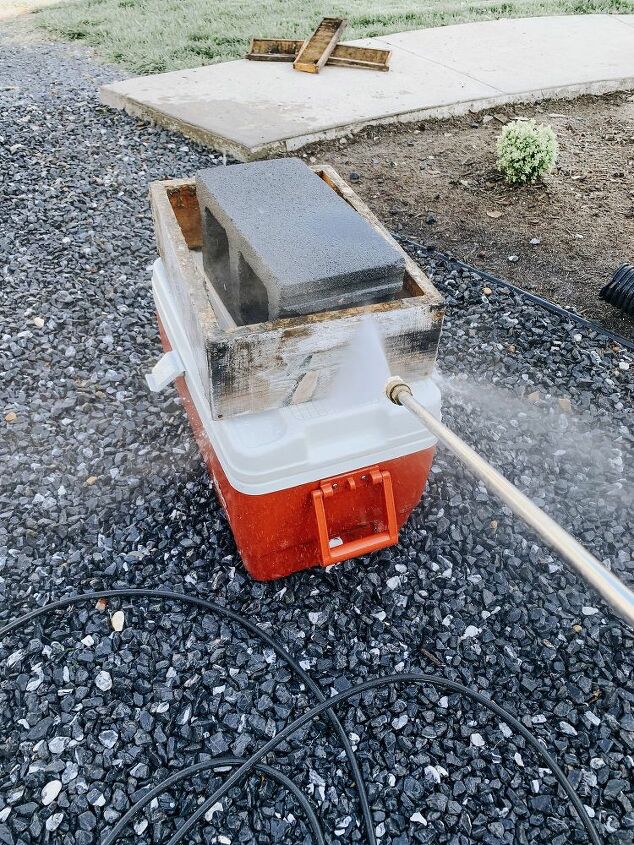
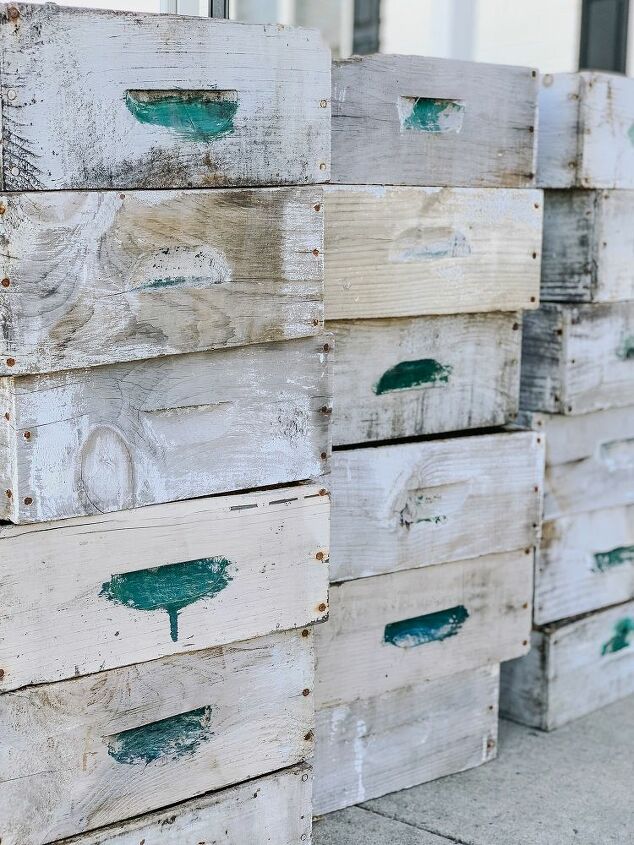
Before doing that, I needed to clean the boxes. I started by using just a hose and scrubbing tool but that proved to be a very time consuming. It was time to break out the power washer! So much quicker and probably cleaner.
I power washed all them inside and out and let them dry in the sun.
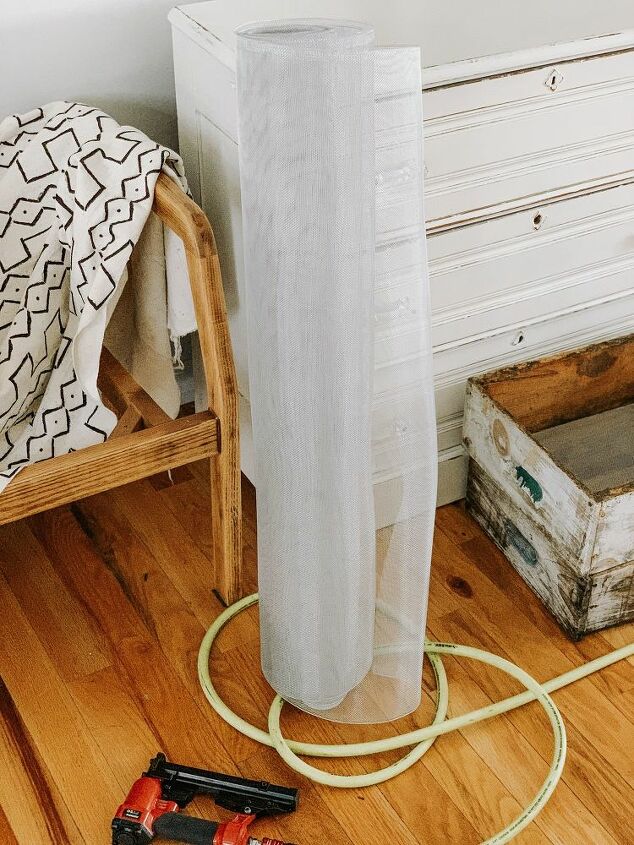
I used 2 and a half rolls of screening to cover the bottom-side of 144 - 12x10 boxes.
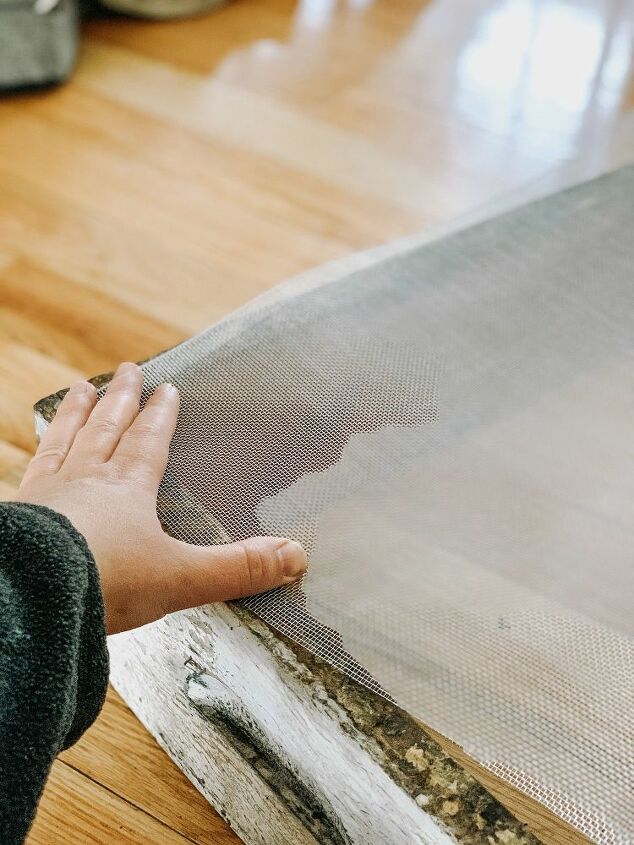
- I would line up two sides of the bee box with a corner of the screening.
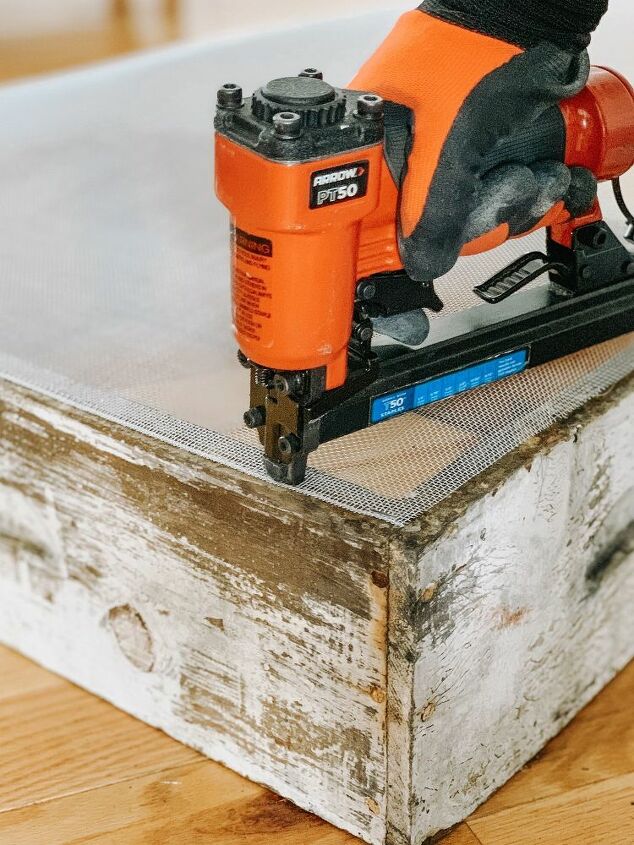
- Apply the screening with a staple gun.
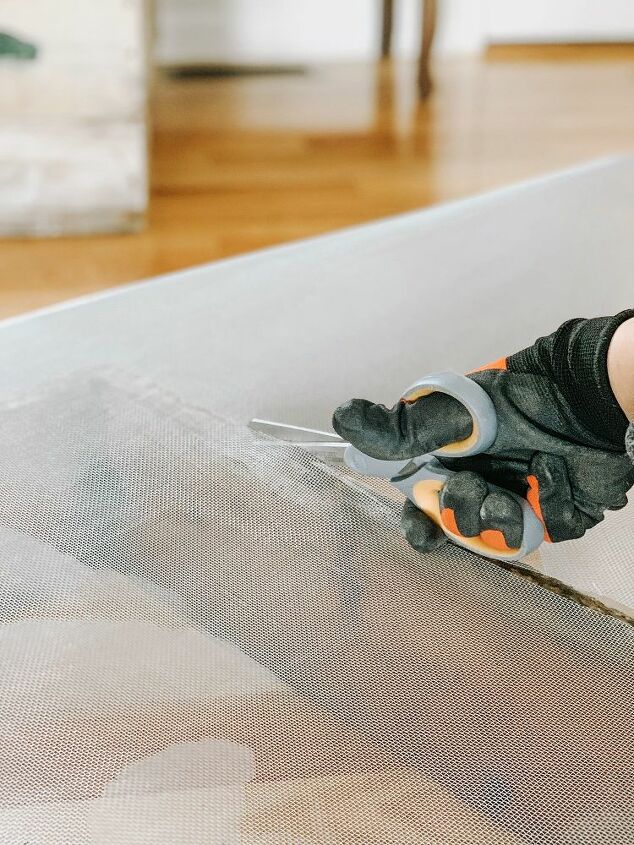
- Cut the other two sides to fit.
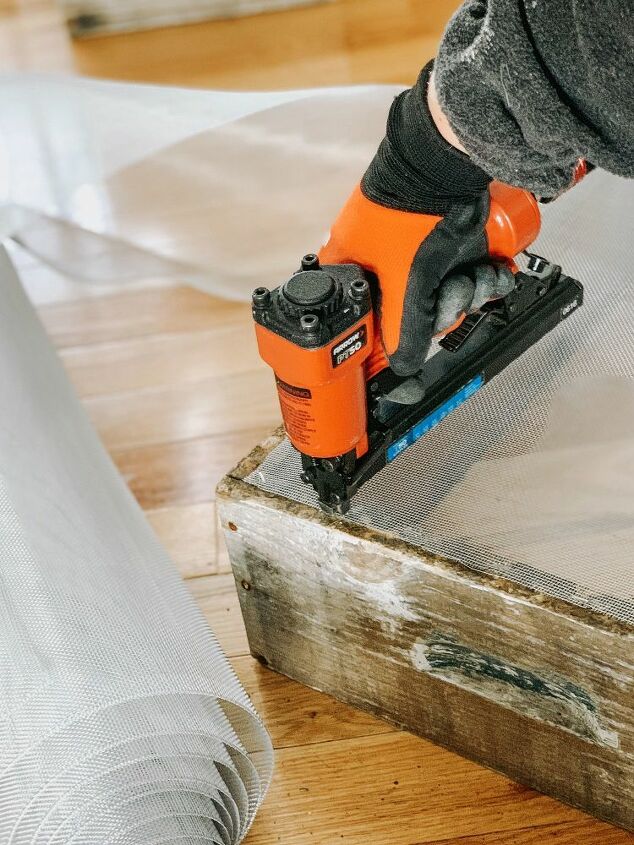
- Staple gun the rest of the screening to the bottom from of the box.
- REPEAT
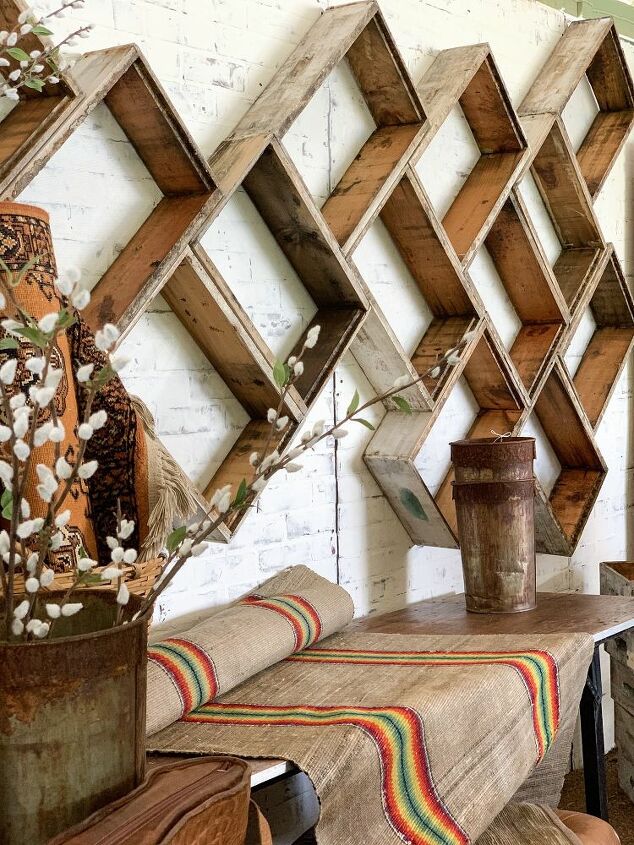
A simple project but if you have multiple boxes to work with, it can create some really cool shelving display. This was my display wall at The Lucketts Spring Market back in May. It was very eye catching.
Other uses could be: A small raised gardening bed for things such as potatoes, holding boxes, holding fruit, a toy box, etc. I had one customer who was going to use them as part of center piece displays on tables at a up-and-coming wedding.
You can check out a short version of the process that I just describe at the beginning of my last YouTube video! The rest of the video is all about getting ready for the spring market and the event itself.
Hope you enjoyed this post and feel free to follow along on my blog and Instagram for more pictures and a behind the scenes of more projects!
- @amandasmercantile (Insta)
- Connected Blog - amanda'smercantile.com
Resources for this project:
See all materials


Comments
Join the conversation
-
I love your wall!! Good idea.
-
I’m not much of a “do it yourself type of person”!


Frequently asked questions
Have a question about this project?
Why the screen backing?
You said you did 144 boxes, what did you do with the rest of them?
What did 144 boxes cost you?