


Semi-Homemade Wall Decor

I have been trying to refresh our home since the pandemic began, and things like painting were a welcome change. But then there was the looming task of choosing the wall decor. It takes me forever to decide what to put on a wall, and I really love things that are not “cookie cutter”. This fact alone makes it seem like it would be fruitless for me to shop at any big store for items for our home. However, I thought maybe I could just start with something purchased and somehow add my own touch to make it more unique.
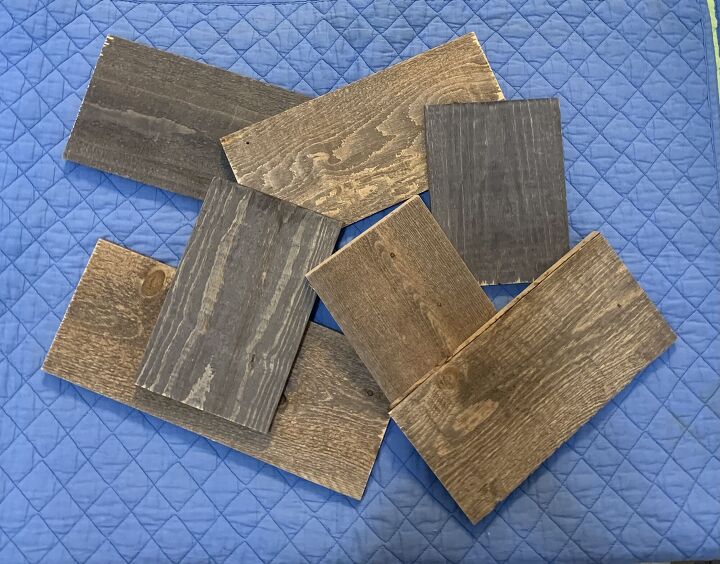
Enter the scraps of weathered wood from the biggest project we conquered during our refresh-our barnwood tv wall. All of the boards were varying shades of gray and brown, which are colors that I wanted to spread around the rest of the house for some cohesiveness. All the left-over boards were of varying lengths, of course, but I felt sure I could work with that constraint. Once somehow using those boards was settled in my mind, I went shopping.
[You can make your own weathered boards from fence posts or scrap wood you have lying around. A little stain, paint, sanding, and maybe some distressing, and you are in business.]
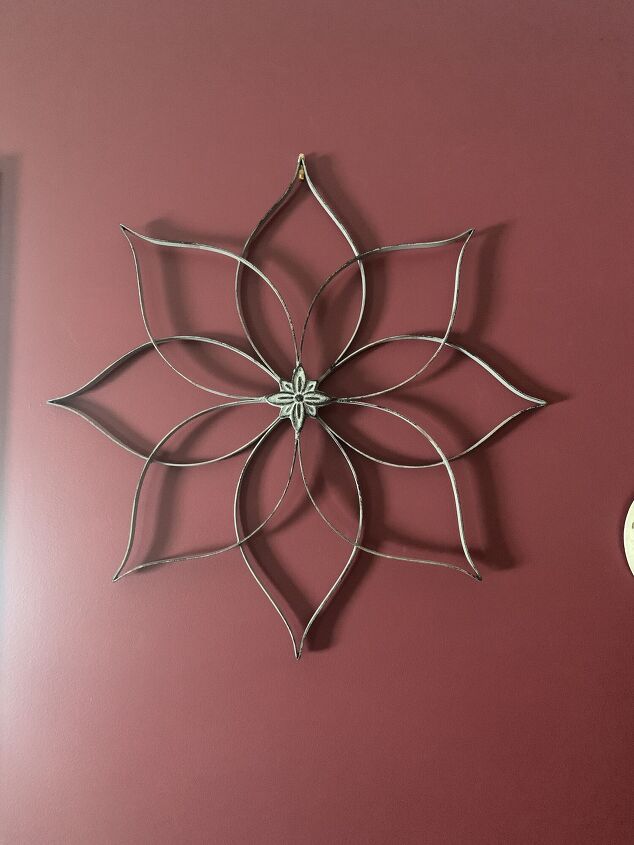
I purchased this metal wall piece at Hobby Lobby.

I purchased this letter board at Lowe’s.
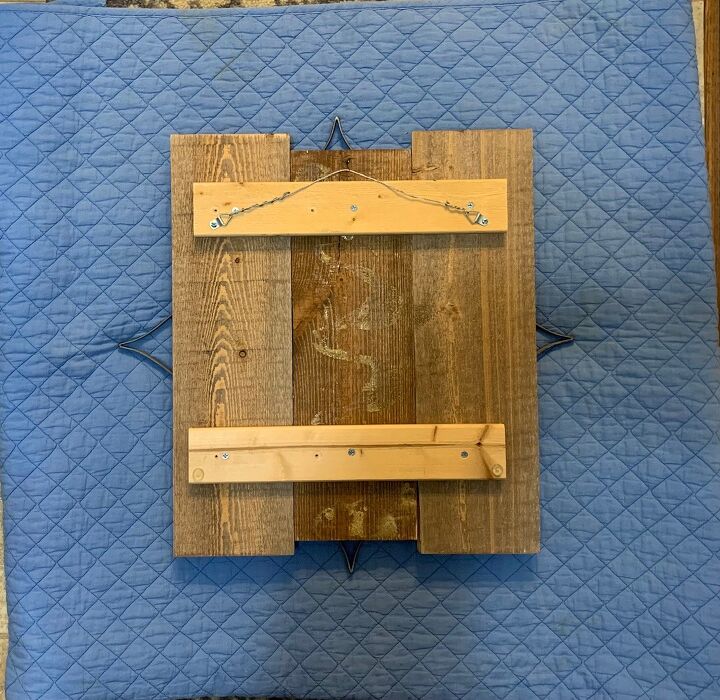
First, the metal flower. I chose three pieces of weathered wood in different lengths and contrasting tones of brown, arranged them vertically in the order I wanted them, and flipped them over to the back. Then, 2 braces were cut from strips of scrap pine board long enough so when laid across the boards horizontally, they would cover the width of all of the boards (the braces don’t have to go all the way to the edges).
The braces were attached to the weathered boards from the back with one screw through the pine brace into each weathered board. [Be sure the screw is long enough to go through the brace and slightly into the weathered board; If it’s too long it will come out the front, and if it’s too short it will not hold the brace and the weathered board together.]
Sidenote: While the original 6 foot boards we purchased were stained on both ends, using cut pieces sometimes resulted in edges that were raw and not stained. I just mixed some craft paint that matched the board’s tone with water to create my own “stain” and brushed it on the cut edge, working it in until it blended with the board tone.

Time to put them together. Once the metal piece was placed where I wanted it on the front of the backboard, I used several small, brown nails in the very center of the sculpture to secure it. I know there are many other ways to do this, but I had these materials on hand, and, in the finished piece, the nails are not noticeable.
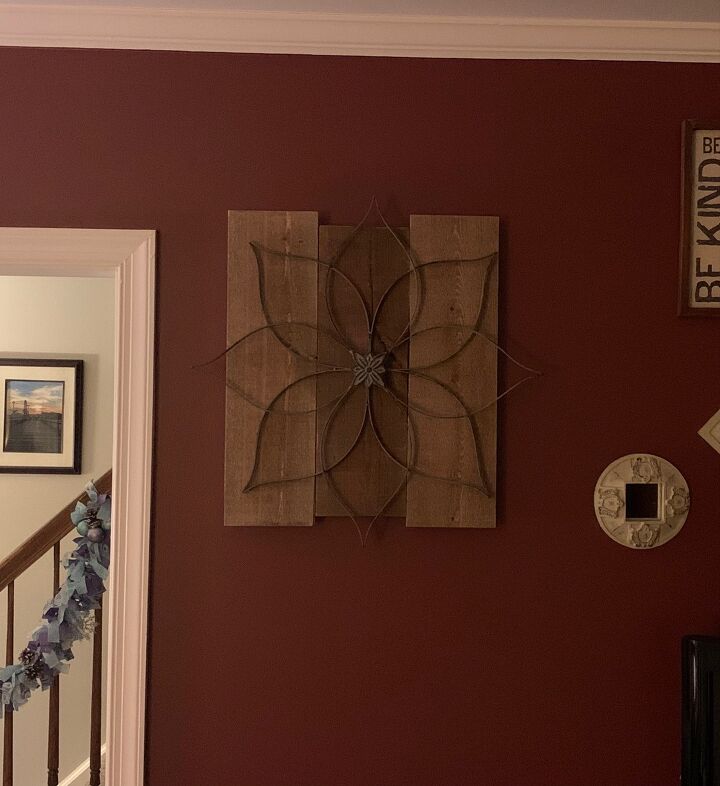
Finished!
Now the letter board. The color of the letter board itself matched very well with the tone of several of the pieces of weathered board. I decided to use them, despite the variation in their lengths. This time, instead of contrast, the color of the backboard would be relatively uniform and blend with the purchased piece on the front. Also, the weathered boards would be displayed horizontally instead of vertically.
Assembly of this backboard was the same as described above, except that 4 boards were used instead of three.
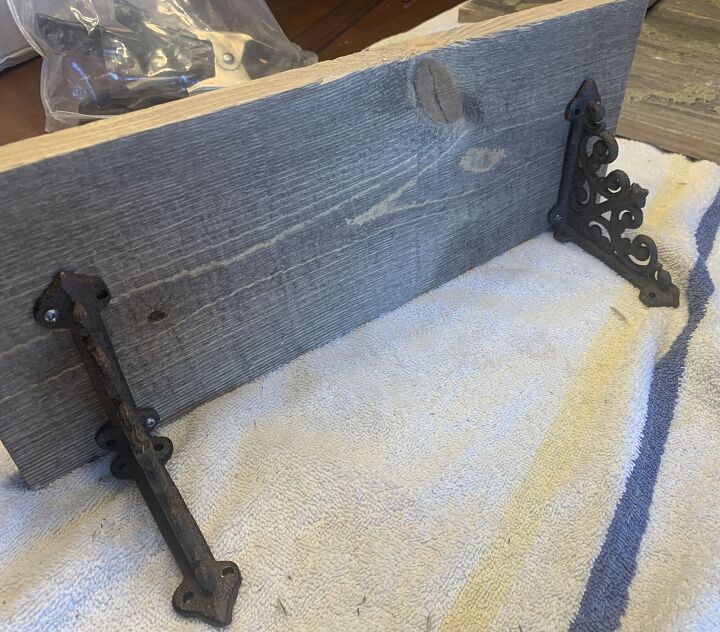
There was 1 other piece of weathered wood that I wanted to use as a shelf, so I purchased 2 small shelf brackets from Hobby Lobby and attached the finished shelf to the bottom of the backboard. The letter board already had a saw-tooth hanger on the back, so all that was needed to attach it to the front was a small nail. (Being able to take the letter board off of the backboard makes changing the message easy and, if we ever tire of it, it won’t be difficult to replace it with something else.)
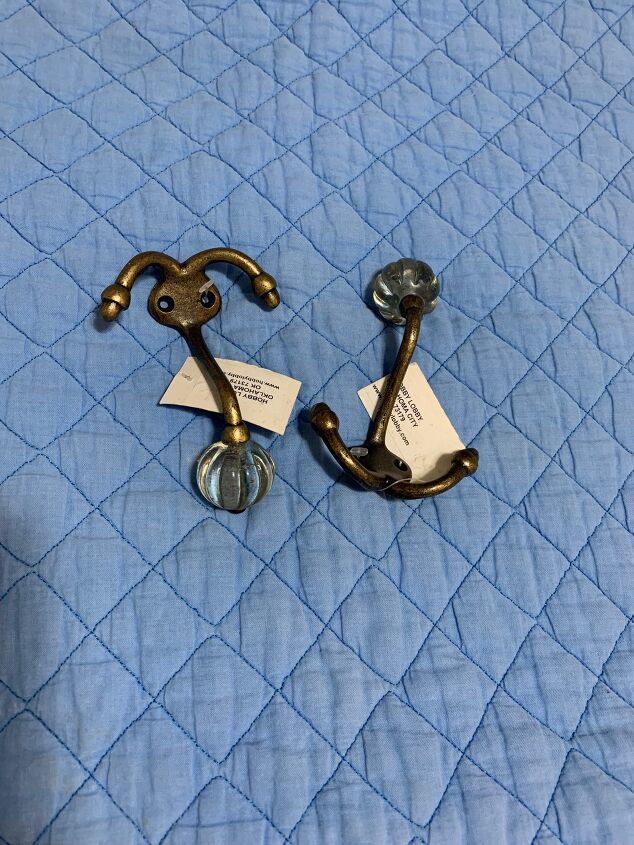
After all of that, I still felt the long board on top needed something. I had some pretty coat hooks that I picked up a while ago, and I attached them to each side of the letter board.
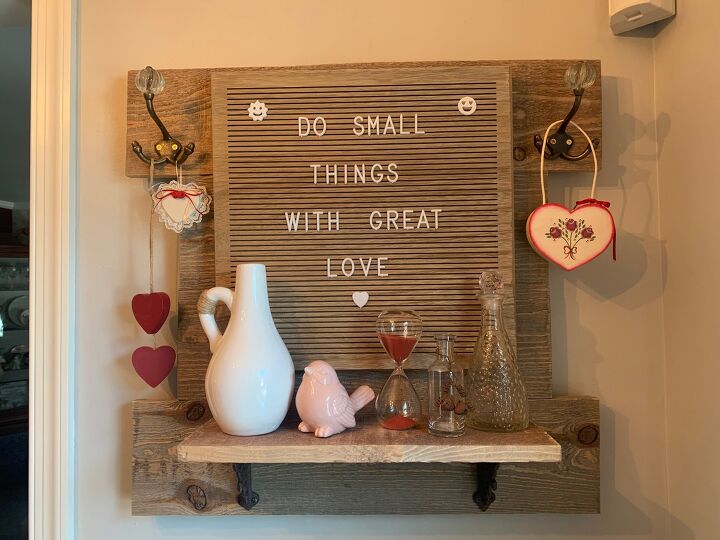
Finished.
Now there is considerably less scrap wood in the garage and 2 new wall pieces. The backboards add a bit of depth, dimension, and interest to items that, on their own, were a bit "flat".
Hanging the finished pieces: I used D-braces and wire along with a 50 lb. (just to be sure) picture hanger hook. Use whatever you feel your wall needs to support the weight of your project.
This project is being offered as diy food for thought. The concept could be adapted in many ways that fit your style. Use anything you love–a beautiful mirror, a framed photograph, a metal sign, a sconce, a decorative metal scroll, etc. Use any kind of wood you like or whatever you have lying around. You get the point; use the idea and make it your own. The options are limitless. I actually traversed the aisles of Hobby Lobby with a pre-made backboard and just about everything I put on it looked terrific. Happy Diy-ing!


Frequently asked questions
Have a question about this project?