


Stenciled Bathroom Sign

I love creating new decor pieces for my home and making them fit my personal style. I tend to lean farmhouse, but I also love antiques and incorporating them into my decor.
Since I like to switch things up often it's helpful to be able to DIY when I can.

Material List:
- Stencil of your choice
- Chalk paint or paint of your choice
- 1 inch foam brush
- MDF board fit to the size of your stencil and a face frame
- 1/4" Plywood for the frame
- Wood glue
- Squeeze clamps
- Table saw
- Utility knife
- Sandpaper
I knew I was going to glue a frame to the front of the MDF board and add a little more detail to my sign. I am choosing to glue the frame vs nailing because the sign is very thin.
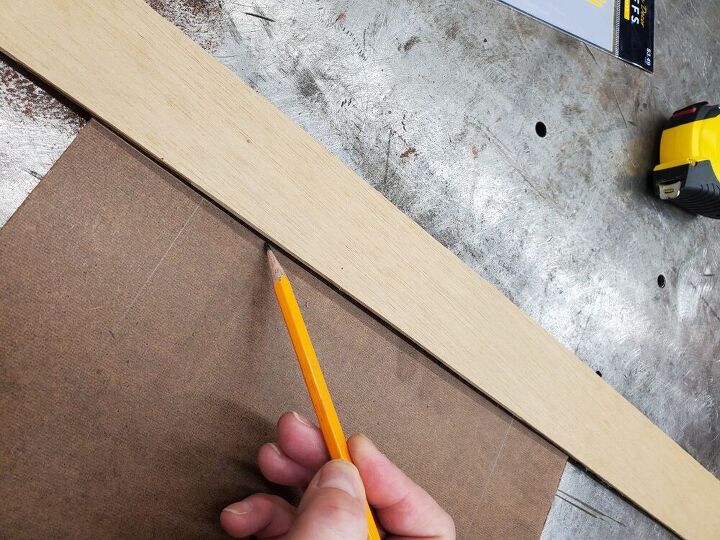
I laid the piece of 1/4" Plywood on my MDF board and leveled it to the edge and drew a line to mark where the trim piece would fall.
I traced the trim for all sides of the frame.
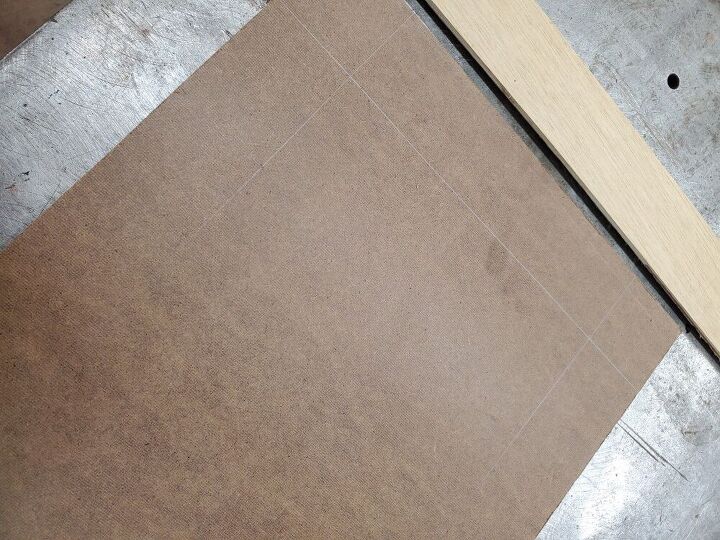
Once I knew where the trim boarder would fall, it was time to find the placing for the stencil. I decided to keep it down an inch from the edge of the top and bottom trim pieces.

Here you can see all the lines for the trim and placement of the stencil.
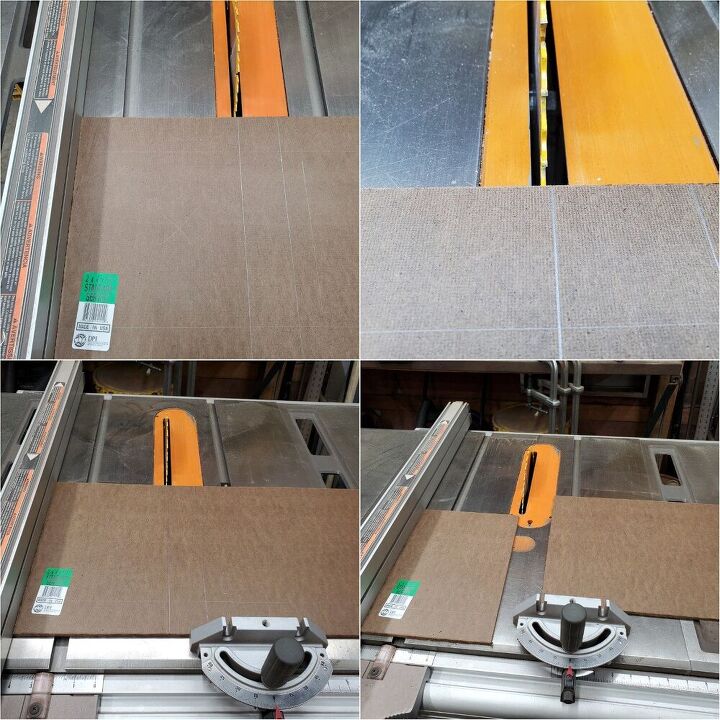
Once I knew where the bottom trim piece landed, I set up the table saw. Using the fences to keep everything square, I ripped the MDF board down to size.
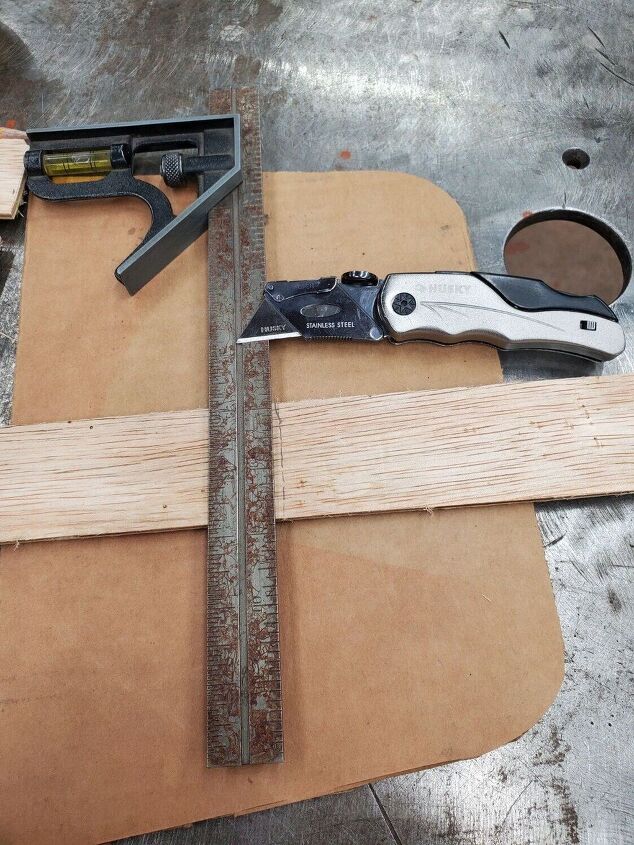
Then I moved onto the trim pieces. I was going to use the table saw to cut these as well, but the smaller pieces were a little intimidating on the saw for me. So, I decided to use a sharp utility knife and square to score the pieces. Once scored, they easily snapped and I sanded the edges smooth.
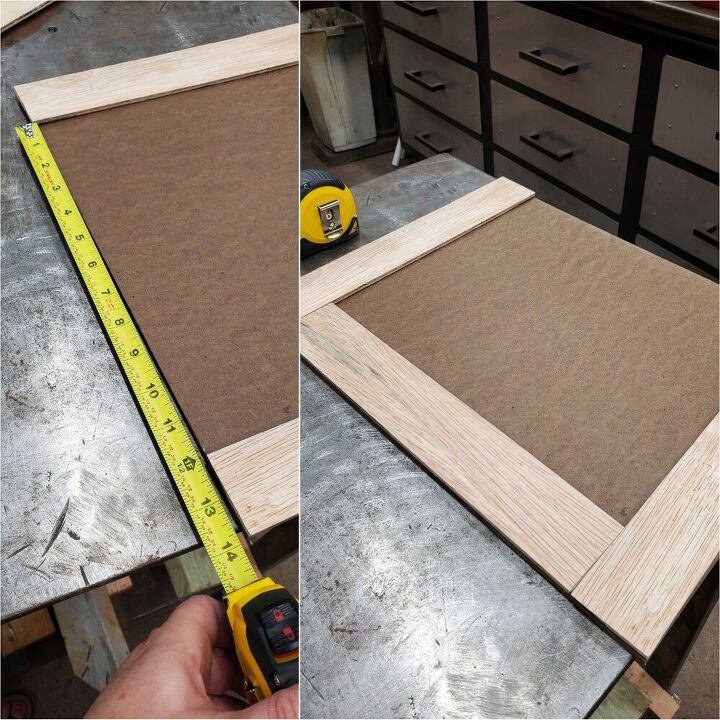
I cut the short sides first and placed them on the MDF board. Then I measured the length needed for the side pieces of trim.

Once all my pieces were cut and sanded, I used wood glue to attach them to the MDF board.
I clamped the trim down and let the glue cure for 2.5 hours.
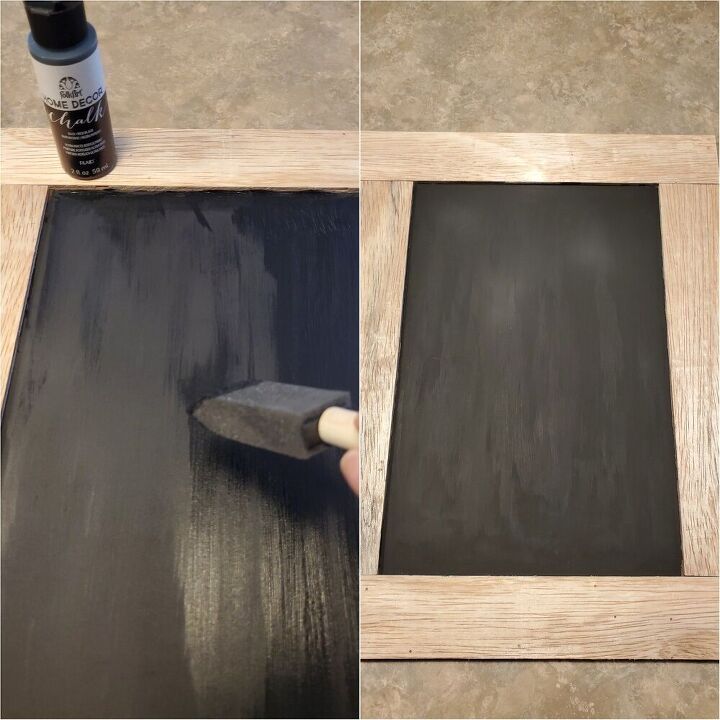
I originally planned to paint the whole sign with white chalk paint, but after seeing the detail in the trim pieces I liked how old it looked.
I decided to use black chalk paint for the base color. The chalk paint covered the MDF board easily in 2 light coats.
As you can see in the second picture the black is a bit streaky looking but that is the look I wanted to make it look like an old chalkboard.
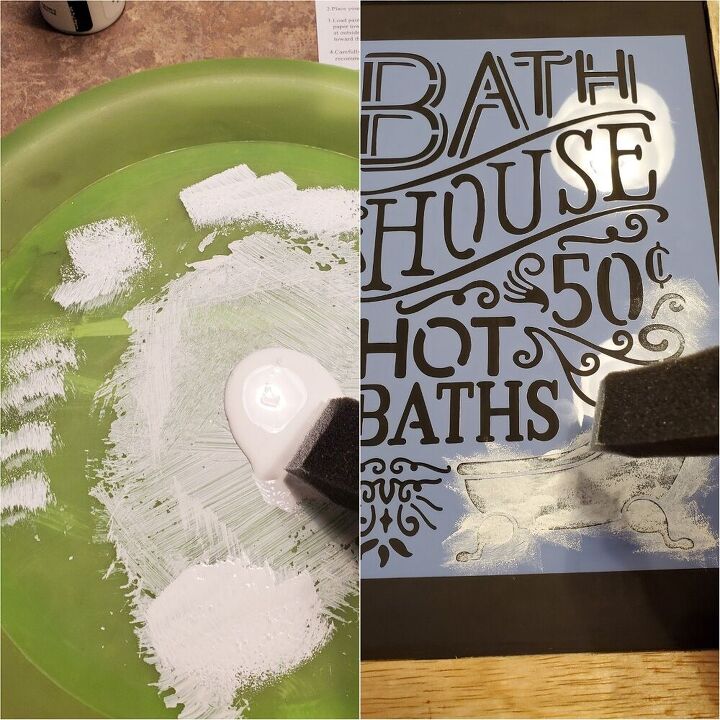
Then I carefully placed my stencil into place. I chose not to use an adhesive or tape to hold my stencil down.
I loaded my foam brush with paint and then dabbed off the extra on my plate and paper towels.
I used a light amount and held the stencil down near the area I was adding paint. I pounced my foam brush vs using a brush stroke motion. I did a light coat over the whole stencil and then went back over it where I wanted a little more coverage.
I wanted a more vintage/antique sign look so I was not going for full coverage or crisp lines.
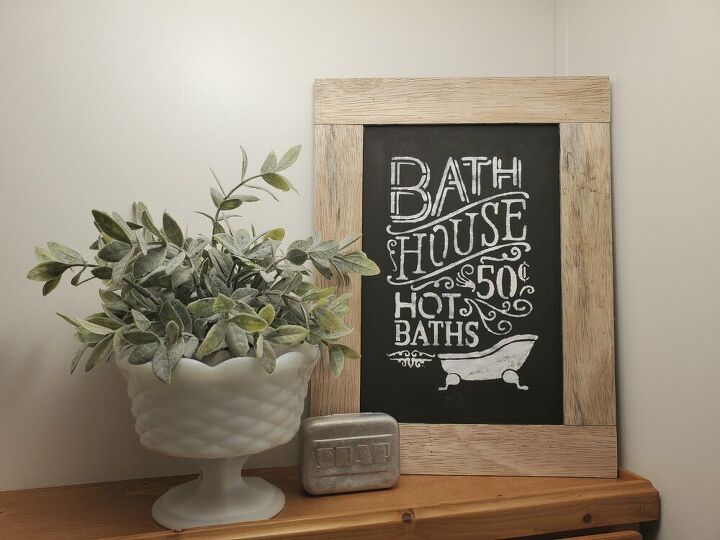
Here is how my stenciled sign turned out and I love it! It's just what my bathroom needed.
Resources for this project:
See all materials


Comments
Join the conversation
-
I wonder how Dr. Rick feels about this sign…


Frequently asked questions
Have a question about this project?