The Easiest Wall-Hanging Ever

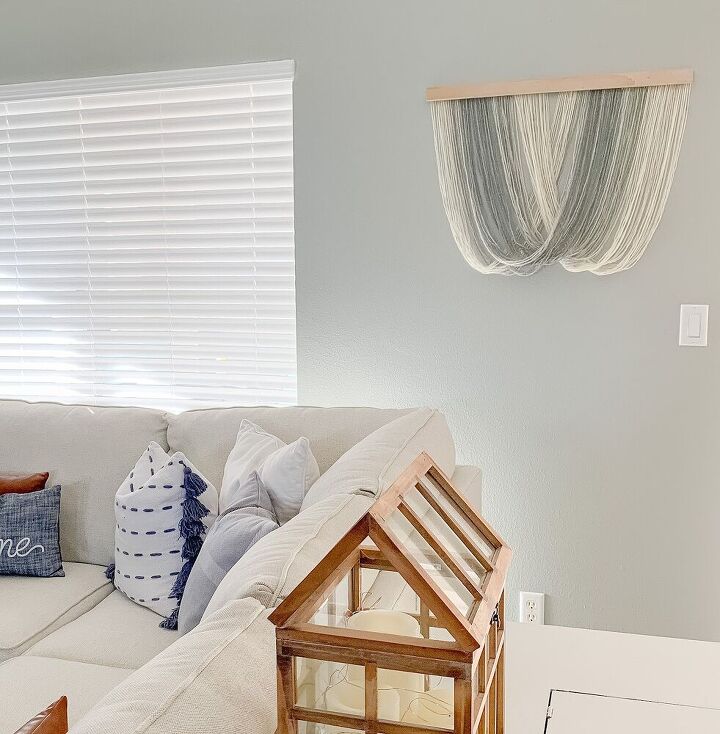
I love the look and the simplicity of this project. I also love how easy and cost effective it was!
Here's what you need:
-piece of scrap wood, any width that you'd like. (mine was a 1x2 that I cut to 36 inches)
-yarn
-hot glue gun
-scissors
I bought a yarn that had an ombre effect that would give me three different shades for my piece.
Mark the middle of your piece of wood as you will only be gluing pieces on the first half.
Cut lengths of yarn in the colors that you have chosen. Make sure you have equal amounts of each and they are all the same length.
For reference: I cut my pieces 3 feet in length.
Use your hot glue gun to attach the end of the yarn to the piece of wood. I found that adding a line of glue about 3-4 inches at a time an then laying 5-6 pieces of yarn made this part of the project go by really quickly.
**Make sure that each piece is as close to the next one as possible but doesn't overlap**
Continue gluing until you reach that mark that you drew halfway on your wood.
For the next step, I used a clamp to clamp my wood onto a bookshelf so that all of the yarn was hanging down. It will make it much easier!
Starting all the way at the left end of the piece of wood where you glued down your first piece of yarn:
- Grab 4-5 strands of yarn at a time, make sure that they are laying flat and not overlapping, glue them down on the piece of the wood to the right of the mark in the middle.
- Continue this process until the ends of the strands are glued down.
- Cut any excess yarn once you are finished
Enjoyed the project?
Resources for this project:
See all materialsComments
Join the conversation
-
 Gypsy Rose
on Apr 26, 2021
Very Inspired. That's a beautiful idea!
-
-












Frequently asked questions
Have a question about this project?