


Upcycle Fry Pan DIY
Do you have a favorite pan you used to cook in, but now it's no longer safe to use? Why not upcycle it into a lovely decorative item!

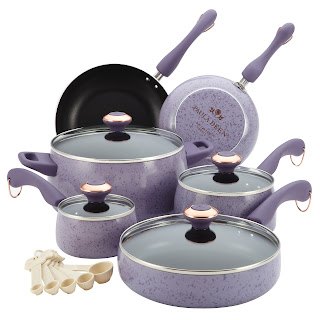
I loved my pretty, speckled purple fry pan! It was part of a seventeen piece set that I purchased at a Paula Deen store while on vacation in Myrtle beach a number of years ago!
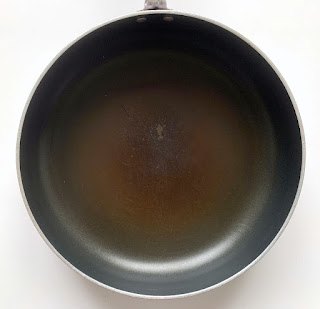
But the non-stick Teflon began to bubble and then peel and no longer safe to use. I'm not sure if my recycling center would take it because of the many materials it is made of - especially the non-stick coating. That would have to be removed first before dismantling the pan for recycling. And special equipment is required to do that!
So instead of throwing it in the trash and ending up in a landfill destined to waste away - probably taking more than most lifetimes to do, plus causing lots of environmental problems, I decided to upcycle my favorite fry pan by decoupaging it, and then decorating it with handmade soda can flowers! Resulting in a pretty decorative kitchen item - perfect in any kitchen decor - especially mine, lol!
Materials used:
- Fry pan
- De-greaser/alcohol
- Chalk paint/sponge/brush
- Paper/pencil/scissors for template
- Decorative napkins
- Matte Mod Podge
- Washi tape
- Aluminum can flowers and leaves
- Utility knife/craft knife
- Hot glue gun/glue sticks
- Faux leather ribbon
Instructions:
Let's begin by cleaning the fry pan with a de-greaser or wipe down with alcohol after cleaning with dish detergent and water to remove grease and cook-on stains.
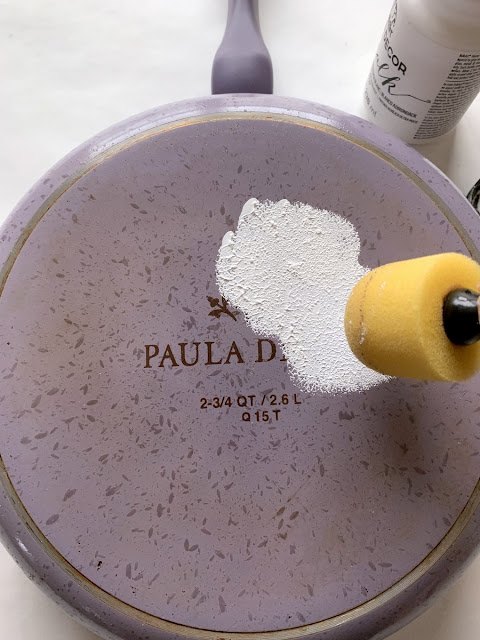
Next, apply chalk paint to bottom and sides. Two or three coats are needed! Let dry.
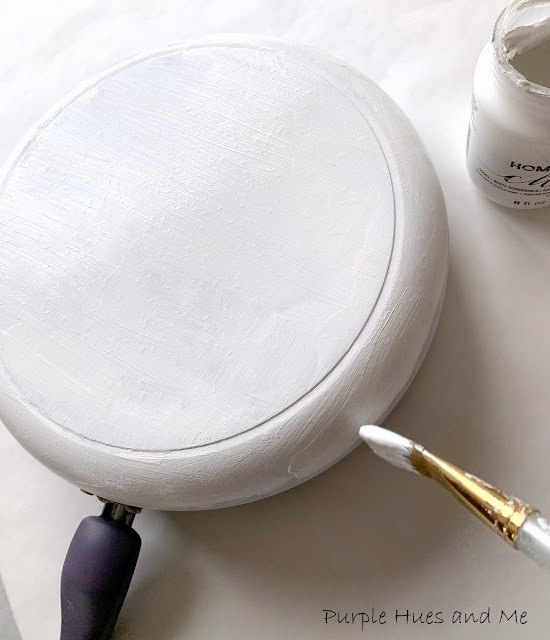
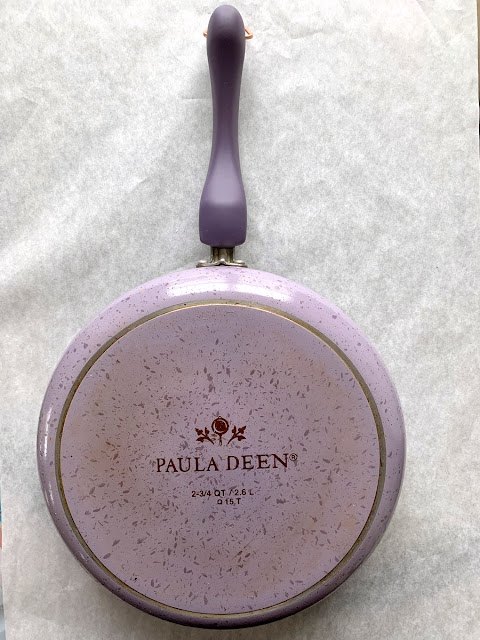
The handle was in excellent condition and left untouched. It's a beautiful shade of purple!
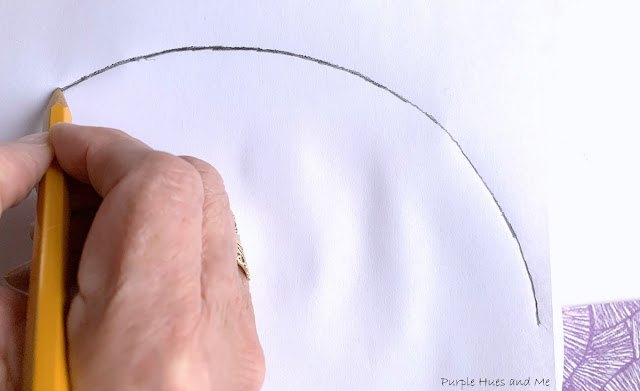
The bottom of the pan had a clearly defined round area to decoupage so a paper template was made using a pencil to draw around the area.
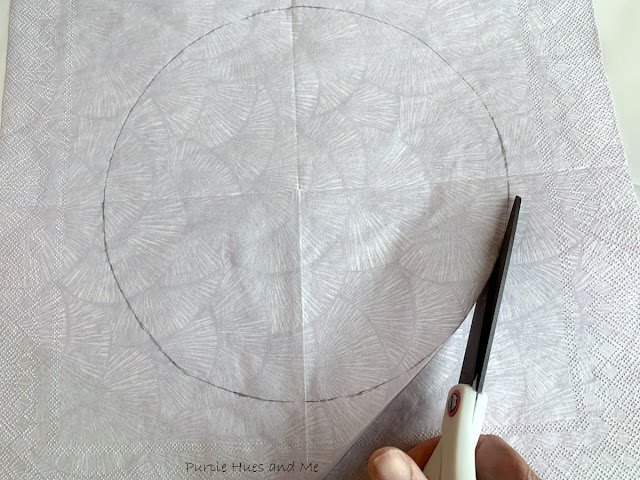
and then used to draw on and cut-out a decorative napkin to decoupage.
Once the napkin was cut-out, the white layers of the napkin were separated from the print backing.
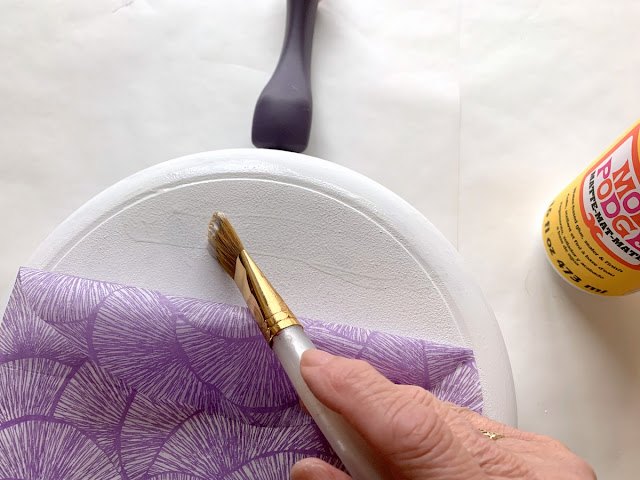
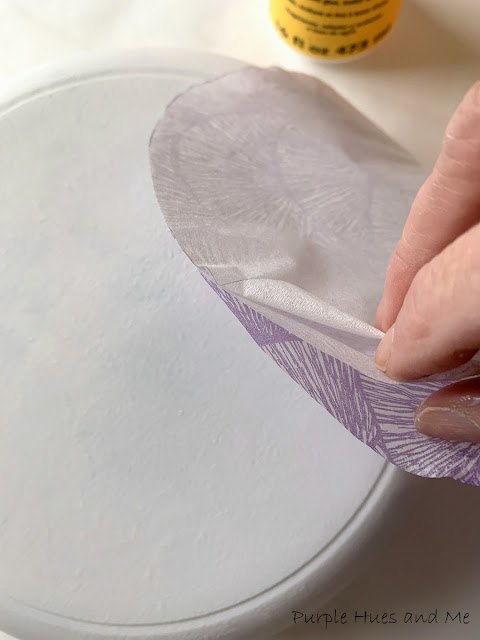
Next, the printed napkin needed to be glued down in small sections since it is thin, delicate and easily tears when wet with mod podge. To do this, position the printed portion of napkin on the pan and lift up an end side to lightly apply mod podge over a small area of the pan. Carefully, replace napkin on the decoupage glue and lightly pat the napkin down smoothing out as you pat.
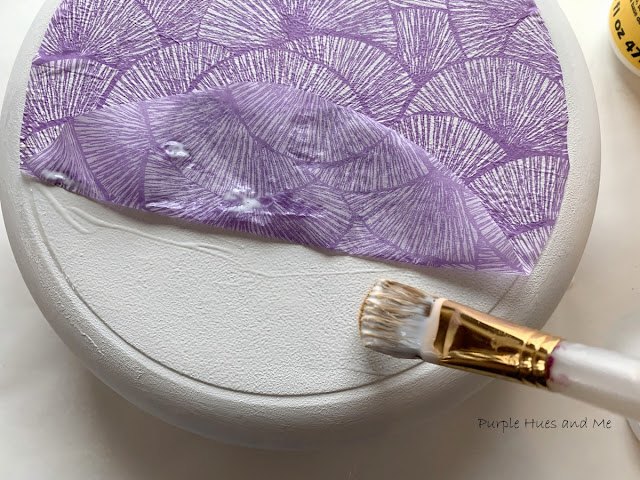
Continue applying mod podge in small sections and smoothing napkin out . . .
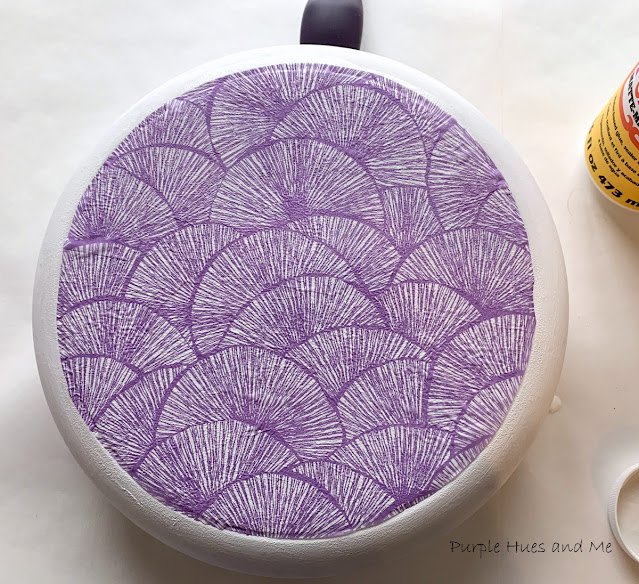
until the entire napkin is applied to pan. Let dry. Then apply a top layer of mod podge over the napkin to seal once it's completely dry.
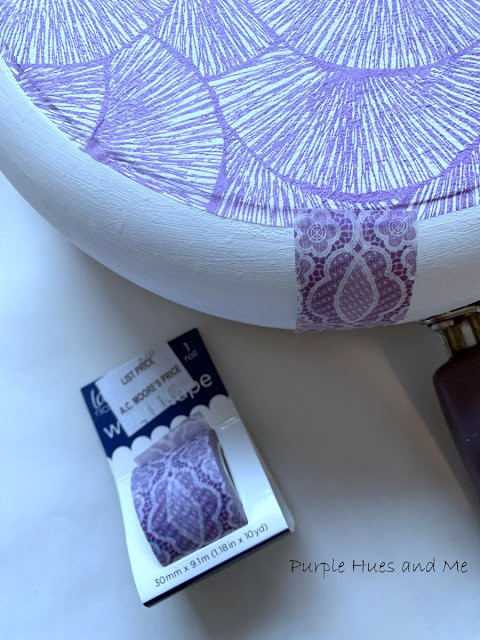
I couldn't decide how to decorate the side of the pan - whether to paint stripes or dots, etc. But took the easy way by using an old roll of washi tape that I found in my stash to apply strips along the pan side.
Sorry about the lighting - different times of day affects the coloring.
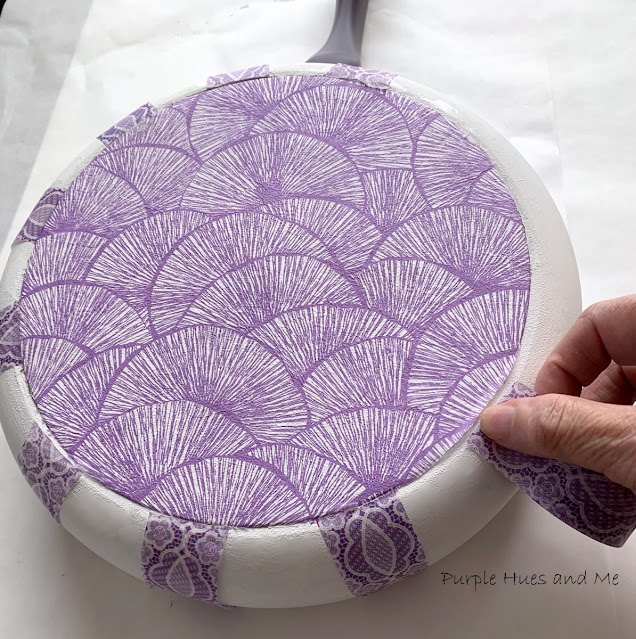
Amazingly, the colors and design of the washi tape match perfectly with the decoupage napkin.
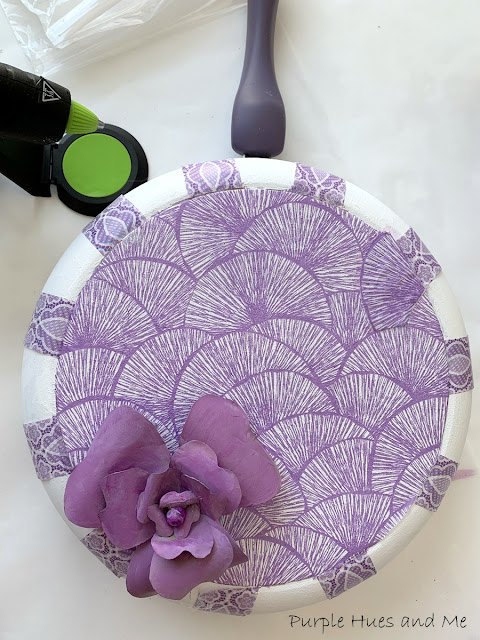
Next, I wanted to add dimension to the pan by using a couple of leftover aluminum can flowers and leaves I had made previously.
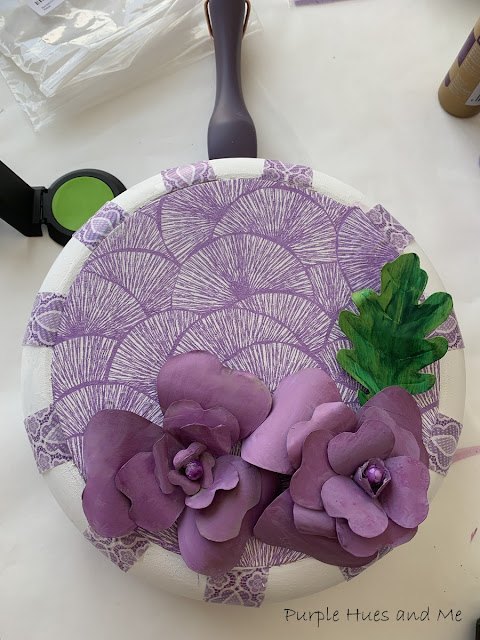
You can find the tutorial here.
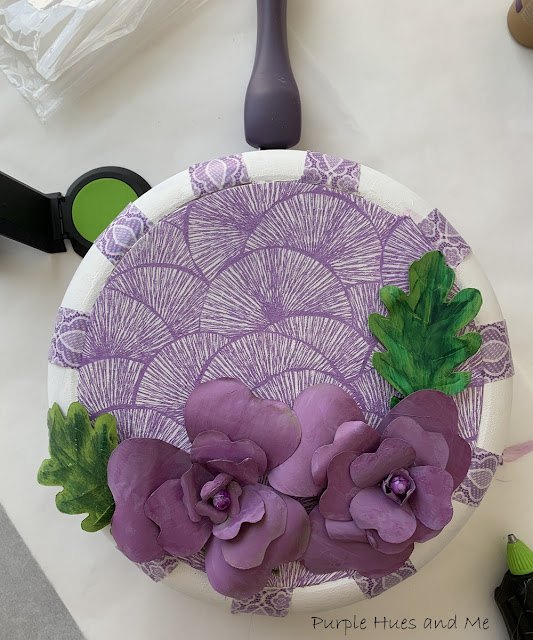
And finally, toping the pan below the handle with a handmade leather-like bow!
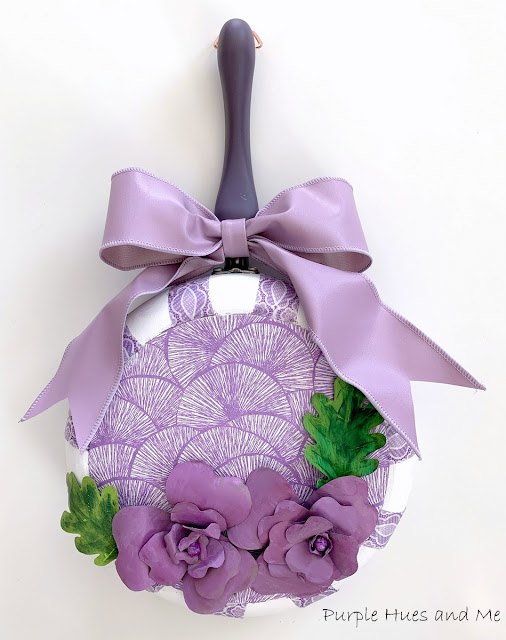
How cute is this!
Resources for this project:
See all materials


Comments
Join the conversation
-
Loved the project, but puzzled why you thought you needed special equipment to dismantle it. However, another option would be to use steel wool to remove the teflon coating. Nasty work, and laborous, but the results is a clean stainless steel pan you can cook in again.
Again, you did a great job and looks absolutely amazing!
-
Thanks so much, Christopher! I did read somewhere that recycling centers needed special equipment to remove teflon coatings in cookware and only a select few localities will remove these coatings. Perhaps that's what I should have said in my post and not imply that I, personally, needed special equipment to remove teflon. Sorry for the confusion.


Frequently asked questions
Have a question about this project?
My favorite color is lavender and purple and your idea is refreshing . I plan to do this and wouldn't it be wonderful to have grandmothers skillet? Thank you so much for sharing your idea. Elaine
Not a question, just wanted to say how gorgeous this pan is! Also the roses, absolutely gorgeous!!!