


Windows: Upcycling to Make Farmhouse Artwork!
I just knew some day keeping all of those old windows would pay off! After painting out the room and getting some things complete one glaring issue was my one totally empty wall above my sofa. I have a confession to make, I literally STOLE the prints out of almost every single room in my entire house to complete the gallery walls of my new entryway when I redid it last year. No regrets at all but it literally left me with nothing on the walls of my living room!
Ever procrastinated on one thing by doing another thing? That’s pretty much how I work all of the time but, eventually, even I run out of other projects.
All of the prints in my house were given to me or I grabbed them when a family member didn’t want it anymore. I have some of my own old photos only because I had them left over from gallery shows I used to do like a thousand years ago.Something about picking out art or making it or figuring out what kind of prints to buy really stresses me out. It makes me nervous. I’m not good at this!
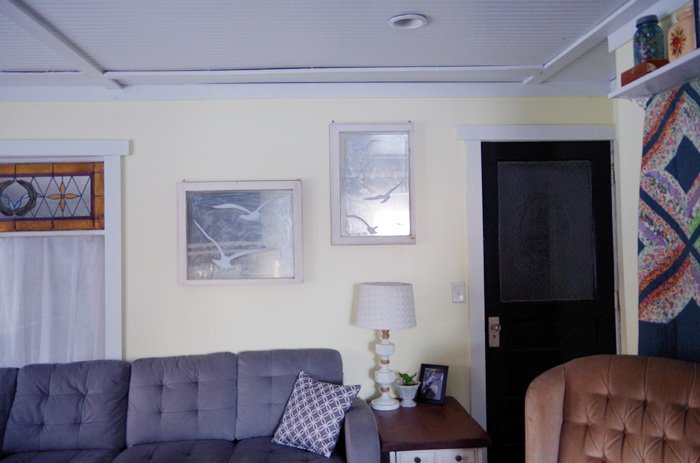
I think my biggest issue is that this is a 100 year old farmhouse and I want to respect that by not going very modern. So I had two big empty walls and for the other wall I came up with the idea of hanging/retiring one of my grandma’s lovely old quilts which I think turned out great!So I was left with this one big blank wall.
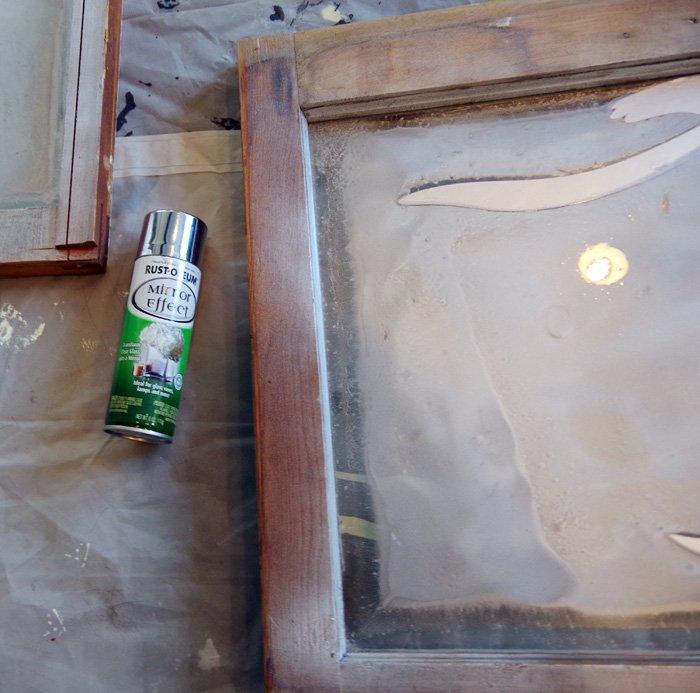
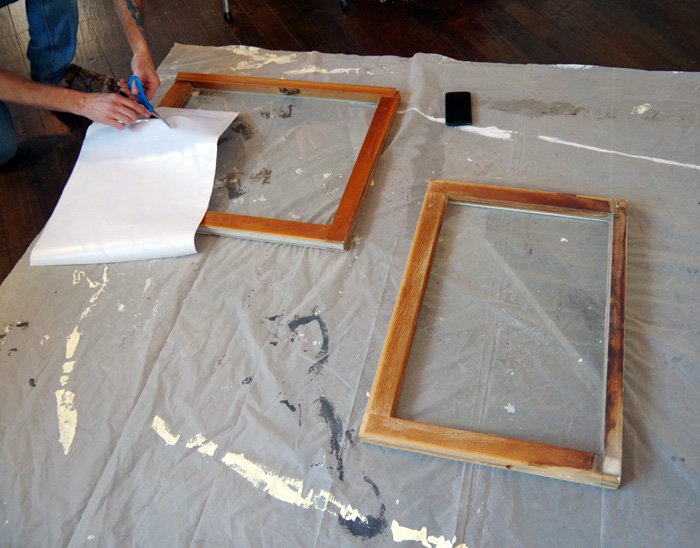
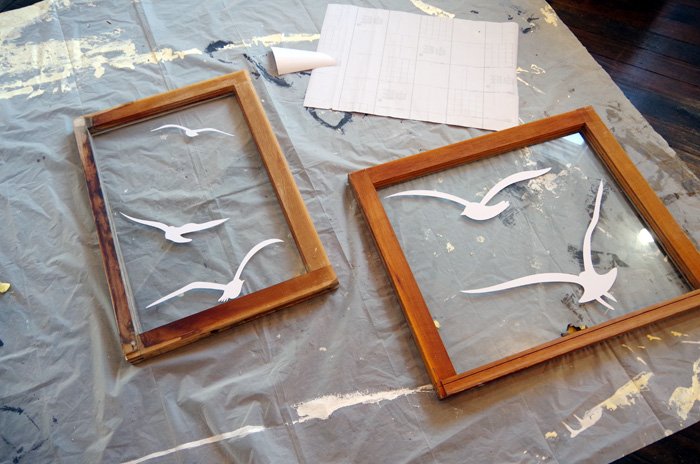
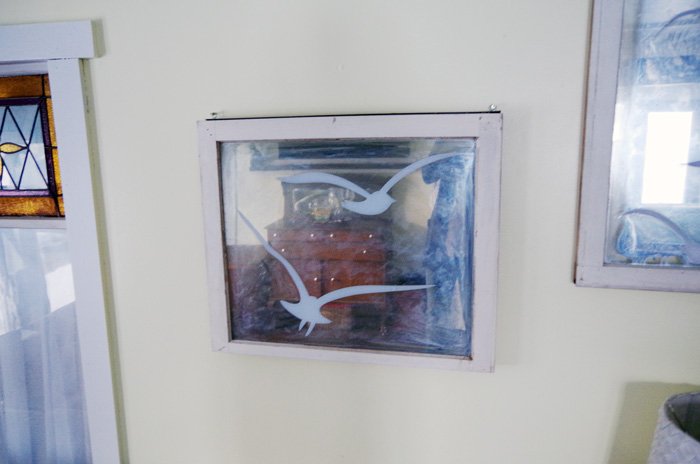
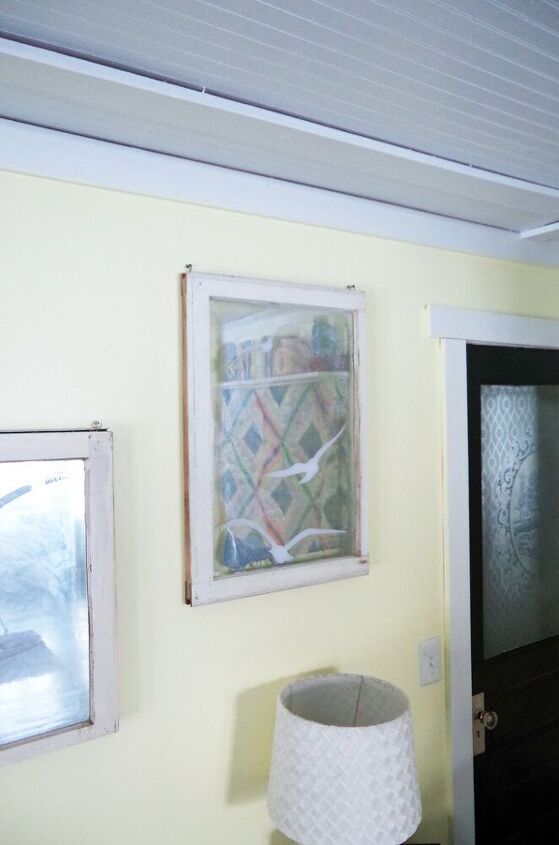
This wall was the bigger conundrum because anything I put here would either fight with or balance with the giant stained glass window beside it.After coming up with my project of making a tray for my coffee table out of an old window I was feeling good enough about the idea that I went ahead and did two more windows as I also made the tray. I used this vinyl bird decal and Rustoleum’s mirror spray paint.
Firstly I cleaned the windows up really well before putting on my bird decals. I did both windows at the same time remembering I was working in REVERSE to how they would be hung because I would be flipping them over after spray painting them.
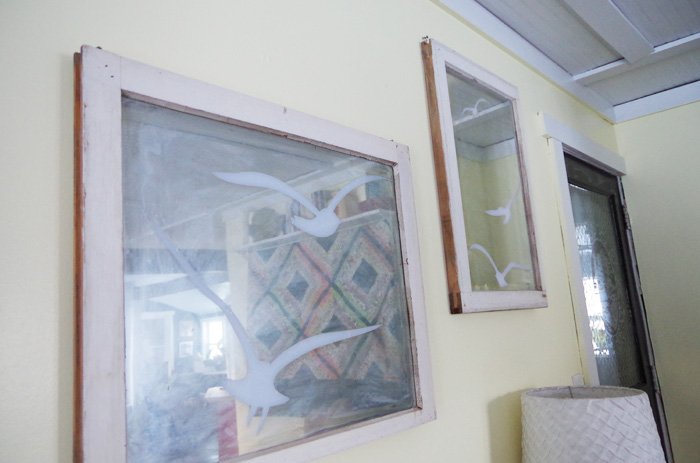
“Mirror” spray paint is not perfectly mirror, its more of a chrome, but that was fine with me. I was excited to see at least some reflections across from the windows in the kitchen. Bouncing light into this home is something I work hard at as I really don’t get a ton of natural light.
Of course, in the summers, that’s awesome because my shady lot and serious tree cover means my house stays awesomely cool.But I do still miss the sun!
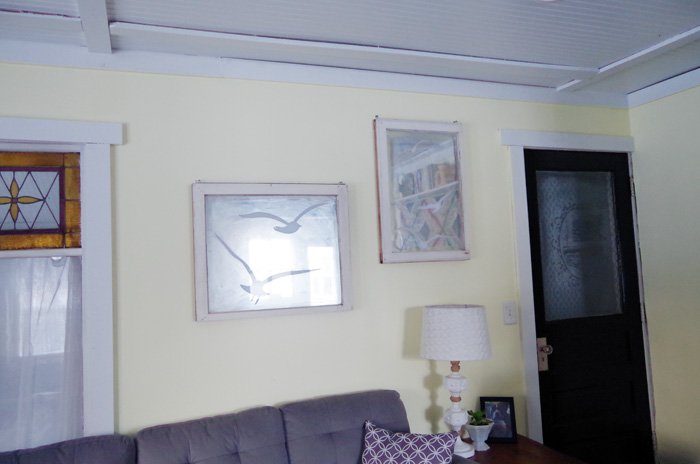
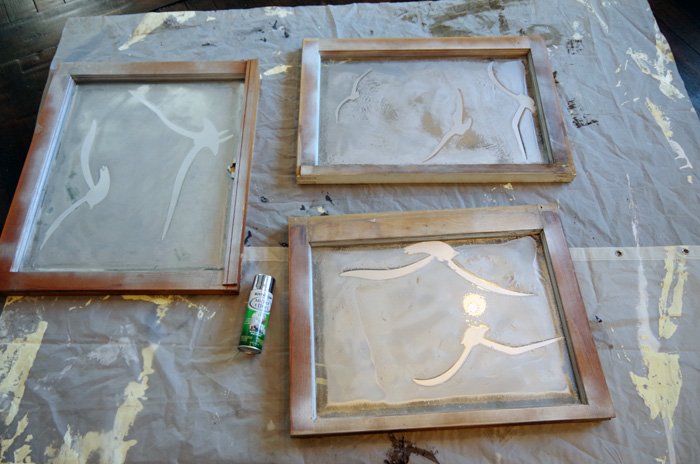
I may decide to paint the frames out with the same semi gloss white I used on all of my trim and ceilings. Currently though, I’m kind of liking them in their raw form.I had Lodi helping me which really did help quite a bit ESPECIALLY with the vinyl decals. Some projects two people really are better than one. We screwed eye hangers into the tops of the windows and hung them like that on screws with sheet rock anchors.
I’m rather smitten, I think they turned out so darned pretty!With my new/old windows up now I think I am finally ready to call this room done!
Resources for this project:


Frequently asked questions
Have a question about this project?