


Yarn Wall Hanging – Two Ways In Under 30 Minutes
I am super excited to share this yarn wall hanging with you guys! The only thing I love more than a DIY Project is a simple DIY project that is easy to do.
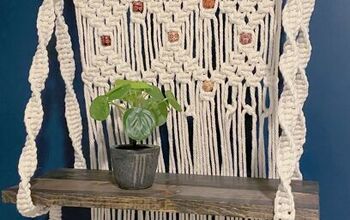
My daughter is really into the boho look lately and I wanted to make her something she could hang on her walls. I found so many cute ideas online that we very pricey so I set out to make one for her.
I will show you two simple ways to make a DIY yarn wall hanging and the tips and tricks I learned along the way (the second one went way faster!).
This post may contain affiliate links, which means I’ll receive a commission if you purchase through my links, at no extra cost to you. Please read full disclosure for more information.
DIY Yarn Wall Hanging Supplies
In order to make this yarn decoration you really only need two things: yarn and a stick of some sort. That’s it!
Yarn
What kind of yarn is used for hanging walls?
You can use any yarn you would like. The thicker it is, the thicker your yarn wall hanging will be.
You can use what you already have, or get yarn just about anywhere. I happened to pick these up at Hobby Lobby, but I wish I would have seen this deal on Amazon. You can get a huge selection of colors for less than $1.00 apiece.
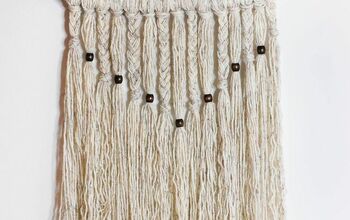
I chose to use three colors for my yarn hanging:
- White
- Light Grey
- Brownie (looks light a light plum)
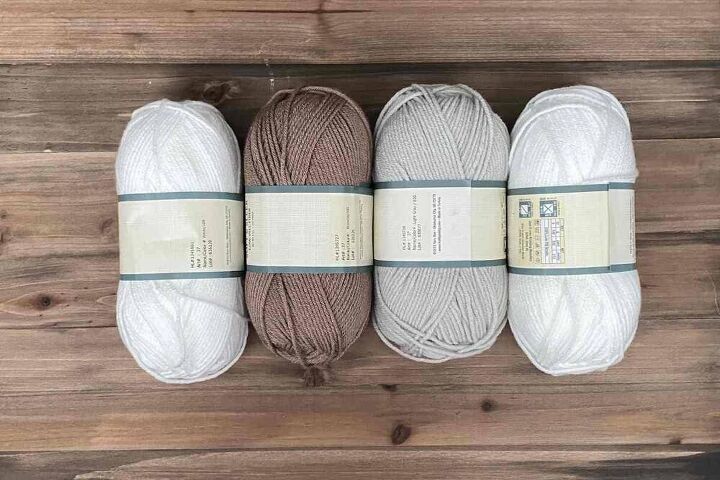
Get creative and have fun here! When it comes to your DIY yarn wall hanging, you can go with any color combination you want!
You can also mix up the patterns on how you want them to look. One of the things I love about this project is that no two yarn wall hangings will be the same.
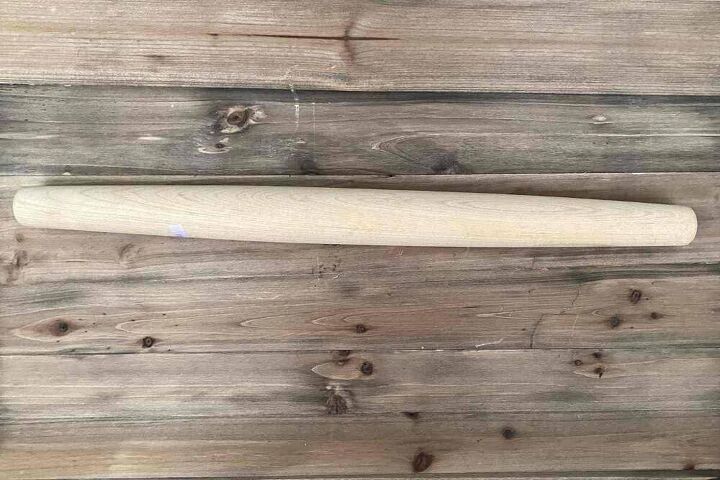
Stick / Dowel
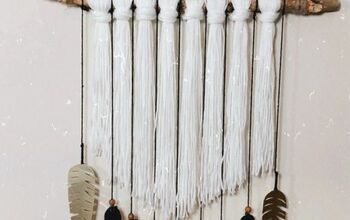
You will also need something to hang the yarn off of like a stick of some sort or a dowel. I happened to find this interestingly shaped one on a recent thrift store visit for less than a dollar, but you can also use:
- Dowel
- Tree Branch
- Scrap Wood
- Old Plunger Stick
- Old Curtain Rod
HOW TO MAKE A YARN WALL HANGING
Step 1 – Paint Or Stain Dowel (Optional)
If you want to leave the dowel its natural color, by all means, do so. It will make your yarn wall hanging project go faster that’s for sure.
However, if you do want it a different color now would be the time to do so – you won’t want to start over once you have hung the yarn on it.
Step 2 – Cut Your Yarn
One of the things that makes this project so easy, is that you do not have to measure and cut your yarn piece by piece. The trick is to wrap it around something first and then cut.
Note: Since you are wrapping the yarn around the dowel, it will only hang half the length of the piece of yarn. Therefore, you want to cut it double the size you want it to hang.
I used a piece of foam poster board I had laying around to wrap the yarn around.
Count the number of times you wrap it around since most likely you will have the same number for a different color.
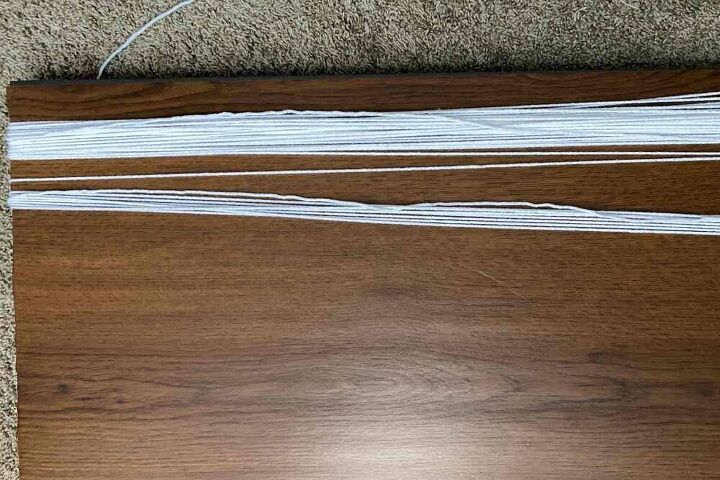
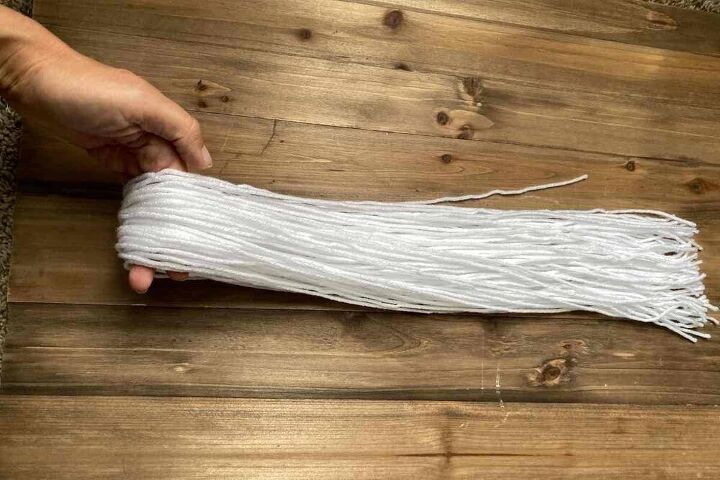
Once you have enough yarn wrapped around, simply cut grab it and cut them all at once. Now you have all your pieces of yarn ready to go.
Step 3 – Attach Yarn To Dowel (2 Options)
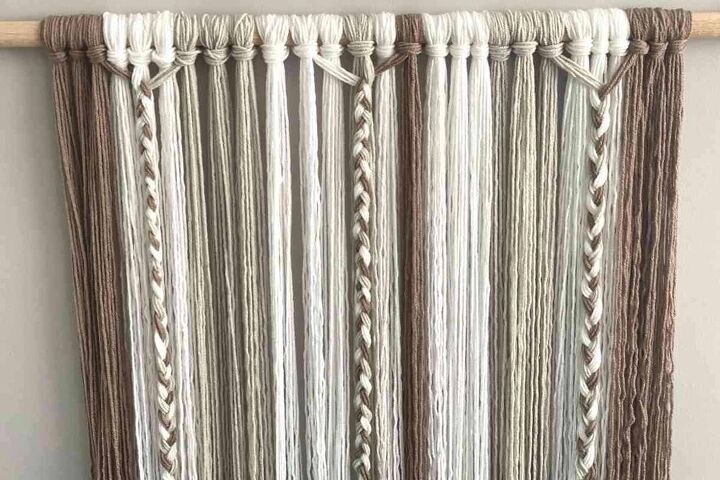
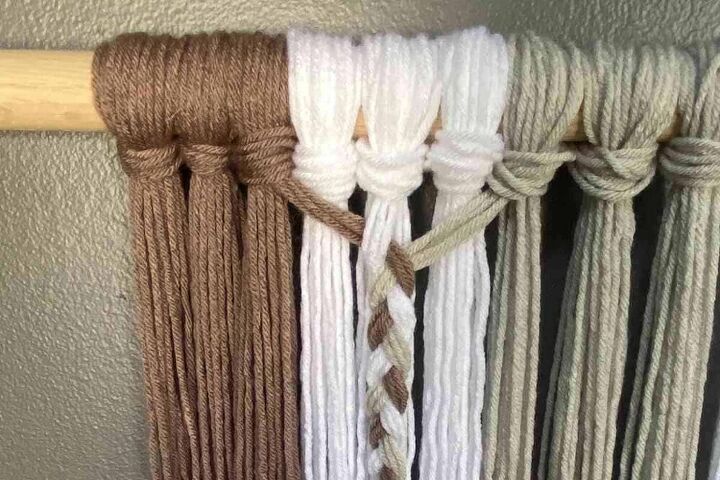
Adding the yarn to your dowel is a simple process. First, decide if you want smaller or chunky knots. For the first yarn wall hanging, I wanted chunky knots so I ended up using 10 pieces of yarn at a time. To give it a bit of personality, I braided some of the yarn.
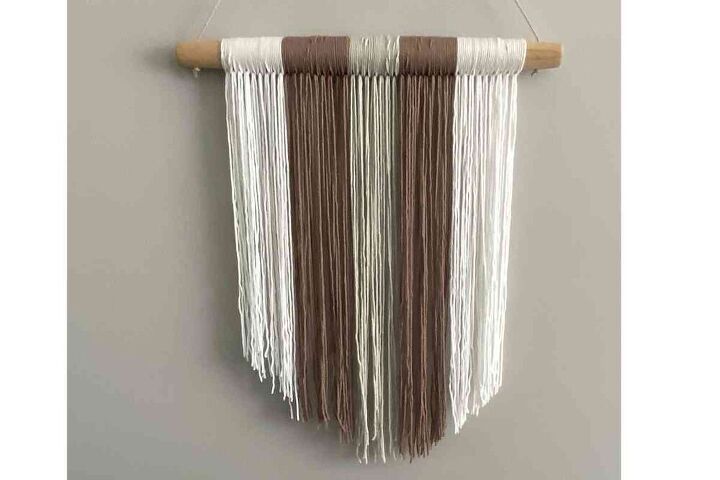
For the second option, I only used two pieces of yarn at a time to create smaller knots. It is just a matter of preference.
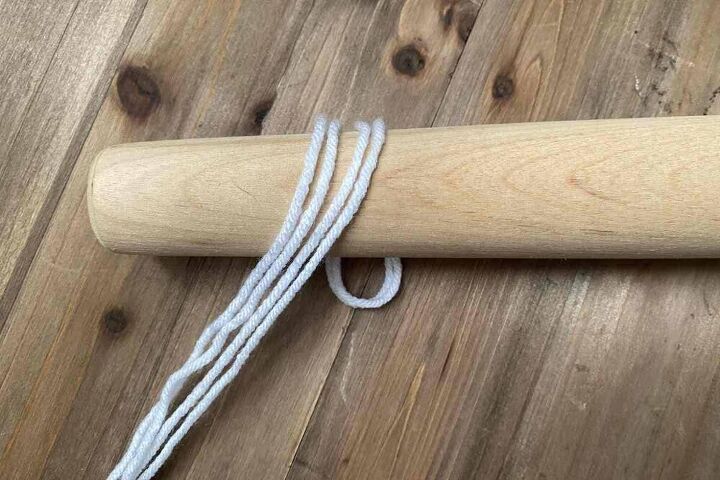
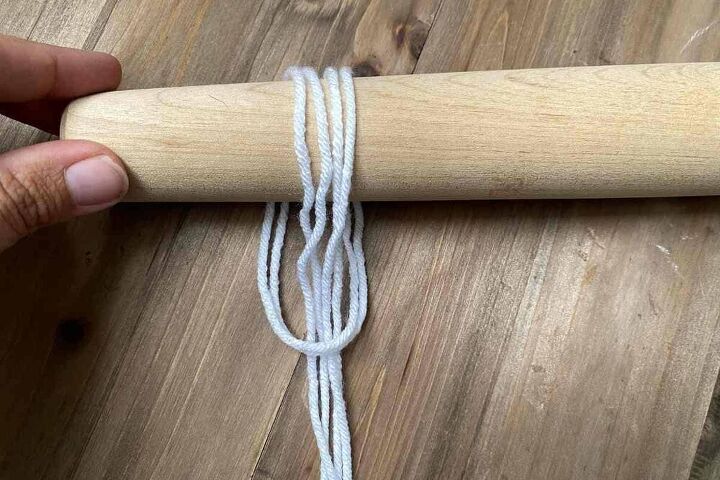
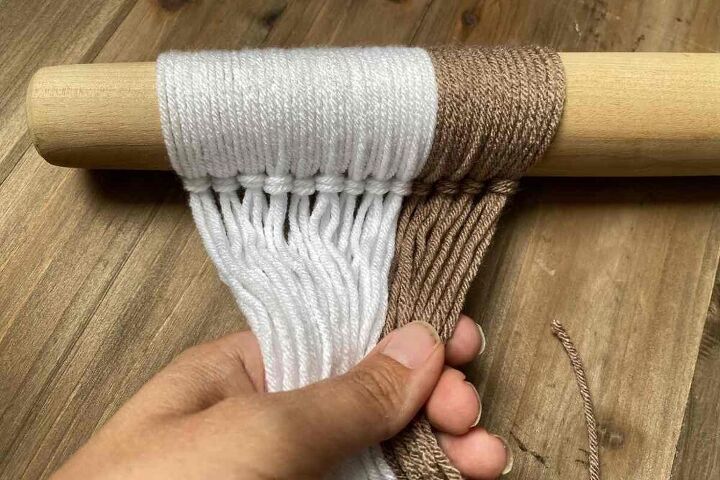
- Fold The Yarn In Half
- Put Loop Under The Dowel
- Put Yarn Through Loop And Pull To Tighten
- Repeat Process To Complete Your Wall Hanging
Tip: Don’t stress about where the knots are or how tight they are during the process. You can easily go back at the end and grab a handful of them and tighten all at once. This will save you a ton of time.
Just worry about getting all the pieces of yarn on, and then tighten at the end.
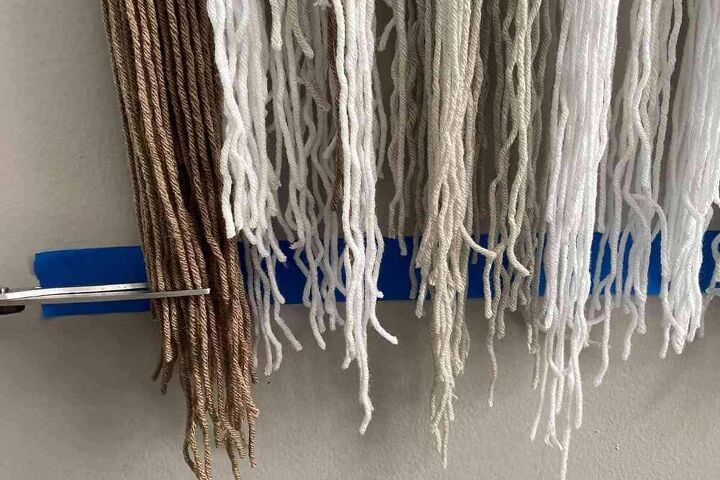
Step 4- Trim Yarn Wall Hanging
Once you have all the yarn attached, you will want to trim the yarn at the bottom. Again this is where you can create with your yarn wall hanging but here are the two options I went with.
Option 1 – Trim straight across to clean it up
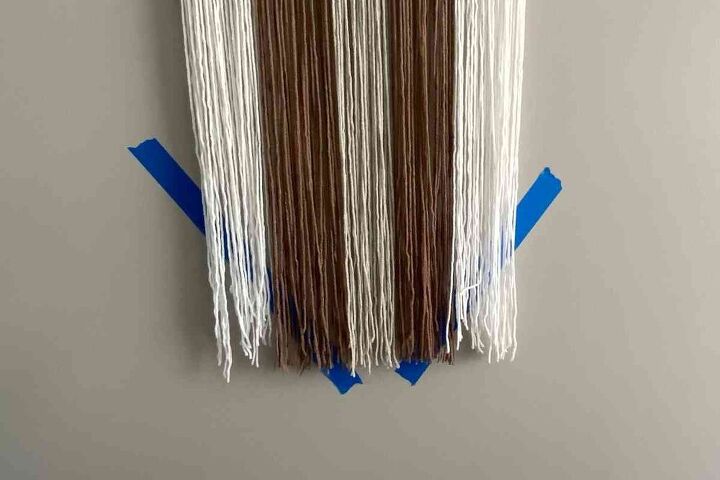
Option 2 – Trim on a diagonal to create a V-Shape (Tip- use painter’s tape to create a guide)
Step 5 – Hang Your DIY Yarn Wall Hanging
The last step is to attach some sort of string to hang the dowel from. You can use thick string, wire, twine – whatever you have handy. I ended up using this hemp cord. There are two ways you can attach it to the dowel.
Option #1 – Drill Holes
You can choose to drill a hole through the dowel and then feed the twine through it. Once you do that, simply tie a knot underneath to hold it in place.
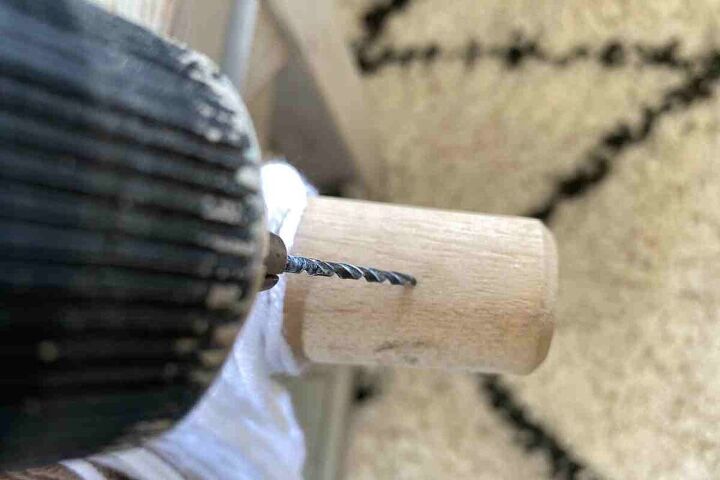
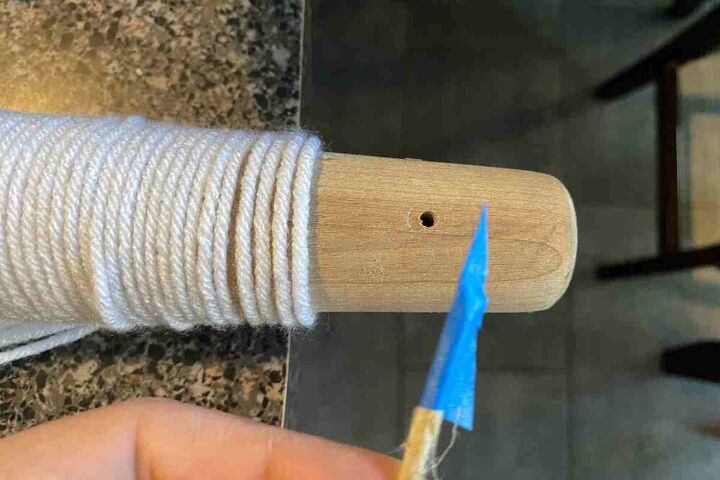
Tip: To feed the twine through the hole, add a piece of painters tape to it.
Option #2 – Wrap Twine Around Dowel
The second option if you don’t want to drill a hole, is to simply wrap it around the dowel and tie a knot. That’s it!
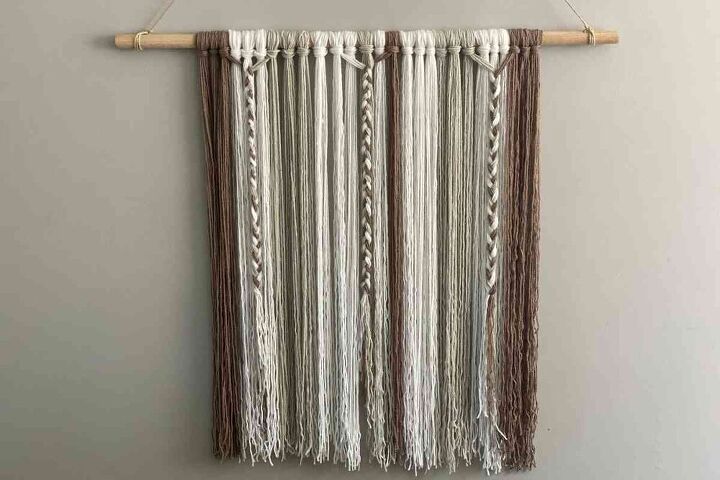
Enjoy Your DIY Yarn Wall Hanging
I hope I have inspired you to try your hand at your own DIY Yarn Wall Hanging.
This was such a fun project and my favorite part was how simple it is. I plan on making a few more as gifts.
If after all this, you don’t want to make a yarn wall hanging yourself, Amazon has a few really cute ones you can get for a good price.
Thanks for stopping by! If you liked this project make sure to check out


Frequently asked questions
Have a question about this project?