


I Loved My Mother, but Not Her 'stuff'

My mother built on to our home (bedroom, half bath , and Livingroom) in 1999 where she then lived until Jan 5, 2021. She passed quietly at home. Upon her passing, I began to realize just how much 'stuff' one person can accumulate in 3 rooms over 22 years. I got a dumpster. I also purged some of my own 'collections' as I realized that I did not want to do that too whomever got the pleasure of dealing with my "stuff". :) My husband and I are going to do a repeat performance of that dumpster this fall! lol
Side note: My mother is the reason I have a love of all things 'crafty'. She taught me how to sew when I was 12 on her old singer.. I made a purple stuffed hippo :) I was very proud of it. She is also the reason that I love the movie Bambi and am obsessed with Whinnie the Pooh. 
In the process of deciding what to keep and what to give/throw away, I asked if anyone wanted the cedar chest she had. No takers.. I stood staring at it.. and then I had an idea...(I know, I know.. me and my "ideas"). His name is Robin, for reasons that will become obvious shortly. 
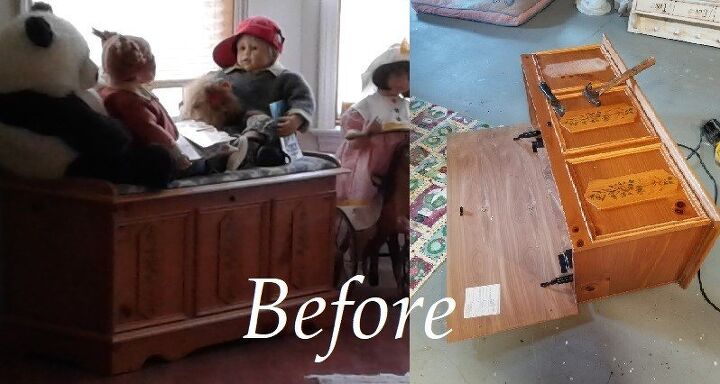
Here is Robin in all his original wonder... and pardon me if you like this style but old cottage 'country' is not my style..
In the Right side picture you can see the tapestry cushion and part of the top wooden 'surround' as well as the bottom wooden base/legs (sorry I do not know what this is really called..). Yeah I took all that off. I was left with a basic, rectangular, cedar box.. yay me :) I also took off the wooden center pieces (the decorative pieces with the flowers) within the 'framing' on the front of the piece. I left the frames because I had plans for those.
**it is important to note that this was not one of my mother's favored and loved pieces. It served a purpose and she 'kind of liked' it. It held a lot of the family pictures that she had amassed and allowed her dolls somewhere to pose. She would have loved this transformation. Which is a good thing because it's going at the end of her bed, in her old bedroom, which I have also repaired and re-done. (nothing had been done in her rooms for 22 years)
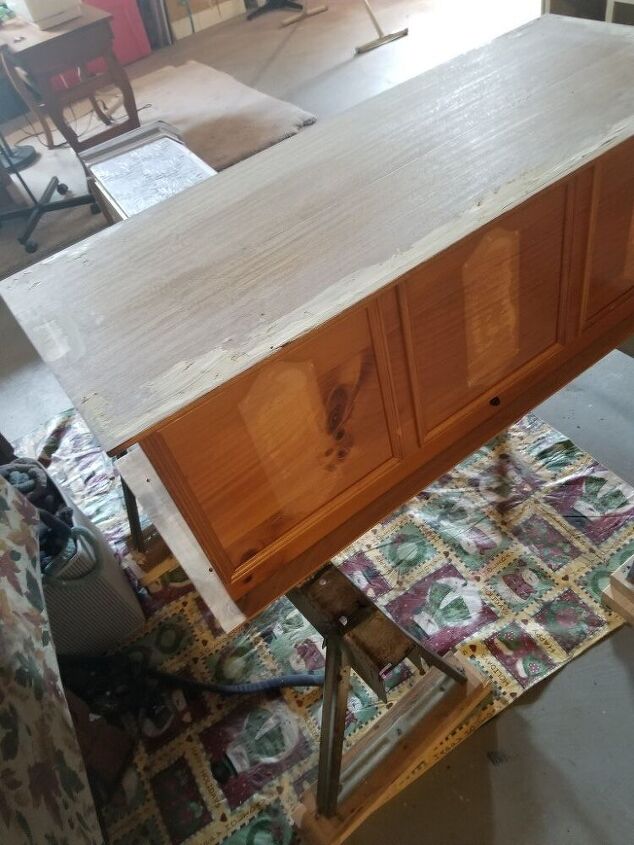
Taking off the wooden sections on the top and bottom of the chest left some divots where the glue was really stuck on. Here I am filling them in on the bottom of the chest. I didn't care about the top as the entire top was about to become one big seat. Once dry, I sanded it smooth and painted with a dark brown (Heritage paint which has a built in top coat). I had already taken off the top of the piece to get it ready to add the cushion, and begun painting with a creamy very pale yellow. This color came from mixing a soft yellow chalk paint I had made, with Annie Sloan's Old White.
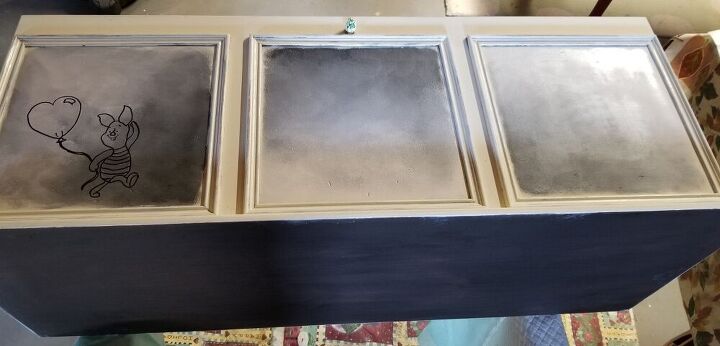
In this photo I have completed preparation of the back ground of the frames. This was done using Fusion's Ash and Fusion's Raw Silk. I used a natural sponge to dab it on going from dark to light to create a 'blustery' feel :) I had also started my first character, Piglet :) He's actually my fav, but don't tell Pooh.
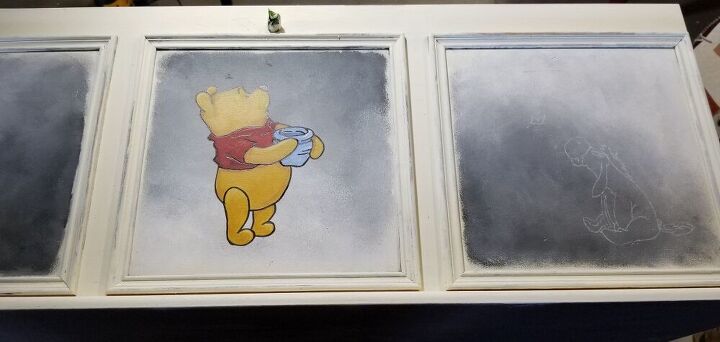
So here I am working on completing Pooh and have just begun working on Eeyore. I bet you are all like "Ooohhh wonderful free hand drawing! Wow talented!" Um no, I took the easy way out LOL I printed out pictures that I liked, smeared the back of the picture with chalk (yep the plain ole chalk) , carefully laid that on the chest where I wanted it, and using a pencil, followed the outline of the picture. Picked up the piece of paper and voila! instant tracing .. and if you make a mistake, just wipe it off! Once the chalk drawing was done, I took a sharpie and outlined it, then began painting. I used acrylics that I always have around for just such projects.
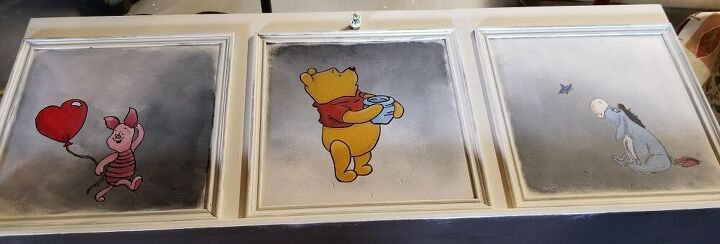
So here are the completed characters : ) Loved them, but I wasn't done yet........... They looked too brand new, I wanted the 'aged' look. So, first I got out my spray clear. I have a low odor clear by Krylon but most would work. You need to seal the pictures so the next step will not smear the felt pen outline. I let that dry over night. I then got out my 'Craquelure' by Autentico. Craquelure is a very fine 'crackle' look. You first paint on the base coat , let that dry (which remains "sticky") and then paint the top coat over that. Let dry and wait for the goodness to happen. Once dry, you use wax to 'highlight' the cracks. I used antiquing wax from American Paint Co.

And here is what it looks like close up : ) Love it! Looks like a very old painting. Just what I wanted!
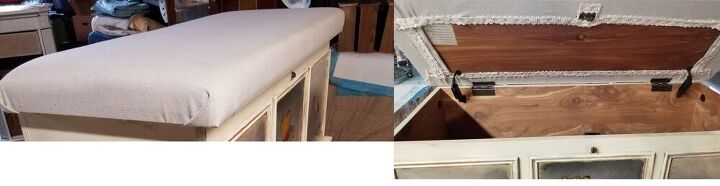
Here is the top cushion as well as the inside. I used a spray on adhesive to wrap purchased foam (which I cut to size) with batting. Then I used the same spray to attach that to the top of the chest lid. I had recently purchased another drop cloth, so I used that as the material for the top. It gave the rustic sort of feel I was going for. I cut the drop cloth to size, pulled it taught and stapled it. Decided to use a lace border on it that I hot glued in place. Done. and Done :) I purchased some wheels for another project, and they didn't work out so I still had them, score! I used them on this chest to add a bit of height and mobility.
I used antiquing wax over the paint and in the recesses of the frames. I also used pickling wax (white) to add highlights where I thought it got a bit dark. Buffed it all once it was dry.
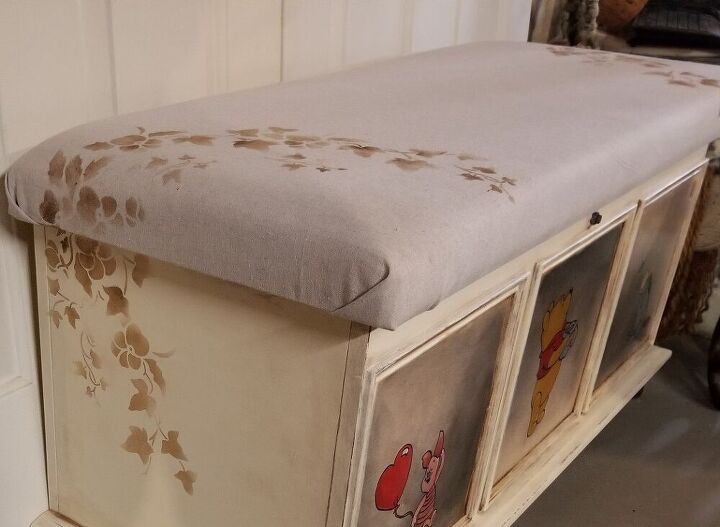
To finish off the top I used a stencil and antiquing wax to create a vine (after all what is the hundred acre woods with out some greenery?!)
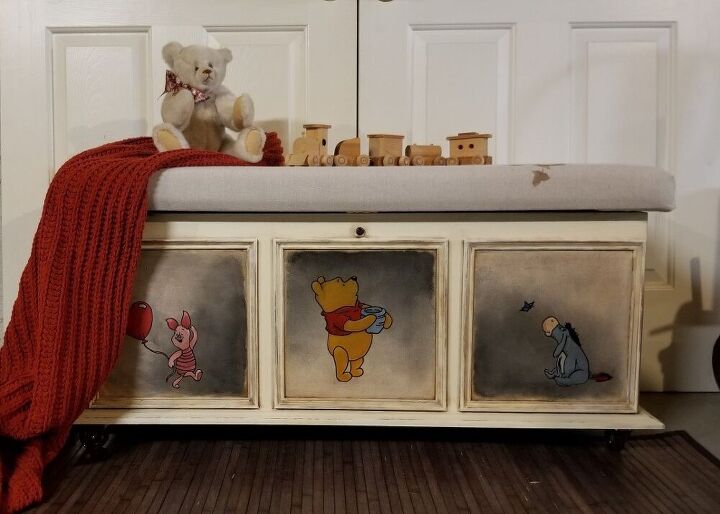
Here is Robin all complete! The memories that he brought back to me while creating him were priceless. I think I will enjoy seeing him for a very long time.
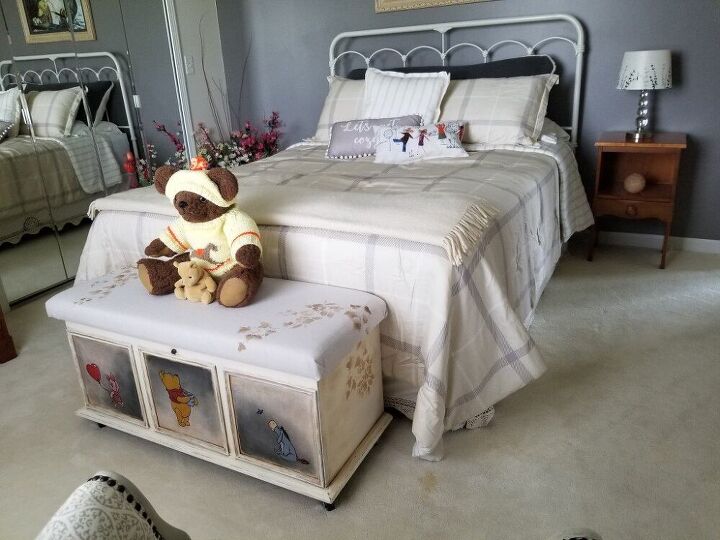
Here he is in his place of honor at the foot of her bed, in her newly painted and decorated bedroom. As always, he will still be the 'keeper of memories' by having the honor of holding old photographs so they do not get lost. The big teddy bear on top of him is 'growly bear', my mother's favorite bear (she collected them). This is now our guest bedroom, but this room, and us, will never forget her presence.
Comments
Join the conversation
-
Great story. Great memory. Great job.
-
You did a wonderful job on your mother’s old chest. Plus the story was heartwarming.


Frequently asked questions
Have a question about this project?