


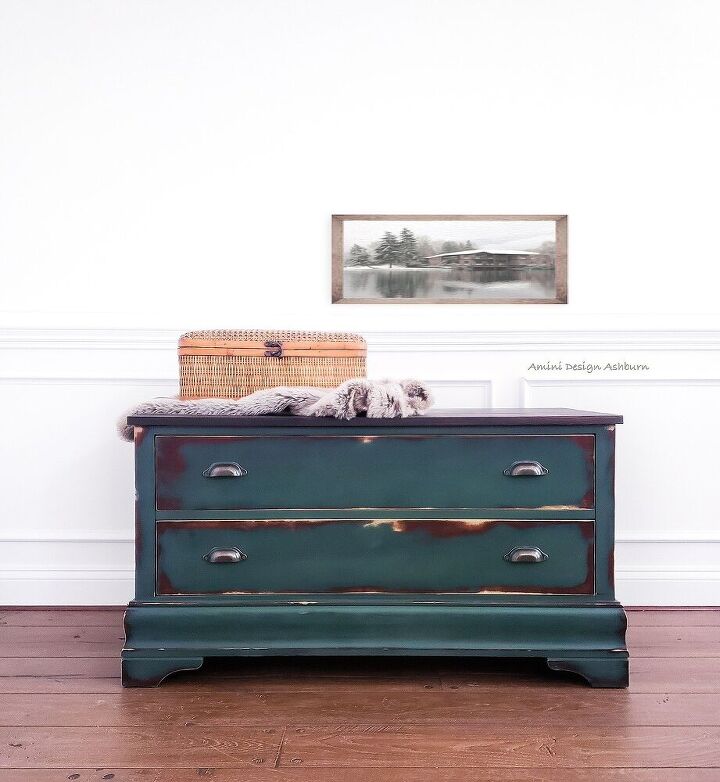
Lake House Storage Bench

Follow along as we transform this remnant from an old armoire into extra seating and storage with a lakehouse feel.
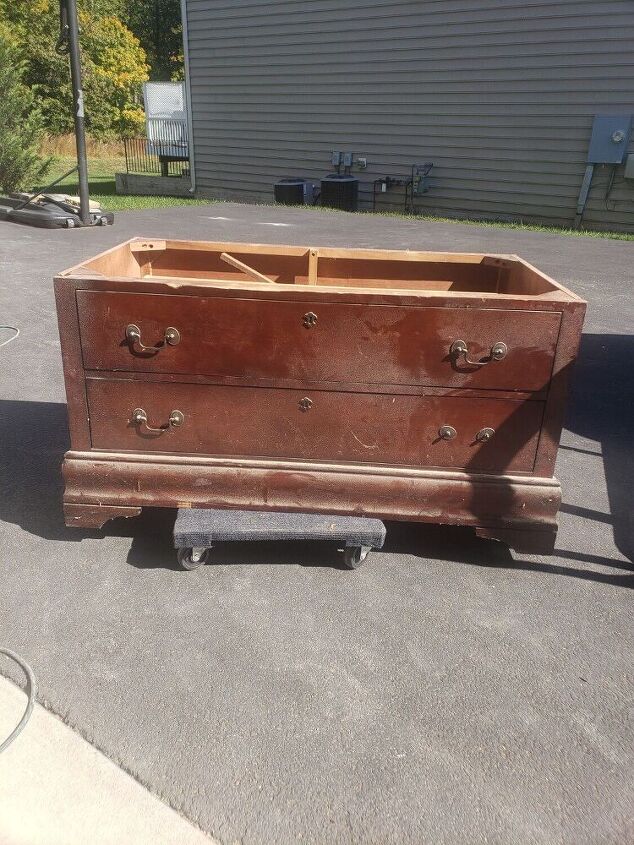
Like we seem to do every fall, my husband and I cleaned out the garage to try and make space for our car as the weather starts to get colder knowing winter is quickly approaching but who are we kidding... our van will never fit since we have a workshop as our garage that we use for all of our furniture redesigns. We did disassemble an armoire and managed to save the bottom in the process. In looking at it's lines, I knew it could make an adorable storage bench.
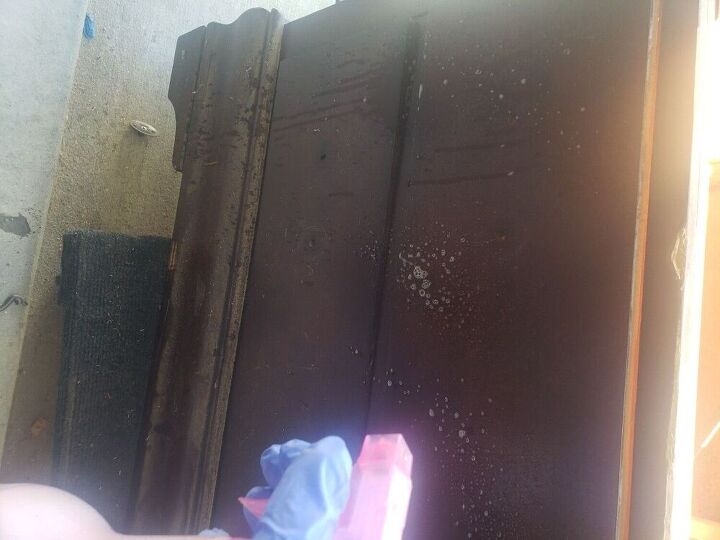
We used krud kutter to clean the built up dirt on this piece, making sure to rinse with water afterwards. Then it was time to sand.
For areas where there wasn't a lot of cosmetic damage we used a 220 sanding pad to scuff up the surface. In the areas where there were deeper scratches or gouges, we used a rougher grit to smooth out those places, creating an even level surface. After removing the sanding dust with a tack cloth, we used shellac as a primer, sealing in the wood.
Next, we painted in a dark rich green called Hollow Hill by Country Chic Paint. It is a clay based paint that distresses very easily and that is exactly what we intended to do for this piece.
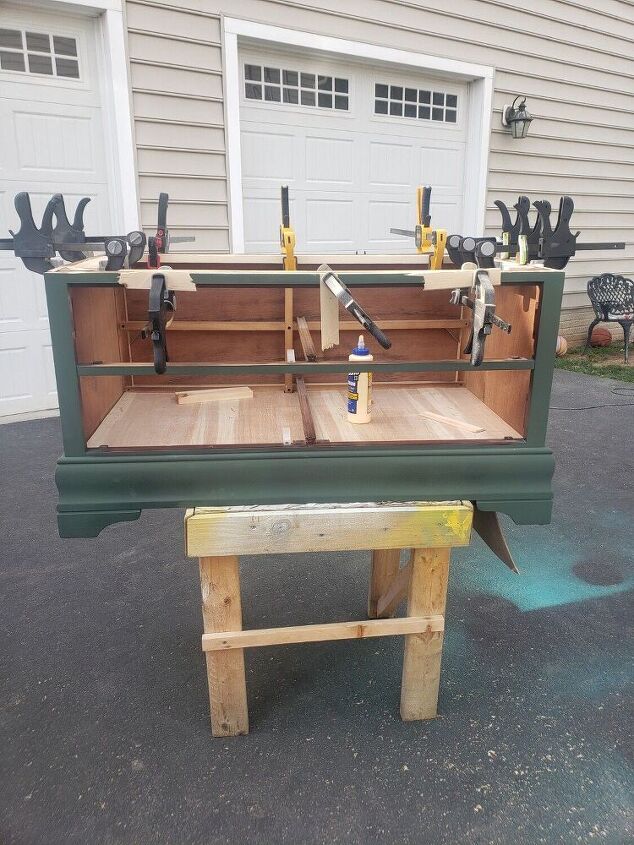
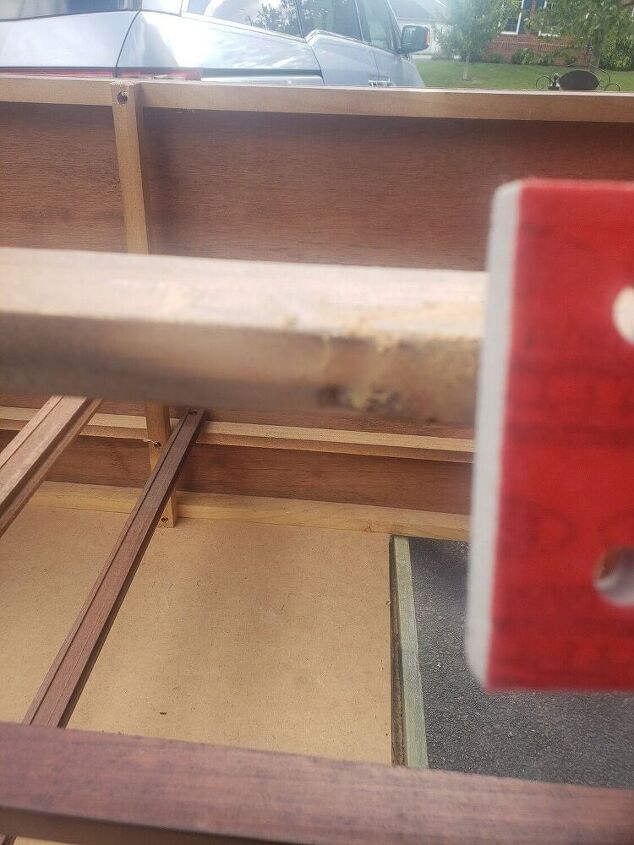
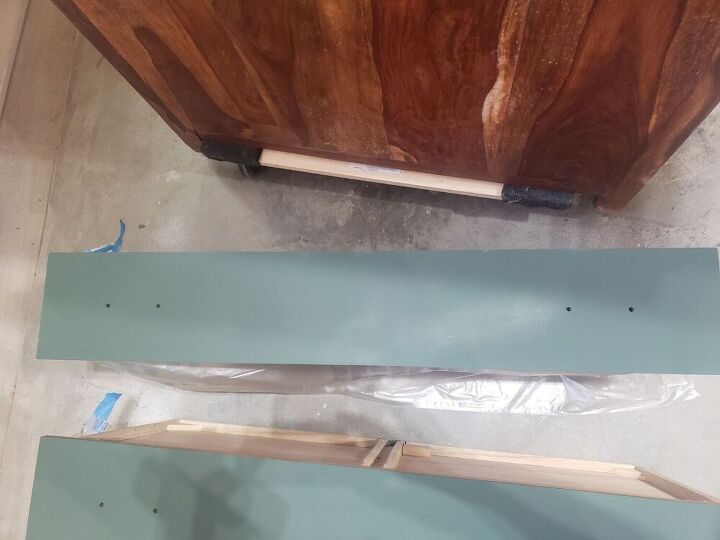
After the paint was dry we cut support pieces to place against the interior framing using glue and screws, knowing we were then going to cut two boards using a table saw to use as the seating area surface. We measured and cut, creating a 1/2 inch overhang on both sides, sanded the boards smooth then stained. We then attached them to the top.
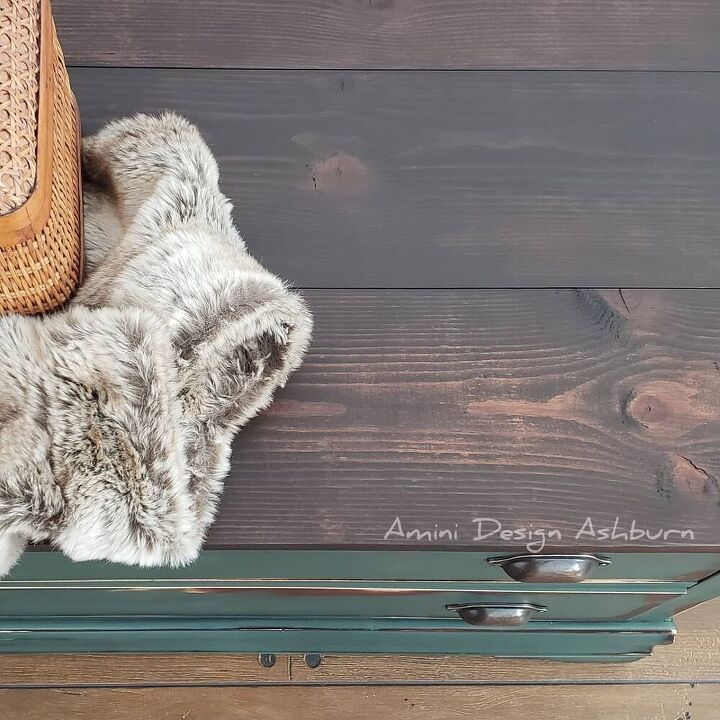
Next, we used our favorite Surfprep Sander, the 3 x 4 electric ray and a fine sanding pad to distress the painted areas of the bench. We wanted to give it a rustic look, something that looked well used. Then, we sealed the entire piece using Varathane Water Based Crystal Clear Top Coat in Satin, three coats in total making sure to sand in between each coat with 1000 grit paper. Lastly we changed out the hardware with these awesome cup pulls from our favorite hardware shop - D. Lawless Hardware. If you follow me on Instagram I have a discount code and link for D. Lawless Hardware, and a discount code and link for Country Chic Paint.
Resources for this project:
See all materials


Comments
Join the conversation
-
I'm curious about the top....just put board on top & nail it down?
-
wonderful, wonderful, wonderful. SO glad you didn't get rid of it. I love it.♥️👍️


Frequently asked questions
Have a question about this project?
A really lovely transformation! But, I’m curious. Did you hinge the top and just use the drawer fronts? Or, did you replace the drawers?