


Thrift Store Purchase to One of a Kind Hallway Bench

Read on to see my thrift store fixer upper iron bench makeover. I’d been wanting a sturdy bench for my hallway for quite some time. When I saw the one pictured below, I loved the lines of the wrought iron part and stopped to check it out. I kept thinking about the bench as I continued to search for treasures at my local thrift store. I went back and looked at the bench once again to inspect it further. The iron frame was super sturdy. That’s about all the bench had going for it.
The iron bench certainly wasn’t pretty, but the frame seemed to be in great structural condition. I did like the rope sides someone had put on the bench along the way. I’m still not sure what the bench originally looked like, but I saw some potential. I had been searching for a hallway bench to use to put on my shoes as bending down to do that is catching up with me. Home bound we were.
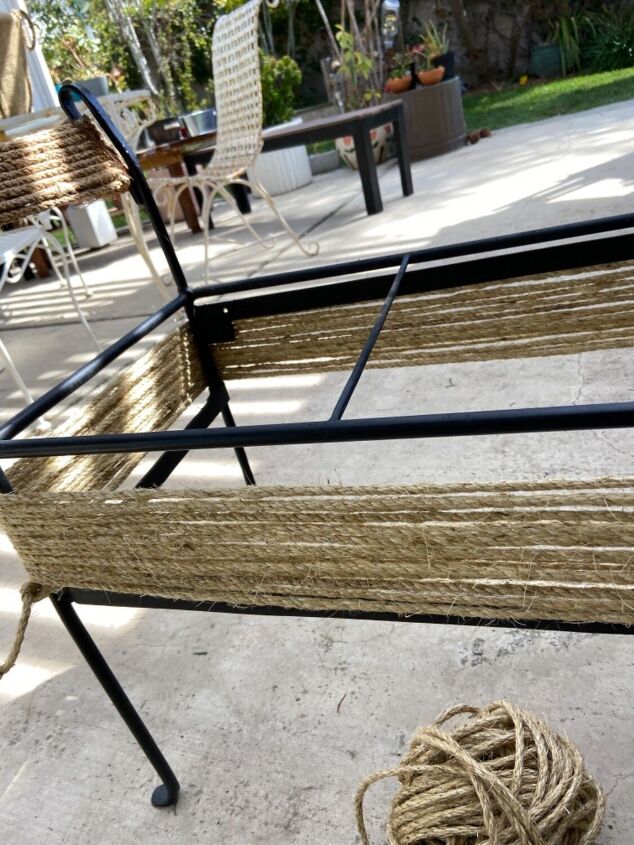
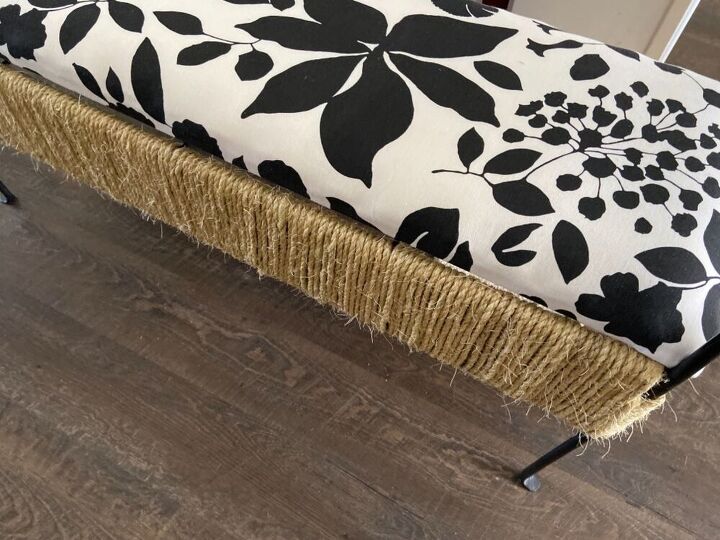
I started by removing the ugly and stained fabric covered seat. I forgot to take photos of the bench in it’s bare bones state. Anyway, I started to wrap sisal 1/4” rope all around the perimeter of the bench to help disguise the missing parts and to tie the new design to the existing sisal rope that someone used for the side handle area. After getting this far, I decided it wasn’t going nor looking like I’d envisioned the finished bench to look. So, I went ahead and started to wrap sisal rope vertically around the horizontal wrap I’d already completed.
I was liking this way better. Plus, the see through aspect was beginning to look more like a solid side. The rope needed to be pulled fairly tight to avoid the loose look.

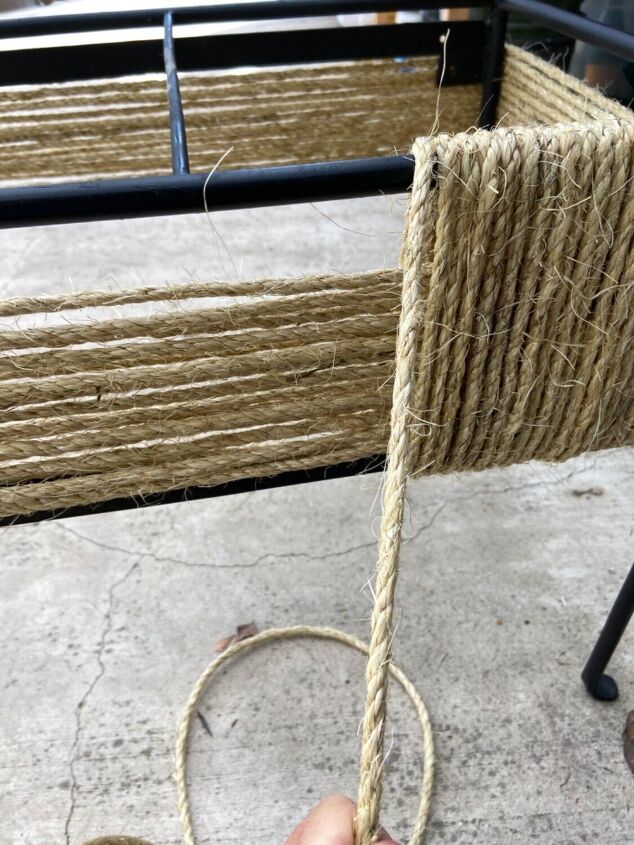
Since the rope was difficult to work with in large pieces, I’d decided to cut it and knot it vs trying to work with 100’s of feet of sisal rope. This added another challenge to my vision as the knots needed to be hidden while wrapping. I also had to be sure the knotted part ended up on the inside of the bench.
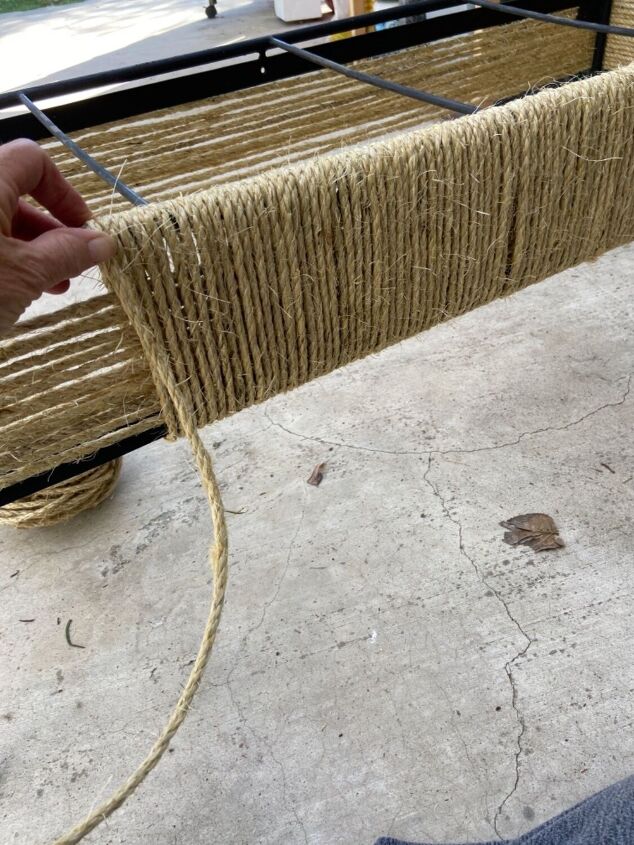
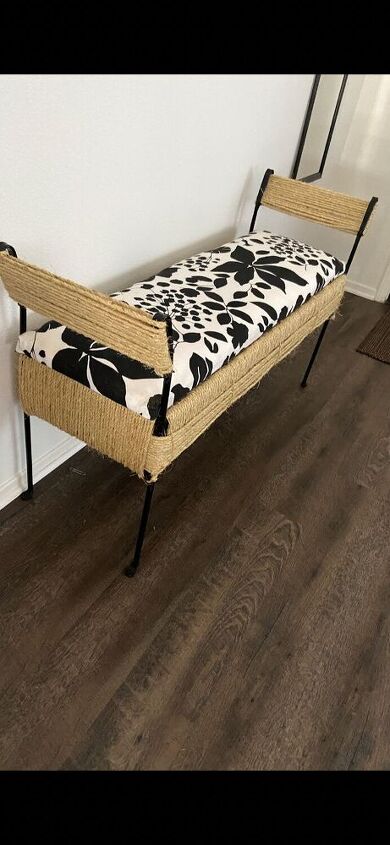
Many more hours of rope wrapping and knotting but I was determined.🤪. About 750’ of rope later, I’d finally wrapped the entire perimeter of the bench in sisal rope. I used a glue gun to add some extra insurance at my final knot ends. I did end up changing the rope on the side handles as well, because it was a different color then the new rope I’d purchased to wrap around the rest of the bench. (The old sisal rope I’d removed was used for my rope vases which I’ve posted as well ) Finally, it was time to put the newly recovered seat in place. ( I’m not going into how to recover a padded seat in this project). My bench project focus in this post is just to show a way to cover up missing parts with rope rather then using wood or having to weld a new front and back.
Just a side note.....The fabric I used was actually a fabric shower curtain that has sentimental meaning to me. Again, recovering the seat is reserved for a whole other posting. Since I forgot to photograph my recovering/reupholstering process this time, I figured I’d wait until i had another project to recover.
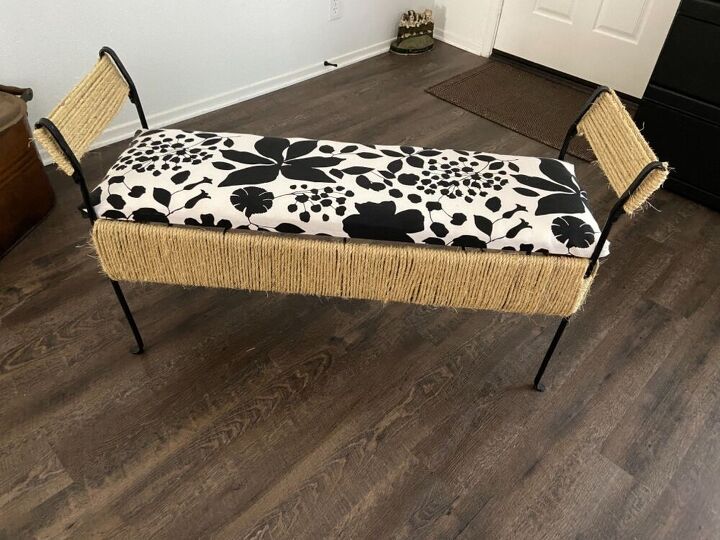
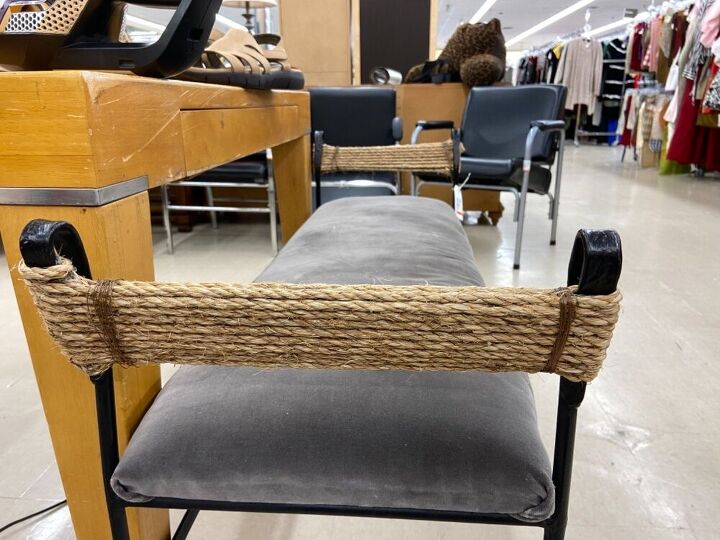
Here is my completed bench which is perfect for me to use in my hallway. The bench is 40” long by 14” deep and I used about 750 feet of rope. I am posting this project to show how you can take something that’s seen better days and turn it into something functional with a bit of perseverance, and lot of changing of ideas along the way. All in all, although it isn’t exactly how I’d envisioned the bench turning out, I’m pleased with the outcome. It took a lot of hours and it cost more then I’d anticipated but, I am still glad I attempted it and am happy with the result.
A helpful side note... while working with sisal rope, it leaves a soft fiber dust. It’s best to do your project outside. I hope you enjoyed my bench transformation. I’ve got many projects to share. Thank you for viewing.
Resources for this project:
See all materials


Comments
Join the conversation
-
WOW I really like what you did. Very nice for indoors or out.
-
Great job! You have an eye for things that can be improved, and imagination for how to do it.


Frequently asked questions
Have a question about this project?
Looks nice but I can tell it was a huge time investment. In retrospect do you think the first horizontal wrapping could have been eliminated and just go straight to the vertical wrap?