


DIY Shabby Chic Coat Rack

by
Mustlovehome
A coat rack is a super easy way to organize an entryway. My family can just throw their jackets and sweaters over a hook and walk away! No more finding heaps of winter gear laying over my furniture or worse, on the floor!! And I love to keep a few tote bags hanging up for a quick place to stash just about anything I want to get out of the way! After pricing pre-made wooden racks and realizing they were WAY out of my budget, I made two coat racks myself.

I purchased one superior grade 8 x 4 x 1 board. My coat racks are 36" long, so I cut both from this board. Each was then given a routered edge. I purchased the superior grade board so that I would not have any knots and as a bonus it was so smooth it needed no sanding. This board cost about $3 more than the standard pine boards and was worth every extra cent.
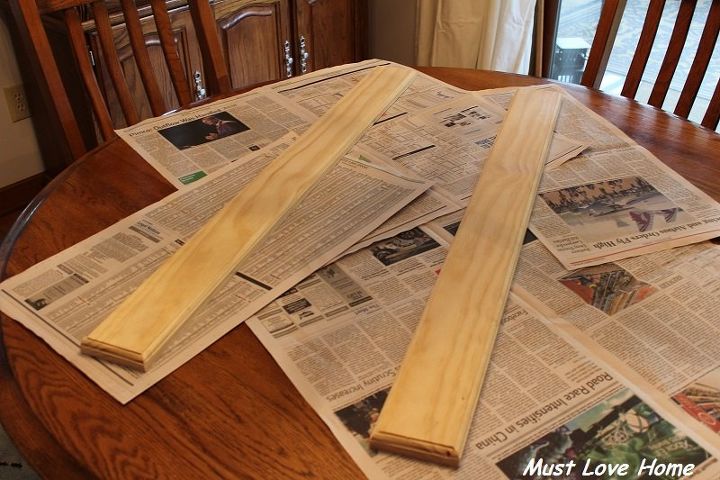
The boards were primed with Kilz and then painted with 2 coats of glossy white. I premarked the holes to line up with studs in my wall, then pre-drilled for counter sinking the screws.The hooks were laid out to find the best placement. Of course wall studs are never exactly where you need them, so the mounting holes are not exactly even on each side. This required a little creative measuring to get the hooks to look evenly spaced.
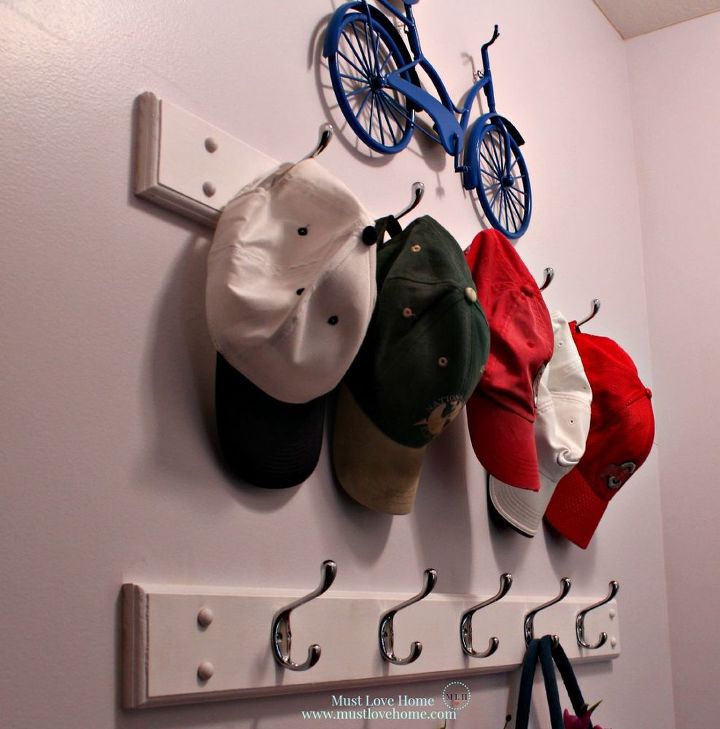
I decided to hang the upper rack as a place to house my husband's ball caps. He never leaves home without one. Please visit my blog where there are more pictures and DIY details.
Want more details about this and other DIY projects? Check out my blog post!
Comments
Join the conversation
2 of 3 comments
-
I really like them! Functional AND chic!
-
Love the two racks for multiple family members to use. The remind me of the ones in my elementary school's cloak closets. I was short, so I got a lower hook. Thanks 😇


Frequently asked questions
Have a question about this project?