


Macrame Mail Stand
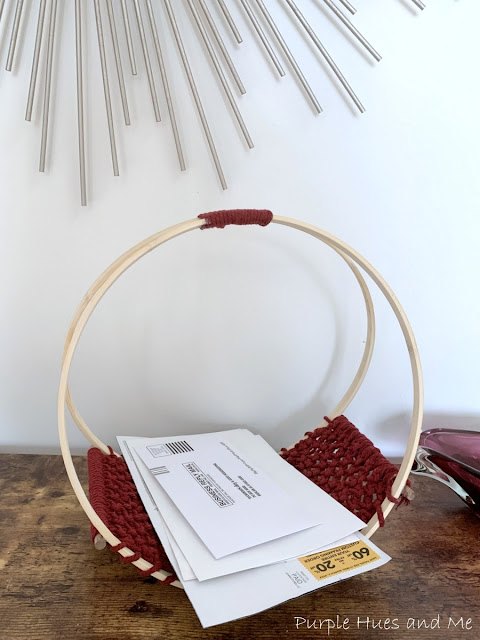
If you have some kind of table in your foyer or entryway, you know it's a natural drop zone area - especially for mail and other items. Have I got an adorable macrame mail stand that tidies unruly mail while adding a bit of glam to the area.Please note that I am not an expert at creating macrame. I took a class over forty years ago and had to re-learn most of the knots and techniques.
Materials:
- Wood Hoops - 12" or larger
- Macrame cord - 3mm
- Yard stick
- Dowel rod - 12"
- Saw
- Hot glue/permanent glue
- Pencil, scissors
Instructions:
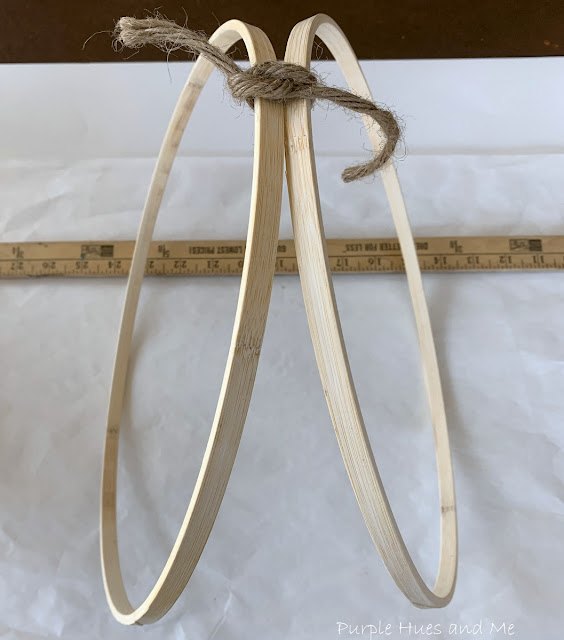
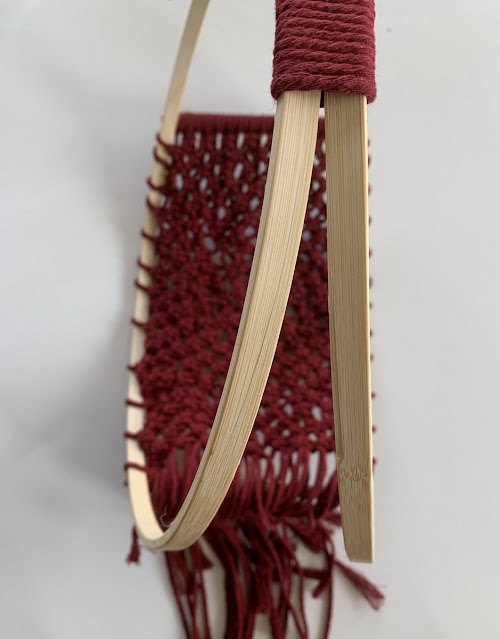
Let's begin with two wood hoops. Mine are 12 inches in diameter. I wish they were bigger, but I already had them in my stash. Stand the hoops upright, touching center sides and tie together (temporarily). Spread bottoms apart, as pictured.
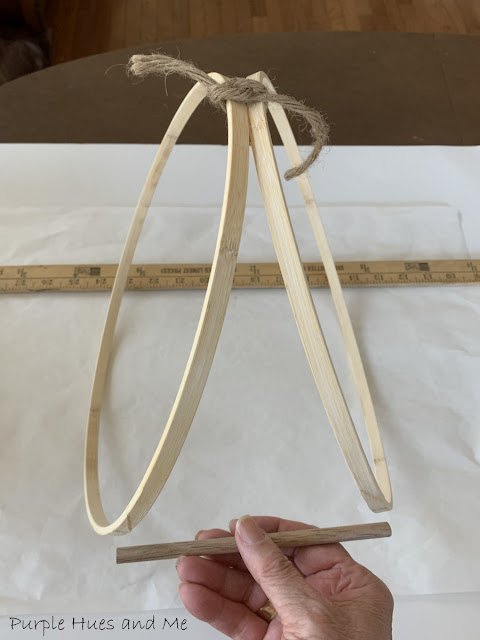
Cut dowel rod in half (6"). Eyeball midway where the hoops are tied and where the width is six inches (from hoop to hoop) on each side of the hoops.
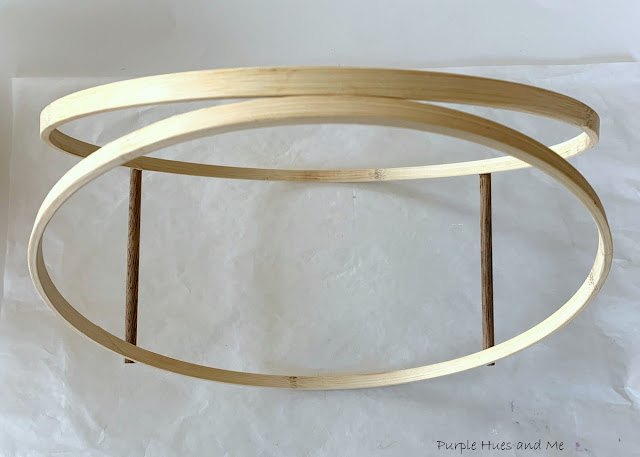
Glue rods to hoops. Then remove the temporary tie and glue edges of hoop together at center.
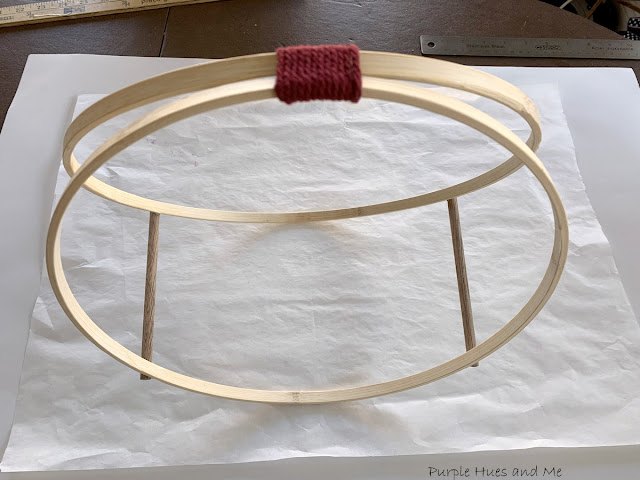
Then wrap macrame cord around center hoops to secure, gluing ends down.
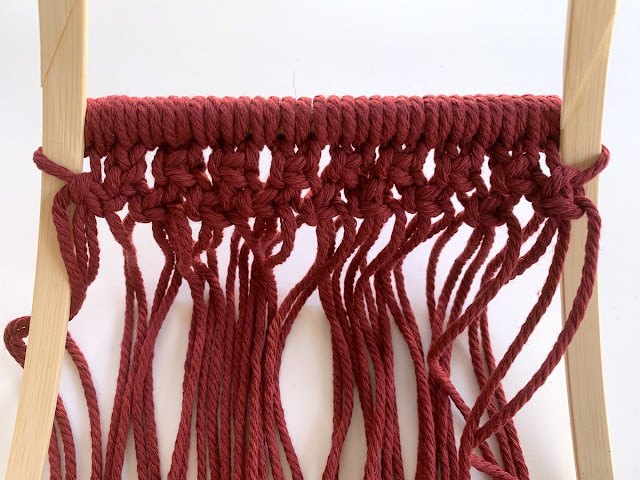
To find out the length of cords needed, I researched online and it said to measure the length needed which would be the distance between rods and multiply that eight times to get the length of each cord needed. My area is 11.5"x8=92" for each cord. I needed 18 cords to cover the dowel rod. These are called working cords.
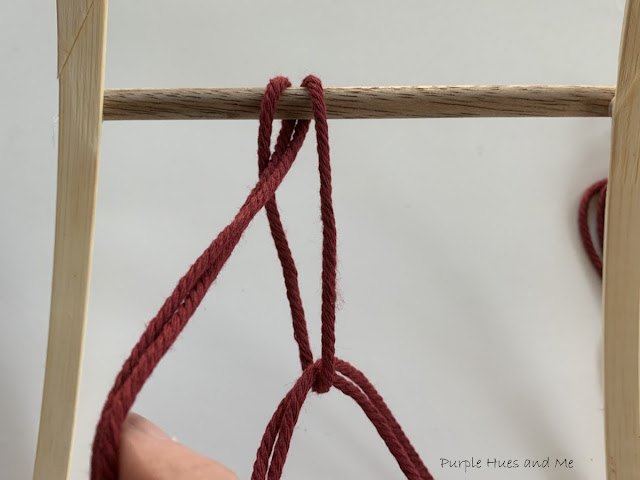
Next, make a lark's head knot by folding the cord in half placing the loop over the dowel rod.
Pull the loop down behind the rod and pull the two cords down and through the loop. Pull and tighten the knot. .
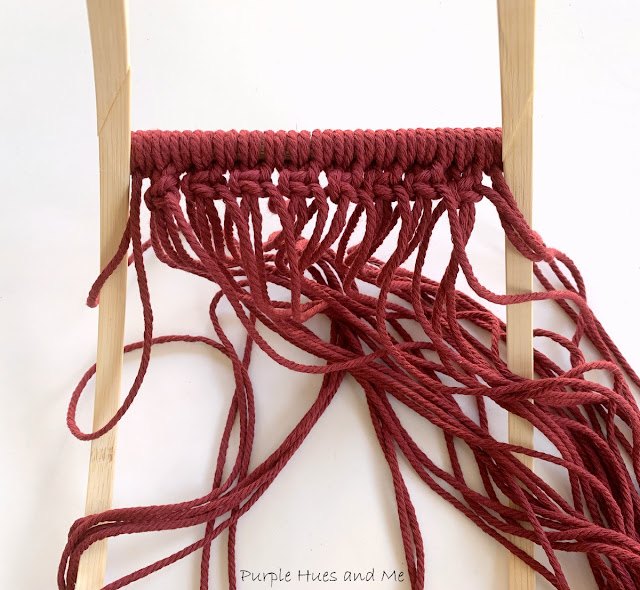
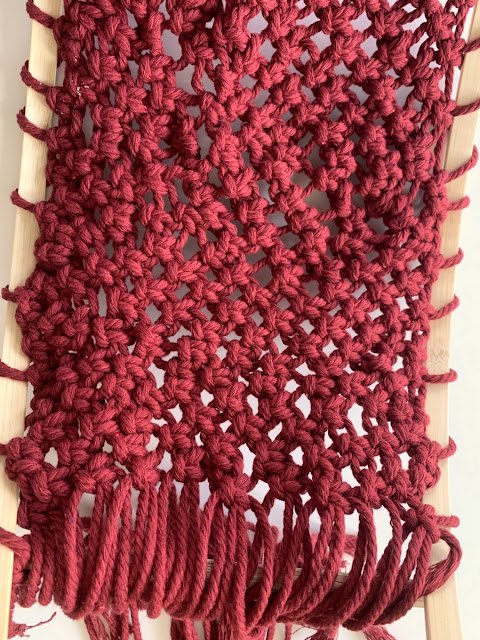
Then fill the rod with lark's head knots . . . 18, as I mentioned before. It's important to have an even number of cords for making the square knots.
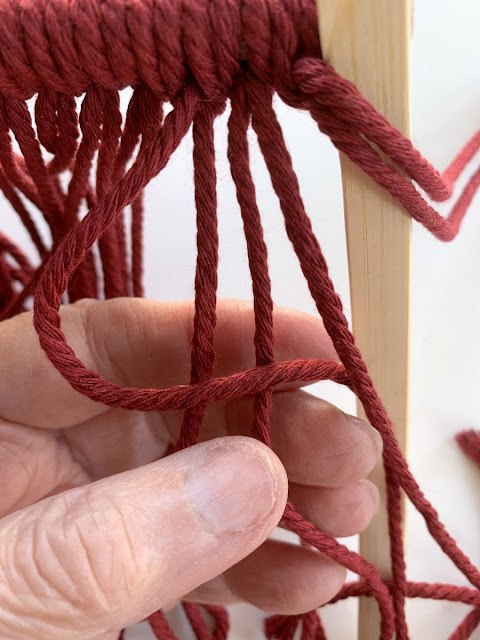
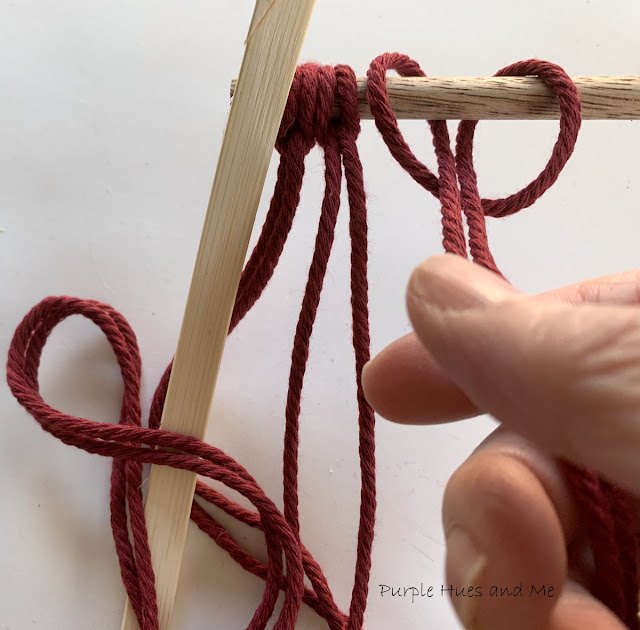
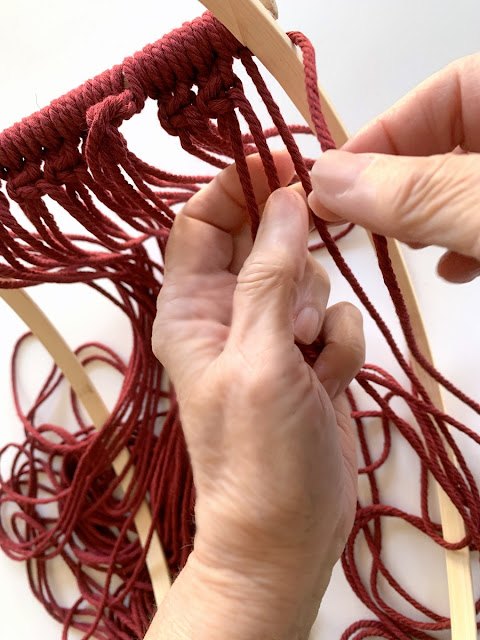
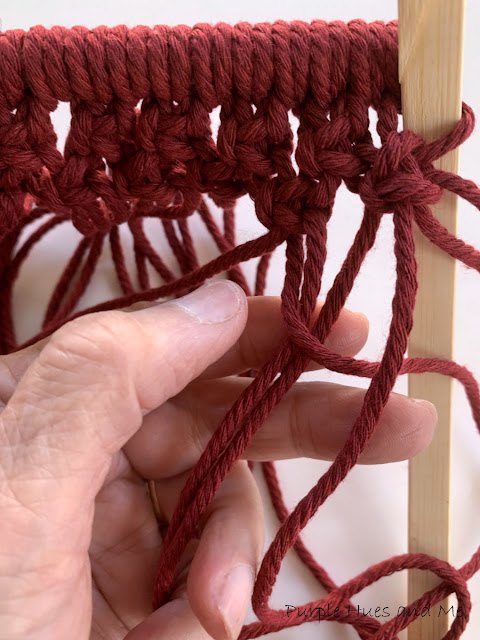
Next, take two cords and lay them over on the right. Then take four cords and begin making a square knot, by taking four cords - two working cords - left, right and two filler cords (center). Take the left cord and make a "L" shape over the two middle cords.

Move the right working cord under the two filler cords and over the left working cord. Pull both working cords to tighten, keeping the filler cords straight. This is a left facing half square knot.
Mirror the process working with the opposite side cords. The two working cord have switched places. Move working cord to the left, passing it over the fillers and under working cord . Move working cord to the right, passing under the fillers and over cord. Tighten the by pulling on the working cords, while holding the fillers steady.
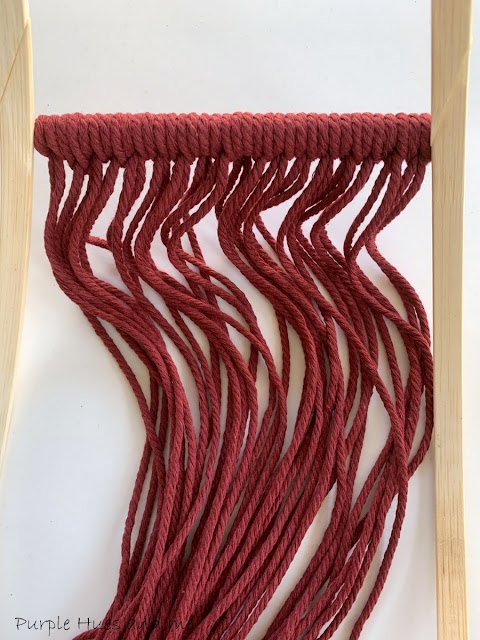
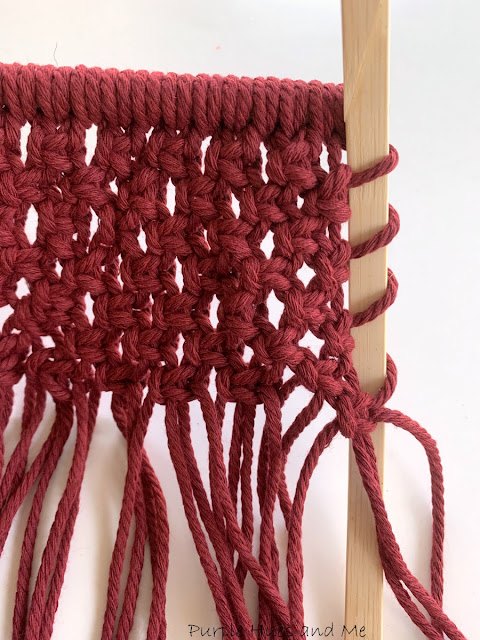
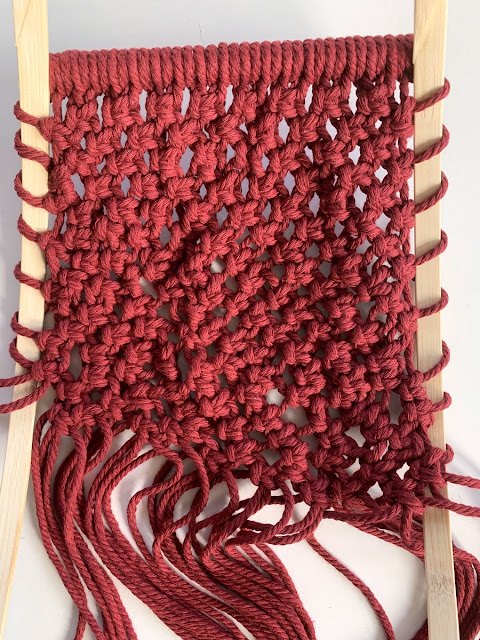
For the next row, include the two cords on the right to make the square knot - continuing all the way over and including those two cords on the left side to secure the knots to the hoops.
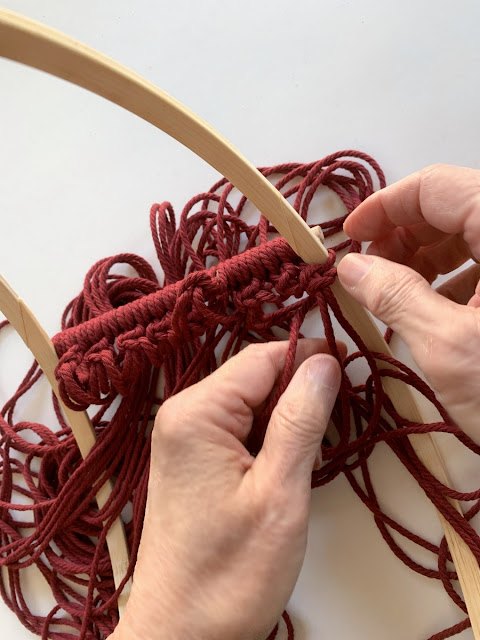
Continue laying two cords over the hoop for each row, creating square knots along each row.
Continue making square knots along the length of the hoops between the rods.
A word of caution - making macrame square knots was very repetitious so I decided to watch tv as I was making them. Bad idea! I got wrapped up in the tv and forgot if I completed square knots and if I left cords out - causing me to take more than a few cords out.
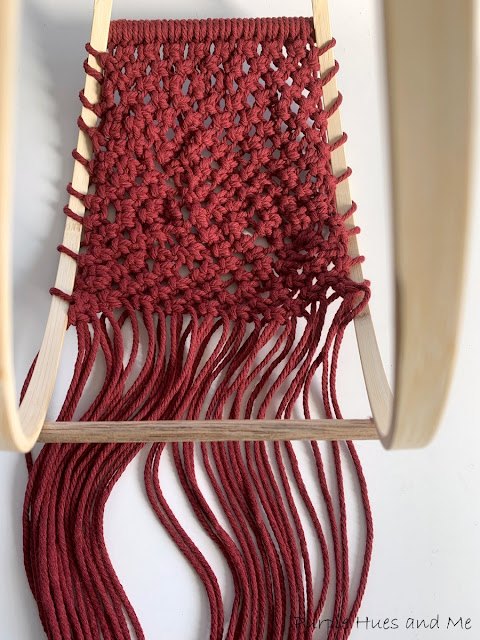
When reaching the next dowel rod, pull the four cords down of each square knot to make a finishing knot for each cord around the rod. Wrap the cord around the rod, forming a loop and thread the end of the cord up and through the loop, pulling the knot tight against the last macrame knot. Cut off excess cords.
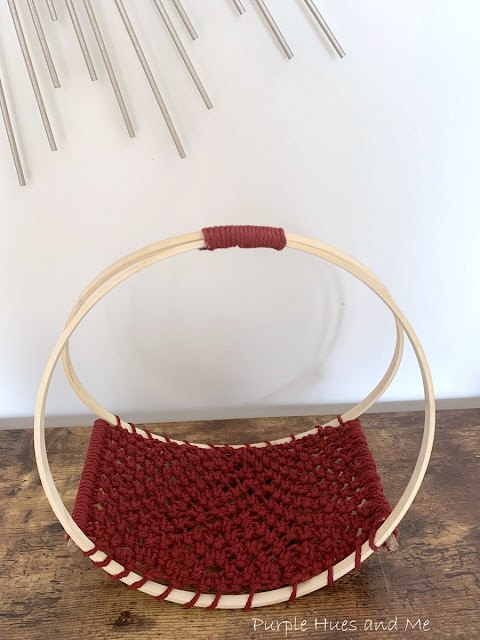
I love having this mail stand for incoming mail.


Comments
Join the conversation
-
Great job.
-
♥️


Frequently asked questions
Have a question about this project?