


A New Take on a Pompom Rug

6 Materials
$35
1 Week
Easy
I wanted to make something special for my granddaughter’s eighth birthday so I browsed Hometalk and found a tutorial for pompom rugs. I think she’ll like this (I hope). It’s a little different from the standards since it uses only half of the pompom maker. Guess you could call it a pom rug.
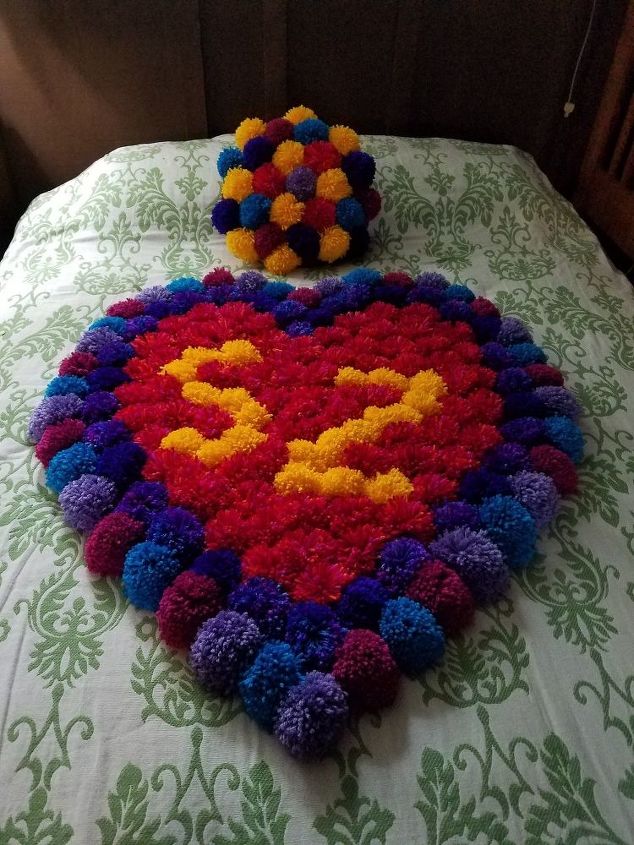
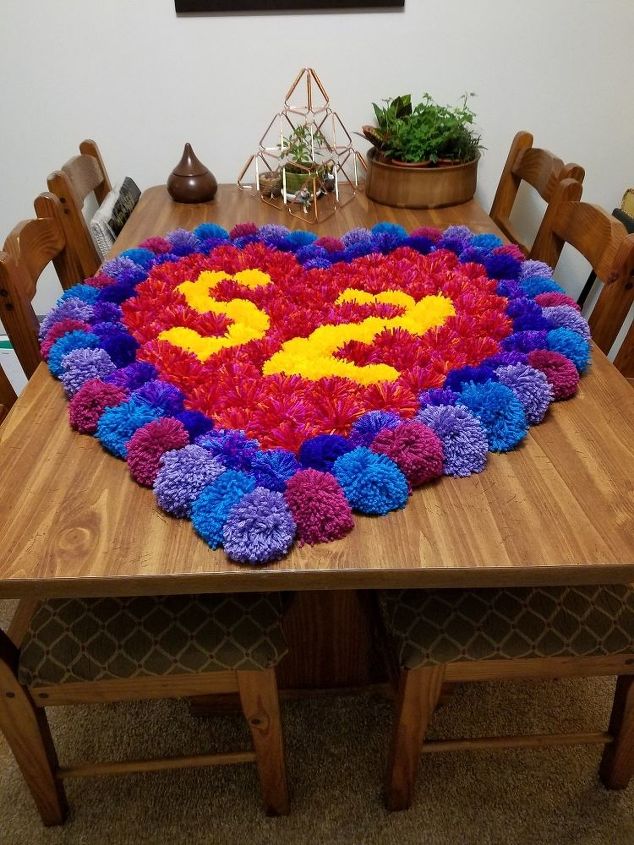
First, I decided on the color scheme (blue, purple, red, and yellow) and shape (a heart, of course, because I love her). This is a pretty big rug, approximately 3 ft wide at its widest point and 4 ft in length. I used a total of 11 skeins of yarn. All the yarn was bought on sale and/or with coupons so that saved quite a bit on the cost. (Gotta love those 50% off coupons!) I got the rug backing from a local craft store that was going out of business – at a 75% discount!
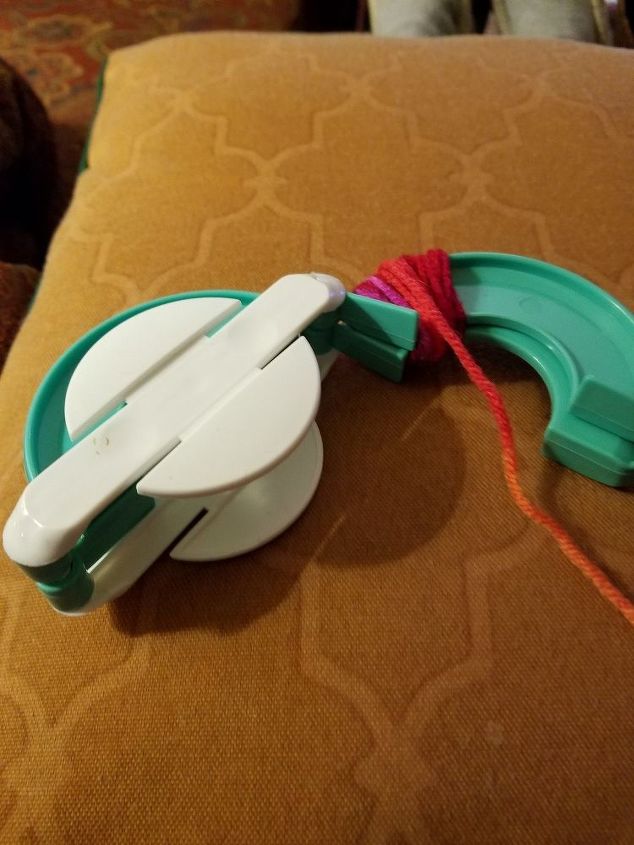
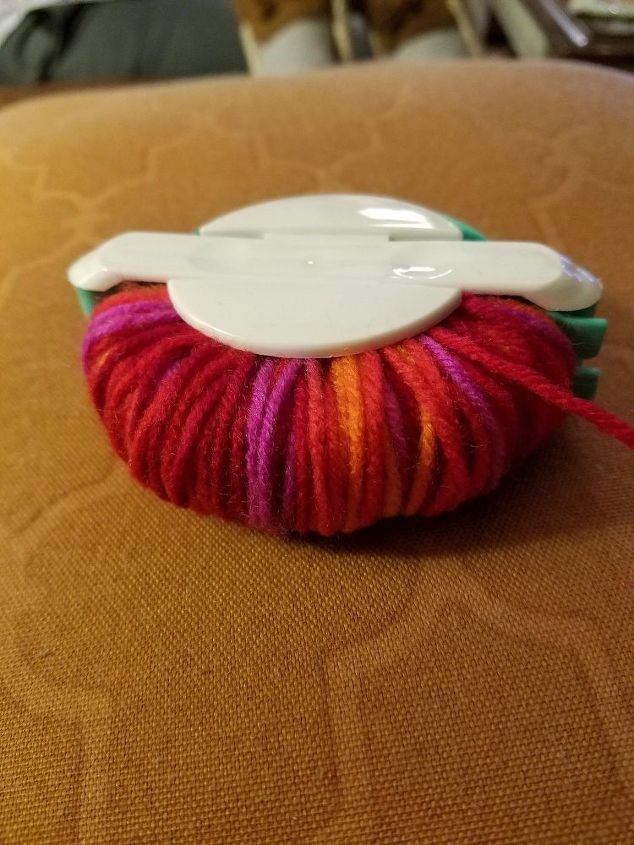
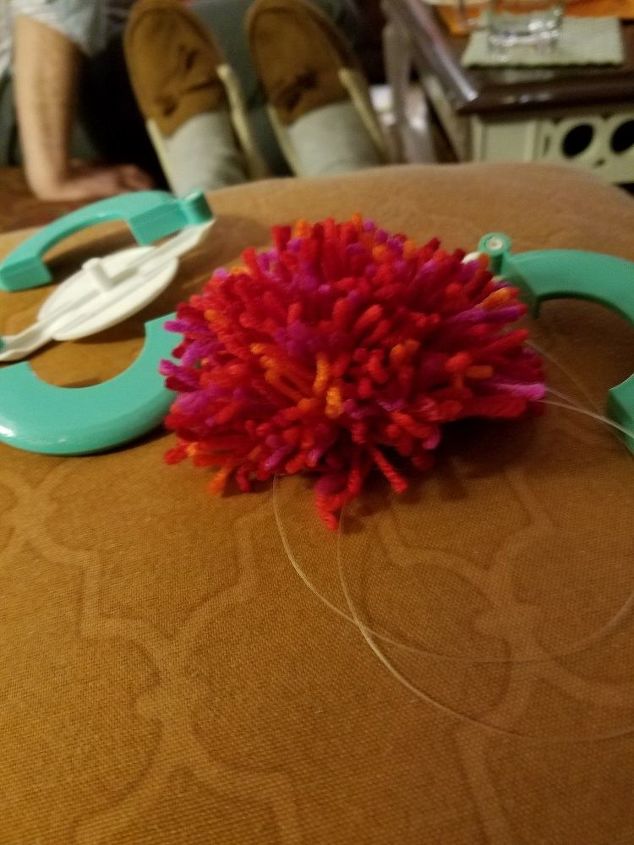
So I began making the first of approximately 150 poms. A skein of yarn makes about 14 half poms. After making the first one I realized that a full pompom would make the rug too thick and difficult to walk on. Sort of like walking on covered ping pong balls. So I took a chance and started using only one side of the pompom maker. This turned out to be ideal for what I wanted.
You can find these nifty little pompom makers at any craft store. They are easy to use and come with instructions. As I mentioned earlier, I wrapped yarn around only one side and tied it off with nylon fishing line. Tie it as tightly as you can and double knot it. Cut pieces of nylon fishing line into 10 inch lengths (I cut a bunch at a time to speed things up a little.) Don’t skimp on the length because it’s much easier to tie the poms onto to rug backing when you have the extra length. More on that latter.
After you’ve finished making all your pompoms, sort them by color and set them aside.
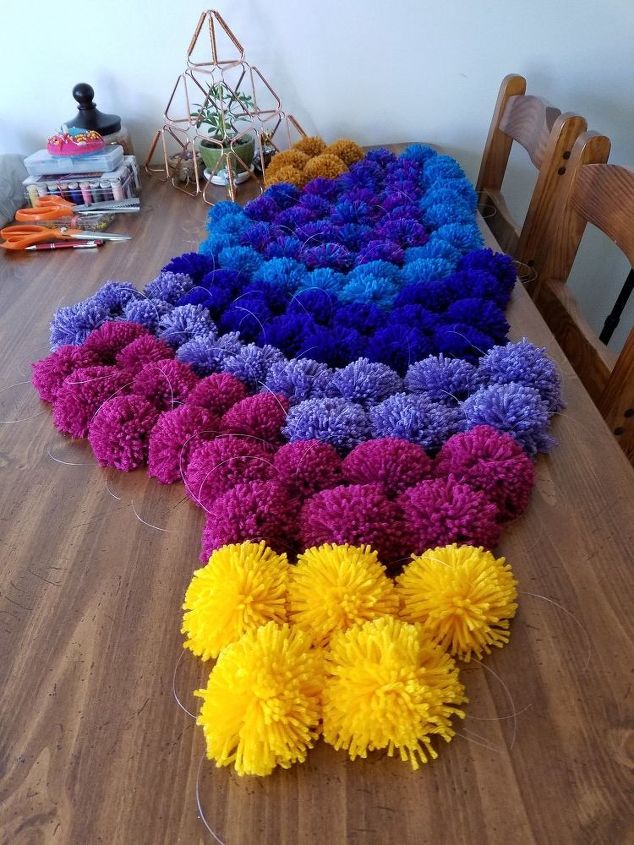
Just some of the pompoms that were made.
Next I cut the rug backing into the shape I wanted. My rug backing was 36x48. Basically, I just folded it length-wise and free hand drew half a heart on it with a felt tip marker, using as much of the backing as I could. I cut it out with scissors (much like you’d cut out a paper heart for valentine’s day). You might have to make a few adjustments in the shape (I had to). If so, just fold it back in half and trim to adjust. Don’t cut down the fold – you’ll end up with 2 half hearts. I forgot to take a photo of this but it’s pretty easy to do.
Put the rug backing on your felt and trace around the pattern – in my case, the heart. Cut out and put aside for now. You’ll use it in the last step.
Then lay the rug backing on a surface large enough to accommodate the shape. I used my dining table.
Begin laying down your pompoms – flat surface down - , arranging your color pattern as you go. This will help you determine if you have enough pompoms. I discovered I needed more red pompoms. Back to the craft store I went – I was lucky to find one available skein in the same color lot there. If you can, take a photo when you’ve finished laying down the poms. It comes in handy as a reference point when you begin tying them down.
Now, take all the pompoms off of the rug backing and set them aside, keeping colors sorted. Begin tying on the pompoms along the outer border. The holes in the backing make it easy to thread the nylon line through them. Don’t forget to double knot and tie tightly. At this point you can snip the extra nylon line if you want. Don’t snip too close to the knot though – It could compromise the knot. The pompoms should lie flatly on the backing. Place them close to each other but don’t crowd them or you’ll run out of pompoms before you finish.
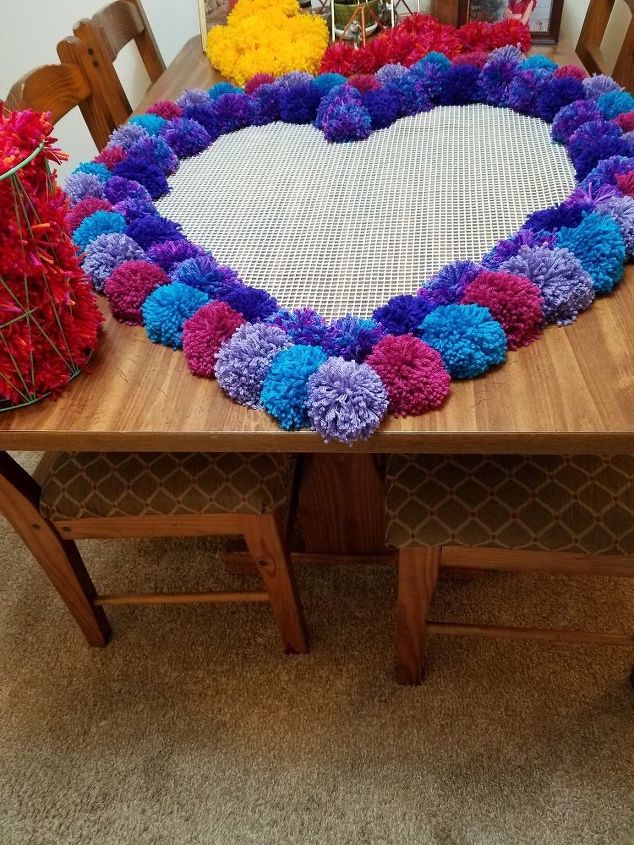
Once you have the outside border complete, continue tying pompoms until you have the pattern you want.
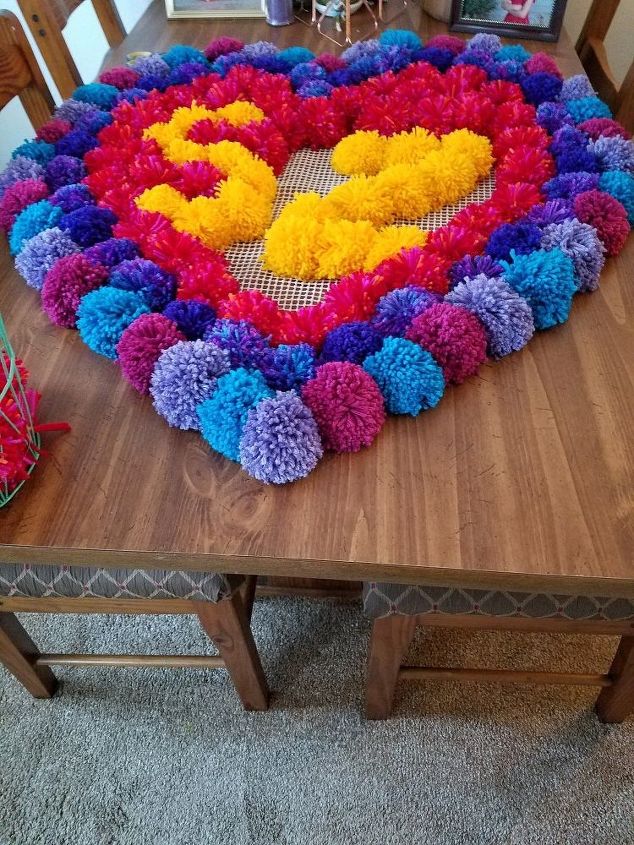
After you’ve finished tying on all the pompoms, flip the rug over. Glue the felt onto the rug backing and you’re done. (I used a spray glue but you have to work quickly because the glue dries fast. You could also use Arlenes glue.)
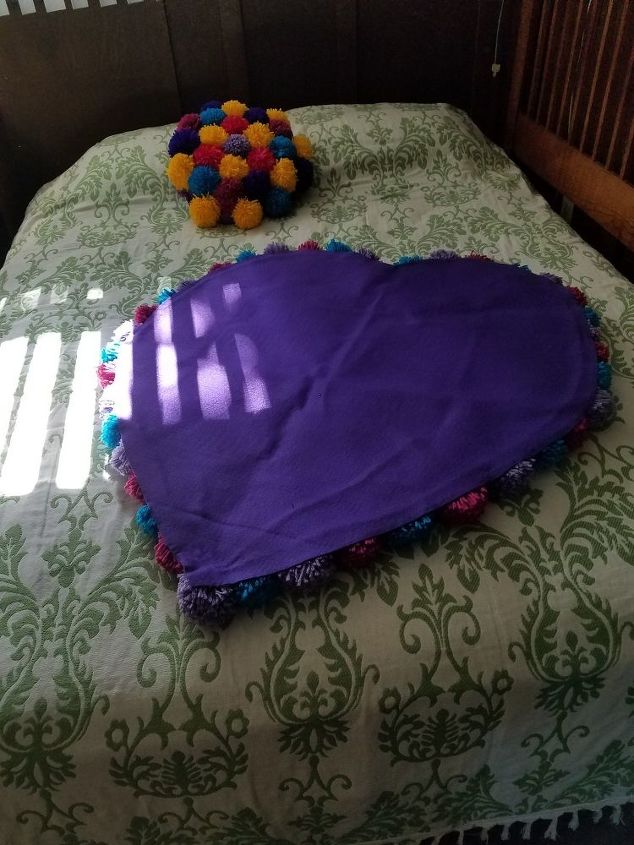
I had a few pompoms left over so I made a matching pillow.
Cut out two felt circles. Mine were 14 inches in diameter. Tie the pompoms onto one circle. The extra nylon line will allow you to use a needle to pierce the felt. Sew the two pillows together – I used a blanket stitch. Leave a space so you can stuff it with polyfill and sew the gap closed.
If you do this, send me a pic. I would love to see what you’ve done!

Comments
Join the conversation
2 comments
-
This looks like so much fun to make!
-
This absolutely caught my eye because my initials from birth were SZ! An adorable idea & very professional looking. She'll love it.


Frequently asked questions
Have a question about this project?