


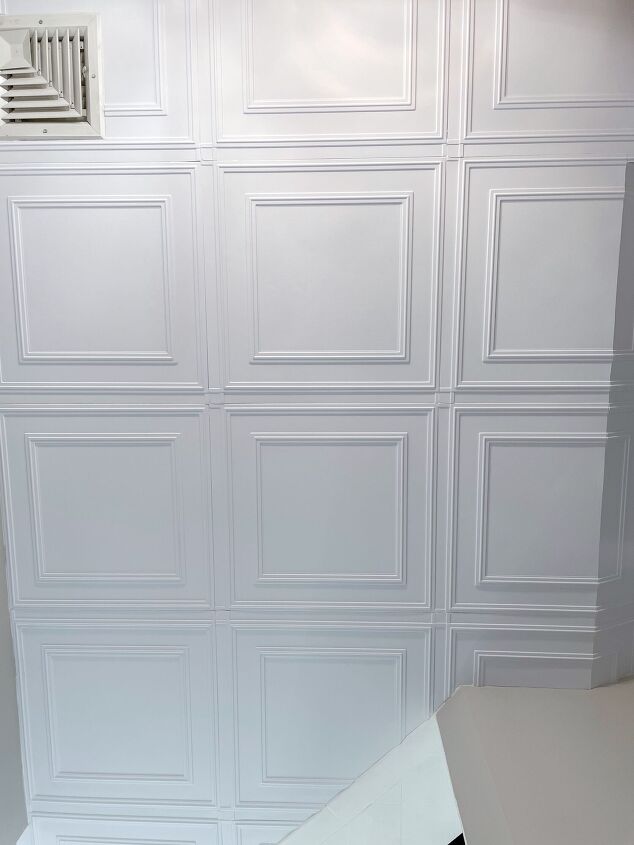
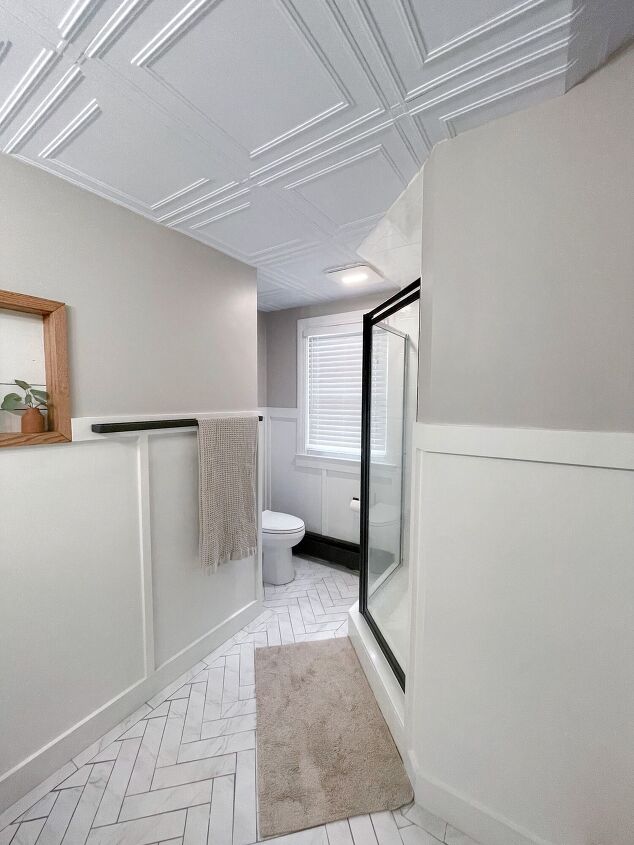
Beautiful Bathroom Ceiling Update

Did you know you can create a beautiful, high end ceiling using light weight tiles?? It is such an easy but crazy impactful upgrade. The tiles from Ceilume are not just beautiful but are waterproof, recyclable, and made in the USA. I seriously could not be happier with how they elevate this bathroom space with very little time and effort!
** This post is sponsored by Ceilume, but all thoughts and opinions are my own.
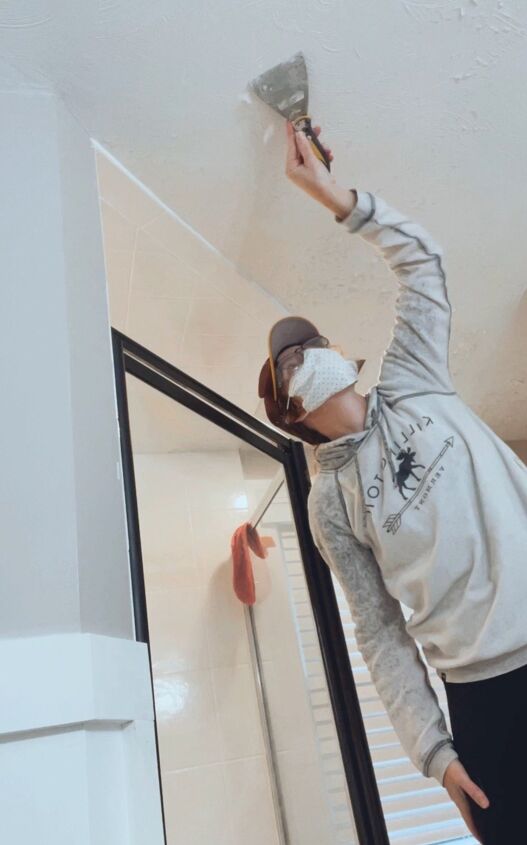
Step one: Prep your ceiling
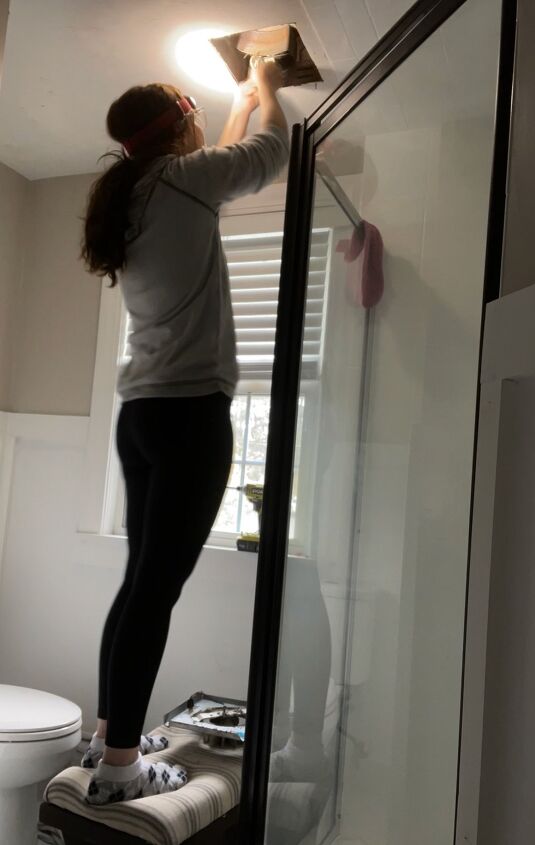
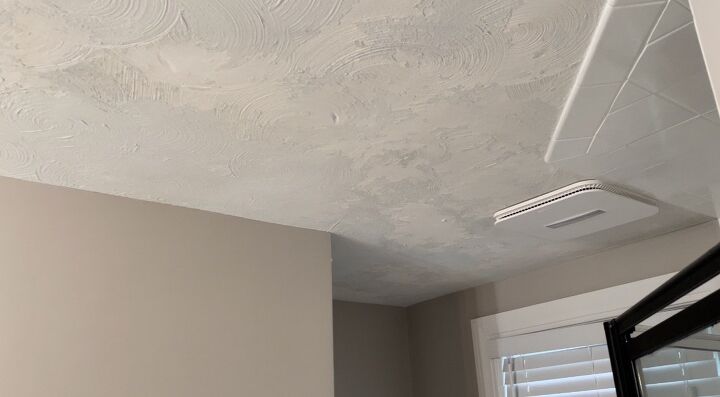
The surface needs to be relatively flat and clean before installing the ceiling tiles. If your ceiling paint is peeling like mine, make sure you remove it first by scraping, sanding, or scrubbing with a steel brush (or all of the above like I did). Remove as much as you can to make sure that the ceiling tiles will adhere to the ceiling itself and not the peeling paint.
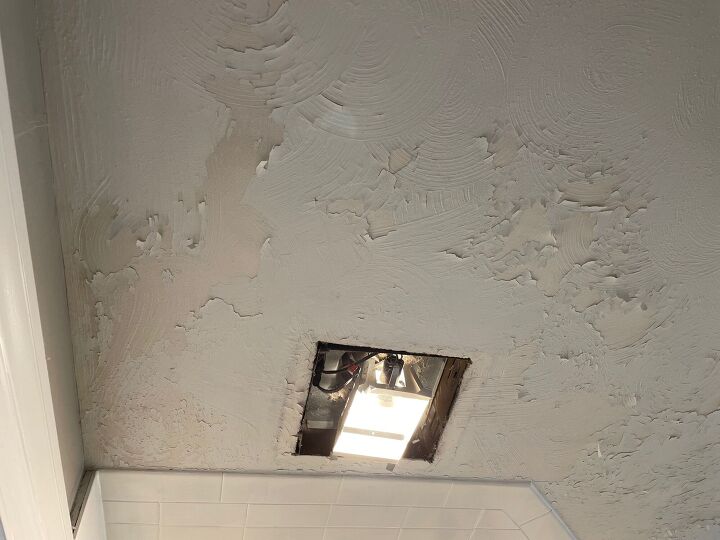
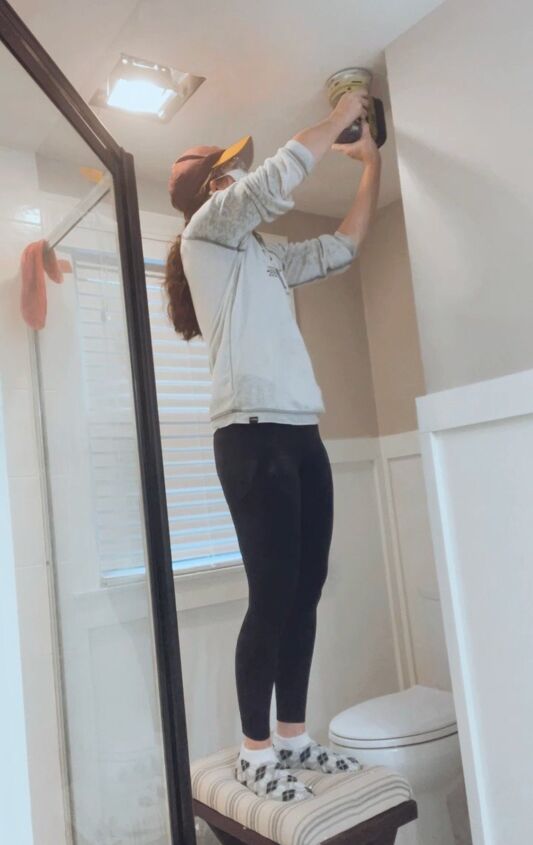
Step two: Solve the moisture problem
If your bathroom has moisture damage like mine clearly does, take the time to resolve the underlying problem. My bathroom needed a new fan installed. The old one was crazy dated and just not strong enough to do the job in this bathroom. So I purchased a fan that had a higher blowing power and installed it to reduce future moisture damage. If you have a good working fan and no moisture problems in your bathroom you can skip this step. Yay for you!
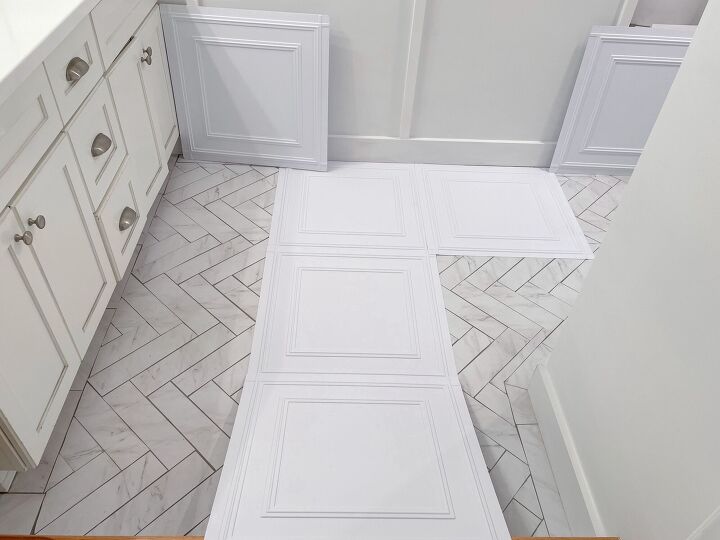
Step three: Determine your ceiling tile layout
Make sure to give some thought to the placement and layout of the tiles before you start installation. The tile should be relatively evenly spaced so you don’t end up with small remnants on one side creating an odd offset look. If you have exact measurements and grid paper, this is likely the best way to map it out. If not, you can do like I did and attempt to lay it out against the wall to determine the first row placement.
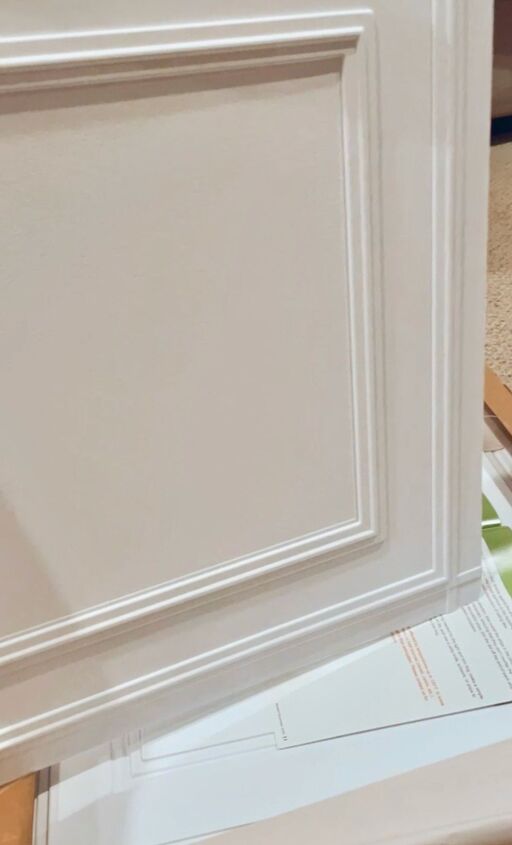
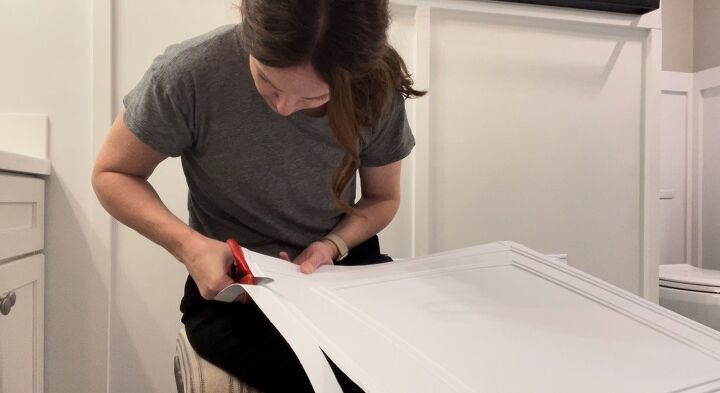
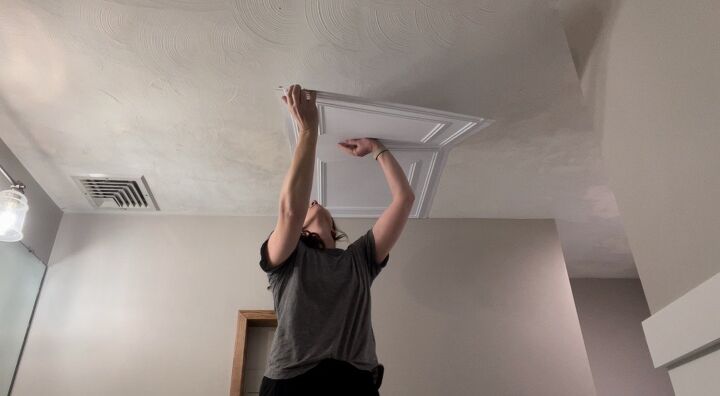
Step four: Install ceiling tiles
Once the layout is determined, installation is super easy! These Manchester Ceiling tiles basically line themselves up and are really easy to work with. I trimmed the edges along where the tile would meet the wall just to remove the border on that side. All cuts can be done with just a regular pair of scissors which makes things remarkably easy.
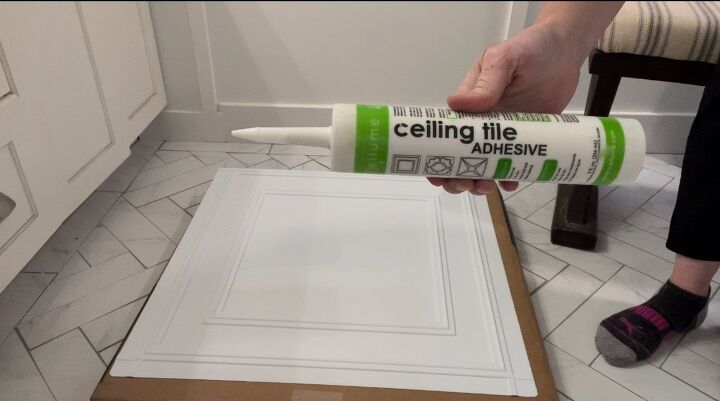
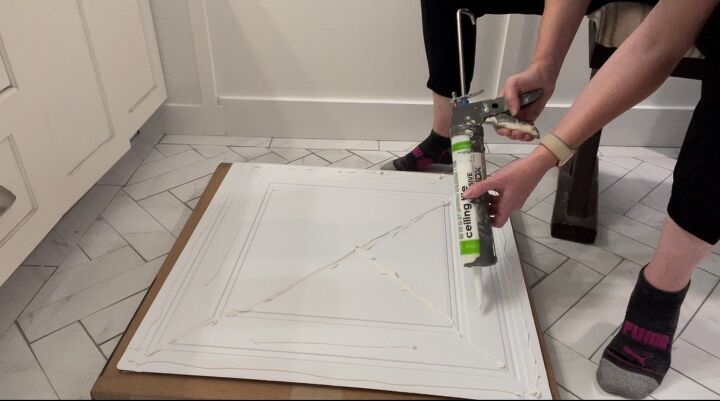
Install tiles with the Ceilume ceiling tile adhesive using a regular caulk gun. Just put a thin bead around the entire border and then an X across the middle of the tile. Put the tile on the ceiling and then put a little pressure and slide it into place. Make sure all of your edges are adhering to the ceiling and that you smooth it out so that the glue fully contacts the ceiling. And that is literally it! It instantly holds and you are now able to move on to your next tile.
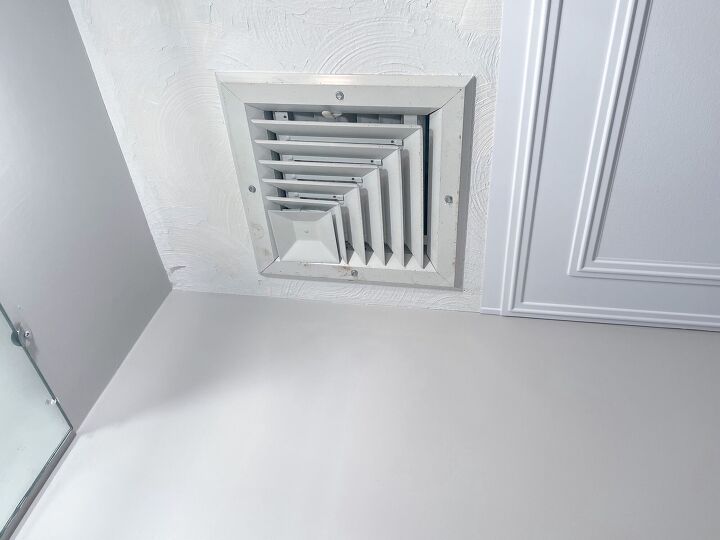
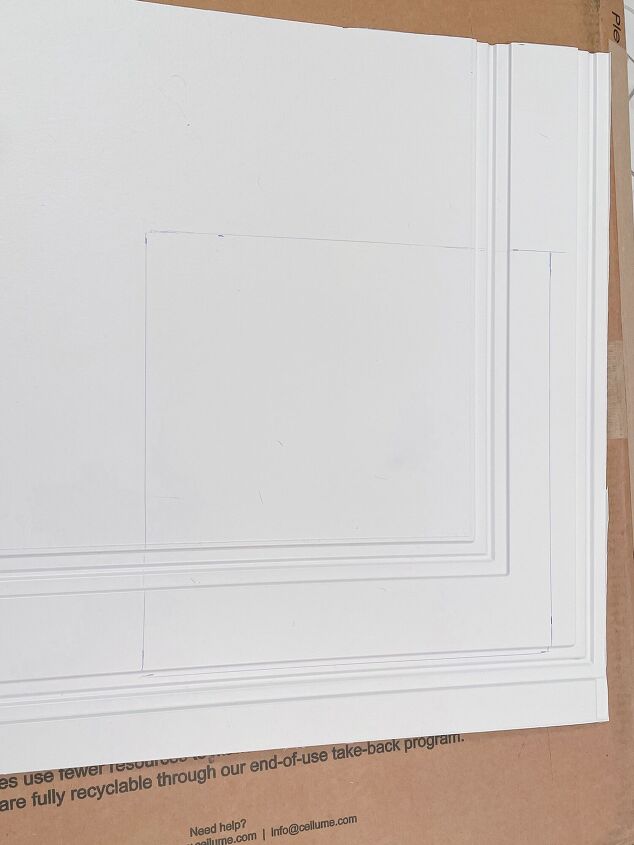
Inevitably you will have to make some cuts around corners, edges or vents. For this vent I measured the dimensions and traced that onto the back of my tile. I poked a hole in the middle of the area to cut out and then cut the rest of the way out with my scissors. Then glue it up the same way as the others right around your vent.
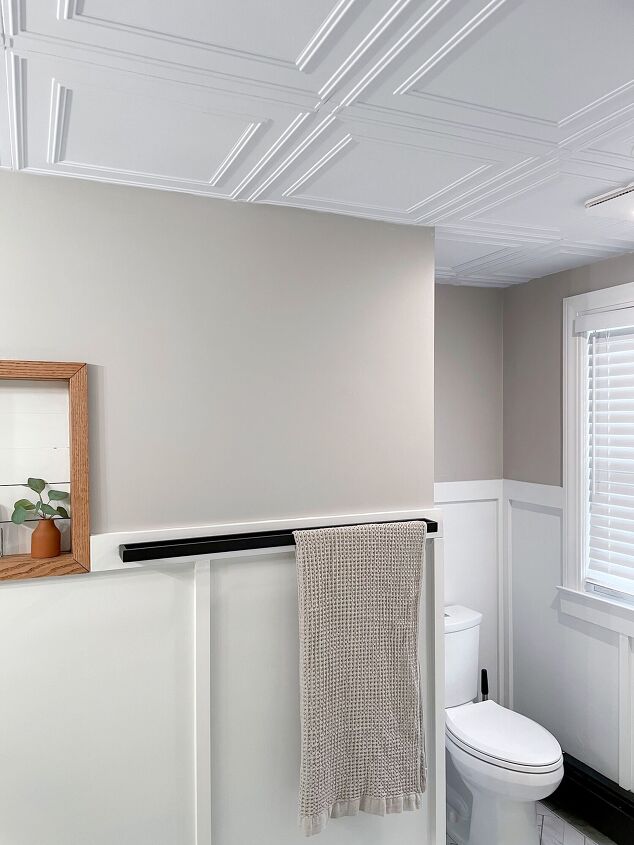
I'm seriously in awe at how easy these were to install and how much they elevate this space! I never thought this space could have a beautiful ceiling but these Ceilume ceiling tiles are seriously incredible.


Comments
Join the conversation
-
Great job, love it!
-
I love ceiling tiles, mine are Styrofoam,I bought on Amazon. We've had them up over 3 years and even in the shower without any problems! We had to move the fan to center it over our bed, so added the wood box and put the same Antique Copper tiles (styrofoam) in the center. They come in beautiful colors and designs! They are 20 x 20 so ceiling goes up so fast!


Frequently asked questions
Have a question about this project?
Can you paint over these and how are they cleaned?
Your entire bathroom is simply beautiful! Great job! Did you install the floor tile yourself?
Did you put up any kind of molding?