


DIY Skinny Slat Ceiling

Have you ever thought of updating a room by doing a ceiling treatment? I honestly hadn't. But, I had just updated my bathroom and I wanted to take it the next level. This ceiling I am calling a DIY skinny slat ceiling. It worked perfectly in my newly remodeled bathroom, but could easily transform any room! I will take you through where I struggled through this project and how I learned to do this the super simple way so that you can breeze right though it! I absolutely love how this one turned out!
Materials needed:
- 1x2x8 whitewood (or any type of wood) this is just the cheapest and what I decided to use
- Liquid nails
- Nail gun (you could just use a hammer and nails, I tried this at first and it is doable but will take you longer)
- Jig saw (a hand saw would also work for this)
- Orbital sander
Best liquid nails!
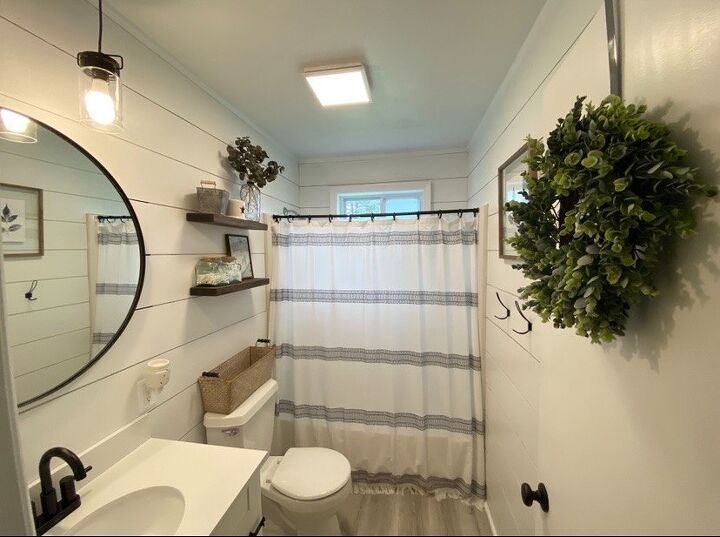
Here’s is the before right after I had updated my bathroom with new flooring, vanity and shiplap walls! I loved the newly updated space but wanted something a little more. That’s when I decided to go ahead and give this ceiling treatment a go!
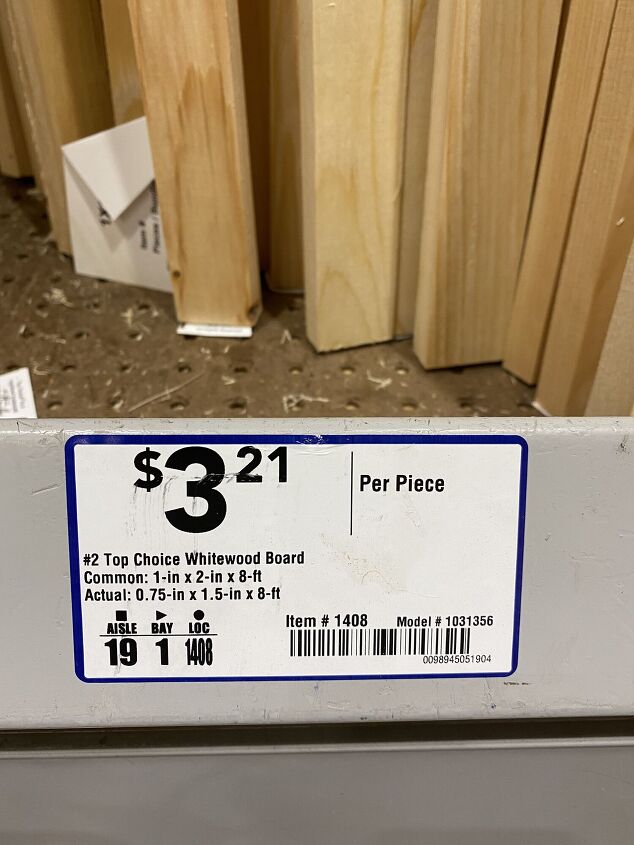
First step is to determine the amount of wood slats you need and to buy your supplies! The amount of wood needed will depend on your ceiling size. I ended up purchasing 30 of the boards pictured above. To determine this, take the width of your ceiling, and first divide that number by 2 (to account for the spaces). Divide that number by .75in (the actual width of the wood). This should give you the amount of boards you will need. Buy extra!! Just incase you make a mistake. You can always return them! Plus you want at least one extra piece to use as a spacer! Now, you're ready to get to cuttin'.
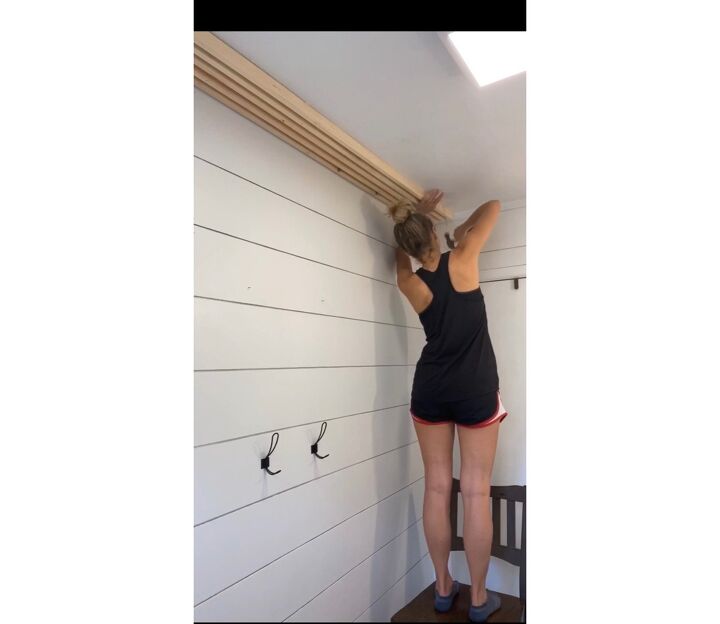
The length of my ceiling is just under 8ft long. So, I needed to trim a little bit off the boards. I used my jig saw to make cuts. You could use any type of saw you have for this! A hand saw would be an affordable option. After trimming your boards, use your orbital sander with 120 grit sand paper to smooth your boards. You could also sand by hand, but the orbital sander will speed up the process. Before you get started putting your slats up you will also want to make sure you have an extra 1x2 to use as a spacer. I screwed long screws into my spacer to allow me to grab and easily take the spacer out so that it wouldn't get stuck. Ok, now your prep is done. Time to put your first board up!
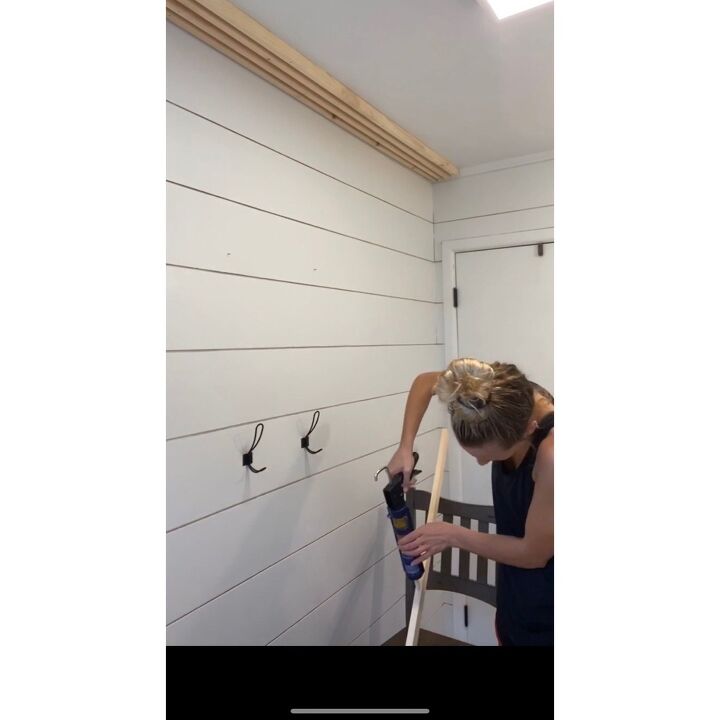
A small amount of liquid nails goes a long way. You don't want to put too much on. If it seeps it will be visible in the spaces and will dry a gross brown color... I learned this the hard way. Place your first wood slat flush against your wall and secure in place with your 2in nails. Then, when you are ready for your next piece, use your extra 1x2 as a spacer in between the 2 slats of wood, place your wood on the ceiling, and hammer away! Or preferably use a nail gun, this will be way easier and look better! Either way you secure your board in place, 2in nails will work perfectly! Once your slat is secure you can use the screws that you drilled into your spacer to pull the spacer out smoothly!
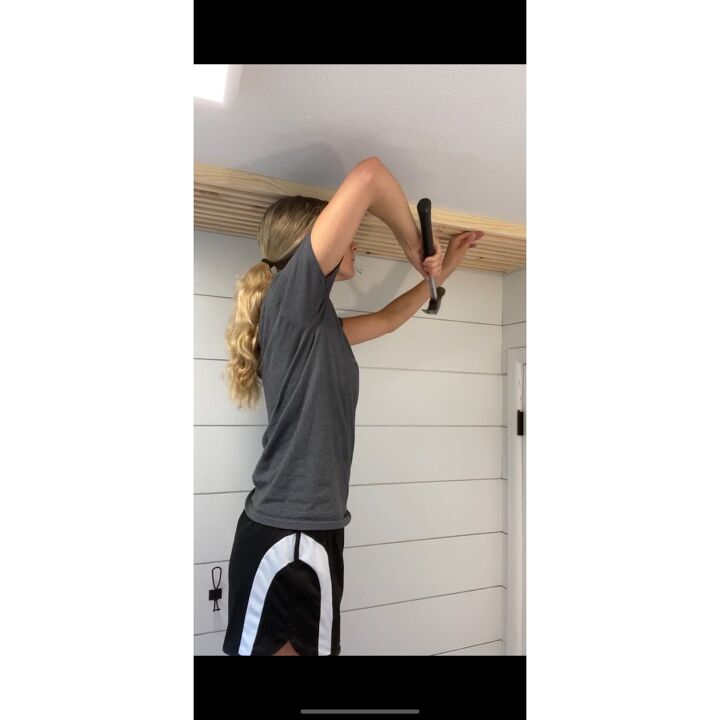
After hours of hammering and using my head as a third arm, my arms felt like jello and my neck was so sore. I caved and bought a nail gun!
It was definitely possible to accomplish this project with just a hammer and nail, but a nail gun in my opinion was the way to go. Plus I now use my nail gun for everything! So it was worth it! I purchased an 18G Ryobi Brad Nail Gun and used 2in brad nails to secure the slats to the ceiling. I nailed randomly about 10 nails in each slat to make sure they were nice and secured.
I continued the process of trimming the boards, sanding, applying liquid nails, using the spacer (to create even spaces), and nailing into place!
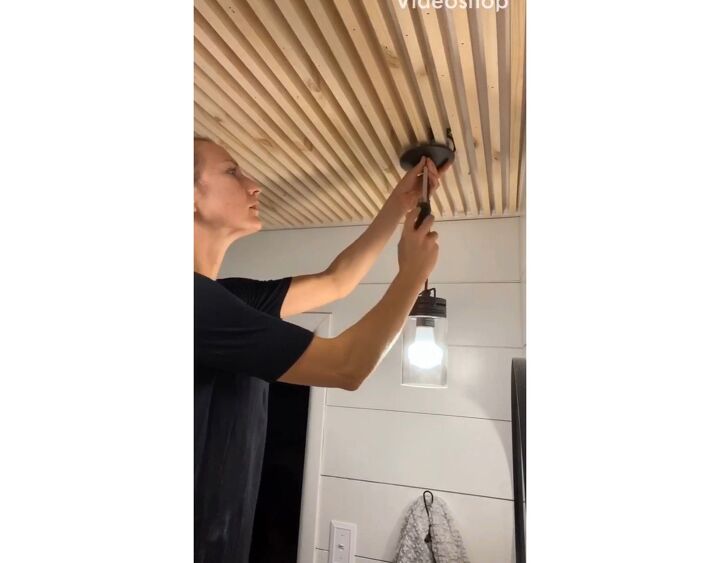
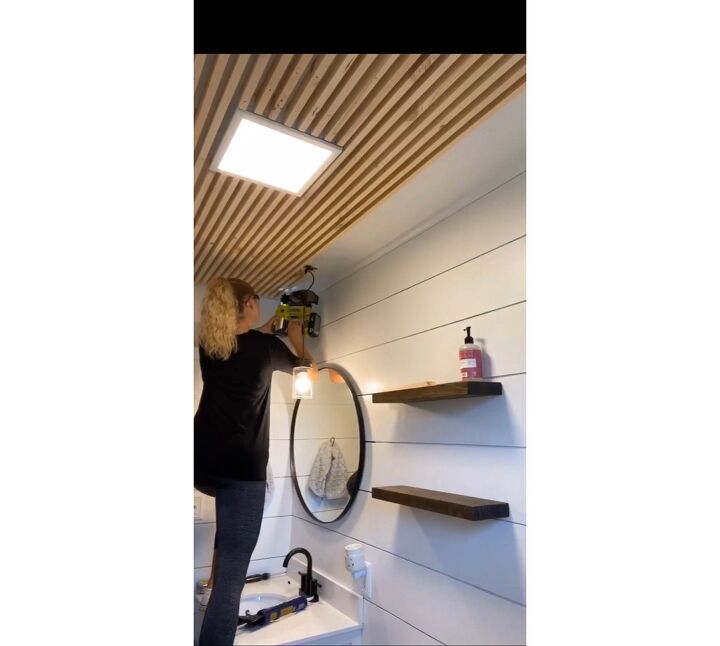
When you get to lights, or other obstacles in the ceiling, I just cut smaller boards and worked around it! The plate for the light nicely covered any cuts in the wood to make the board look seamless. Then just simply re-screwed the light plate back on!
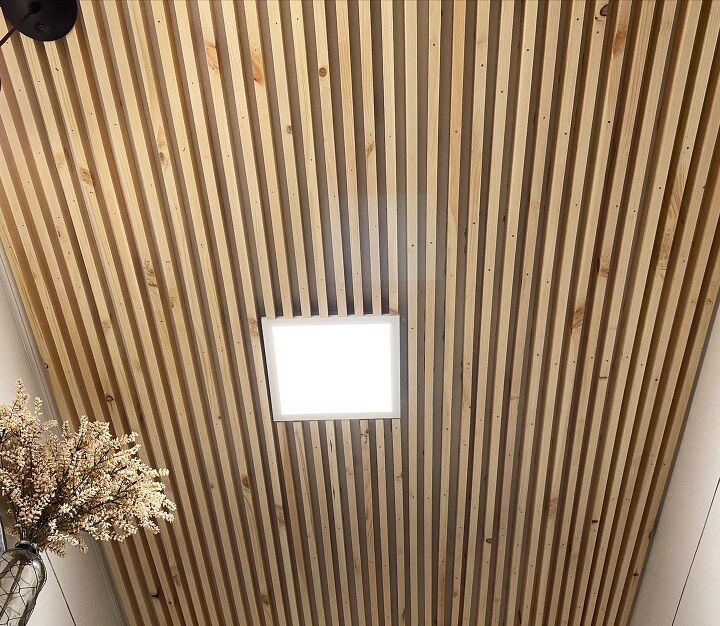
Ta- dahh! That's it! What a statement right?!
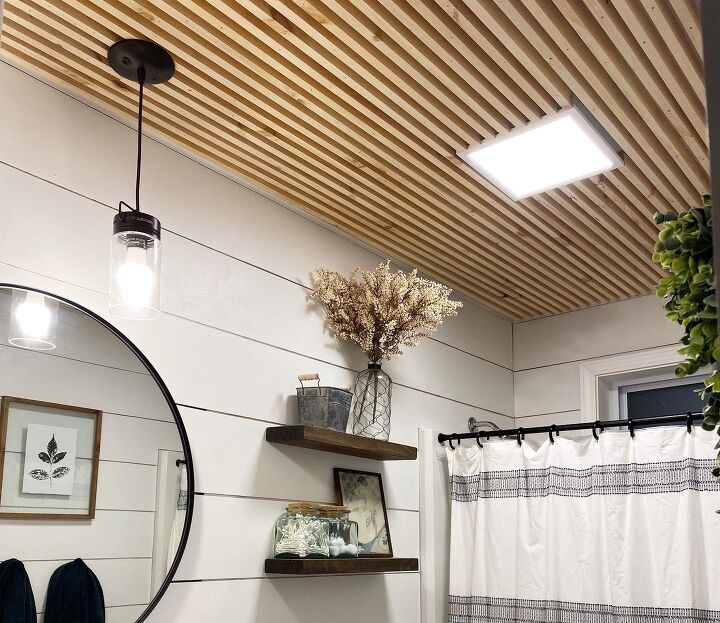
I am obsessed with this ceiling. It has now been over a year and they are holding up great! None have fallen on me yet, so I'm calling it a success. You could use wood filler to fill in all of the nail holes. I have not, because they don't bother me. The holes from when I was using a hammer and nail are definitely bigger than my nail gun holes though. So, if you are looking for a cleaner look use a nail gun. I felt the nail gun also secured the boards better! Another finishing touch I haven't done but probably should do, is apply polyacrylic to protect the boards from water/moisture. Maybe one day I'll get to this! I am hoping this helps convince you to try this skinny slat ceiling out! Follow my tips and you will breeze through it! Are you ready to tackle an accent ceiling project?! Let me know what you think in the comments! And check out my full bathroom remodel as well as my other home improvement projects and DIYs on my Instagram!
Resources for this project:
See all materials


Comments
Join the conversation
-
Incredible!!!! Love it!!
-
No question
It looks GREAT


Frequently asked questions
Have a question about this project?
No question but want to applaud you on your work. It thrills me to see women to get into carpentry work. Far to many can't even change a light bulb!!! You go girl!!
could I use this technique to cover my outdated, dirty and ugly popcorn ceiling?
How to do a floor?