


HEWN Flooring | Durable, Beautiful Floors For Our High-Traffic Home
We did it! After SIX months (that’s 183 days friends) of living with concrete floors in our living room, we finally came to a decision with our flooring.
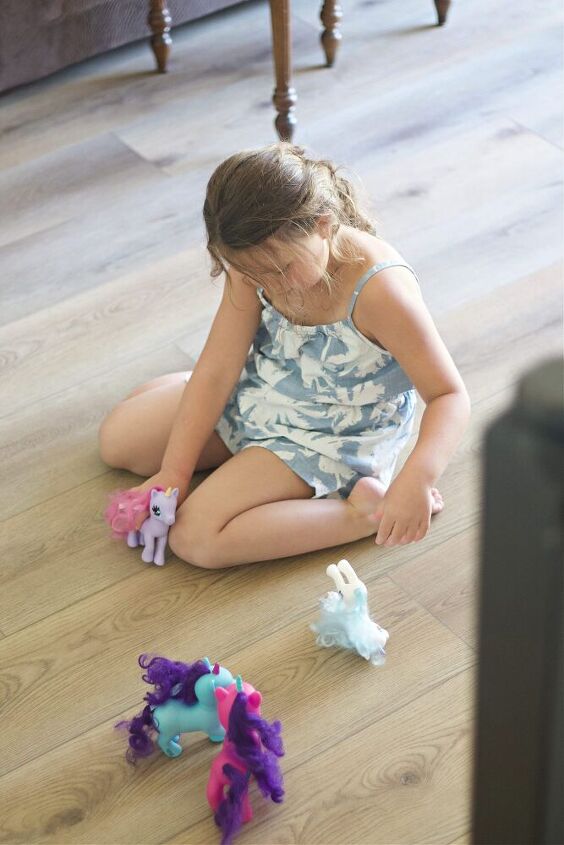
Two kids, three cats, and a huge dog equal a heck of a lot of dirt, water, grit, and pet hair coming into our home and onto our floors. I did not want to get this flooring decision wrong, regretting my choice for years to come. Flooring is a big deal. It’s the groundwork and sets the tone for your entire home.
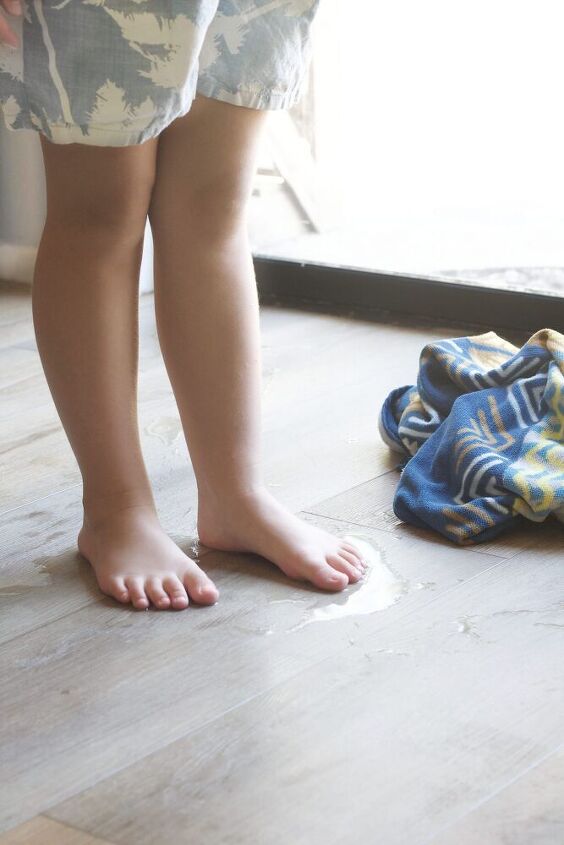
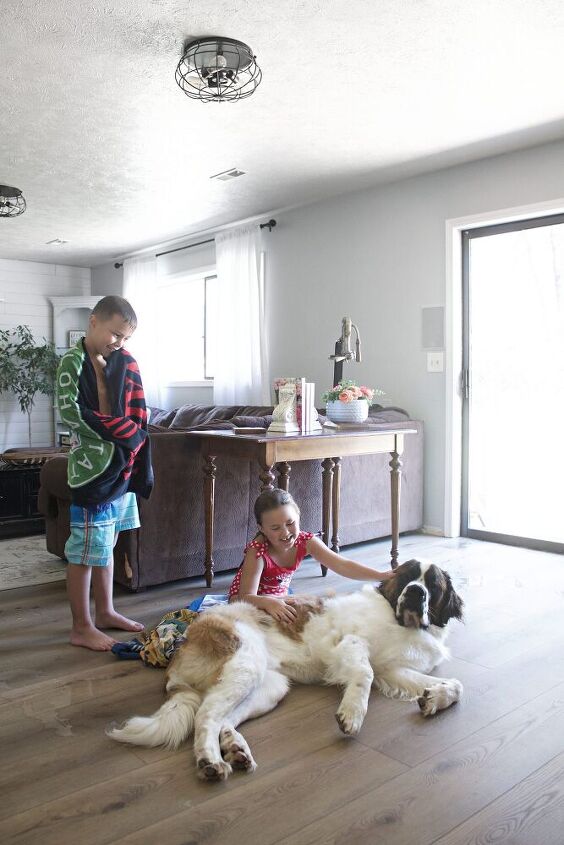
We have a huge slider that opens to the backyard from this room. It’s the door the kids use most. They bring in what I consider an impressive amount of water almost each time they enter. In the wintertime, they drop all their snow gear on the floor, and it melts into a giant puddle if I can’t get there fast enough. In the summer, they swim in our Stock Tank pool for hours upon hours, and again, their wet feet, towels, and swimsuits always seem to end up scattered across our floor.
This post is in partnership with HEWN floors. All opinions and experiences are my own. To read my disclosure statement, click here.
now you understand my dilemma.
Tile: Too slick and cold
Carpet: not an option in our home. The stains, wear, and water is just too much for it. Not to mention the pet dander that gets caught in the fibers.
Real wood: Too expensive and also easily damaged.
LVP (Luxury Vinyl Plank): I wasn’t in love with the vinyl aspect of it, and how it can warp, peel, and bubble. We placed LVP in our master bedroom and it is peeling up on the sides and has been a major headache. We’ll have to end up replacing it, which basically means $2,000 down the drain.
I was at a loss.
Until one day, when scrolling Instagram (where all good ideas seem to come from) I stopped mid-scrool on a post by a company called Hewn, and I was intrigued. They had something called Stoneform, and after researching a bit, I got really excited.
It looked like wood but wasn’t, and it also wasn’t vinyl that looked like wood . . . it was, get ready for this: Made 70% of stone! Say what? Stone is pretty dang durable. So I did some research, reached out to the brand, and decided to make the leap!
Hewn Stoneform and what you need to know
Stoneform come in three different options. Select, Premium, and Elite.
Why I went with Hewn Stoneform flooring in Elite:
- Strength: It’s resilient, waterproof, sustainable, and made for real life! (AKA: Bruno!)
- Durability: Because it’s Stoneform, made from 70% stone, it won’t do the bubble, peel, lift, or warp thing like I was worried about with LVP.
- Accessibility: They sell direct to us, the customers, cutting out the middle man and passing on the savings.
- Quality: With enhanced bevel edging, extra-long wide planks (9″X72″) and embossed in register, Elite is their highest-grade flooring with 30 mils/.75MM wear layer, 5MM+1.5MM thickness, and a 20-year residential warranty.
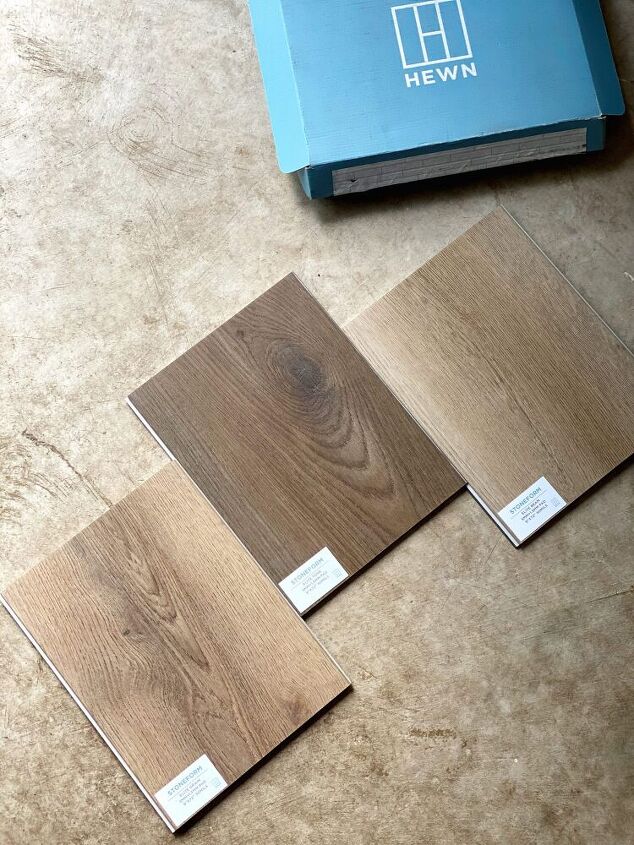
Guys, I was so excited! But just to make sure, I ordered their samples so 1. I could look them over and decide on a color. And 2. so my brother-in-law, who is a flooring specialist, could tell me his thoughts.
Upon checking out the Stoneform samples he said, “This is quality stuff, it’s made well.” That was all I needed. Dustin, my brother-in-law, has been in the flooring industry for 18+ years. He knows his stuff.
You can order three HEWN Flooring samples here for $20 + free shipping!
Picking a color
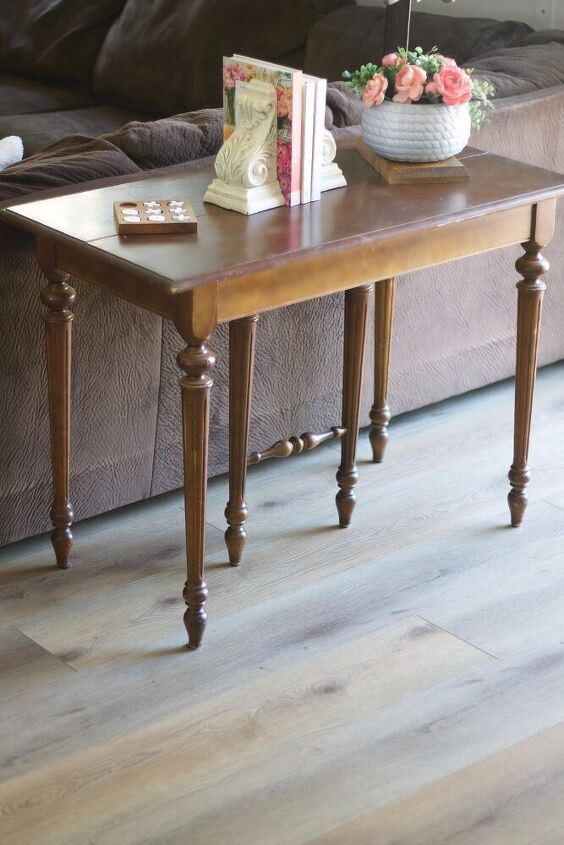
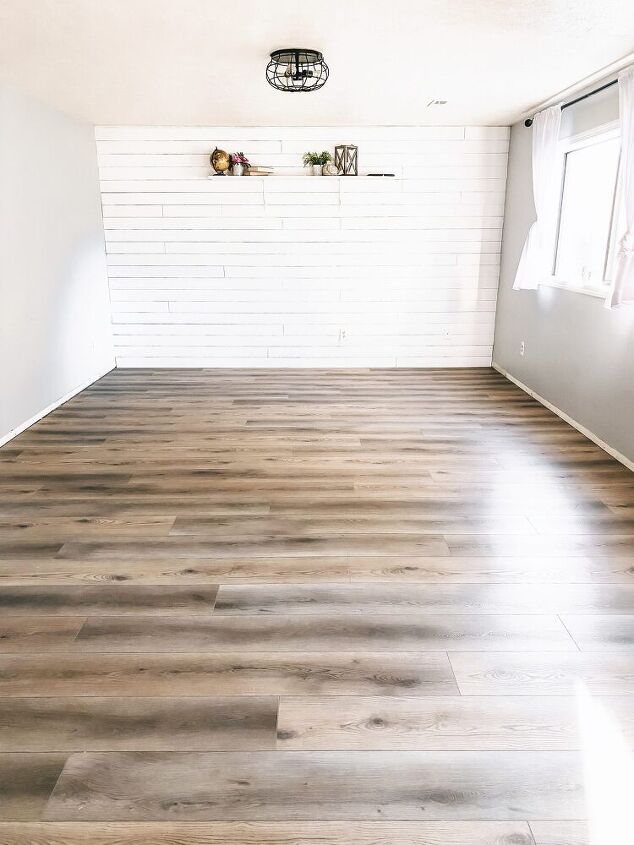
Stoneform comes in so many beautiful colors. Pictures don’t do it justice. The dimension, hues, and grain. It’s stunning. For my samples, I ordered Beam, Grain, and Tone. I had everyone in Instagram stories vote on the color. Grain won by a landslide. I think my followers all know me well because that was my favorite too. The Beam was a tad too light got my liking, and tone was a bit dark. Grain was the perfect mix of them together.
The flooring calculator worked perfectly for helping me with the square footage. I had a few pieces leftover, which will be perfect to use when we expand this flooring throughout our house. Because that’s definitely the plan!
Let’s take a trip down memory lane
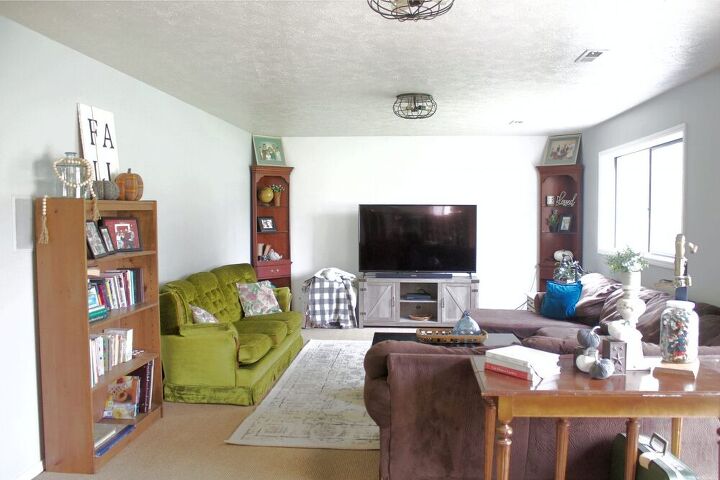
This was our living room a little over a year ago.
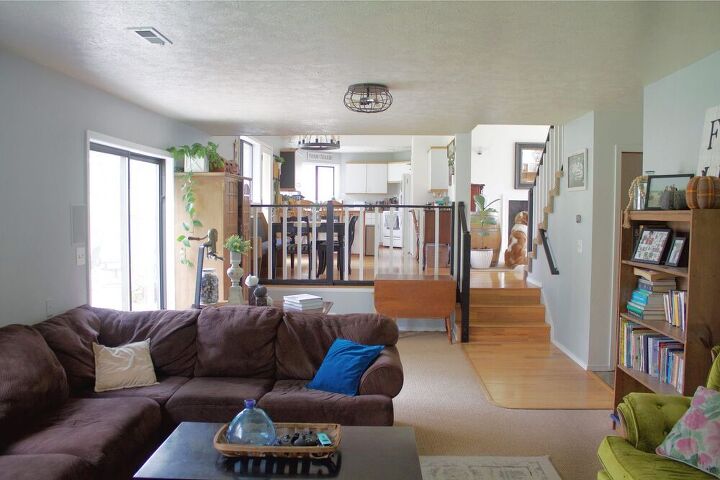
This was the room after we shiplapped the back wall and I painted the upright cabinets, as well as ripped up the carpet. Getting better right?
Sorry, it’s decorated for Halloween in this photo. Apparently, I’m not a great before and after photo taker.
Another reason I was so glad to get rid of the carpet and flooring in this room was because of this wood walkway. Walkways in homes scream old and dated to me. And that carpet . . . it looked like dirt. Apparently, they thought that was the best option for everything that got tracked into the room from the glass slider. It all just blended together!
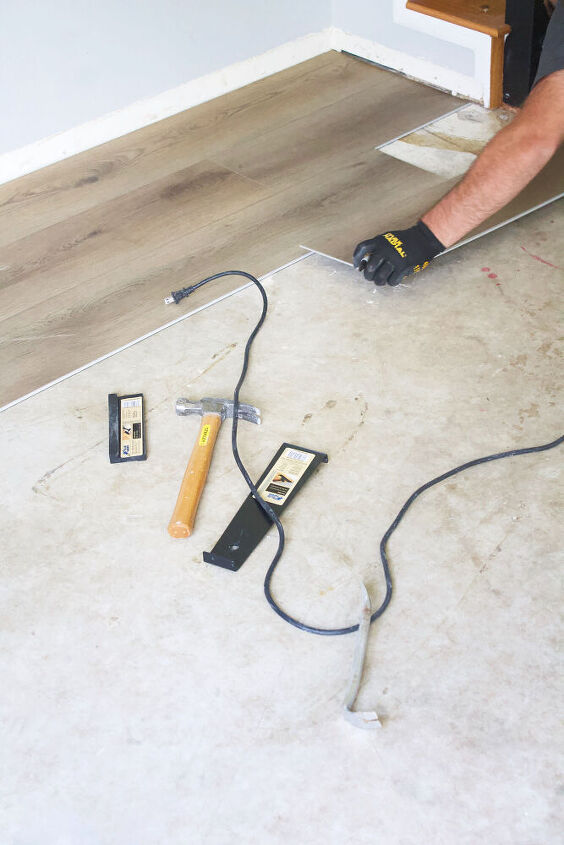
Installation process
Okay, I may have cheated on this one, having my brother-in-law help, but after Travis and I watched and helped him with the install, we both looked at each other and said, we could easily do this ourselves!
For reference, here is a great video from HEWN on how to install their flooring:
Our room was so darn easy. It’s basically a rectangle with stairs coming down one side.
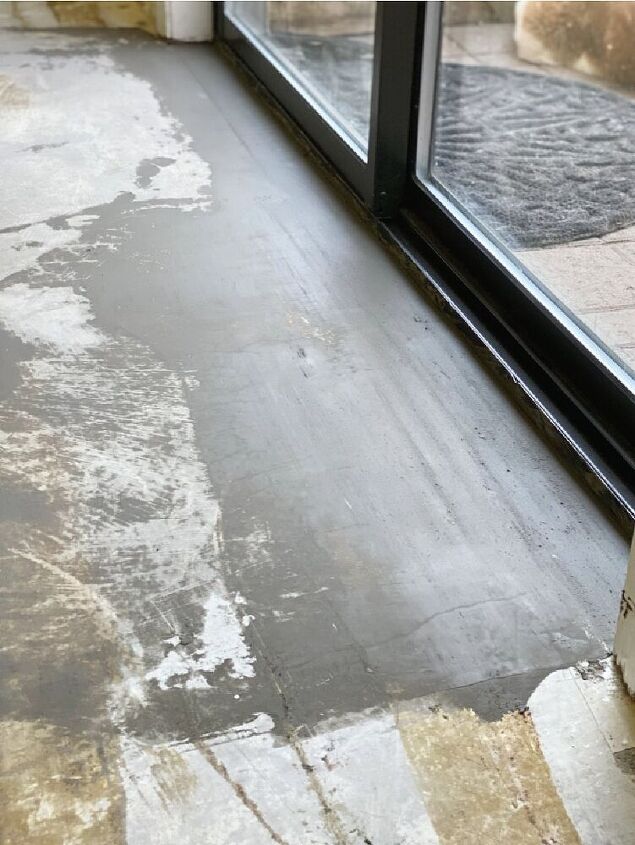
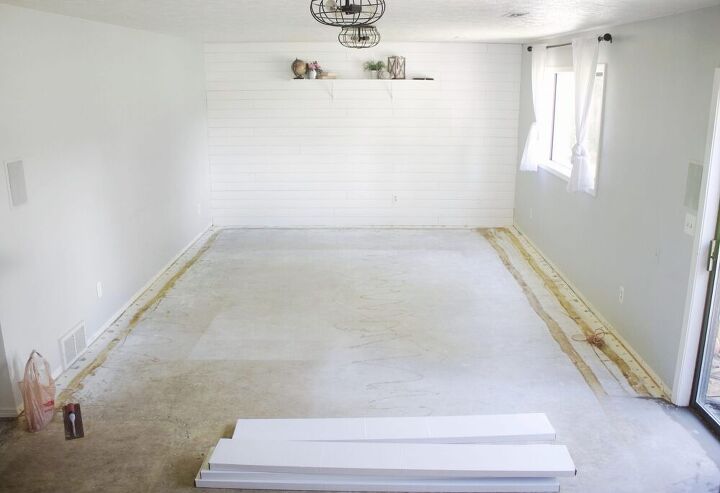
We removed the carpet six months ago, scraped all the glue off the floors, removed all the tack strips, and cleaned it well.
Before we placed the floor down, there was one section by the door that we had to level.
Once that was level we could begin! We decided to do the flooring following the width of the room, not the length. The flooring upstairs was also going that direction, and it would look odd to start this section going opposite. We also didn’t want it to look like a bowling alley, following the length of the room.
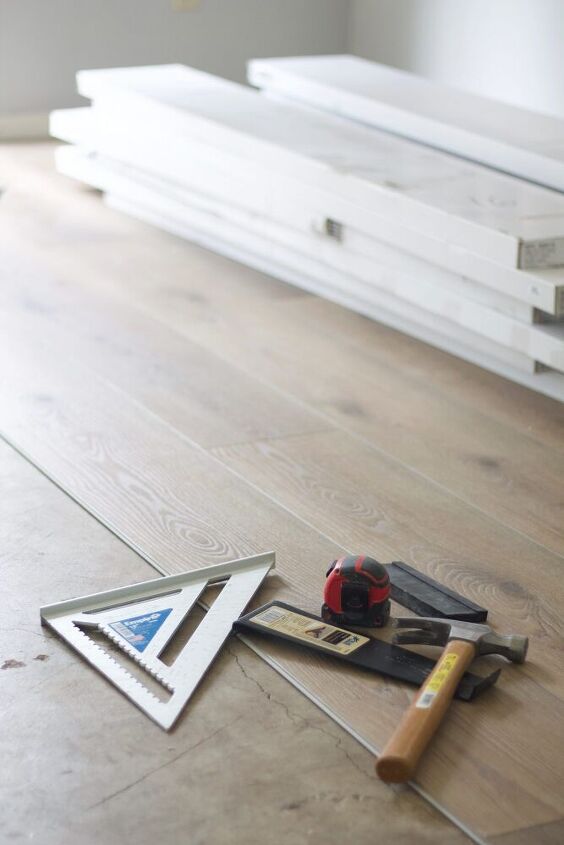
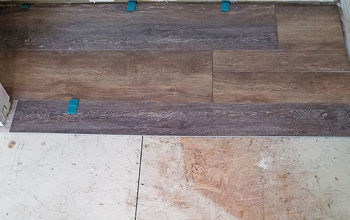
Placing the first plank
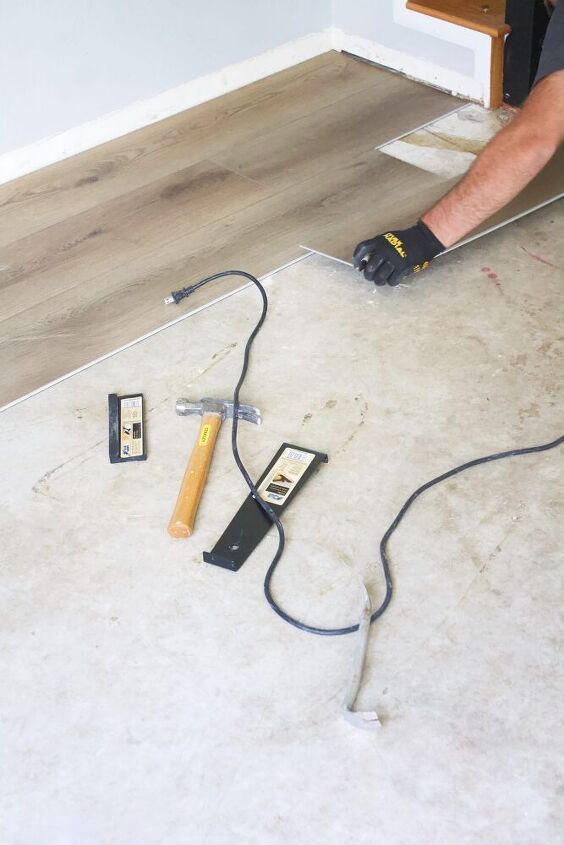
We want the planks to appear staggered and natural. To do this is fairly simple! We started with a full plank against the side of the room. (Tongue side facing the wall) From there, we cut the next plank using a box cutter. You simply use a square, mark the area that needs cut, score, and snap. It will break evenly. If the bottom of the board is still attached, cut that with the knife and place plank into its spot. Take the remainder of that plank, and start the next row. If any of the planks end close to each other, grab another plank, use that one, and then add the extra to the end of it. Keep going until finished!
We started on the side with the stairs, cutting around the stair pattern with a grinder saw.
Once that was done it was smooth sailing. They slip right into each other, and then you simply tap them into place. The whole install of this room took three hours. I feel like the prep took longer than that!
We plan to add white baseboards to this room, as I don’t want to take away from this beautiful flooring with different colored wood baseboards.
Once the flooring is down, it felt a bit dirty from the install process. I cleaned it up with a mop real quick, and it looked even better than before, if that was possible!

We couldn’t be happier with our choice.
I’m so glad I waited (not patiently at times) for the right flooring to show itself. This is the perfect finishing touch to this room, and I’m so grateful it will be beautiful and durable for years to come.
We’ve already had our fair share of water, dirt, and grime over it’s surface, and every time, it’s cleaned up beautifully.
Q & A: Common questions answered
I asked for my Instagram friends to send in questions about the flooring, and I got some great ones! Here were the commonly asked questions and the answers.
QUESTION. Are the floors rough and cold? That’s what I think of when I think of stone.
ANSWER: Quite the opposite. I find the floors smooth and comfortable underfoot. With the built-in padding on the back, they have some give to them, making them easy to walk on, the kids to play on, and they aren’t super cold in the mornings.
They also state this on their site: We use a 1.5MM IXPE underlayment. Our underlayment is made of cutting-edge Irradiated Cross_linked Polyethelene, the newest advance in foam technology. IXPE is a closed-cell foam that is 100% waterproof, impervious to mildew, mold, rot, and bacteria. IXPE is an excellent insulator and has an excellent IIC sound absorption rating of 60. This all helps Stoneform feel warm underfoot as well as dampens sound.
QUESTION: What does it feel like when you walk on it? Tile? Hardwood? LVP?
ANWER: If I had to relate it to one of these, I’d say wood I guess? It’s not cold and hard like tile, but it doesn’t have a plastic feel to it like LVP does. It just feels smooth and almost soft. I love it!
QUESTION: How to you clean them?
ANSWER: I used a Norwex Microfiber mop. I just use hot water, as the microfiber picks up dirt and grime without the need for soaps or chemicals. When I went to look up the info on their site, to make sure I told you correctly, they also said this:
Typically, we recommend plain water and a damp microfiber mop to clean our floors. If a cleaner is used, we recommend Bona Hard Surface Floor Cleaner. It is important that only a PH Neutral cleaner is used on Stoneform. Using cleaners that are not PH Neutral results in an unwanted residue that attracts dirt and dust and causes a haze on the finish of Stoneform.
QUESTION: Do the floors scratch?
ANSWER: Nothing is 100% scratch-proof. But HEWN Stoneform floors are close! I placed these felt pads I purchased from Amazon on the bottoms of all my tables and furniture in our living room. These floors can take a beating, but if you’ve moving furniture or large items, use common sense and pick them up.
QUESTION: Any long-term care required?
ANSWER: Nope! Just take care of them and they’ll last for years and years. They have a 20-year residential warranty. So you’re good to go!
Overall I’m super impressed with HEWN
Their customer service was amazing. They were willing to help and answer questions as needed. One of my favorite things about the flooring is the long, big planks. They make the room look spacious and uncluttered. The color is perfect, and it’s held up to a lot of pool water, Bruno's hair, and drool, and everything else we’ve thrown at it these past couple of weeks.
Have more questions? Let me know in the comments or shoot me a message over on Instagram. And make sure to Follow HEWN on Instagram as they share lots of tips, advice, and beautiful flooring on their page!

Comments
Join the conversation
-
The floors look amazing!
-
Floors look great. Another great product to add for the DIY. Composite flooring made with almost 70% limestone and 30% PVC. Similar to composite decking, wood fibers and PVC. As with most flooring options comes with padding installed so no underlayment needed. Great share


Frequently asked questions
Have a question about this project?
do they run higher than the laminate floors.