


How to Install Peel and Stick Tile in 5 Easy Steps

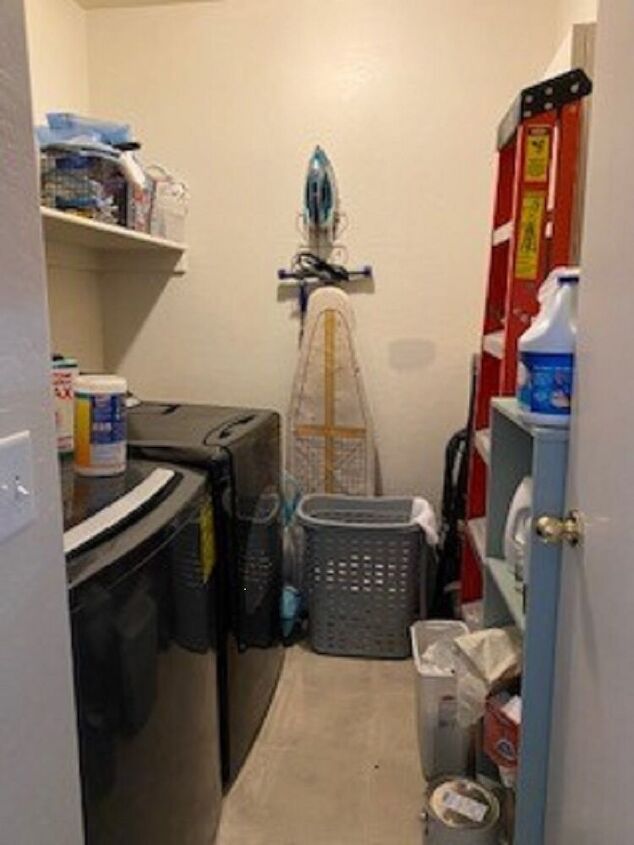
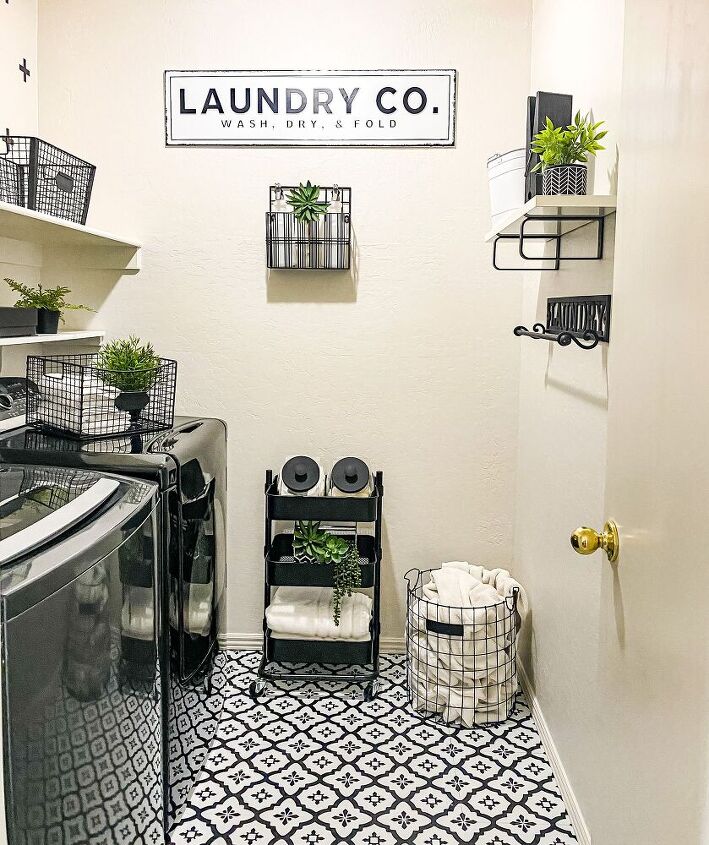
Have you ever heard the story If You Give a Mouse a Cookie? Well, that is the story of my laundry room makeover. New flooring was not originally in my plan, or budget. But once I painted the walls a brighter white, the existing flooring looked dirty and yellow. I was just going to cover it with a rug, but then I would need a rug pad, and by the time I added up that cost, it was less to just slap peel and stick tile on it.
I realized that Joann Fabric carried Floor Pops by Wall Pops, and they accepted coupons on the Floor Pops! Using a 40% or 50% coupon each box made the total come down to $10-$12 per box! So I could purchase the 5 boxes of tile that I needed for less than a larger rug and rug pad! Installing the peel and stick tiles was not hard at all, but I did make some mistakes, and learned a few things along the way, and figured I’d share it all with you in these 5 easy steps to how to install peel and stick tile!

Supplies Needed:
~Enough boxes of tile required for your square footage. Be sure to look at the lot numbers on the back of the box, and buy the same lot numbers. The pattern will not line up otherwise. Also be sure to include some extra for messups!
~Glue-E600 or Gorilla glue
~Tile roller
~Speed square
~Laser level-strongly suggested, but not needed
~Chalk line-strongly suggested, but not needed
~Scissors or paper cutter
~Tape Measure
~Contour Gauge
1) Mark the center of your room
(This is one of the steps that I failed to do. To do this properly, we really needed to move the washer and dryer out of the room. But since there was nowhere in the house to move it, I just scooted them all the way to one side of the room, laid the tile, and then all the way to the other. DO NOT DO THIS!!! )
To mark the center of your room properly, everything needs to be moved out. Then, measure the width of the room, and the length of the room, and figure out the half-way point of both. Where the half-way point of the length and width intersect is your center point, mark it.
Then, take a piece of the tile and lightly with pencil mark the center point of the tile. Line the first piece of tile up with the center mark on the tile and the center mark of the floor as best you can. Do not adhere at this point!
To properly lay tile, you start in the center of the room and work out, so you will want to know where the exact center is.
2) Draw a line across the room both horizontally and vertically
(Again, another step I did not do. Trust me, and do it!!! Your tile will turn out much better! )
Using a laser level and chalk line, or very long straight edge, draw a line across the room both out from the top, bottom, right, and left sides of your center tile. This line needs to be straight and level as possible. This will give you a guide to be sure that the next rows of tile will be straight and level.
Doing this one time should give you enough of a guide to get started, but if you are nervous, then continue the process of drawing very straight and level lines every 12 inches, or whatever dimension your tile is.
3) Lay all of the tile out first, do not adhere!
Lay all of the tile out first, with the exception of any edges that need to be cut. Be sure that the pattern lines up exactly with each tile (you may need to rotate each tile until it lines up). Look for any defects on a tile. Any tiles with defects can be used for cut pieces on the edges. Label the back of any imperfect tile.
*The directions on the box say to lay the tile out flat for 48 hours before installing to acclimate to any temperature changes. I didn’t do this, and didn’t have any problems with the tiles sticking. But my house was about the same temperature as the store, and I didn’t have them delivered or sitting out in the heat or cold.
4) Begin Installing
Finally, you can peel of the back of the center tile. Make sure that you install the tile back in the exact center. The tiles are pretty easy to deal with and can be peeled back up easily if you make a mistake.
Roll the center tile with the tile roller to be sure that it is completely adhered. Start with the next tiles around the center, and then you can go line by line, or whatever process works for you, rolling each tile to adhere. Use the glue if you find there are any tiles that are not adhering, and then use the roller over it. I didn’t have any tiles that wouldn’t adhere, but I had to glue down some of my existing flooring that was coming up before I could put the new tile over it.
5) Cutting the edges
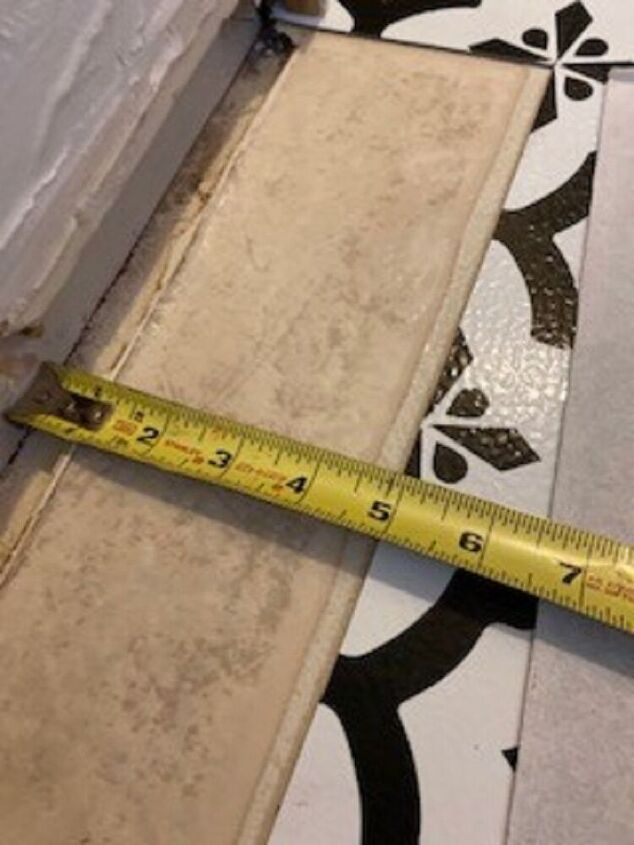
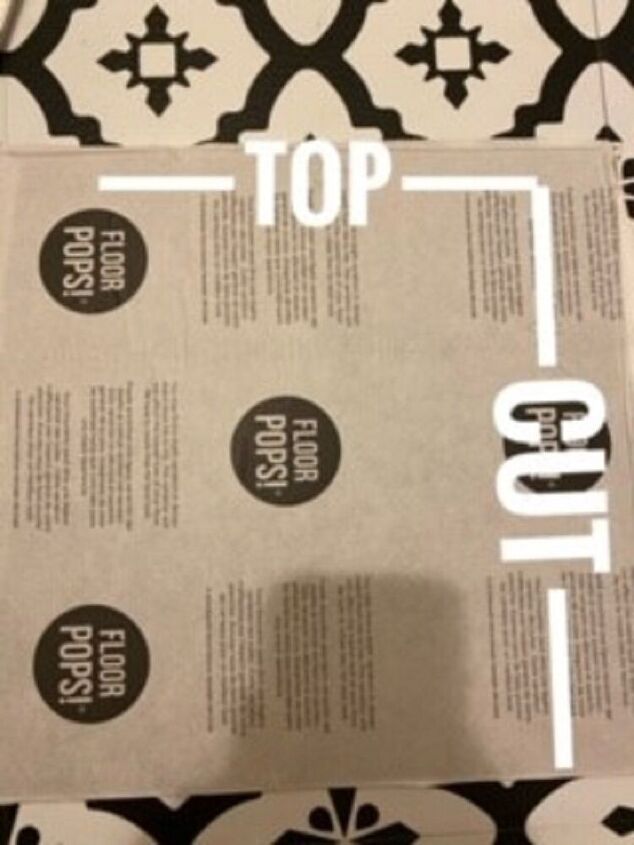
You should now be left with the edges. I did the straight edges first. Measure the width between the wall and the edge of the existing tile. Next, match up the tile as best you can to be sure the pattern matches, then label the back of the tile “top” and “cut” for the edge that needs to be cut. You will save yourself a lot of wasted tile and time if you do this!
Then, transfer that measurement from the UNCUT side. For example, if you have 11 1/2″ from the edge of the wall to the edge of the tile, measure out 11 1/2″ out from the side that is not marked “Cut” and make a mark.
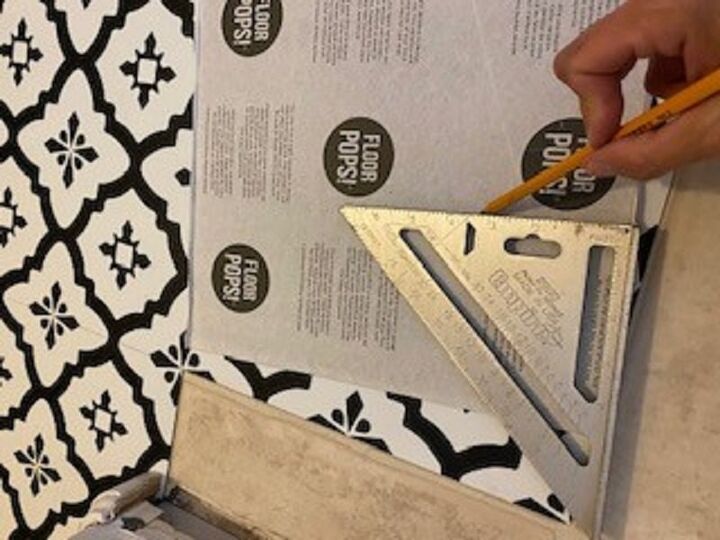
Next, draw a straight line across the tile at your measurement tick mark. I like to use a speed square because it ensures a straight line. My speed square was shorter than my tile, so I just drew the line half way, then flipped the tile upside down and continued the line.
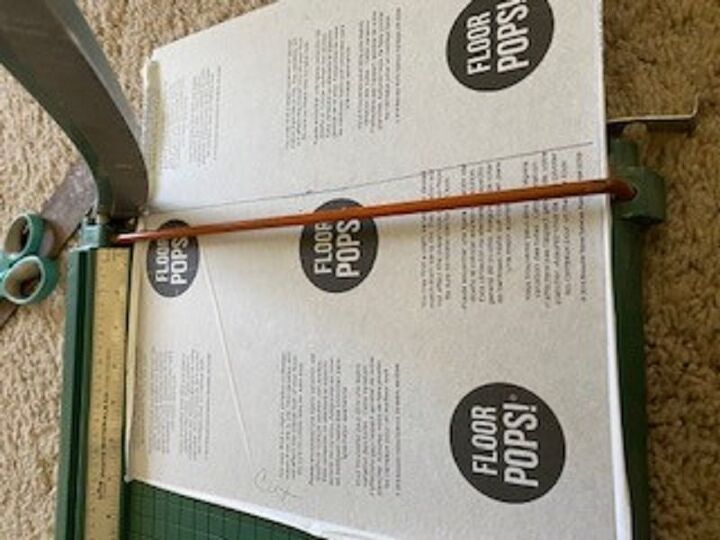
Finally, cut along the line. I am horrible at cutting a straight line with scissors, but you can use scissors, an exacto knife, or a paper cutter. I chose a paper cutter, because I cannot cut a straight line otherwise. The tile cuts very easily with all three.
Continue measuring the space between the wall and the edge of EACH piece of tile. It’s a little tedious, but it goes quickly. It’s doubtful that anyone’s wall is going to be the same level edge across the room. Mine differed by over 1/2 an inch. Do not skimp on this step!
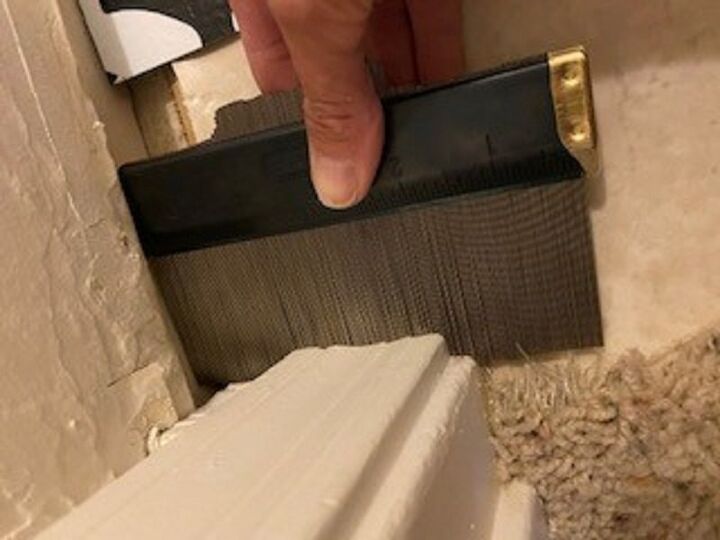
Now you should only be left with any corner pieces, or pieces around pipes, moldings, etc. This is where the contour gauge comes in, and any tiles that you marked flawed for cutting. Line up the tile as best you can to match the pattern up, then mark “top” and “cut” and any other notes you think necessary. Press the contour gauge firmly all the way into the moulding, baseboard, etc. then remove. You can trace the outline on the front or back of the tile, that is up to you. But if you trace it on the back of the tile, be sure to flip the contour gauge over since the backside will be the reverse of the front. I will tell you honestly that I STUNK at this part!!! There might be some sort of secret for doing it, but I don’t know what it is. I’m just glad that the only two spots that I had to do this in are not visible!
Resources for this project:
See all materials


Comments
Join the conversation
-
Wow! It came out beautiful!
-
That floor!!! What a difference! You did an awesome job! Now I have to do mine. LOL


Frequently asked questions
Have a question about this project?
I would love to do this in my powder room. The floor in there is 12” tumbled stone that I detest. How could I deal with the grout lines? Would I have to fill them in with caulk or something to keep the peel-&-stick from sinking along the grout lines? Would it even work?