


How To Lay a Peel and Stick Floor

by
Lauren Z
5 Materials
$100
3 Days
Medium
Peel-and-stick vinyl flooring has come a long way and if you are looking for a very budget-friendly way to transform a floor, look no further!
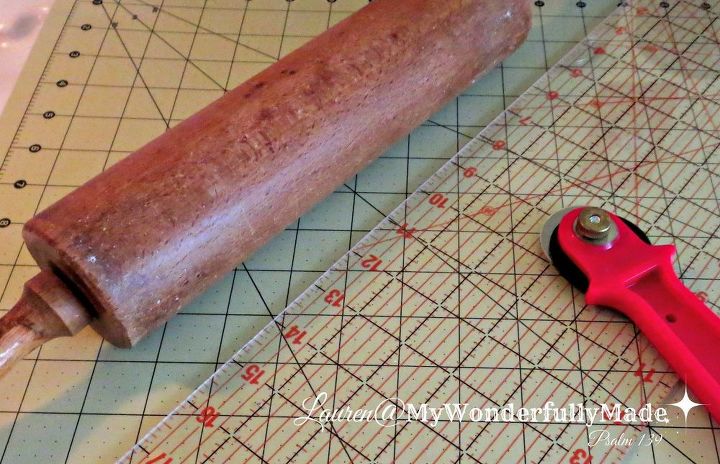
You don't need a lot of fancy tools to do this but you will need:
A vinyl cutting board
A clear ruler plate (like ones used by quilters)
A sharp rotary cutter or X-acto knife
A rolling pin
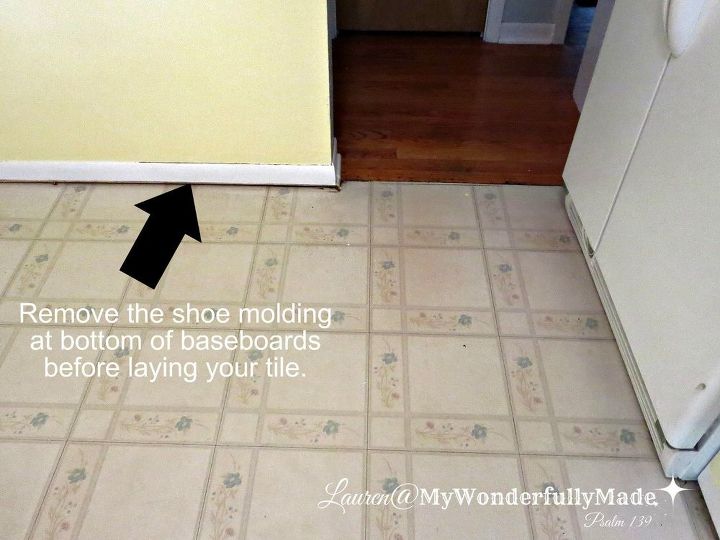
Ugly, right? There are a few prep steps you will want to do before you get started. First, remove the 3/4" shoe molding. This is the molding that is between your baseboard and the floor. You have to remove this to make sure your tiles go right up to the wall. Second, scrub, scrub, scrub and then scrub again. You want a super clean surface so your tiles will adhere properly. Be sure to let it dry thoroughly and then you're ready to begin.
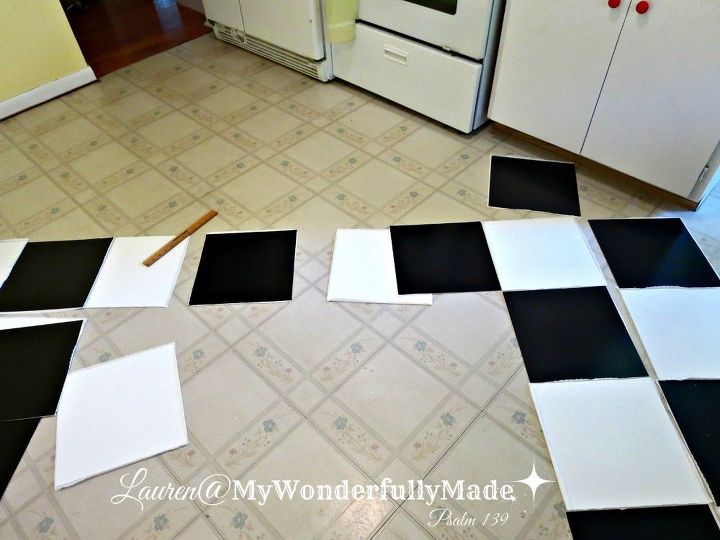
Do not remove the paper backing from the tiles yet. First decide if you want your tiles to go horizontal/vertical or in my case on the diagonal. Once you've determined that, you are going to lay the tiles out. It's best to start in the middle of the room and work out to the edges.
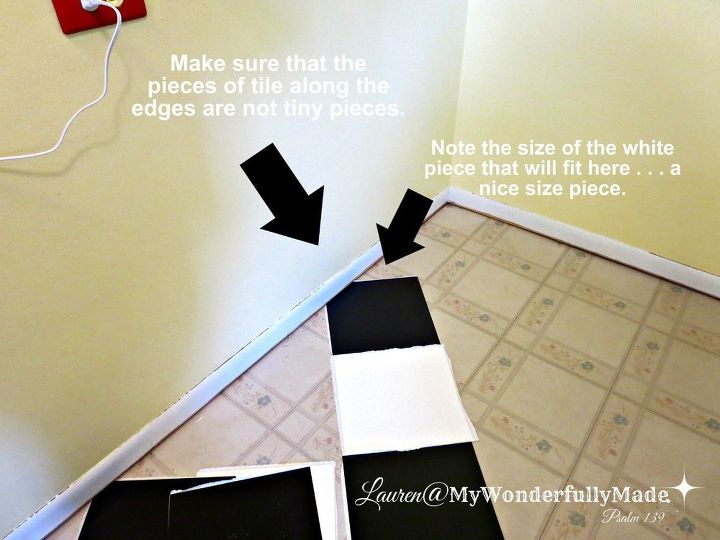
When you reach the edges, you want to make sure that there are not going to be tiny little pieces that you have along the walls. Look at the picture and imagine the white piece that will go in next to the black by the second arrow. It will be almost a full triangle . . . that's good. You don't want a bunch of little 2" pieces. Not only do they usually not stay in place but they look sloppy. This part IS time-consuming but you'll be very glad you took the time once the floor is complete!
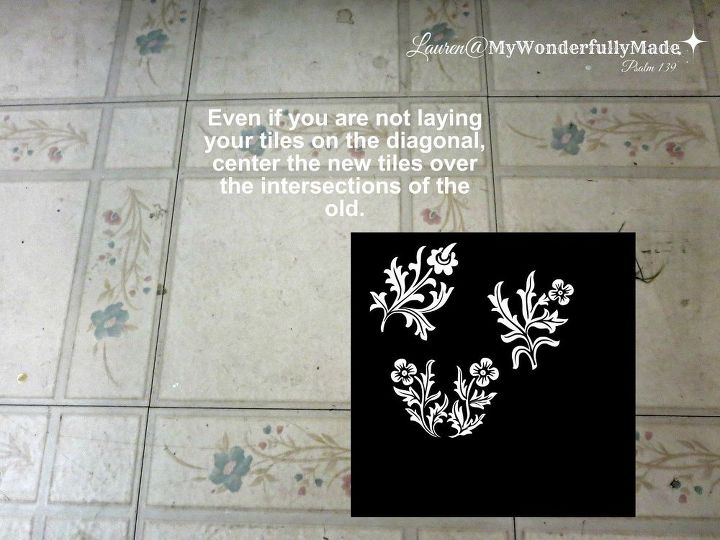
Here's another important tip if you are laying tiles on top of an existing floor with square tiles. Don't place the tiles along the same lines as the old floor. You want to center the new tiles at the 'crossroads' of the old tiles. This will prevent separation and will give a nice, finished look.
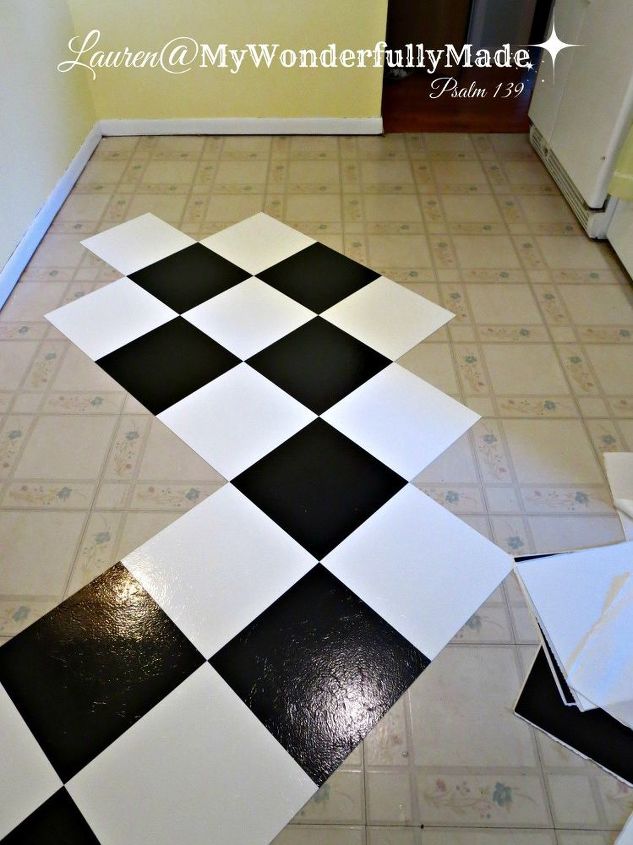
Now you're ready to begin sticking the tiles to the floor. Go back to the center of the room and find that one tile that all the others will radiate off of. BE 100% sure that this is the right placement because remember, all of the other tiles will be dependent on this one so you need to get it right! Then . . . peel and stick! Work towards one wall at a time cutting pieces to fit against the wall as you go.
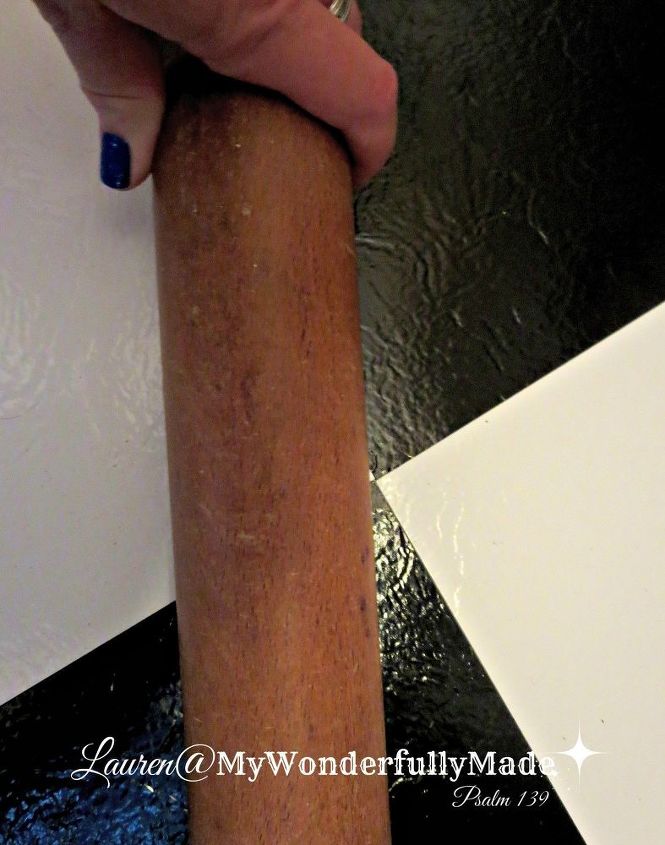
As you lay the tiles and they intersect, use the rolling pin to roll over the intersections and edges to completely seal them to the floor and smooth the seams.

Use your cutting board and ruler to measure and make sharp, clean cuts.
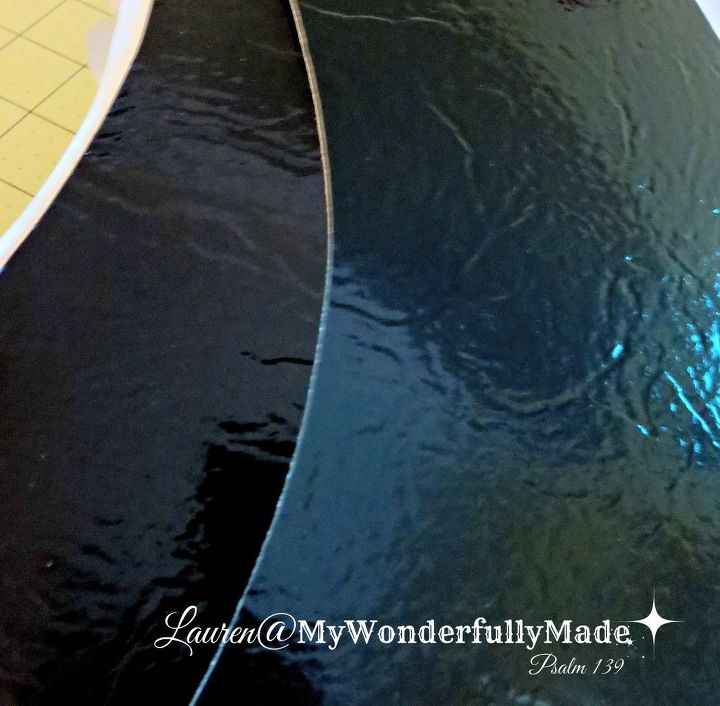
The rotary cutter is best if you have to make curved cuts. They're really easy and clean with this tool.
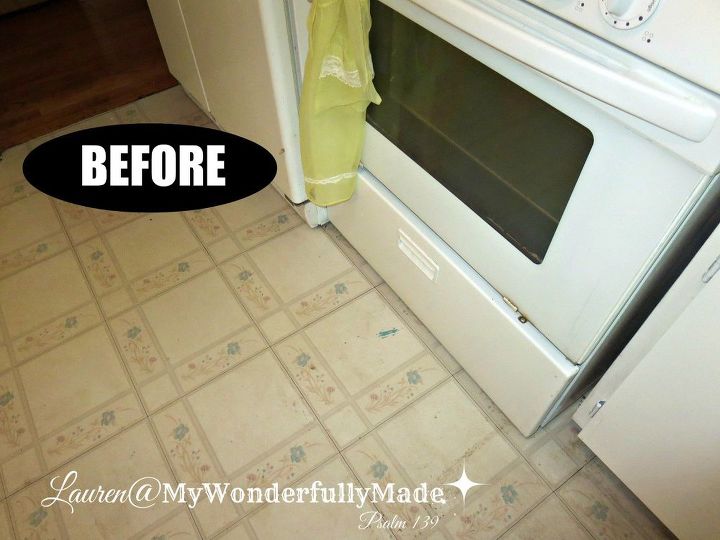
Here you have the 'before' . . . awful!
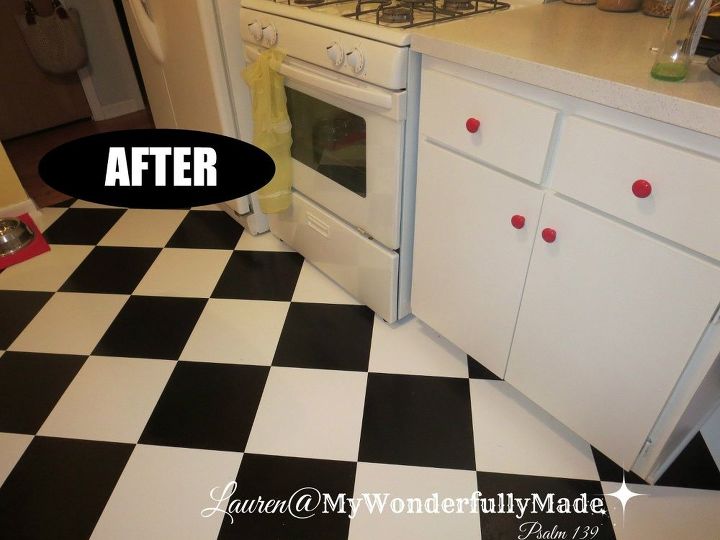
And here, the 'after'! For less than 100.00 I have a new kitchen floor that I love. Having never done anything like this before, I can easily say it was worth the effort and time and anyone can do this!
Resources for this project:
See all materials


Any price and availability information displayed on [relevant Amazon Site(s), as applicable] at the time of purchase will apply to the purchase of this product.
Hometalk may collect a small share of sales from the links on this page.More info
Want more details about this and other DIY projects? Check out my blog post!
Comments
Join the conversation
4 of 24 comments
-
Great Job! Thanks for the advise about not laying new tile the same way as old seams. I would have made that mistake! Now I won't! :)
-
I love it and the tips you gave will now help me to do peel and stick in our kitchen. We need a whole new kitchen but this is perfect and reasonably priced as a temporary fix.


Frequently asked questions
Have a question about this project?
Did you also line the points of the tiles with the wall so that they were laid in straight lines? I couldn't tell from the pictures. Nice improvement over what you had!
Did you move any of the appliances out or just butt the tiles up against them?
Will it be OK if I prime my subfloor first and then also add extra adhesive so I can ensure everything sticks?