


My Paper Bag Floor Experience!

5 Materials
$80
4 Months
Easy
I have been watching for quite some time now especially with interest in others experiences with a "Paper Bag Floor"
I was very apprehensive to try the idea as there were so many conflicting processes and quite a lot of failures, (in my opinion)...
I decided to go for it! The carpeting in the Master Bedroom was old and the Pergo flooring that I had installed in the living area was quite costly.
So I left the baseboards, (in anticipation of necessary quarter round) removed all the tackless filling the holes with a mortar I had leftover from a previous project. Cut both carpet and padding in in 3 ft. sections, rolled and tied it up for our garbage men.
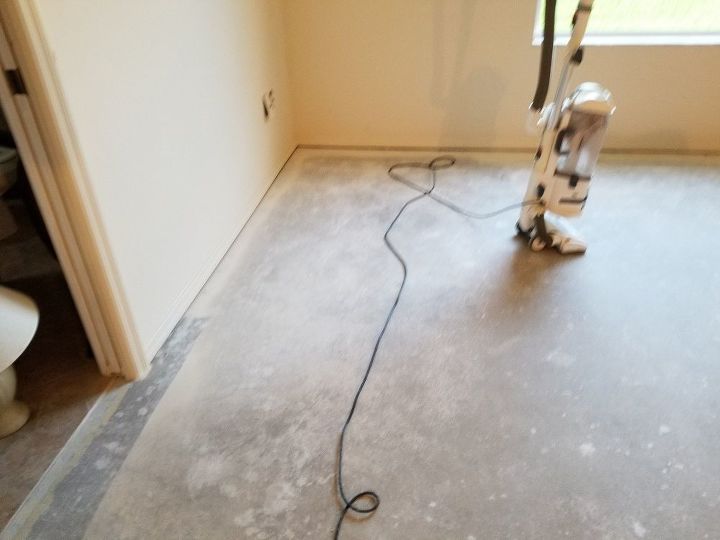
While the floor was down to concrete, I decided to go ahead and paint the walls. I did not anticipate the blotchy concrete being an issue, but it was.
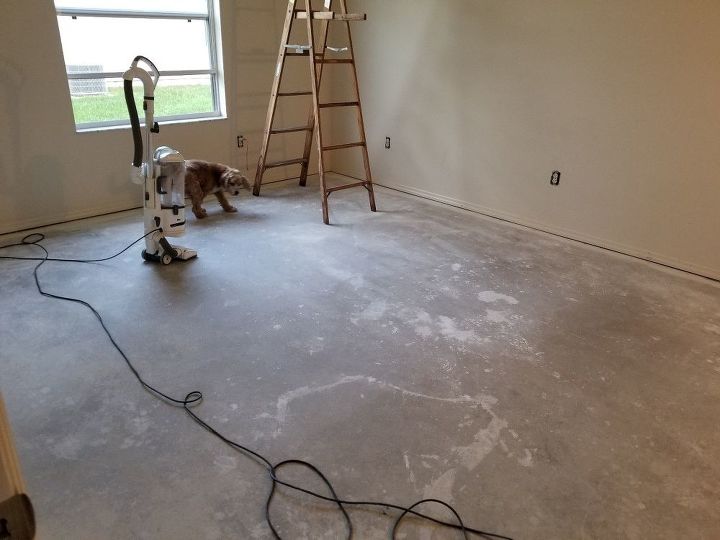
The builders must have had a paint fight, because the floor was all different shades, even areas of paint that clumped up. It was necessary to scrape the paint and sand areas that were bumpy.
My poor dog didn't know what to think!
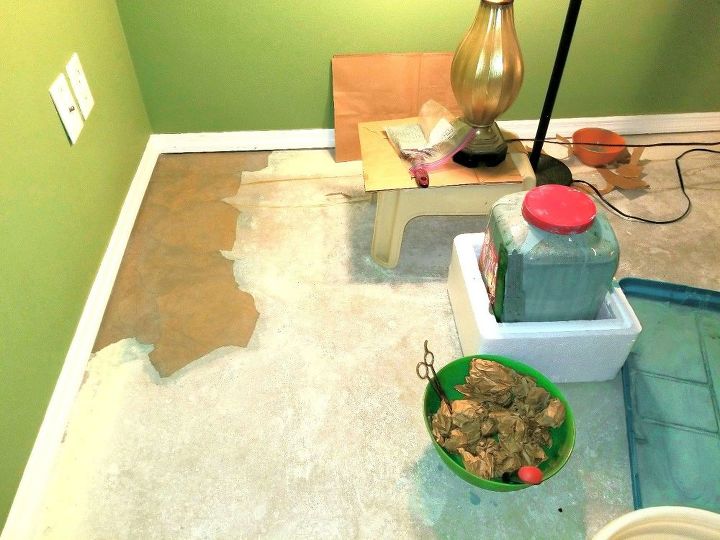
After I painted the colors that I thought I'd like... I started on the floor and added green Rit dye to the glue mixture (which was another blunder, you'll see - there were several). After it dried the next day I was amazed at how the floor had absorbed the glue, and the wrinkles that worried me were gone, just the veins were left.
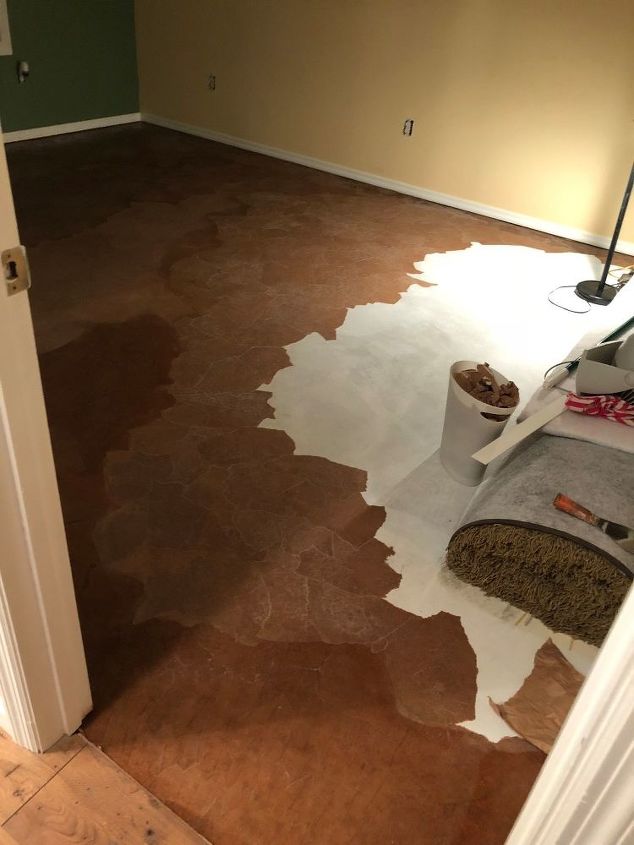
The greens totally clashed, so I ditched the huge mixture of green glue and started over. I tried to sand the color off but I was also sanding out the veins so after it was all smoothe I papered over the existing paper and continued on with just the normal glue recipe which is my own concoction (half glue half water).
****What I did not add in my original post was that the next day or *whenever I could focus on this, I used a fine grit paper - made a block out of it, and sanded the creases that did not stick to the concrete to make the surface to the swipe smooth with no digits or snags - very important if your going for a leather look to sand out the minor imperfections (**Always use latex gloves, it saves on the wear and tear of your skin ** blunder of that soon to come:....you'll see !!)
The Big Blue Mixture had to go, Sand away....
I found it necessary to white wash/paint the floor because the discoloration of the floor was showing thru on the paper bag when dried.
This picture was taken when it was dark out
But For the most part I got the hang of it pretty quickly, and I underestimated the amount of paper bags I would need to crumple up. That was the most time consuming part of the whole project.
***If you use regular grocery store bags, you will need to rip out the printing on the bag, While ripping keep in mind you will need straight edges. So designate and area of your pile JUST for straight edges, whether corners or nice straight side. Rip the other sections left into small swatches (the size of it is up to you and the look you are trying to achieve) just keep the straight edges separate because you will eventually need a square or straight line.
After you have ripped your bags to shreds, separating pilies (and you think you will have enough - Ha, Ha you won't LOL.....) Spray each piece with a spray bottle of warm water (easier on the hands) crumbling each piece into a tight ball. MAKE TWO PILES: One for the corners the other pile for middle pieces) thrown them in their respective piles and let them dry
I did my bags at night so the next day they were dry and I was ready to lay them down. Start in a corner and use all your edging before you use the middle pieces. Start to set your pattern. I brushed a a thin coating of my glue mixture on top of the area I was working with. Actually dip each each ball of paper in the glue mixture - You will need to overlap it at least by a half inch because your shrinkage occurs while it dries. When it is dry take a fine grit sandpaper and smooth out any creases in the paper and run your hand across it to feel any unforeseen creeces.
Not necessary to smooth each and every wrinkle as it dries the concrete soaks up the moisture, when dry for the most part all that should be left is left is the veins and creases from the crumpled up pieces of bag. Time takes time, and I wanted the look of leather not stone, so it took what it took... Just be sure to sand over the area the next day for a smooth gloss look.
This particular evening, I got anxious and applied the Minwax PolyShades stain and polyurethane 1 step - color "Pecan Gloss". I was starting to have high hopes that it would come out great. I couldn't wait to see it in the daytime. The next day it looked great - then I did the unthinkable. I went to home depot and bought silver slivers of glitter in colors of silver, white, black etc. That evening I applied the second coat of Poly and lightly sprinkled about 3/4 of my floor! The next day I realized that I ruined the leather look and it looked like a garage floor!  Goodness NOOOOOOOO!!!!!
Goodness NOOOOOOOO!!!!!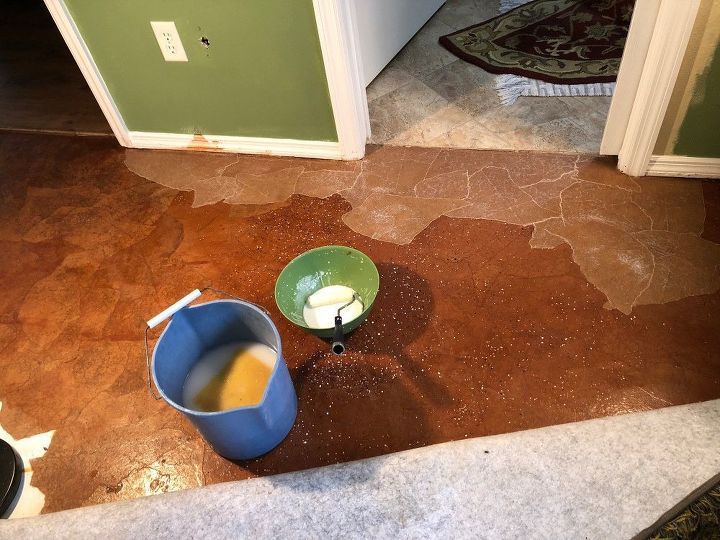
After I had a fit with my stupidity the next morning ("never do anything at night wait until the next day so you can see how badly you're screwing up, before you ruin the rest of your efforts"). These sparkles were stuck fast to the wet Poly that I put down and had now dried to the cement paper bag floor, I almost cried at the sight of my "leather floor"... Goodness Gracious - 1/3 of the floor was sprinkled with these tacky silver slivers.
I dropped to my knees with a sharp spackle knife and started to scrape these little buggers off. Quite a few were easily removed with the scraper, but a lot of them were stuck fast to the Polyurethane so once again, I started sanding them off but there quite a few dots left which meant the areas would have to be repapered.
Once again. I had to start over covering the sections that were smooth. At this point I had become so disgusted with this endeavor that I walked away from it only to come back with a clearer head and fix this mess.
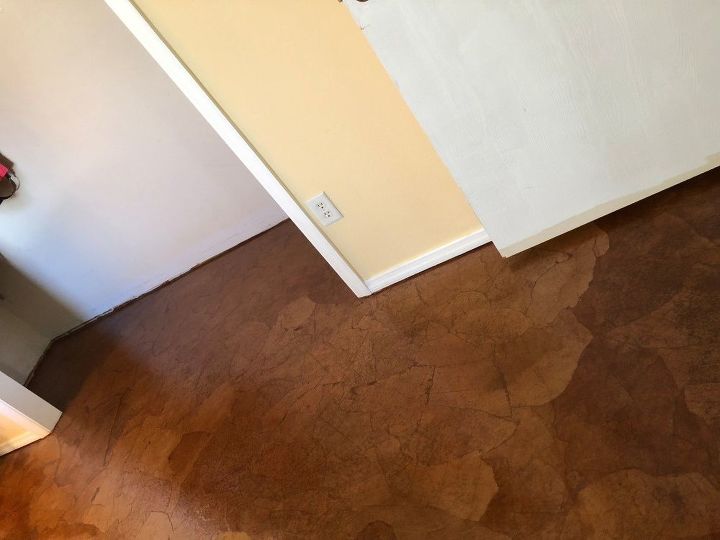
After I finished the repapering, I continued to finish the floor. This area in the closet, and the rest of the floor has 1 coat of polyurethane on it. I have yet to put down the quarter round but the trim is painted and ready for it's final coat.
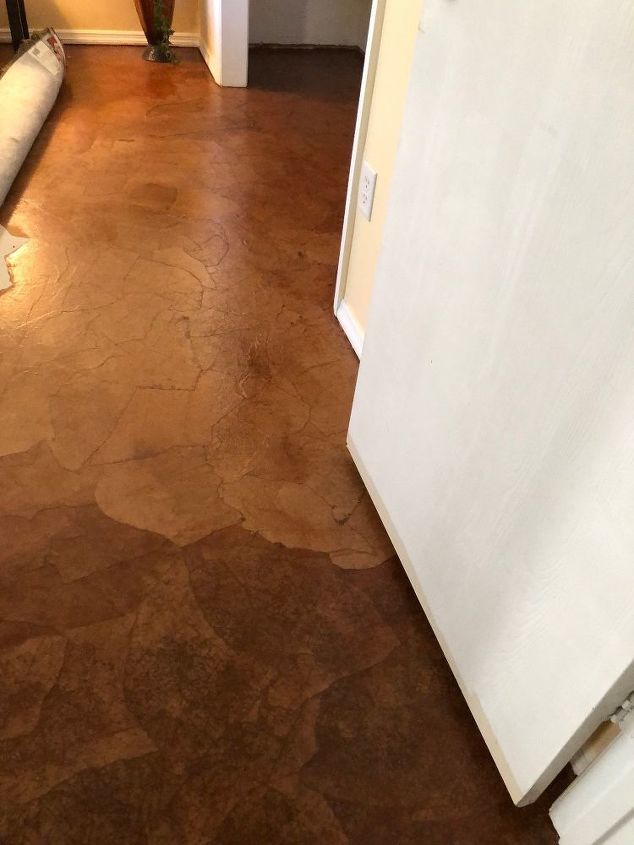
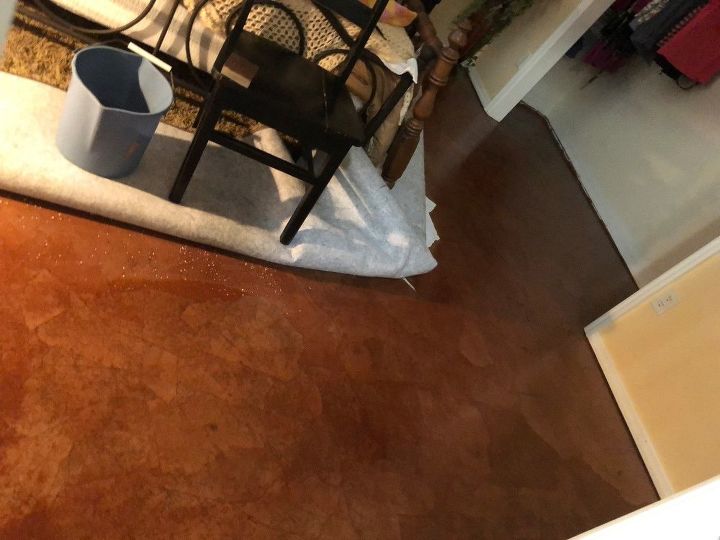
Lighter shade w1 coat the darker MULTIPLE 4
Moving right along and anxious to complete this project I began using the polyurethane the lighter area here is 1 coat. The darker portion of this picture is the entryway to the bedroom that I have put around 4 coats of poly on it because I figured this would be a big traffic area and I wanted it to be protected from normal wear and tare. I put 2 coats of poly on the rest of the floor and it was finally finished. The next few photos are the finished project after I moved the area rug and furniture back into the room.
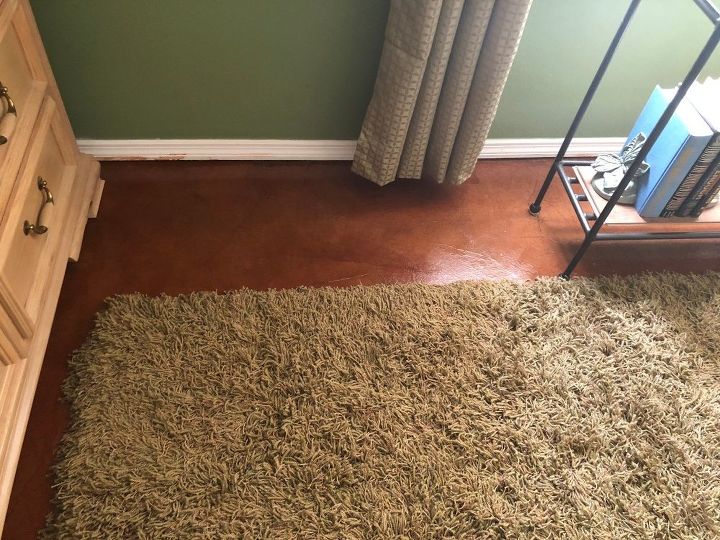
Just before I rolled the carpet out, this is how the closet and end of the rug look. The picture was again taken at night. It came out really sharp. I was satisfied that I took the time to fix my errors and learn from them. The Guest room is next I suppose, but I am not in any hurry just yet. Since it isn't 100 degrees every day just yet, I am spending my time outside landscaping which is a whole other project. :)
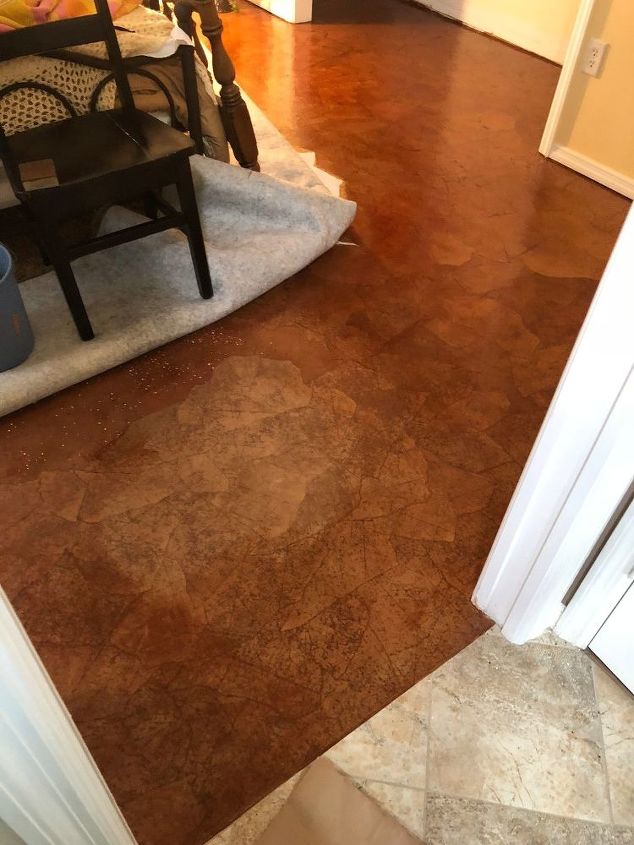
This area with the newly installed bag floor still needed multiple coats of polyurethane as it is the entry way from the master bath, and I wanted to be sure it withstood a higher traffic area than the rest of the room. After this was completed it was time to move the furniture back after letting it dry for several days.
At this point I was just waiting for the Poly to dry. Checked for surface blemishes that could be sanded away. I wanted a look of shine. I was happy with the results.
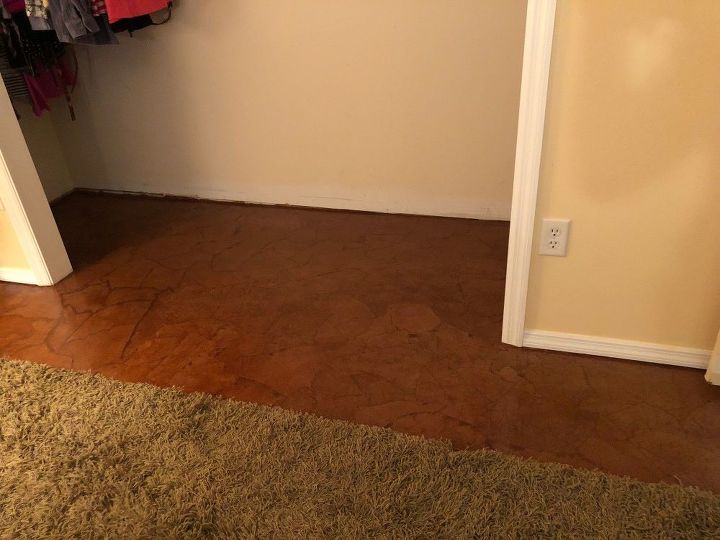
Here I had to put the molding back inside the closet.
HUGE HUGE TIP:
***One of my other "learning experiences" that I forgot to tell you about is definitely worth mentioning:
LISTEN UP:
I dropped the polyurethane that I kept in a gallon glass jug (easier to seal and stay liquid) anyway I dropped said gallon of Poly on the cement floor and it shattered into a million shards of glass. It was everywhere. I quickly began scooping it up with my bare hands and when it was mostly all off the floor, i realized my hands were destroyed. It was stuck to my hands like glue.
I tried everything to get it of my hands, nail polish remover, turpentine, acetone, gas, soap and water, nothing removed the sticky poly from my hands - I thought about going to the ER but just before, I googled it and found that OLIVE OIL - YES believe it or not, Olive Oil removes pretty much any oil based product especially in my case "Polyurethane" from skin. Within 3 minutes of lathering my hands in "olive oil" they came out beautifully! POLY GONE and left my hands clean and nice and soft!

I didn't think to take a picture of the entire floor because I was anxious to get the furniture out of my living room AND I had Guests arriving for the Florida season Jan, Feb, and March. Hindsight is 20/20, but after all the blunders I was anxious to geterdone! LOL
No Quarter round yet, but it doesn't look like stone to me, It looks like a leather floor. I have to admit, I truly hate that green wall!
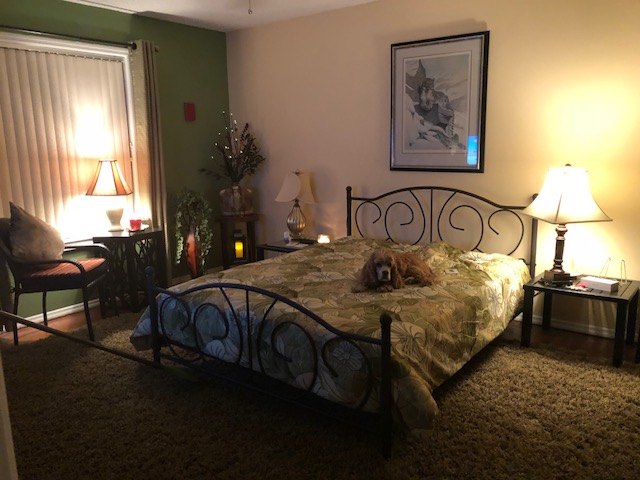
I realize that with the area rug down it is not showing the floor very well, but this floor is tough, it is now down 5 months and the only scrape I have seen so far is one that I did myself in the closet, which is an easy fix. I would recommend that if you are interested in doing this project that you take your time (I took TOO much time) fixing and repairing areas that due to my impatience and inexperience of the process cost just a lot of time. The total project cost just over $80.00: I got permission from Winn Dixie to take as many paper bags that I felt I needed, 2 gallons of Elmer's Glue, 1 gallon of PolyShades Polyurethane and Stain in one step. $38.00 in Home Depot, I am not even going to put the cost of those damn sprinkles in cause that was a huge waste of TIME (not so much money, they were like $5.00) At lease 200 hours (maybe more) of my time - I lost track. But it came out gorgeous (it looks like a leather floor which is the look I was going for) and I have one other bedroom to take the carpeting out of, but I am going to wait until it is hurricane season down here before I go with that project as I am working on the outside of the Villa before it gets too HOT down here to work outside. If you have any questions, or I forgot to add any details feel free to message me. Happy Papering!!!
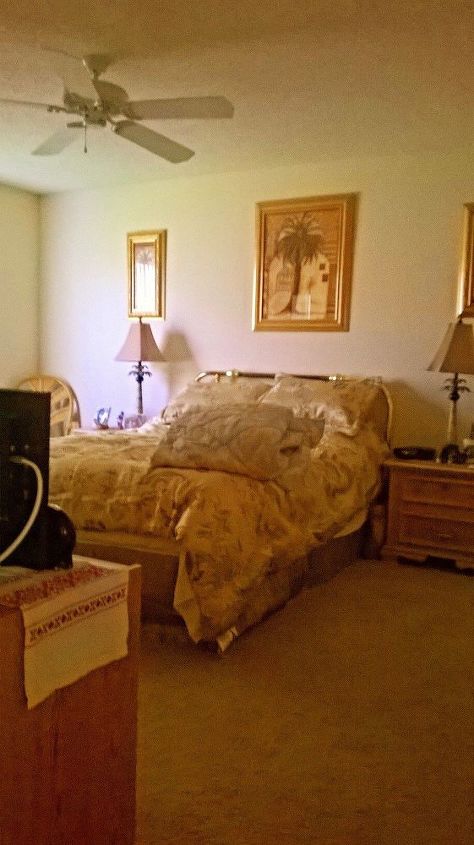
This is the Master Bedroom the day I closed on the house. I had to de-Fugly the MB and lose that nasty 16 year old carpeting. Amen!
Resources for this project:
See all materials


Any price and availability information displayed on [relevant Amazon Site(s), as applicable] at the time of purchase will apply to the purchase of this product.
Hometalk may collect a small share of sales from the links on this page.More info
Comments
Join the conversation
2 of 66 comments
-
Do you have any pics of your floor?
-
I did this to my center island and I can tell you it is tough! And of course a fun project. I can't wait to tackle my floor. You did a wonderful job.


Frequently asked questions
Have a question about this project?
Can u also do this inn a old weird preddes practical floor in a 1970's ? And can u do this in a bathroom? I LOVE this flooring idea.
Can this e done on a particle board floor? When we ripped out the carpets, instead of finding wood flooring we found particle board much to our dismay. To buy new carpet would be expensive and we had hoped for wood floors...sigh...now what are our options??
My craft paper has a shiny side and flat on other side, should glossy side be face up or down