


Paint Your Tile Floor

There are countless DIY projects that I will gladly throw myself into; learning as I go and picking up new skills along the way. However, ripping out and replacing floor tile is not one of those things. So, with that being said I had to find some way to spruce up our dated and dark tile that makes up nearly 50% of our downstairs living space.
After a lot of research, reading reviews and technique blogs I decided to give it a go and PAINT my floor.
I had my reservations, especially because this room is our entry way and playroom so I expect it to get a lot of foot traffic, but I went for it anyway.
I have to say that I am pleasantly surprised with how great it turned out considering the cost and time spent!
This whole project took me 3 days, but it would be done in 2 or even 1 if you had unlimited time and no distractions. On the first day I moved everything out of the room and cleaned the tile really well. On the second day I taped the trim off and painted the floors, then on the third day I sealed everything. It really is that simple!

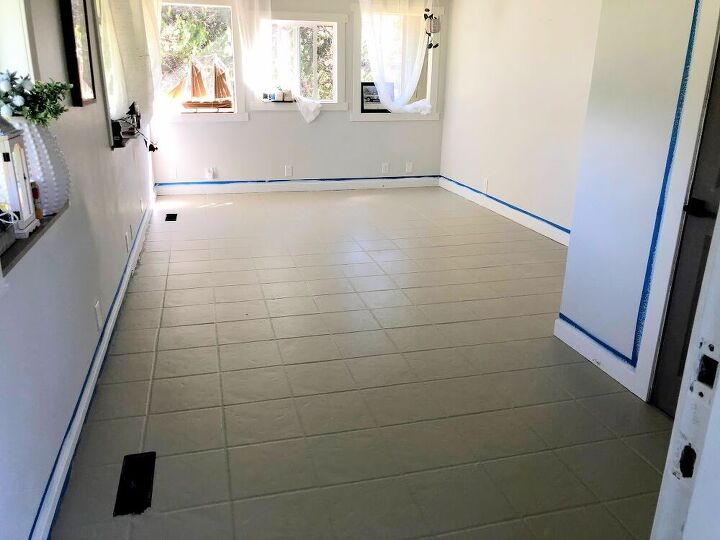
This photo does not do this tile justice. It was a hot mess. The previous home owners had not done a great job keeping it up and it showed. Needless to say, I was over looking at it. It looked dark, dirty and grimmy. Everything about it made the room not feel clean and cozy - which is the way I like my house!
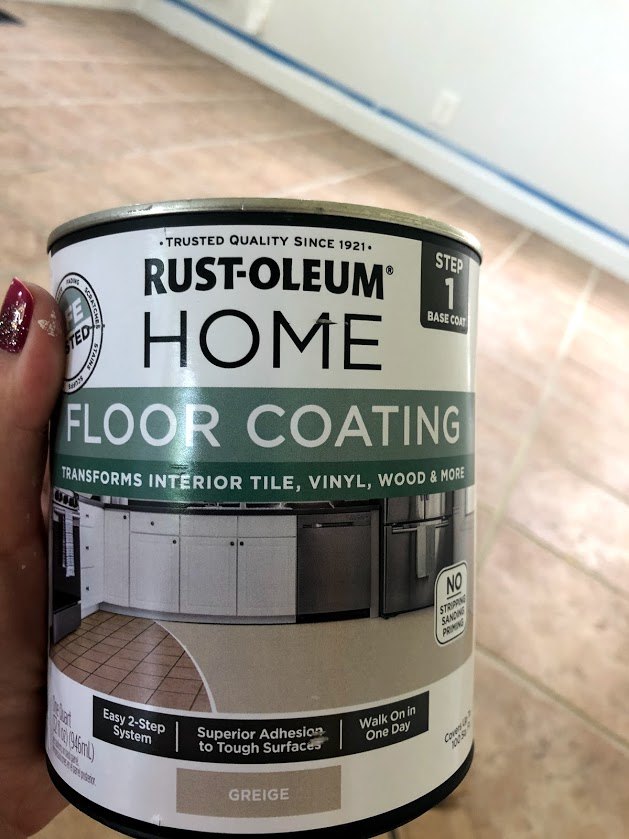
Step one took me about 4.5 house to get the paint on the floor for a roughly 250 square feet area. I used 2 quart sized cans in the color Greige for this project.
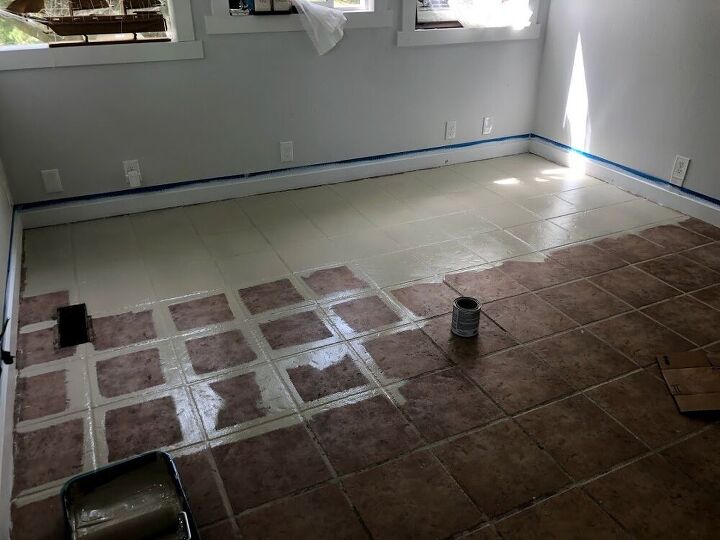
I taped off the trim and got to work. It took me about 3 rows to find a rhythm between brushing the grout lines and rolling the rest. Once I got in a groove I really started to cruise through it.
One of the most challenging things was trying to figure out how to sit/crouch/bend over while I was painting.
I decided to paint the grout lines first because they were lower than the rest of the tile so the roller would just go right over them making it more work in the end.
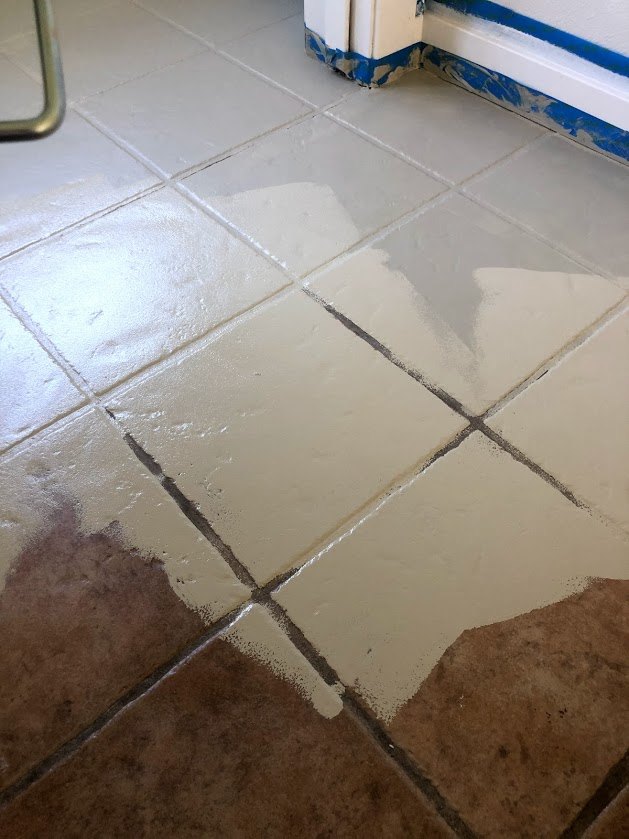
If you choose to not brush the grout lines and they are lower than the tile pieces then this might be the result you get, so you would inevitably have to go back and paint them with a brush or tilt your roller to get into the grout lines.
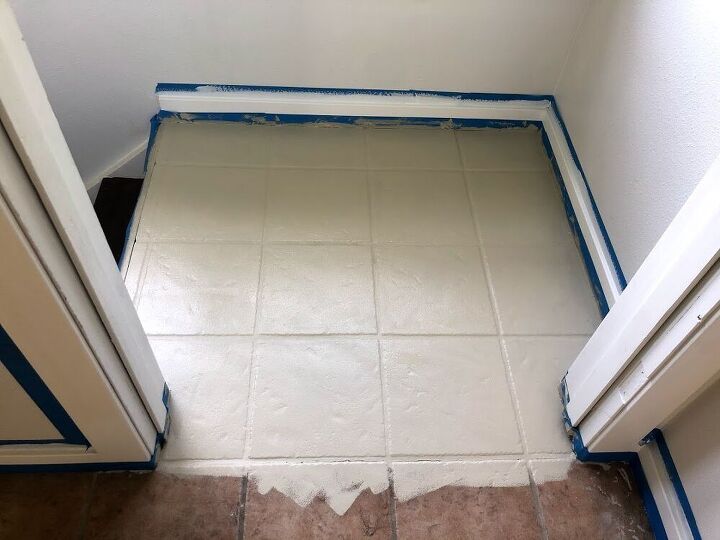
This is the beginning of our entry way. Here you can see the coverage that the paint gave the tile.
I got right up against the trim with a brush then went over it with the roller to give it the same finished looked. This paint is not self leveling, so if you choose to use a brush you will likely see brush marks.
I painted the base color in the early afternoon on a Monday and let it dry overnight and the next morning. Then I painted the sealer on Tuesday afternoon. Now I am going to go back and touch up my trim and get some furniture back in the room.
In the end this was way cheaper and less time consuming than ripping up and replacing all of this tile. I am happy with the outcome and it seems to be durable.
This was done on 6/16/2021.
I will provide updates every 3 months for the first year.
Comments
Join the conversation
-
I found out the blue star means I am part of the Hometalk helper program. This is when I became a moderator reporting inappropriate, rude, bullying content among other things
-
What do you think of the greige color? It looks lighter in your photos than the color on the can. I have noticed some of the rustoleum greys are very cool. I have accent tiles I want to paint, not the whole floor.


Frequently asked questions
Have a question about this project?