


How to Plant Amaryllis Bulbs in Pots

By Hannah Twietmeyer
Fresh blooms aren’t just for spring, though a flower garden full of pastels is a great way to ring in the season. Bouquets can be enjoyed year-round, with or without an occasion. You’re probably used to seeing bundles of poinsettias around the holiday season, but that’s not the only flower you can gift in the winter.
Amaryllises, vibrant in color and tropical in nature, are most often sold during colder months. They’re fairly easy to grow in pots, too, great for those of us who might not have the greenest of thumbs. Here’s everything you need to know about planting and growing amaryllises at home.
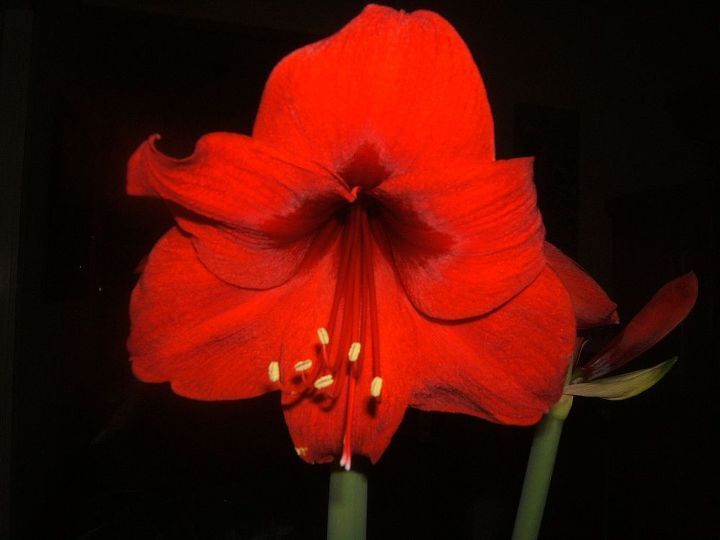
Photo via Sensible Gardening and Living
About Amaryllis
A pop of color is the least you’ll get with a bright bundle of amaryllis flowers. While the most popular colors tend to be red or white, the flowers can bloom in pink, apricot, salmon, rose, burgundy, and more (via University of Minnesota). The flower shape of these beautiful blooms differs by variety.
For the holiday amaryllis (the kind you see around Christmas), the size and shape are somewhat similar to that of a daffodil or lily — trumpeted, with a long stalk.
Exotic amaryllis types are a little different, with thinner, wiry petals. When fully bloomed, an amaryllis plant will stand one to two feet tall, with the flower reaching about four to 10 inches in size.
Greek Origins
When Does Amaryllis Bloom?
Amaryllises often have a planting time between the months of October and April, and they tend to bloom between December and June. However, they really can be successfully planted year-round, especially if done in controlled conditions. After planting, you can expect your flowers to show up in about eight weeks.
According to White Flower Farms, amaryllises are considered to be tender perennials. They’ll come back year after year if you take care of them, but only in climates that suit them, specifically climate zones 9-11. The farther north you go, the more likely your collection of amaryllises won’t overwinter and will instead be considered annuals, meaning they go through an entire life cycle in one season.
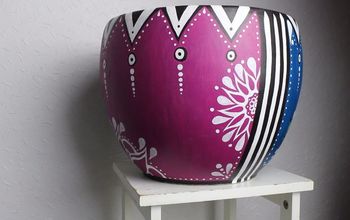
Best Pots for Amaryllis
If you’re growing a bulb inside for the very first time, it’s helpful to know what kind of pot to house amaryllis in. Here are some important tips:
- It doesn’t matter if you reach for a temporary plastic container or a ceramic decorative one—amaryllis isn't picky in what container material it grows in.
- You want to make sure your pot of choice is large enough to hold an amaryllis bulb. For a single bulb, Longfield Gardens suggests using a pot that is around eight inches deep and six inches in diameter. There doesn’t need to be an excess of room, but the bulb shouldn’t be squeezed by the sides of the container. Also, if your pot is large enough, you can plant multiple bulbs together.
- You also need drainage holes in the bottom of your pot, otherwise, you risk standing water and root rot.
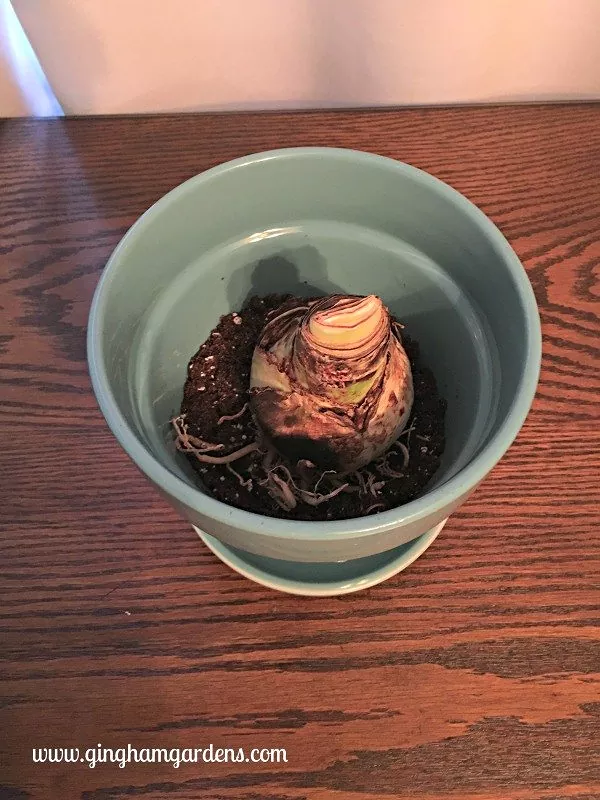
Photo via Joanna - Gingham Gardens
How to Plant Amaryllis Bulbs in Pots
Let’s get to planting bulbs! Here’s how to do it, and we also include some pointers on how to choose the bulbs that will thrive.
Tools and Materials Needed:
- Pot
- Amaryllis bulb
- Potting soil
- Garden gloves
- Hand spade
Step 1: Select the Best Bulb Possible
Bulbs at your local nursery come in all shapes and sizes, but we’ve got a few tips on picking the perfect one. Opt for the largest bulb available, which will equate to more stems, more flowers, and overall a fuller pot. Look for a bulb that is free of mold or soft spots; a healthy bulb will be firm and undamaged. Once you have your bulb, pot, and the rest of the materials listed above, you’re ready to get started.
Step 2: Start with Soil
Equipped with garden gloves and a hand spade, scoop some potting soil directly into the pot. It should cover the bottom and up to about half the height of the pot.
Step 3: Plant Your Bulb
With gloved hands to keep things clean, carefully place your amaryllis bulb on top of the layer of soil with the tapered neck of the bulb facing up. Then, use your hands and the spade to fill in the spaces and gaps between the bulb and the sides of the pot with soil. Don’t cover the entire thing with soil; keep the top third of the bulb exposed.
How to Care for Amaryllis Bulbs in Pots
Planting your amaryllis bulb is easy enough, but providing the correct care afterward is key to a happy, healthy, flowering plant.
Water
Give your bulb a drink immediately after you plant it. Water until the soil is moist, but try not to soak the exposed part of the bulb. Continue to water as the plant needs it and let the top two inches of soil dry out before the next drink. Amaryllis plants do not like to sit in water, which is why drainage holes in the pot are important, too.
Environment
Amaryllis is a tropical plant, but a hardy one. You can start your newly-planted bulb near a window in direct sunlight since heat is an important component to root and stem development. Ideally, the temperature will be somewhere between 68 and 70 degrees Fahrenheit, according to Amaryllis & Caladium Bulb Co.. When flower buds begin to show, you can go ahead and move the plant to a place where the sunlight isn’t so harsh.
Fertilizer
To promote growth and blooming, you may choose to add a high-phosphorus fertilizer to your amaryllis. You can start when it’s a newly-purchased bulb, and add half the recommended amount every time you water it.
Maintenance
You can expect your amaryllis to grow and bloom about seven to 10 weeks after planting the bulb. After the flowers fade, you can go ahead and cut them off, and then the stem when it turns yellow. The goal here is to keep your energy and care focused on the plant’s bulb after the flowering period so that it can rebloom. Continue to water and fertilize the bulb as described above and give it lots of sunlight and it’ll start regrowing in 10-12 weeks (via Miracle Gro).
Photo via Three Dogs in a Garden
How to Grow Amaryllis Outdoors
Although it’s common to pot amaryllis first and then move the bulbs outside when temperatures permit, you can also go ahead and plant your bulbs directly in the ground if you’d like. Just make sure that you’ve cleared the last frost date; even though amaryllis is a generally hardy plant, you still want consistently warm temperatures to help the bulb sprout.
Tools and Materials Needed:
- Amaryllis bulbs
- Garden gloves
- Hand spade
- Fine mulch
Step 1: Select Bulbs and Planting Location
Look for bulbs that are firm and free of any bruises or discoloration. For planting location, carefully select an area with well-draining soil, and make sure that the space will receive about six to eight hours of direct sunlight a day.
Step 2: Plant Bulbs
After determining the best growing area for your plants, glove up and start digging. Using a hand spade, dig a hole in the soil just a few inches deep. Place the bulb in the hole so that its neck is at or above ground level, and then use loose soil to fill in any open spaces. Cover the bulb with about five to six inches of soil and then several inches of fine mulch (via White Flower Farm).
Step 3: Water
Watering amaryllis plants outdoors is similar to the process of watering potted ones. Go ahead and water your newly-planted bulbs immediately after placing them in your garden. Between planting and any signs of new growth, keep an eye on rain patterns and only water when rainfall is sparse. Otherwise, follow the tips for amaryllis care in the section above, “How to Care for Amaryllis Bulbs in Pots”.
We’d love to see your amaryllis plants! Share any photos or tips you have in the comments below.


Frequently asked questions
Have a question about this project?