


Seed Box From Pallet Wood

by
Clint
3 Materials
$20
8 Hours
Easy
I was very late in making a fathers day gift but I wanted to get it done nonetheless! My Dad loves gardening but always seems to accumulate a ton of seed packets that end up all over the place. So I thought some organisation was needed and decided to make him a seed box with little dividers. It also has a lid that stays shut with a latch in the shape of an acorn to keep out the mice and keep the seeds dry.
If you'd like to check out my past projects and keep informed on my future projects then please give my Facebook page a like.
Check out the build in the YouTube video below. I hope you enjoy this project!
{
"id": "3977571",
"alt": "",
"title": "",
"video_link": "https://www.youtube.com/embed/6C6eiyVrgyE",
"youtube_video_id": "6C6eiyVrgyE"
}
{
"width": 634,
"height": 357,
"showRelated": true
}
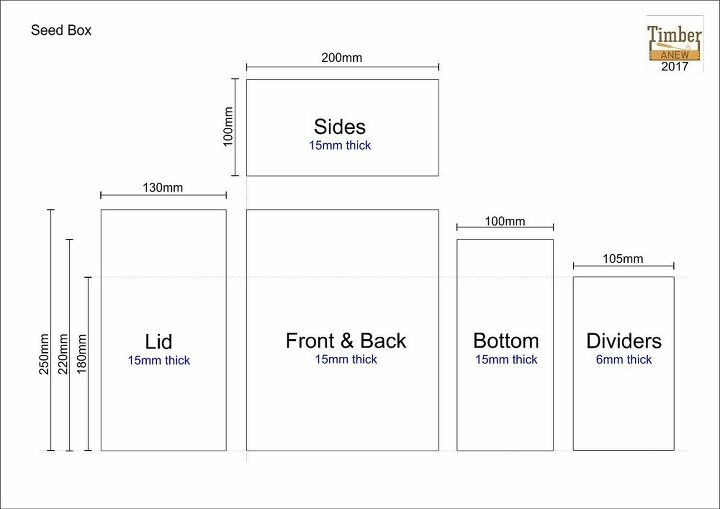
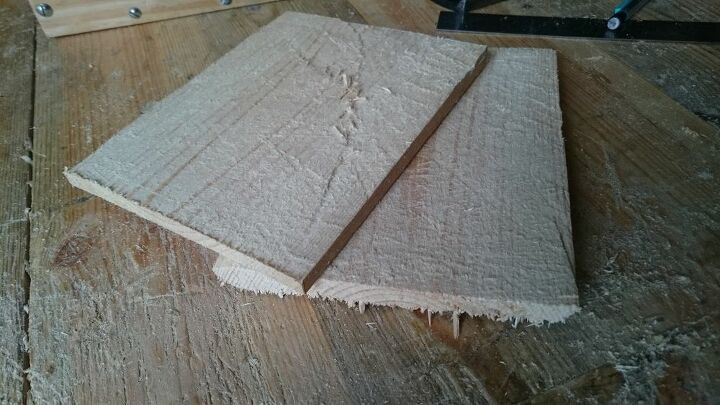
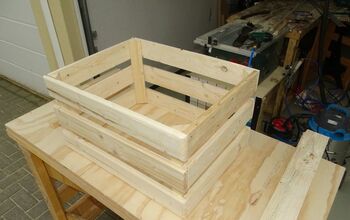
Here you can see the measurements for each part of the box and the dividers. If you have some wood that's already 20cm wide then you can completely skip the part of the process where glue is used to join two lengths together.
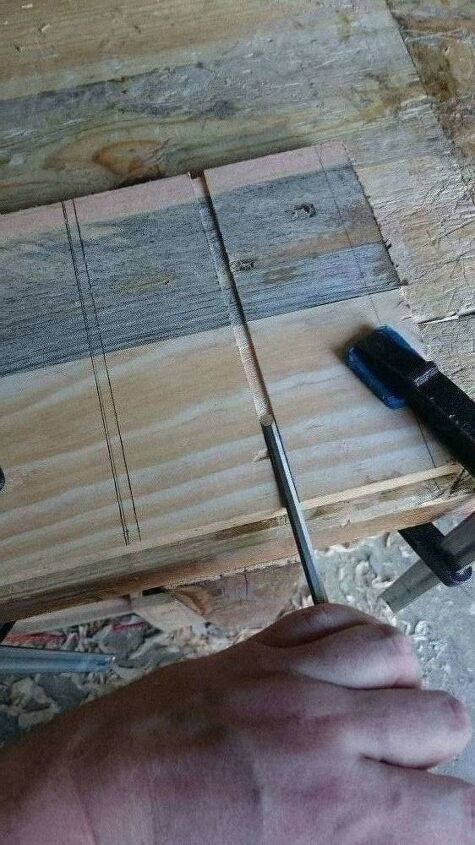
After the pieces were cut I scored down the lines where the dividers would go with a carving knife and then took my thinnest chisel and cut the grooves out. I made sure I matched the positions of these on the other side of the box.
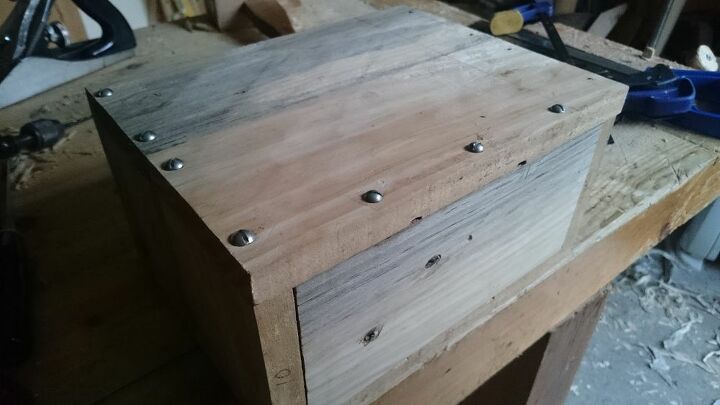
After I drilled all the pilot holes I screwed the screws in very slowly with a brace, you could use a drill also of course. The reason I used screws here and not wood joints is because I feel like this project is more accessible to people when using fixings. Also I have a project coming up soon where I'll be making a dovetailed box.
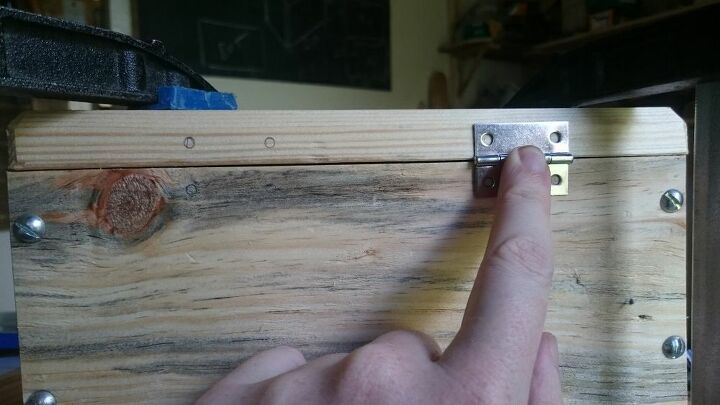
I attached the lid with two small hinges and some tiny screws. On the front side of the lid I inserted a dowel that the latch would hold onto to keep the lid shut.
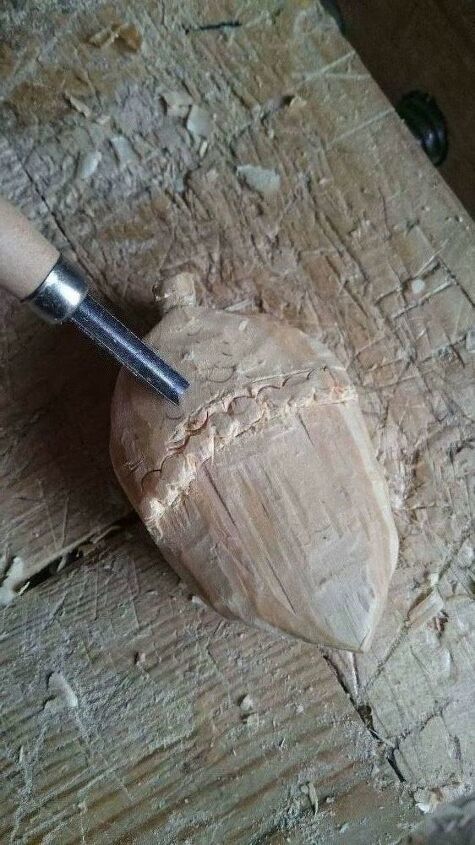
I took a piece of bed frame I had and did my best attempt at carving out an acorn. As you can see I still need some practice! But I feel like I have to branch out of my comfort zone now and then.
This is how the latch looks from the back. The slotted section slides over the dowel and locks in at the top when the acorn is upright. The hole in the middle has a screw going through it which attaches it to the box but is loose on the screw itself so the latch can turn freely.
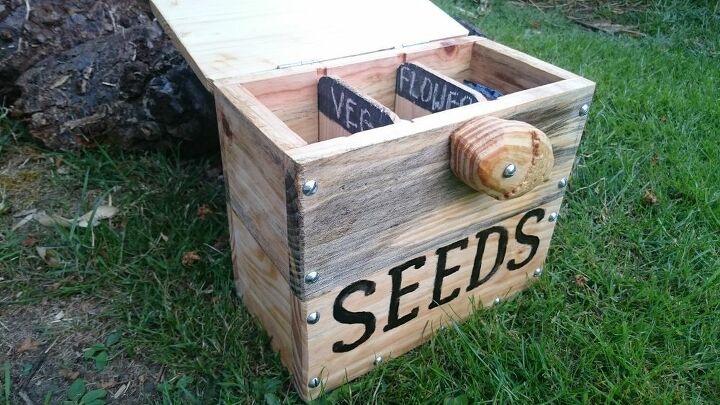
After I had that done I cut down the centre of another piece of pallet wood and cleaned the pieces up with a smoothing plane. I cut little curves on both of the top corners and then painted a small section of the top with some blackboard paint. This makes it possible to label them with chalk or a blackboard pen to keep your seeds organised.

All I had to do then was paint on the logo. This was achieved by finding a font I liked, printing it off, cutting out the letters and drawing them on the box using the print out as a template. I then free hand painted it in black gloss.
Want more details about this and other DIY projects? Check out my blog post!


Frequently asked questions
Have a question about this project?