


Setting Up an Automatic Watering System for Outdoor Plants & Hanging B
Setting up an automatic watering system for outdoor plants and hanging baskets using drip irrigation is easier than you might think.
I used THIS easy and inexpensive drip irrigation kit to install mine in less than an hour!
Once you have one, you’ll wonder how you ever managed without it!
When we built our raised-bed, deer-proof garden last year, we placed it near the back of our property, far from the nearest spigot, which made watering it a huge challenge. Fortunately, we already had a lawn irrigation system in place, so we were able to have an extra line run directly to the garden, so that it can be automatically watered on whatever schedule we set it up for, just like the lawn.
In May, when it was time to plant, I decided to put my herbs inside the garden too, rather than in my farmhouse herb box that I usually use, because I knew we’d be gone for a couple of weeks in June, and this way, the herbs could stay watered too.
Well, when we returned from our trip, we were shocked to see our garden had grown into a jungle!
I was speechless when I saw it. I couldn’t believe that in only two weeks it had turned into this! I think it was a combination of some really great organic soil we added this year + perfect weather + the auto watering.

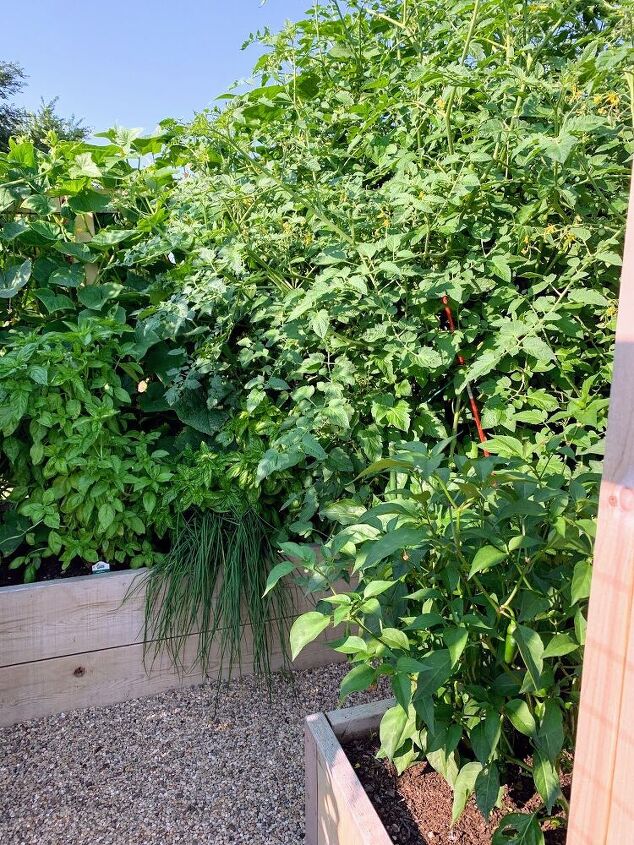
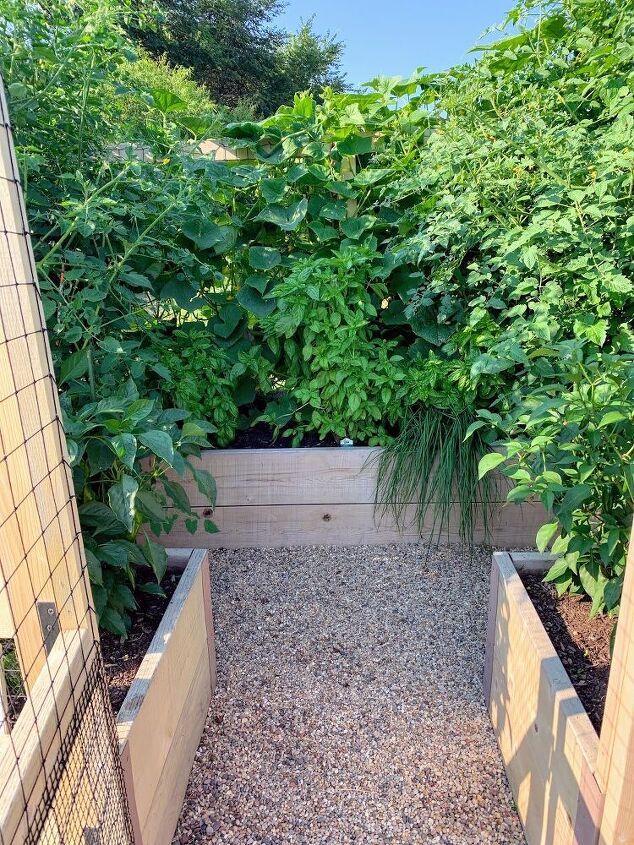
Needless to say, something had to be done. The cucumbers were attaching themselves to everything, the basil was overcrowded, and look at the poor chives! They look like they’re trying to escape!
I spent about two hours in the garden attaching stakes to hold up tomato branches, and using garden wire to retrain the cucumbers in a different direction. Ultimately, I decided the herbs would just have to be relocated.
Fortunately, I already had these three big whiskey half-barrels that I hadn’t planted anything in this year, knowing we’d be traveling so much. They would be the perfect place to move the herbs, except I’d have to remember to go out and water them daily, sometimes twice daily if it was really hot, because they are on the hot side of the house that gets no shade, ever.

Flowers in the Desert
Recently, on our vacation, we stayed in an adorable cabin at the Moab Springs Ranch.

Each cabin had a beautiful pot of flowers in front, that were vibrant and well-watered–in the middle of the Utah desert, where temps regularly reach 100+ degrees. At first, I was thought, “Wow, someone must water these things multiple times a day.” But upon a closer inspection, I noticed that each pot was equipped with an automatic drip irrigation line. Bingo!
When we got home, I set out to do some research. The Raindrip Automatic Watering Kit for Container and Hanging Baskets (see link in the first paragraph of this post) was the solution I was looking for!
For less than 30 bucks, I was able to easily set up a system to water all three of my whiskey barrel containers automatically each day, on a schedule of my choosing. Let me tell you, this is literally a life-saver (for the plants) on busy days when I don’t remember to get outside and get them watered, or for days after I go back to work, when I won’t have time to get to them until evening. And especially for when we are traveling. It’s such a relief knowing that the plants won’t die if we aren’t home to keep them watered daily in the hot weather.
Setting Up an Automatic Watering System for Outdoor Plants & Hanging Baskets
The instructions that came with the automatic watering system said it would take about 20 minutes to set up. Eh, it took me more like an hour, but I still call that pretty simple.
Faucet
Luckily for me, my outdoor spigot was literally right next to my containers, so I only needed a short amount of tubing to reach them. The kit comes with 50 feet of tubing, so even if your spigot is a bit further away, you should still have enough to reach.
Supply Tubing
Setting up the automatic watering system for outdoor plants & hanging baskets is as easy as running one long piece of the included black supply tubing to extend along the back of your pots, and then attaching off-shoots to each pot. One end of the tubing should attach to the timer/ faucet, and the other end should reach as far as the last pot you want to water. I was able to use a pair of cutting pliers to easily snip through the plastic tubing to get the lengths I needed.
After you have the length of the tubing stretched out to reach each pot, it’s time to attach connectors to run to each individual pot. All of the connectors needed (plus extras!) are included with the kit. Simply snip the supply line behind each pot, and add a tee connector that will attach a separate line running to each pot.

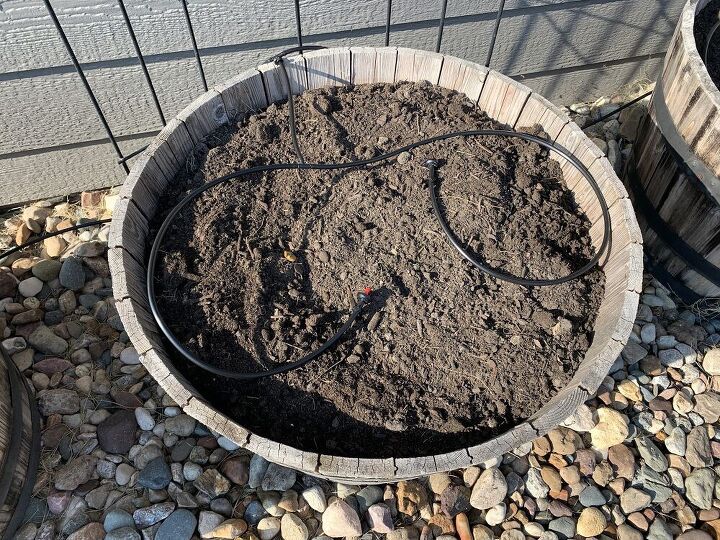
The kit even includes mounting clamps and nails, which are likely meant for attaching the tubing to your covered porch for hanging plants, but I used them to attach the tubing to my whiskey barrels, since they are so big and high off the ground. If you were using this sytem for smaller potted plants, you wouldn’t need the mounting clamps.

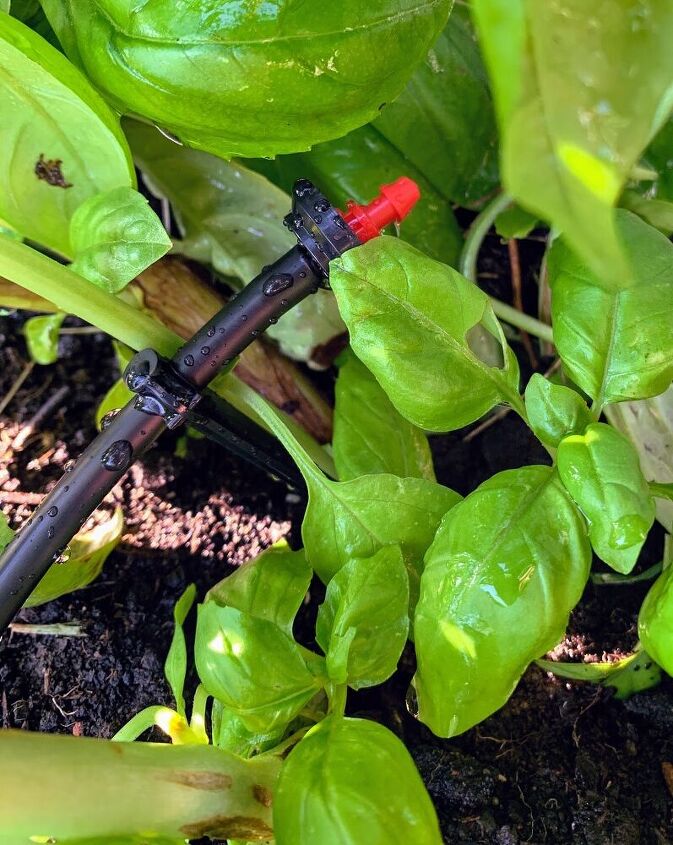
The instructions say that if you have a pot “smaller than 1 foot wide”, one dripper is recommended per pot, and pots “larger than 1 foot wide” should use two drippers. Since my barrels are large, I used a second tee bracket to add two drippers to each pot. I included fairly long pieces of tubing (about 12 inches each) for each dripper, so that I can have the flexibility of moving the drippers around in the pot exactly where I want them.
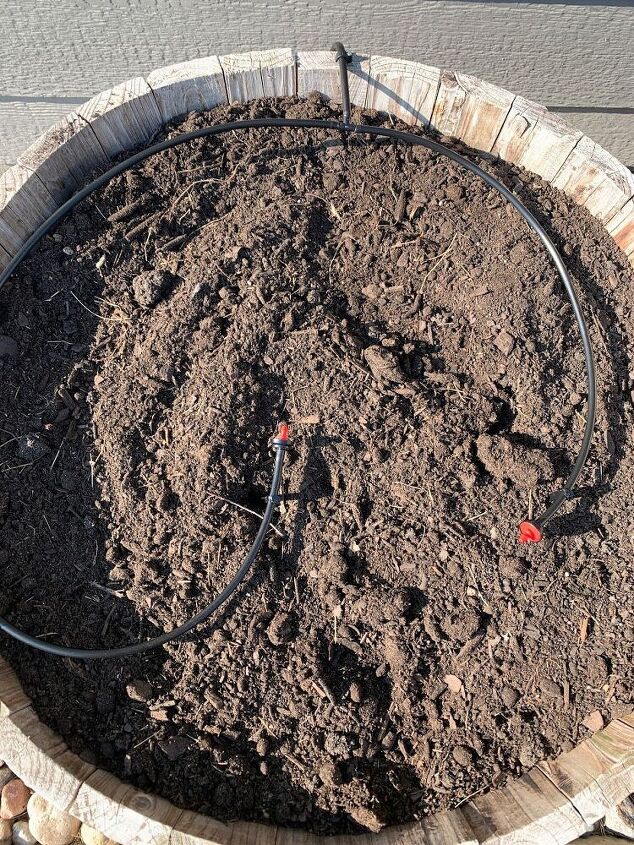
After all my tubing and drip heads were in place, I added my herbs, and then used the included support stakes to situate each drip head near the base of the plants.
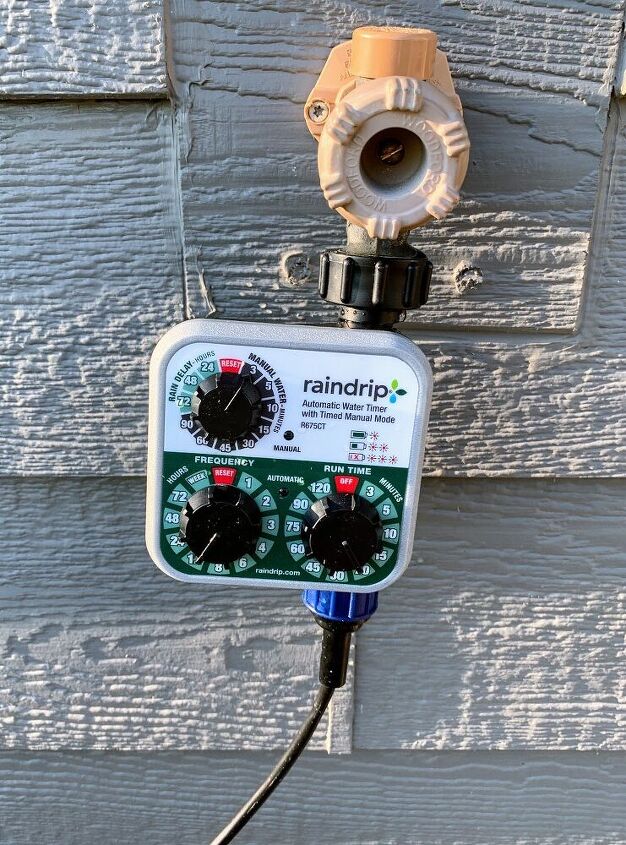
Timer
All that was left then was to set the timer. The included timer allows you to set both the frequency of watering, as well as the run time. It even includes a bypass dial if rain is expected, and you want to skip watering for 24-72 hours.
The drippers put out 1/2 gallon of water per hour, so I currently have mine set to water 3 times per day (every 8 hours) for 10 minutes at a time.
I’m so happy to have these herbs out of the garden (I think they are probably happy too!), where all the plants can have a bit more room. I’m even happier that I can “set it and forget it”, and know they will be safe in their new home with a constant and predictable water supply during these dog days of summer.
I used the kit for container and hanging baskets, and it was such a great solution for my watering needs. Raindrip also offers additional kits for other types of automatic watering:
- Raindrip Vegetable Watering Kit
- Raindrip Automatic Ground Cover and Flowerbeds Kit
- Raindrip Flower, Shrub and Tree Watering Kit
Happy Gardening,
Let’s stay in touch! You can subscribe to The House on Silverado by using the box on this page, and follow on social media, so you won’t miss a thing!
Facebook —– Instagram —– Pinterest
Shop My Gardening Favorites:
This post contains affiliate links.
Resources for this project:


Comments
Join the conversation
-
I am amazed at your garden. It is positively inspirational. I think this post will finally get me started on the raised bed system of my dreams - with auto-watering too!
-
Your garden is absolutely beautiful. How do you use the kit for hanging baskets? Do you see the tubing and do you find that a drawback?


Frequently asked questions
Have a question about this project?