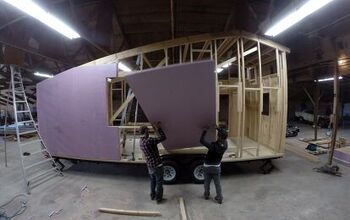
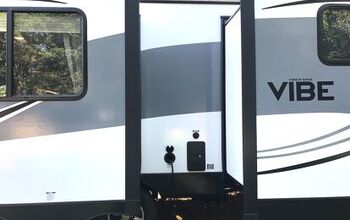
How To Affordably Flip an RV
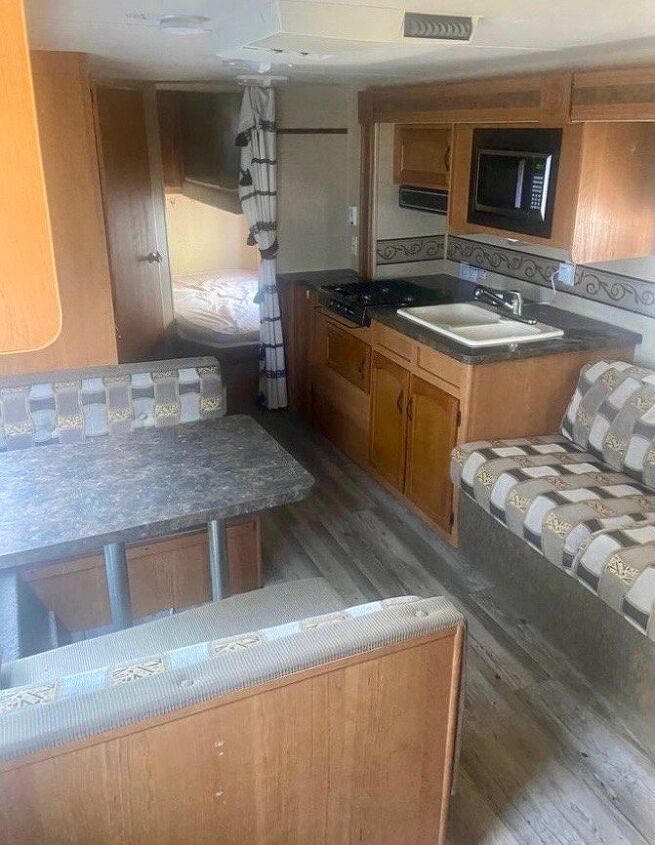
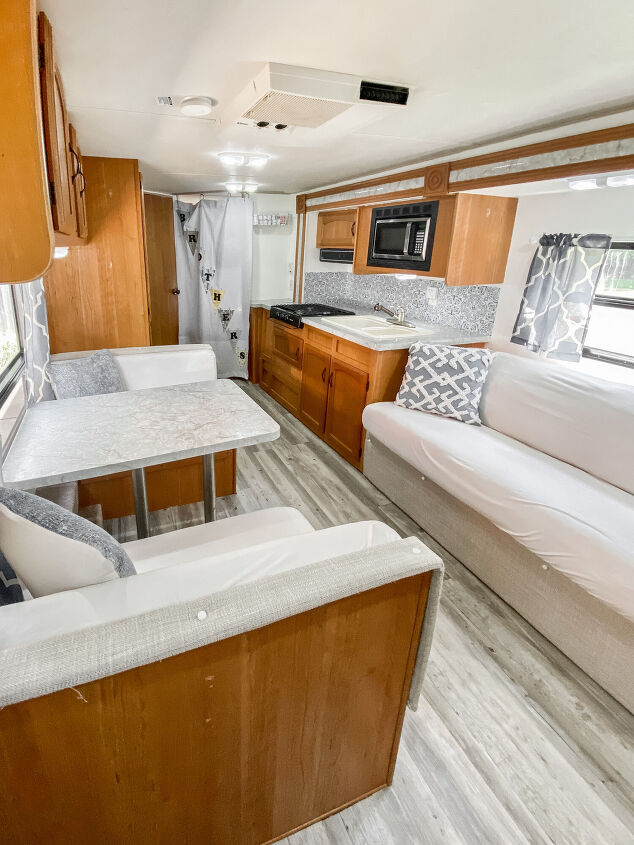
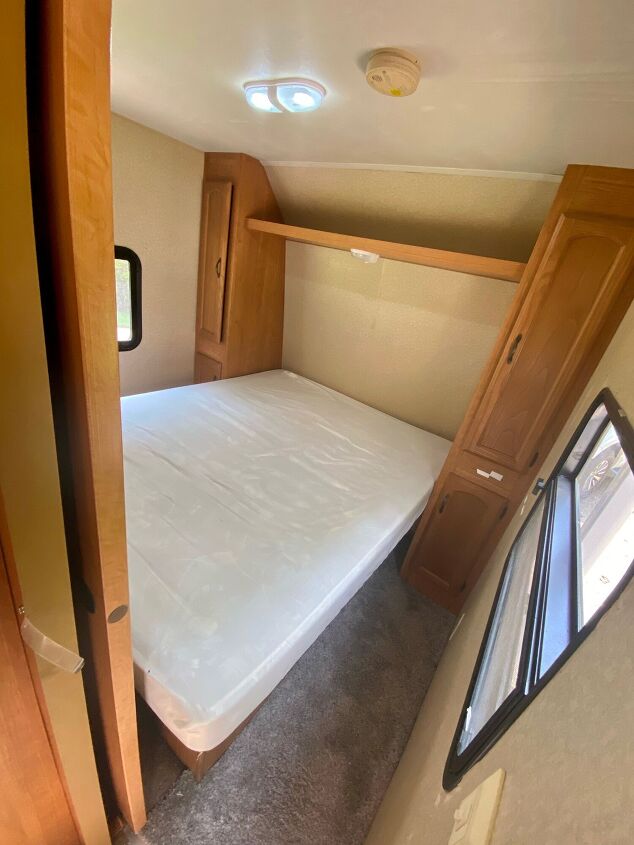
Covid has caused a lot of change- notably in the way families feel comfortable traveling. Whether temporary or permanent, a lot of folks have stayed out of the sky and instead hit the road! And what better way to travel than RV? I know you might be seeing dollar signs, but it is possible to find an older camper, travel trailer, fifth wheel or RV at a reasonable price. The only downside? It may show some age. Let me teach you how to take that home on wheels from drab to fab in just two weeks with this DIY RV remodel.
To prep RV walls for paint, start by using a 220 grit sanding sponge to scuff them up a bit and give the paint something to stick to. Be mindful not to ruin the vinyl coating on the walls, or vinyl seam tape you’ll find every 4ft between wall panels.
If you are fixing up an RV, my bets are its used. So after sanding, scrub the walls well with a watered down vinegar solution to get rid of any dirt, grease or grime. Lots of tutorials I came across recommended using TSP.
TSP (Trisodium Phosphate) is a heavy-duty chemical cleaner safe for walls, woodwork and floors found at most hardware stores. I get hesitant using hard core chemicals, and I typically prefer natural cleaning solutions. I also did not like that it would be a 2 step process of cleaning all the surfaces, then rinsing all the surfaces. If water/vinegar was enough to clean the interior walls of our house after 30 years of smoking I’m sure its enough for this RV.
To ensure proper prep and adhesion, it’s important to prime the walls. Due to the unique surface of RV walls, Kilz Adhesion primer is recommended. PPG Gripper worked as well if you don’t have access to Kilz Adhesion.
Don’t be shy, make sure and paint a nice thick coat of primer on the walls. I wanted to make sure and do all my work by the book, which meant I would be taping off all the surfaces bordering the walls. Typically I don’t tape when I paint, but this was a good learning experience for me.
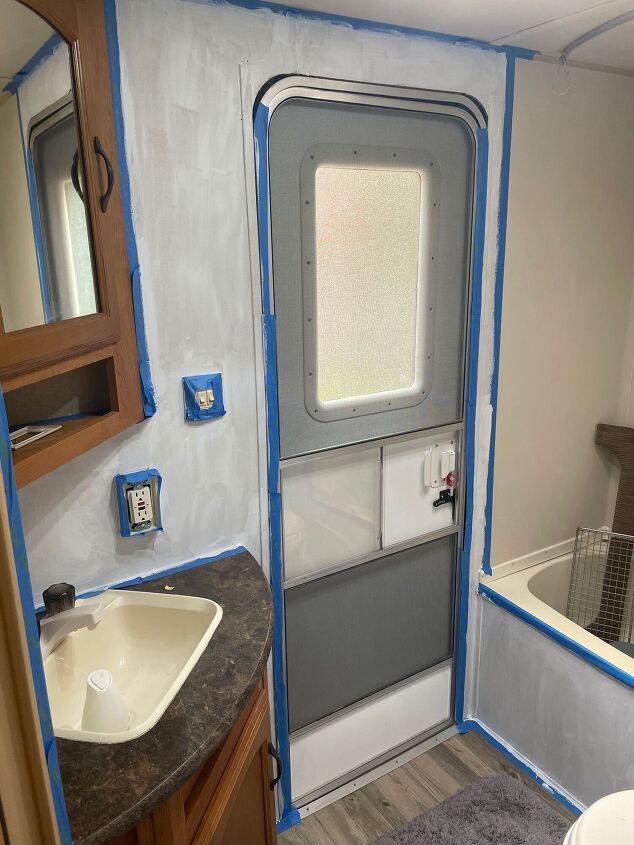
What I discovered is that if you tape, there is more time spent on prep work but the actual painting (especially edging) goes much more quickly. So it’s up to you! Either spend more time prepping on the front end with tape, or more time edging with a steady hand without tape.
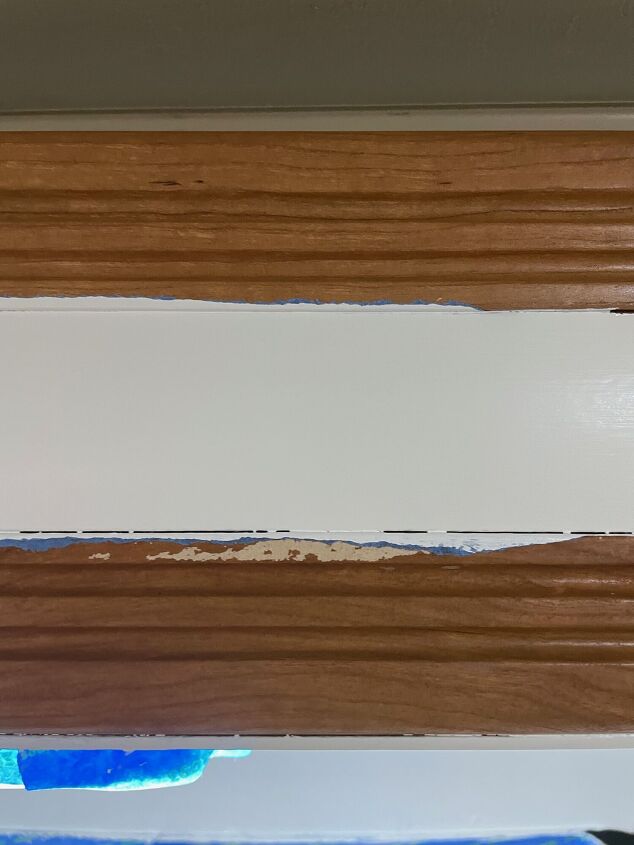
I also had some painful moments with the tape. I used Scotch blue Sharp Lines Multi-Surface tape, which was a first for me. In the past, I have only used Frog Tape. Due to the amount of area to be primed and painted, the tape was adhered for a few days in the Memphis heat before removal. As recommended, the paint was dry before I took the tape off. However, it did not come off in one piece, or even two pieces. I peeled and scraped for hours.
Unfortunately, the tape also took off the wood veneer in some places from the cabinets. This was a problem because we decided not to paint the wood! The owner of the RV came up with a great idea and used a colored pencil to color in the areas where the tape removed the wood grain. Plan B was to use these wood grain markers, but luckily plan A worked.
STEP 2: Paint the walls
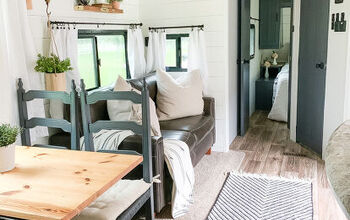
The owner chose a creamy white paint color by Behr called Cotton Blossom. You can never go wrong with clean, white walls.
Another option would be a greige, such as Sherwin Williams Agreeable Gray, especially if choosing not to paint your cabinets if they are wooden. The light gray tends to cut some of the “orange” tones typical in 90’s oak wood cabinets.
People have different preferred painting tools and tricks, but I have outlined my process in depth for a beginner to feel like a pro here. Whether interior house walls or an RV, the same general rules apply.
STEP 3: Update the Countertops
Keeping with the goal of lightening up the dark 90’s style interior, the owner wanted to update the dark laminate countertops. An easy, cost effective way to do this is to use contact paper. We utilized a lighter, marble contact paper on the kitchen countertops, dining table, and bathroom counter. To make the process easier, first we made a template of the space using wrapping paper, cutting out spaces for the sink, stove, etc. Then, traced the outline onto the contact paper, and cut out the various shapes.
This is much easier as a 2 person job. While one person holds the contact paper up, the other uses a credit card or official contact paper smoother to ensure a smooth application and release any bubbles.
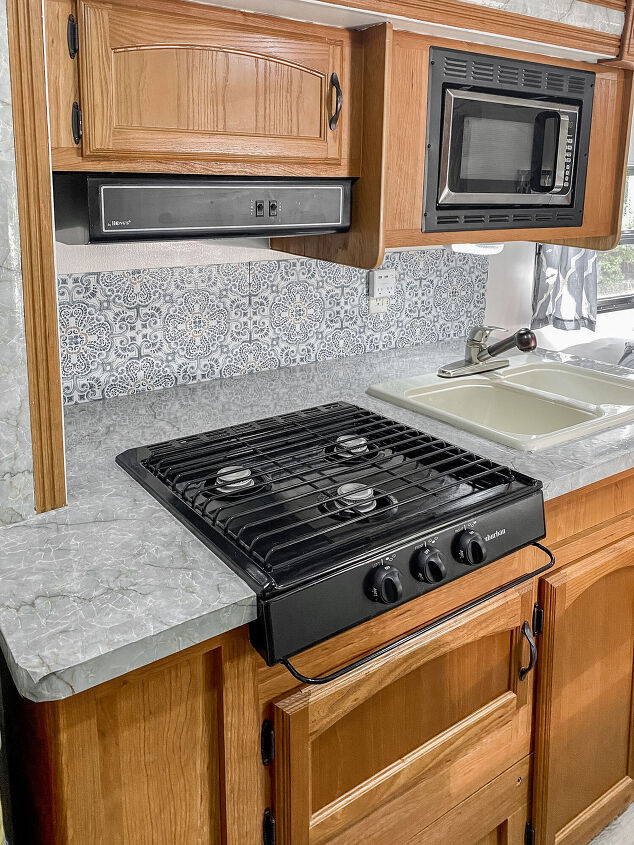
STEP 4: Backsplash
Your possibilities here are endless, but the owner chose a square patterned tile that was actually marketed as peel and stick floor tile to use as backsplash. To promote adhesion, we used extra adhesive using Loctite PowerGrab adhesive, and rolled the tiles on with a wallpaper roller. These tiles are easily cut with a box cutter.
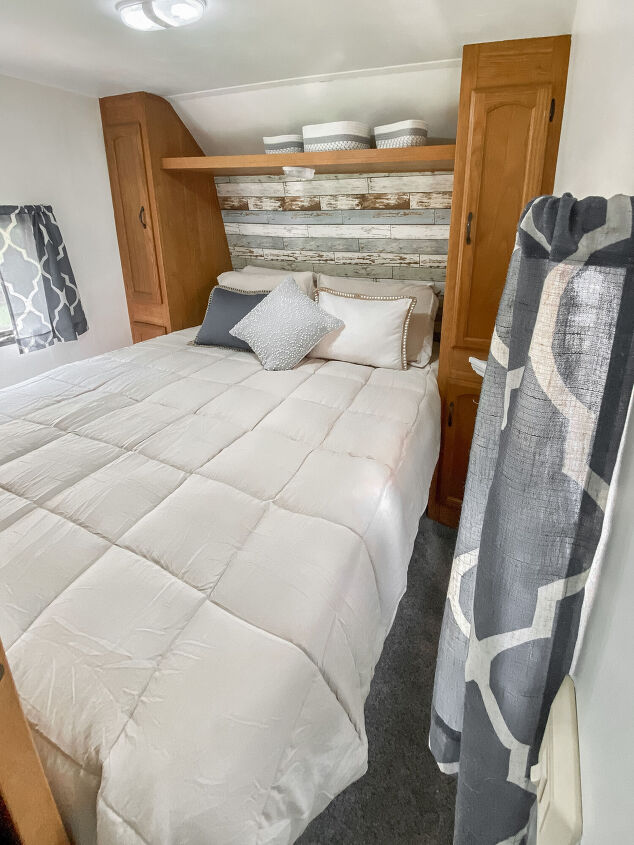
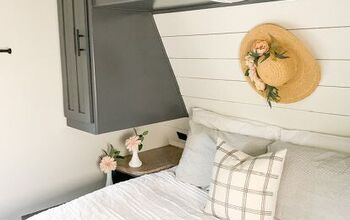
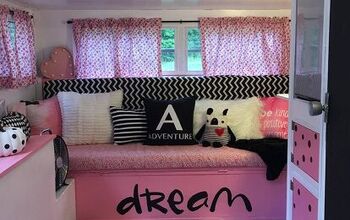
The owner also applied peel and stick wallpaper above the master bed, reupholstered the cushions, purchased and hung all new curtains, and made her kids bunk room special with colored lights. With both of us working on it, we were able to complete all 7 projects in less than 2 weeks.
What do you think of this DIY RV remodel? It’s so perfect for the owner’s family, and her three small boys will love it. I can’t wait for them to make memories in this space they’ve created to fit their style.
Remember to check out more information on this project, as well as another DIY pop up camper remodel on Emily Rone Home!


Comments
Join the conversation
Wow! You did an amazing job!
Beautiful! So much brighter. Would love to find a campervan and do that. So my dog and I can travel. You and your boys have fun.