


How to Clean a Vacuum—It's Dirtier Than You Think

By Marilyn Syarto
When was the last time you cleaned your vacuum cleaner? It may sound absurd that a vacuum needs cleaning, but there are so many nooks, crannies, filters, tubes, brushes, and other surfaces where dust and debris settle and fester.
Whether you have a bag or bagless, upright or canister, or snazzy lightweight cordless stick vacuum, our guide will help you get it back to nearly factory-new so the dust stays inside your vacuum instead of blowing back into your room due to blockages and other problems. If you’ve invested in a good vacuum cleaner, you’ll want to take care of it so it has a long life.
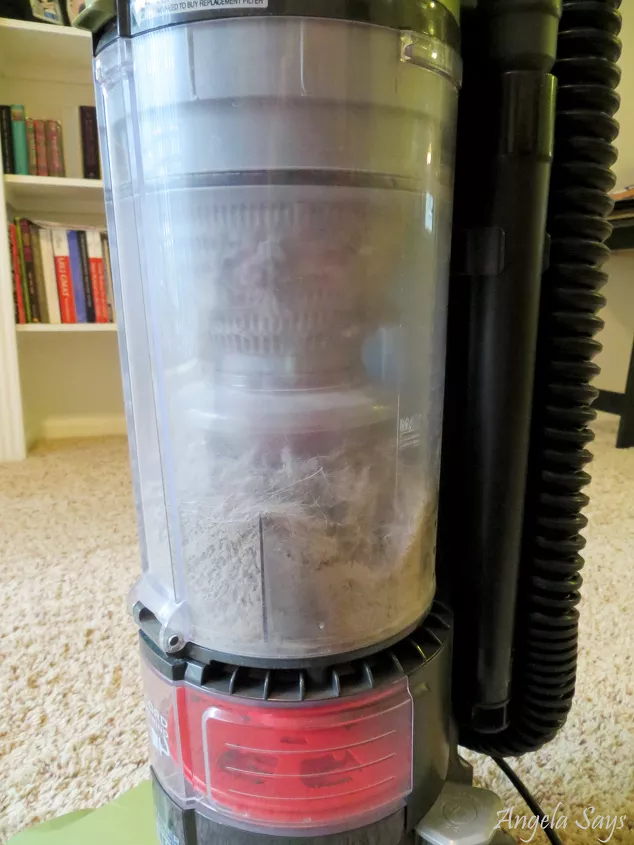
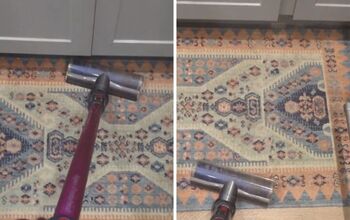
Photo via Angela
Why You Should Clean a Vacuum
Let’s get into the nitty-gritty about why you need to clean your vacuum. The reasons aren’t for the faint of heart, but it may encourage you to clean your vacuum for a thorough and effective vacuuming experience. If your vacuum isn’t up to snuff, it can leave a whole lot of nasty things on your floors and in your carpets, including:
- Bed bugs
- Dust mites
- Smoke odors
- Mold spores
- Pet hair and dander
- Bacteria and fungus
The result is that your home and floors will look and smell dirty, musty, cluttered, and unwelcoming. An unvacuumed home can trigger allergies, too. A clean vacuum can help make your home sparkle and keep your floors and carpets from wearing out too soon or getting stained from ground-in dirt. So maybe it’s time to clean your vacuum after all!
When to Clean a Vacuum
There’s no set schedule for when to clean a vacuum. But, taking it apart and giving it a good cleaning about every six months is a good habit to keep your appliance in good working order, according to The Home Depot. However, there are plenty of telltale signs that show you it’s time to clean out your vacuum. Every vacuum has a slightly different way of letting you know it’s dirty and clogged, but here are three major signs:
- Dust and debris blow back out the vacuum when you’re vacuuming (possible blockage or full bag/canister).
- Your vacuum has little to no suction (possible blockage).
- Your filter gives you the signal it needs to be cleaned (some vacuums have built-in monitors).
Parts of a Vacuum
Most vacuums will have the following parts, but always refer to your owner’s manual when attempting to remove a part for cleaning.
Removable vs Non-Removable Parts
Upright Vacuum Parts
- Cord: The cord plugs into the wall outlet and powers the vacuum. Many are retractable so they are out of the way while the vacuum is in use.
- Motor: Internal motor determines vacuum’s suction power and performance.
- Fan: Internal fan mechanism forces air through a vacuum, helping it do its job of sucking.
- Long hose: Extends for cleaning under furniture and walls and ceilings and holds attachments.
- Hose rings: Holds hoses in place, good to know when you need to remove hoses for unclogging.
- Crevice tool: Great for reaching narrow spaces, such as along baseboards and around furniture legs.
- Dusting brush: An attachment that sucks up dust from wood surfaces and furniture.
- Upholstery tool: An attachment that cleans couches, drapes, and textiles.
- Wand: An extension of the machine that offers wider cleaning range and holds attachments.
- Dust Cup: Stores dust and debris.
- Cyclone: On bagless models, this part funnels dirt and debris into a dust cup.
- Post-motor filter: Prevents debris from entering vacuum’s interior mechanisms.
- HEPA filter: Also known as a high-efficiency particulate absorbing filter, this captures dust and dirt particles as small as 0.3 microns.
- Brush roller/beater bar: Bristles on the bottom of a vacuum that agitate carpet fibers for deep cleaning.
- Power head: The part of the vacuum that holds the brush roller and belt and physically rolls over the carpet; can be height adjustable, housing for some mechanisms.
- Headlight: Comes on some vacuum cleaners; a light on the power head that lets the user better see what the vacuum is picking up.
- Belt: Part of brush roller that rotates the brush roller/beater bar.
Canister Vacuum Parts
- Main canister unit: Separate wheeled body that contains the main motor, filter, and any dust bags.
- Powered hose: Attaches to canister and to the main wand.
- Main wand: Holds the cleaning nozzle.
- Vacuum power head: Sucks up dirt and debris to send through the wand and hose into the canister.
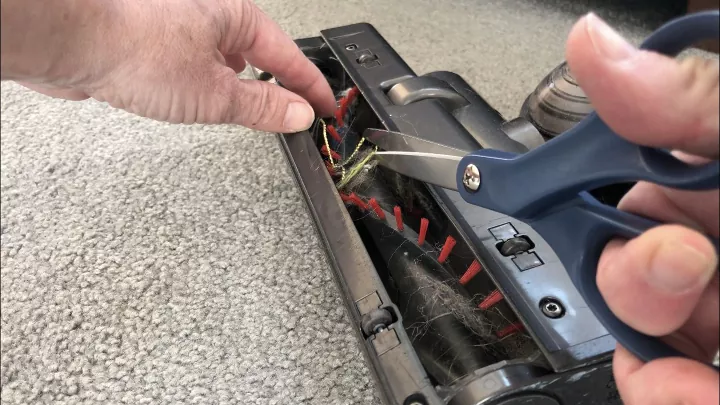
Photo via Chas' Crazy Creations
How to Clean a Vacuum
Clean your vacuum during a time when you will not need to use it for a day or two because you’ll need to make sure all the cleaned components are completely dry before putting it all back together and using it in your home. Most of the following steps for how to clean a vacuum apply to both upright and canister vacuums. Of course, it helps to have your owner’s manual on hand if you’re unsure how to take apart any pieces of your vacuum.
Make sure you’re cleaning your vacuum in a well-ventilated area or outdoors. You’ll be stirring up a lot of dirt, and the last thing you want is to make a mess or breathe in tiny dirt particles.
Finding Your Vacuum’s Model Number
Tools and Materials Needed:
- Garbage bag
- Bowl
- Water
- Liquid dish soap
- Disinfectant wipes (optional)
- Slim dish scrubbing brush with handle
- Old comb
- Can of WD-40 (optional)
- Face mask
- Can of compressed air (optional)
- Broom handle (thin enough to fit inside hose)
- An old toothbrush
- Microfiber cloths or rags
- Pair of scissors
- Pair of protective rubber gloves
Step 1: Unplug the Vacuum
Make sure the cord is out of the plug and retracted into its compartment so it does not get wet or damaged while cleaning.
Step 2: Mix Detergent and Water
Using a small bowl, mix together some liquid dish detergent and water. You’ll use this sudsy solution to dampen cloths or toothbrushes for a bit of extra cleaning power.
Step 3: Remove and Clean the Filters
Depending on your vacuum model, you may have two or three filters. You could have a HEPA filter, a filter to protect the motor, and an exhaust filter to keep particles from flying out of the machine, according to Consumer Reports.
- If you have a washable filter (check your vacuum’s manual to make sure), remove it, shake it out in the garbage, and rinse with cool water and a small amount of liquid dish detergent for a few minutes until all the dirt goes down the drain. Don’t scrub the filter—just use your fingers to gently help remove dirt. Let the filter thoroughly dry overnight before replacing it back in the vacuum.
- Remove the HEPA filter. It can usually be cleaned by dusting it off with a dry, clean rag. Replace it back into the vacuum once it’s clean.
When to Replace a HEPA Filter
Step 4: Detach and Clean the Canister
Next, remove the canister from your vacuum. Note: If you have a bag, replace it when needed and skip these steps.
- Empty the contents of the canister into a garbage bag.
- Dust it inside and out with a rag.
- Use the can of compressed air to forcibly remove debris stuck in any of the crevices of the canister.
- Use a dampened toothbrush or scrubbing brush to remove any sticky residue.
- Clean out the rest of the debris with a dampened rag.
- Wipe the canister dry with a clean rag or towel.
- Wring out a disinfecting wipe so it’s just dampened and run it around the canister (optional).
- Let the canister thoroughly air dry for 24 hours before replacing it back onto the vacuum–no moisture should be trapped inside your vacuum.
Do Not Soak Your Canister
Step 5: Clean the Beater Bar/Power Roll
Cleaning a beater bar requires a bit of elbow grease. If you don’t feel comfortable detaching the bar from the vacuum, it’s okay to leave it on. You will just need to manhandle the bar a bit more to remove hair and debris that has rolled tightly onto the bar. Use your scissors to start trimming away the hairs and throw it all away in the garbage. Use a dry toothbrush to scrub away any crusty gunk.
Step 6: Clean and Unclog the Hoses
If your vacuum has little to no suction, you may have a clogged hose. Regardless, it’s a good idea to clean out the hoses even when there’s no hint of a clog. Here’s what to do:
- Put on a face mask.
- Disengage the hoses from the hose rings and clips. Over time, a ring or clip may have become tight or stuck. If you run into this, use a bit of WD-40 to loosen it, but always check which hose can be removed or not. Longer hoses are typically removable.
- Take the detached hose or hoses outdoors.
- Stick the broom handle into the hose, pushing it in until you can release the clog into a garbage bag.
- Shake out the hose to remove the rest of the debris and dust (this is why a face mask is good to use).
- Wipe down the outside of the hose with a microfiber rag before reattaching to your vacuum.
Step 7: Clean Vacuum Attachments
They graze along baseboards, touch all sorts of dirt and grim on the kitchen floor, and might be covered in pet hair: Your vacuum attachments are dirtier than you think! Clean them by doing this:
- Dust each of them with a slightly dampened rag.
- Run the crevice tool under a stream of water to remove interior debris. Let it dry thoroughly before using it again.
- Clean the dusting brush by using your hands and an old comb to remove the hair, dust, and debris. Rinse the dusting brush under water in the sink. Let it dry thoroughly before using it again.
- Clean the upholstery tool carefully because it may be designed like a mini power head. Wipe the outside of it down with a slightly damp rag. You may need to remove the small beater bar to clean it out. Do not rinse this attachment in water.
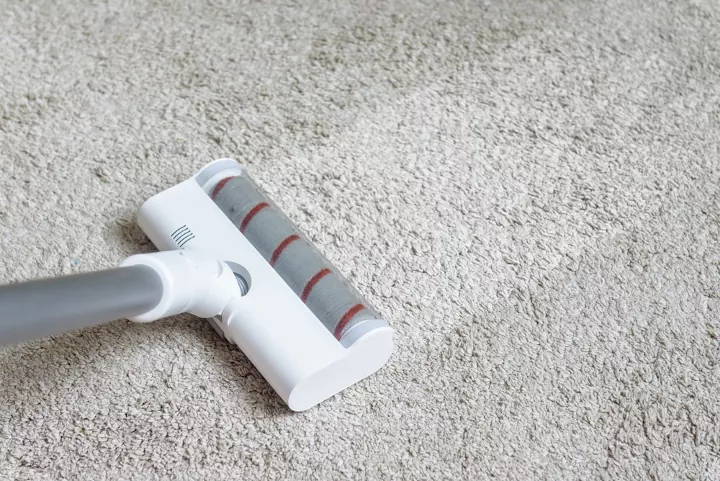
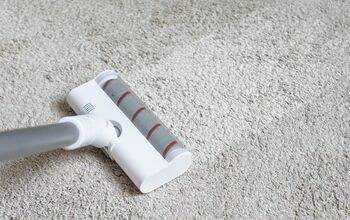
Photo via Shutterstock
How to Clean a Stick Vacuum
A stick vacuum can be cordless or corded, but it will typically have fewer parts to clean. That means you can’t take much of it apart, either. It will also have a much smaller dirt bin which you are already emptying frequently. Here are basic steps on how to best clean a stick vacuum with a cyclone unit, but always refer to your owner’s manual for further guidance.
Tools and Materials Needed:
- Dust face mask
- A second vacuum
- A dusting tool from another vacuum
- Microfiber cloths and towels
- Water
- Cotton swabs
- Can of condensed air (optional)
- Hair blower (optional)
- Leaf blower (optional)
- Scissors (optional)
- Screwdriver
Step 1: Clean the Dustbin
Remove the dust bin and empty it. Dust it using the other vacuum and brush tool.
If you don't have a second vacuum, skip to Step 2 and use a slightly damp rag or paper towel to wipe the inside of the dust bin. Then dry it with another dry rag or towel. You don’t need a second vacuum to do the job!
Step 2: Wipe it Down
Slightly moisten a microfiber cloth with water and use it to clean the dustbin inside and out.
Step 3: Clean Gaskets and Rings
Use slightly dampened cotton swabs to remove dust and debris from the rubber rings that hold the dustbin together and any other small crevices that need cleaning. Use a can of condensed air to remove stuck debris.
Step 4: Remove Filter From Housing
You may have one or two filters even in a stick unit.
- Remove the filter or filters from the housing.
- Use the vacuum and brush tool to clean the filter(s).
- If one of the filters is washable, run it under cool water until the water runs clean. (You may have a HEPA filter that needs dusting or even replacing if it smells foul.)
- Vacuum off the bit of debris on the filter’s housing unit(s) using the brush tool.
Step 5: Cleaning the Cyclone/Motor Unit
There are many solutions for cleaning this part of a stick vacuum. Bring the unit outdoors since this can be a dusty job.
- Vacuum the unit using the other vacuum and its brush attachment.
- Use dry cotton swabs to remove dust from tiny crevices.
- Use a slightly dampened cloth to wipe down the unit.
- If it’s still very dusty, use a hair blow dryer to remove more dust.
Step 6: Clean the Head
Depending on your model, you may need to pop out the roller/brush or leave it in. Or, you may have a brushless version that just sucks up debris. If you have rollers/brushes, you can usually release them by unscrewing the locking mechanism. You may have two types of brushes on your head that you will need to release and clean (for example Dyson’s cordless stick vacuums tend to have multiple brushes).
- If you pop it out, then clean the casing by vacuuming it with the brush attachment.
- Vacuum the roller/brush (whether it’s in or out of the casing).
- Work out the hair on the roller/brush with your hands or use scissors to release the tangled mess, but be careful you don’t scratch the surface of the roller/brush.
- Check the intake area of the vacuum head to make sure there’s nothing clogging the opening.
- Once clean and unclogged, make sure this piece is thoroughly dry before reattaching it to the stick.
Tips for Keeping a Vacuum Clean
Your vacuum cleaner works hard to keep your home dust-free, so you want to return the favor by giving it plenty of love and care. Here are some vacuum care tips to keep it clean:
- Empty your canister when it’s halfway full, suggests Merry Maids, because a canister that’s filling up makes the motor heat up too fast, which could lead the vacuum to burn out.
- If you have a bagged vacuum, replace the bag frequently or when it’s two-thirds of the way full, says AllergyandAir.com.
- Buy the correct bag for your model vacuum and properly attach it.
- Frequently check the brush roll and remove hair and fiber tangles using your fingers or scissors.
- Check the belt that keeps the brush roll in place; it may be frayed or stretched out which could render the vacuum useless.
- Wipe down the outside of a vacuum with a microfiber cloth or a slightly damp wipe to keep the dust from building up.
Do you have any tricks you’ve used when cleaning your vacuum cleaner? Do you have any advice on wrangling a vacuum cleaner while trying to clean it? Let us know here!
Comments
Join the conversation
-
Great instructions, I try to do this every 6 months. Amazing what it looks like "under the hood"
-
Cleaning the vaccum is so important. It's pareto principle at work! Thanks for this.


Frequently asked questions
Have a question about this project?