


How to Grow Microgreens and Level-Up Your Favorite Recipes

By Hannah Twietmeyer
You’ve seen them before and have maybe even eaten them, but have you ever tried to grow microgreens? The tiny, sprout-like plants sit atop a pedestal in the culinary world, praised for their taste, nutrition, and garnishing abilities. Yet at the supermarket, they often come with a price tag that many of us would rather not justify.
Instead of buying in bulk or only enjoying microgreens on top of your local brunch spot’s avocado toast, what if you were to grow microgreens at home? Because you can, and the process is cheap, simple, and results in a tray of microgreens that you can use whenever you want.
In this guide, we'll cover everything you need to know about microgreens, including what exactly they are by definition and how to grow and harvest them.
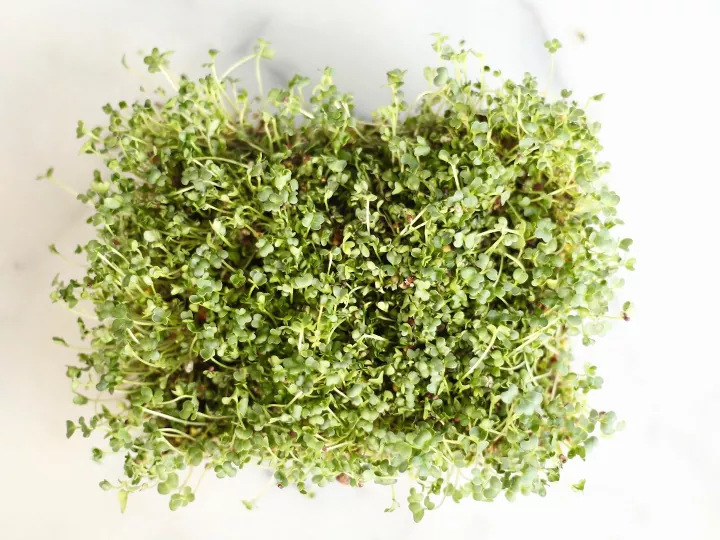
Photo via Home for the Harvest | Mary Jane Duford
What Are Microgreens?
The word “microgreens'' is actually a general term for the edible seedlings of herbs, vegetables, and other plants we grow and eat. They’re often harvested when they’re between one and three inches tall, and are bigger and leafier than a sprout, yet not quite the size of baby greens. Essentially, microgreens are growing plants that have not yet matured, but their strong taste and aromatics make them popular additions to a wide variety of meals in the fine dining scene.
Although microgreens are technically just really, really young plants, they’re still planted from specifically-formulated microgreen seeds, making them palatable and growable at home.
According to Medical News Today, popular microgreen varieties include those grown from some of the following:
- Amaranth
- Basil
- Beet
- Borage
- Broccoli
- Kale
- Kohlrabi
- Mustard
- Orach
- Parsley
- Pea
- Red pak choi
- Rocket
- Swiss chard
- Tatsoi
Microgreens vary in taste depending on what seeds they are grown from, but usually have a very concentrated flavor ranging from a neutral palate to bitter or even spicy notes (via Healthline). They also pack quite the nutritional punch for their minuscule size, as they’re rich in antioxidants, zinc, potassium, iron, magnesium, and copper. Needless to say, microgreens are more than just an eye-catching garnish or vinaigrette addition.
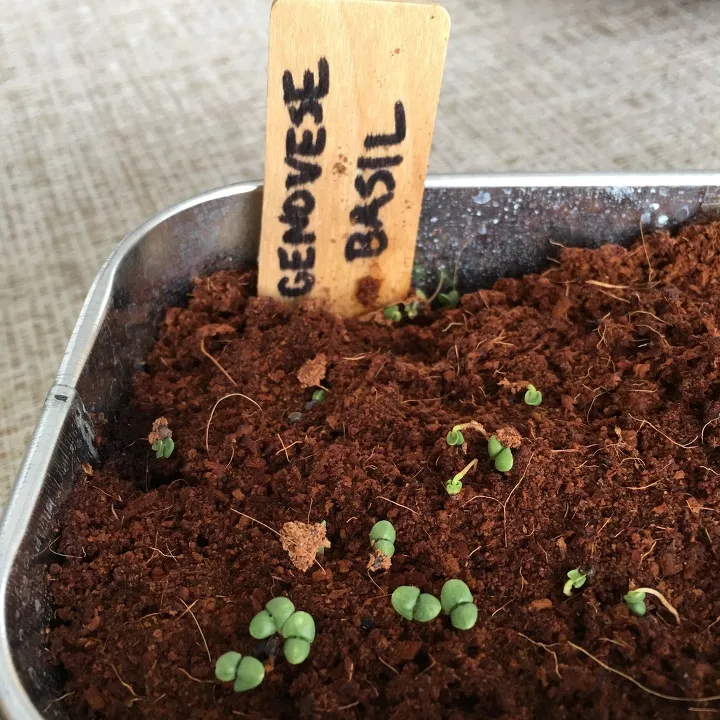
Photo via Home for the Harvest | Mary Jane Duford
How to Grow Microgreens
Microgreen growing is especially practical for those who might not have access to a full-fledged vegetable garden. The process doesn’t require an extensive list of tools, nor does it take up much space. Below, you’ll find all that you need to get started.
Tools and Materials Needed:
- Microgreen seeds
- Growing tray
- Garden gloves
- Potting soil
- Water
- Spray bottle
- Plastic lid
- Flat surface
Step 1: Select Microgreen Type
As we previously mentioned, microgreens come in all sorts of varieties. If you have a specific flavor or variety in mind, head over to your local nursery to see what options they have. National hardware stores like The Home Depot also carry some popular varieties, like these microgreen kale seed packets.
Step 2: Prepare Tray
A growing tray is a perfect container to start your microgreens in. If possible, try to purchase one that has a few holes in the bottom to promote water drainage, or carefully make some small drainage holes yourself. The soil you are using should be something that’s easily accessible yet well-draining, says PennState Extension, so a peat and perlite mix or even regular potting mix should do the trick. Slip on your garden gloves and disperse the growing medium throughout the tray, filling it up to the top.
Step 3: Add Microgreen Seeds
Open your seed packet and sprinkle your microgreen seeds evenly across the surface of your soil. Use a spray bottle to moisten the seeds and the soil, cover with a plastic lid to build up humidity and help promote germination, and keep your tray on a flat surface in a dark environment for a few days.
How to Care for Microgreens
Congrats! You’ve started on your tray of microgreens. There are still a few more tips and tricks to practice before they’re healthy and ready to harvest. Here’s what you need to know.
Water
Some microgreen varieties do better when their seeds are soaked before planting, so do your research when picking out seeds. Otherwise, you can continue to mist the seeds and soil with a spray bottle for a few days after the initial planting. Moisture is especially important during this time period and will help facilitate germination. Once the seedlings are properly germinated and have gained a little height, you can water them once a day to keep the soil moist. You can even water trays from the bottom-up to reduce overwatering.
Sunlight
During the germination process, it’s important to keep your tender seeds covered and out of any light. After a few days, check on the seedlings when you go to mist them and if they’ve sprouted, you can remove the cover. The seedlings will then need ample sunlight, so place your tray near a window if possible. You don’t want to scorch the newly-sprouted greens, though, so keep an eye on them for a few days to check on how they’re doing. If they’re starting to flop, move them a little further out of the sun.
Fertilizer
Typically, microgreens do not need fertilizer if they’re grown in nutrient-dense soil. They have a quick growing cycle and will usually be ready to harvest between 7-21 days, according to Plant Hardware, but if you’re in a time crunch, fertilizer may help them grow even quicker. If you happen to be starting microgreens in a low-nutrient environment (like in hemp mats or burlap) and want to use a fertilizer, use liquid kelp.
Pests and Diseases
According to Produce Grower, the most common threats to microgreens are pythium, a type of fungus gnat, and phytophthora, another type of soil-dwelling pathogen. Both thrive in wet environments and can sustain crop loss. The best way to prevent damage is to avoid waterlogged soils or stacked seeds; keep seeds well-spaced out and select a growing medium with good draining properties. If changing conditions doesn’t help, remove affected plants.
Aphids and whiteflies may also be an issue if you’re growing microgreens in the same trays as other plants or in a crowded greenhouse. Usually, your seedlings will be safe if they’re in their own tray. If you happen to spot any of these pests, spray the affected area with a food-safe insecticide.
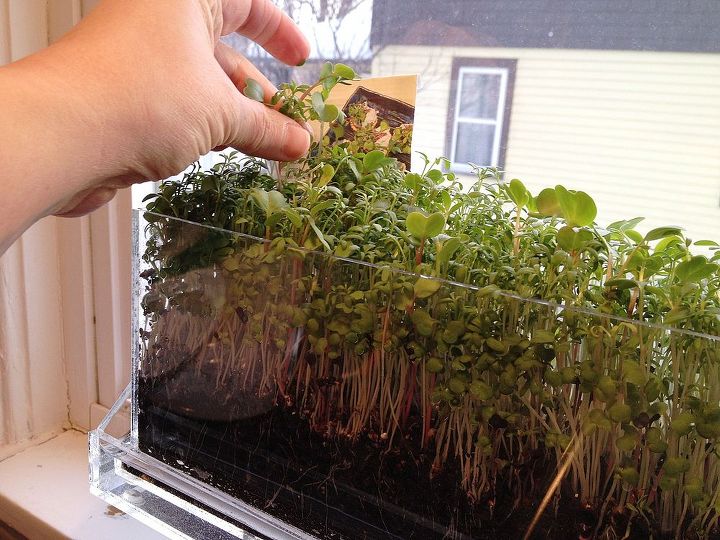
Photo via Chrissy Rex
How to Harvest Microgreens
After the growing cycle is complete, your microgreens will be lush, green and ready to harvest. The length of the growing cycle depends on the seed variety you’ve chosen and can vary from a few days to about three weeks. Keep your seed packet and refer to it for the best harvest time.
To harvest microgreens, all you really need is a clean pair of sharp scissors. Carefully cut the stems just above the soil, and that’s it! Before eating, make sure you rinse the greens thoroughly with water in a colander.
Freshly-cut microgreens have a relatively short shelf life. Usually, they won’t last more than 10-14 days after harvest, according to the Royal Society of Chemistry. And because the plant tissues are so delicate, they might perish quicker after washing them. Use them up while you can! Incorporate microgreens into sandwiches, salads, wraps, smoothies, and more—their strong flavor and nutritional benefits might make them your new favorite garnish.
Have you grown microgreens? What’s your favorite way to use them in the kitchen? Comment below—we’d love to hear!
Comments
Join the conversation
-
We love microgreens at our house. We have a video of our setup on our HomeTalk page, for more ideas. 😊


Frequently asked questions
Have a question about this project?