


An Essential Guide on How to Grow Tomatoes in Pots

By Alexa Erickson
Growing tomatoes in pots is an easy process that requires little space and yields big results. The sweet, juicy fruit can be grown in pots on balconies, porches, decks, or anywhere you can tuck a pot in adequate sunlight. Luckily, growing tomatoes in pots isn’t too much different than growing them in the ground, but there are still a few important things to consider when planting, like container size, soil type, and plant spacing.
Here’s everything you need to know about how to grow tomatoes in pots, whether you start from seeds or transplants.
How to Choose a Pot for Growing Tomatoes
Choosing a good container for growing tomatoes is a pertinent part of the process. The pot should be large enough for adequate soil and its substantial root system—a root-bound plant will produce fewer fruits. Here’s the rundown of pot size:
- Large tomato varieties grow best in a pot five gallons or larger.
- Mid-size varieties grow best in one- to three-gallon containers.
When choosing a container, be sure your pot has drainage holes in the bottom (or drill some yourself if you need to) to avoid wet conditions, which can lead to root rot.
How to Plant Tomato Seeds in Pots
Before you plant tomatoes in pots, get to know the type of tomato you plan to grow. Determinate varieties are ideal for pots as they grow no more than three to four feet tall. But if you have plenty of real estate to spare and want to go big, indeterminate tomatoes will work, too!
Tools and Materials Needed
- Seed starting mix
- Tomato seeds
- Egg cartons or Styrofoam cups
- Water
- Plastic wrap
Step 1: Prep the Containers
Fill small containers like egg cartons or Styrofoam cups with seed starting mix. Add water. The consistency of the soil should be damp but not soaked.
Step 2: Plant Seeds
Plant two seeds per container, about ⅛-inch deep. Press the soil firmly to make sure the seeds are in proper contact with the soil.
Step 3: Cover and Place in Dark Location
Cover each container loosely with plastic wrap to keep the moisture in. Place the containers in a dark, warm location between 70 to 80 degrees Fahrenheit.
Step 4: Move to a Sunny Location
The seeds should start sprouting within one to two weeks. Once they’ve done so, move the containers to a sunny spot.
Step 5: Transfer
When their first leaves appear, it’s time to transfer the tomato plants into a bigger pot, in which case, you can follow the directions for transplanting in the next section.
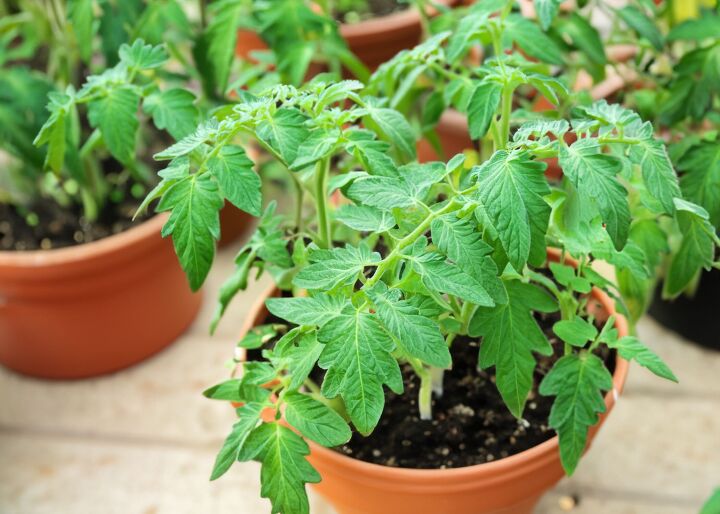
How to Plant Tomato Transplants in Pots
If you choose to start tomatoes from transplants, you’ll want to slide the plants out of their nursery pots and dig them a proper hole in a container filled with quality soil. Here’s how to plant tomatoes in pots from transplants, step by step.
Tools and Materials Needed
- Quality potting mix
- Pot
- Tomato cage
- Mulch
Step 1: Add Soil to Pot
Fill your container with premium quality potting mix. The soil should fill the pot to at least one inch below the rim.
Step 2: Plant the Transplants
You’ll want to wait to plant your young tomatoes in their pots until after the last threat of frost has passed. Once this happens, dig a hole in the soil deep enough to cover two-thirds of the young plant’s tomato stem. This will promote proper root growth. Turn the transplant upside down in its nursery pot. The plant should slide out of the pot easily, then, place the tomato plant, roots first, into the hole, covering two-thirds of the stem with soil. Press the soil down firmly with your hand.
Step 3: Add a Tomato Cage
Tomatoes need cages to help them grow upwards and not outwards. It’s a good idea to add in a tomato support now, so you avoid disturbing the root system later on. The most common type of tomato cages are cone-shaped and made with thick wire, with one end that is narrow and pointed with stakes and another end that is round. Use your hands to firmly press the staked end of the cage into the soil around the brim of the pot, and firmly compact the soil around each tine to keep the cage secure.
Step 4: Cover the Soil
Cover the soil with mulch, straw, or newspaper. This ensures the soil remains moist for longer, and you won’t have to water as much.
Step 5: Water Regularly
The soil must remain consistently moist, but not saturated. When the top inch of the soil is dry, water thoroughly.
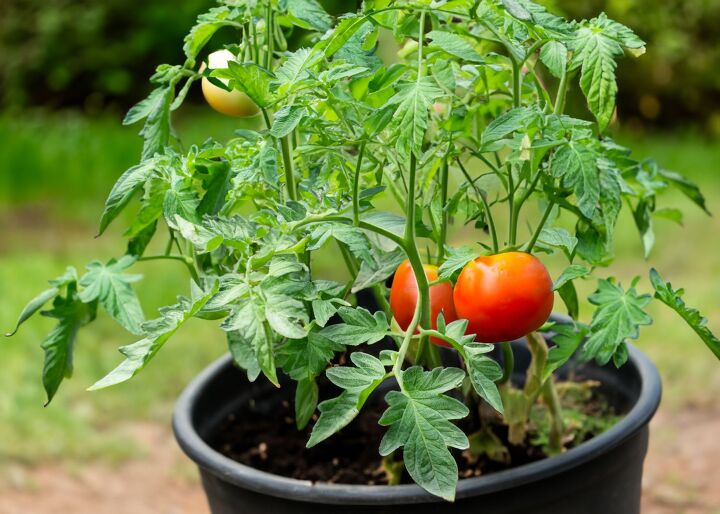
How to Care for Tomatoes in Pots
Caring for tomatoes requires giving the plants a good drink now and then, a little feeding, and plenty of sunlight. Here’s everything you need to know about how to care for tomatoes in pots.
Water
Maintain consistent moisture in your tomato pot. Check the soil every day until you have a good idea of how long it takes for the top layer to dry out. During warmer times of the year, ambient heating will dry out the soil quicker. To reconcile this, water plants in the morning to provide moisture all day, applying the water directly on the soil and avoiding wetting the foliage, which can promote fungal growth. The soil should always be moist but not soggy.
Sunlight
Tomato plants require full sun, so be sure to place the container in an area that receives six to eight hours of sunlight per day. Along with enough sunlight, be mindful of the temperature outside. If it drops below 50 degrees F or soars to above 90 degrees F, bring your plant inside.
Fertilizer
Feed your tomatoes about every two weeks during the growing season (late spring to early fall) with a continuous-release fertilizer. Some potting soils already have fertilizers in them, so be sure to read the contents of your chosen soil bag to make sure you don’t overfeed your tomatoes. Too much fertilizer can hinder fruit production or lead to poor fruit color and flavor.
Maintenance
Pruning tomatoes encourages proper air flow, which leads to a healthier production of fruit. Pruning involves pinching off suckers of the plant, or the small shoots that grow between the trunks and stems. By pinching off suckers, you’re ensuring that water and nutrients are going to the fruit-producing part of the plant instead of the energy-sucking offshoots.
If you're growing determinate-variety tomatoes, pinch off the suckers as they emerge from the lowest flower clusters closest to the soil.
Since indeterminate varieties of tomatoes are bigger, you'll want to pinch off suckers as they emerge from the second flower cluster down.
Supports
Adding supports to your potted tomato plants is important for a variety of reasons. Supports lift the plant to keep the fruit clean and away from pests, while also promoting proper air circulation to help prevent disease. You can purchase a traditional tomato cage, as we outlined in the steps above, or you can make your own by bending metal fencing or hog wire into a cylindrical shape, connecting the ends with wire, and staking it into your pot.
Pests and Diseases
If you spot pests or diseases, it’s important to immediately identify and tackle the issue to prevent any spread.
Aphids are one of the biggest offenders and can be identified by their soft pear-shaped bodies and white, black, brown, or even pink color. They settle on stems and young leaves, leaving behind a sticky substance from sap-sucking. The best way to get rid of them is by handpicking the pests.
Cutworms are another pest to look out for. They are gray or brown caterpillars with black or yellow spots, and leave large holes in tomatoes and attack the stems. Cutworms work at night and hide beneath the soil or under plant debris during the day, but if you happen to spot one, pick it off with your hands. To prevent an infestation, till the soil frequently.
Look out for hornworms as well. Part of the caterpillar species, they are identifiable by their light green color and feature a straight black horn. They can chomp off the leaves of an entire plant. They are best removed by hand. To prevent an infestation, spray the leaves with water frequently, and till the soil at the beginning and end of every gardening season.
Slugs and snails love tomatoes, too. They leave behind large holes in foliage and fruit. Pick off these critters at first sight, and stop them in their tracks using bait pellets on the soil. When the critters eat the bait, they stop feeding immediately, becoming less mobile and eventually dying within three to six days. Apply during the evening, when the critters are most active, scattering the granules on the soil.
As for diseases, look for early blight, which appears as bulls-eye-shaped brown spots on the lower leaves of a plant. As a preventative measure, mulch plants with a protective layer of newspaper topped with untreated grass clippings, straw, leaf mold, or finished compost.
Another common disease is septoria leaf spot, which appears as tiny, round splotches on the leaves. Remove infected leaves immediately. To prevent the disease, use an organic fungicide with copper or Bacillus subtilis.
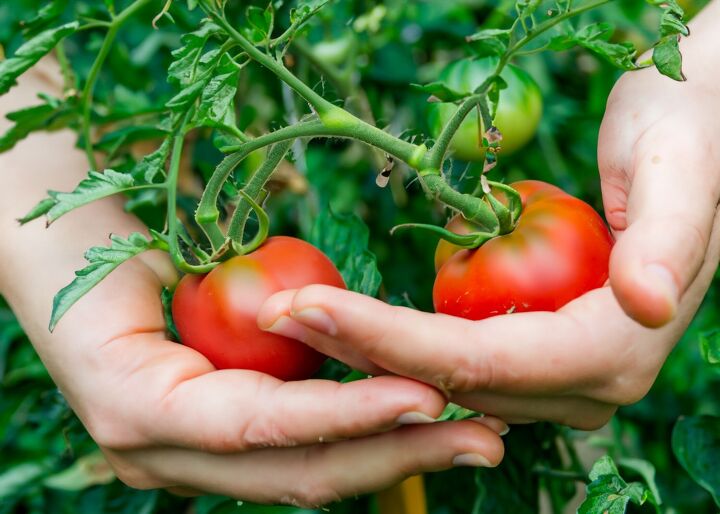
How to Harvest and Store Tomatoes
Expect to see tomatoes start to appear between 45 and 90 days after planting. Once the tomatoes are rich in color and slightly soft when squeezed, they’re ready to harvest! Cut the fruit from the vine with a simple twist using your hand, breaking the tomato off its vine. The tomatoes can then be stored at room temperature for about a week and in the fridge for two weeks.
Have you grown tomatoes in pots before? Share your experience in the comments below!


Frequently asked questions
Have a question about this project?