


How to Grow Watercress Successfully at Home

By Alexa Erickson
Not only is watercress a healthy, yummy vegetable to grow and take advantage of in recipes, but it’s great for your health. It’s a refreshing addition to salads, a delightful layer in sandwiches, and a tasty ingredient to add to sauces and marinades. It’s packed with nutrients, landing it on the list of U.S. Centers for Disease Control’s Powerhouse Fruits and Vegetables list.
The best part is that anyone can grow watercress at home. The only caveat is that, instead of sowing seeds in plain, dry dirt as you would squash and green beans, watercress thrives in—you guessed it—water. If you want this superfood at your disposal, read on to learn how to grow watercress.
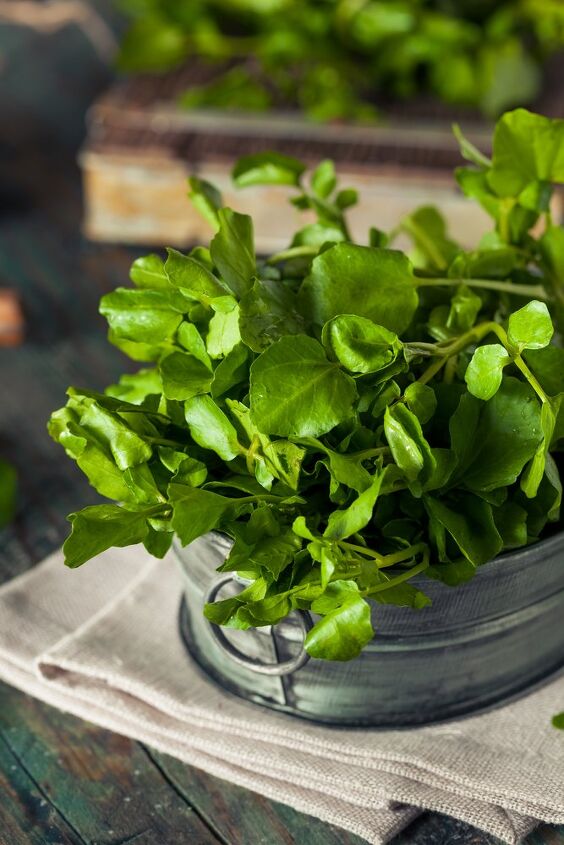
Photo via Shutterstock
What Is Watercress?
A member of the Brassicaceae family of vegetables alongside leafy greens like spinach and Brussels sprouts, watercress is packed with powerful nutrients. The vegetable has been revered for its health benefits since ancient times, popular among Roman soldiers, and thought to be a food to aid in and prevent scurvy. Native to Europe and Asia, the vegetable was brought to North America by immigrants and quickly became a nutritious addition to indigenous peoples’ diets.
Watercress features small, spade-like leaves and edible stems with a peppery and slightly spicy flavor. The plant produces attractive, small white flowers, which are also edible. Watercress can also be grown as a microgreen, where the plant's tiny stature packs an even stronger flavor.
How Does Watercress Grow?
In the wild, watercress grows in partially submerged running water and flooded areas. In nature, you’ll find it in cold, alkaline waters of springs in moderately cool climates. Watercress can be grown from seed, transplants, or cuttings.
At home, the plants still grow in water, but that doesn’t mean that you need a pond or fancy water feature on hand. We’ll detail how to do it below, but all it takes to grow watercress at home is a pot and saucer or a sunny spot to dig out a bog.
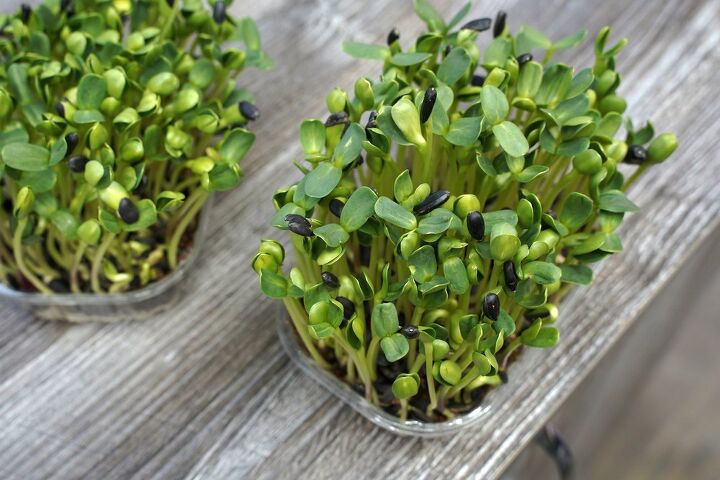
Photo via Shutterstock
How to Plant Watercress in Containers
Watercress thrives year-round in pots. If you’re preparing to transplant your watercress outdoors, plant it in containers during March and April, or when the average daily temperatures hover between 50 and 60 degrees Fahrenheit—this is when it'll best germinate.
Tools and Materials Needed
- 15-inch clay pot
- Rich soil
- Sand
- Pebbles
- Watercress seeds
- Saucer
Step 1: Sow Seeds or Bury Watercress Stems
Fill a 15-inch clay pot with rich soil, sand, and pebbles. Make sure the pot has holes in the bottom. Thoroughly water the soil and sow seeds thinly, ¼-inch deep on top of the potting mix.
You can also buy watercress stems from the store. To plant them, remove leaves from the stem, then bury the first node from the bottom of the stem in the soil. For either option, make sure to place a saucer beneath the container, which will help keep soil conditions moist.
Step 2: Flush Pot With Water
Seeds and stems germinate best in cool, wet conditions and you’ll see sprouts after about 14 days. Along with watering the plant daily to keep the soil wet, pour water into the saucer beneath the container daily, and change out the water twice a week.
How to Plant Watercress In the Ground
In the wild, watercress prefers cool but sunny spots. If you have a small creek or stream on your property, you can easily grow watercress there. If not, you’ll want to create a bog yourself. Here’s how to make your own ideal bog environment for watercress.
As with planting in containers, plant watercress in the ground in March and April, or when the average daily temperatures hover between 50 and 60 degrees F for it to properly germinate.
Tools and Materials Needed
- Black pond liner
- Scissors
- Garden fork
- Shovel
- Garden soil
- Coarse builder’s sand
- Compost
- Mushroom compost
- Water
- Slow-release fertilizer
- Watercress seeds
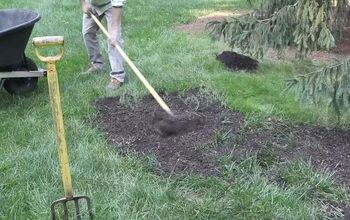
Step 1: Create the Bog
Create a bog by digging a hole about two feet across and 12 inches deep. Place a pond liner over the hole, pressing it firmly into the hole with your hands. Trim the excess liner off the top, leaving about a four-inch lip. Punch a few holes in the sides of the liner using a garden fork.
Step 2: Fill the Bog
Add equal parts garden soil, coarse builder's sand, compost, mushroom compost, and a handful of slow-release fertilizer into the bog until the combined material reaches about two inches below the top of the bog. Cover the remaining exposed liner with soil. Water the bog thoroughly.
Step 3: Sow the Seeds
Sow watercress seeds ¼-inch deep and about ½-inches apart in the bog. Cover with garden soil. Lightly water.
Step 4: Thin Seedlings
After germination, thin out the seedlings so that they’re six inches apart. Make sure that the bog remains moist at all times.
How to Care for Watercress
Watercress is relatively low maintenance, so long as you ensure there is consistent moisture and that the plant is always in full sun. Also, make sure that the roots are always in moist conditions as described above.
The plant is relatively pest-free, although sometimes whiteflies or snails affect watercress. You may find whiteflies (small winged insects) on the underside of the leaves. To remove them, spray the undersides with a sharp stream of water. And you can just pick off snails with your hands. If you find that snails are becoming an ongoing issue with your watercress, place copper mesh at least four inches tall around the base of the pot or bog to keep snails out.
Watercress doesn’t have high nutrient requirements, so a regular fertilizer application isn’t necessary. However, if you notice signs of deficiency, apply a complete soluble fertilizer at the recommended rate.
- Phosphate deficiency: Stunted growth and leaves and stems are turning dark in color
- Potassium deficiency: Scorched leaves
- Iron deficiency: Leaves are yellowing on their veins and newer foliage is coming up yellow. This is typically common in the winter.
How to Harvest Watercress
Harvest watercress when the plants have become well-developed and during cooler months when the flavor is best. To harvest, trim off the tops of the shoots with scissors. Avoid cutting too low down on the plant as the stems need adequate length to produce new growth and side shoots.
How to Store Watercress
Once harvested, store the watercress clippings in a deep bowl in the refrigerator, the stems submerged in water and the leafy tops covered with a plastic bag. The watercress should keep for up to five days.
How to Use Watercress
Watercress adds a little something extra to sides and dishes. Here are a variety of ways to enjoy watercress in your recipes:
- Add into salads for a peppery kick
- Blend into smoothies to reap the health benefits
- Add a crunch to sandwiches
- Chop and use as a garnish for soups
- Toss into a stir fry
- Try out this Sizzled Clams With Noodles and Watercress recipe!
What’s your favorite way to use watercress? Share your thoughts in the comments below!


Frequently asked questions
Have a question about this project?