


How to Repair Vinyl Siding Like a Pro

By Judy Schumer
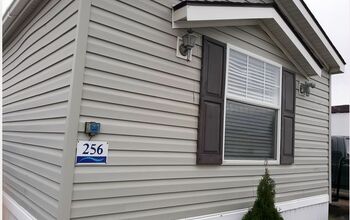
Vinyl siding not only adds curb appeal to your home but also protects it from damage that can be caused by moisture and insects. The plastic-like material successfully resists water and isn’t the tasty treat that wood-boring insects love to snack on.
Even though vinyl siding is strong, it does have its weaknesses. Extreme cold can cause vinyl siding to become brittle enough that a piece of gravel kicked up to it can create a hole or crack. Excessive heat can cause it to melt, particularly when the siding is directly behind a grill or too close to the airborne embers from a fire pit.
No matter how the hole or crack happened, repairing or replacing vinyl siding will renew the barrier the siding forms. The small investment of time in this DIY project will pay off by keeping your home’s exterior safe from destructive forces like mildew, wood rot, and nesting areas for wood-eating bugs. Keep reading this guide to learn, step by step, how to repair vinyl siding woes.
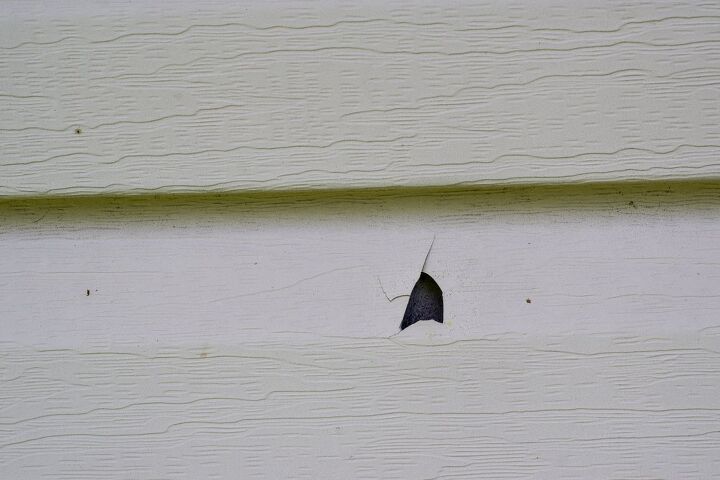
Photo via Shutterstock
About Vinyl Siding
Understanding how vinyl siding is meant to perform and the correct way to install it is essential when it comes time to make repairs.
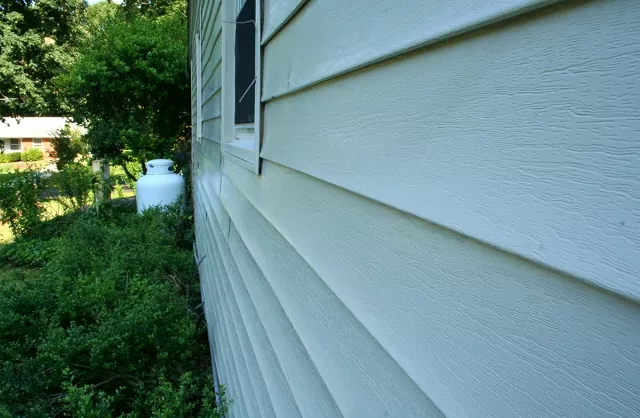
Vinyl siding is a solid plastic that mimics the look of wood planks. Unlike single wood planks, vinyl siding is formed in molded sections. The sections expand and contract with the outside temperature, creating a solid barrier to protect your home’s exterior from the elements. Each of the sections interlock at the top and the bottom, and you’ll need to preserve this interlocked system if you replace a section of vinyl siding in the course of a repair.
When vinyl siding is installed, it attaches to the outer wood shell of your home by nails hammered through a series of holes at the top of each siding piece. The nails shouldn’t be completely flush with the siding, or the siding won’t expand and contract as needed. Nailing too closely will also cause the siding to make crackling and popping sounds as it expands as it heats up in the summer or contracts with the frigid winter air. On the flip side, they cannot be nailed too loosely, or water can seep in behind the panels.
Common Vinyl Siding Issues
Like any exterior-facing material exposed to the elements, vinyl siding has its fair share of problems. Some issues that can crop up and lead to vinyl siding needing to be repaired or replaced are:
- Holes or chips. Caused by an impact, a hole or chip will weaken the ability of the siding to protect the wood underneath it.
- Cracks. Cracks can be caused by impact or siding that is nailed too tightly, causing it to crack as it attempts to expand or contract.
- Rotting wood underneath the siding. If the wood the siding is nailed to becomes unstable, the siding can no longer form a tight barrier to protect your home from the elements.
- Warping. The heat from an outside source like a grill can cause siding panels to buckle or warp. Warping creates gaps that compromise the seal that the vinyl siding provides to your home’s exterior.
- Mildew or mold. If mildew or mold is present anywhere but the outer panels, it’s a sign of water damage behind the siding.
How to Repair Holes in Vinyl Siding
Vinyl siding is far tougher than wood siding and much easier to care for. However, it is an exterior product that can sustain damage from the elements and outdoor hazards like rocks, severe weather, and overzealous athletes that send a golf ball or baseball careening into your siding.
Fortunately, small holes (an inch and a half or less in width) are easily repaired without having to completely replace the siding. Tinted caulk that matches your home’s siding is the easiest repair, but you can also use a white caulk and paint it to match your siding. Follow the simple steps below to learn how to repair holes in vinyl siding.
Tools and Materials Needed:
- Ladder (if needed)
- Bucket
- Liquid dish detergent
- Sponge
- Warm water
- Tinted or white caulk tube
- Scissors (if needed)
- Caulking gun
- Damp paper towel
- Razor blade
- Paint to match the siding (if needed)
Step 1: Clean the Siding
Pour a few tablespoons of dish detergent into a bucket and fill halfway with warm water. Wet the sponge and clean the area around the hole, removing all dirt or pollen. Let the area dry for two to four hours. It’s best to do this on a sunny day so the sun can help the drying process.
Step 2: Prepare the Caulk
Remove the tip from the tube of caulk, using scissors if needed. Place the tube into your caulking gun and adjust the plunger so it rests against the top of the tube. Squeeze the trigger until the caulk flows out easily.
Step 3: Fill the Hole
Point the nozzle of the caulk gun into the siding hole and squeeze. Fill the hole with the caulk until it reaches the top. Set the caulk gun aside, press down on the caulk with your finger, then feather it around the sides of the hole to blend it with the siding.
Step 4: Let Dry
Let the caulk dry for at least 24 hours. Once dry, use the razor blade to scrape away any excess caulk raised above the siding surface. If you did not use tinted caulk, paint the caulk with exterior latex paint to match the siding.
How to Replace Damaged Vinyl Siding
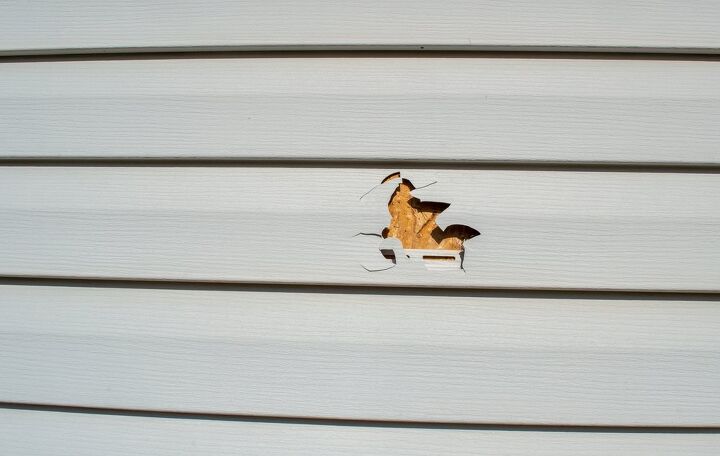
If the hole or crack in your siding is over an inch and a half in width, you’ll need to replace the damaged piece of vinyl siding completely. Doing so is the only guaranteed way to preserve the siding’s structural integrity against insects and moisture.
Tools and Materials Needed:
- Zip tool for siding
- Pry bar
- Tin snips
- Utility knife
- Replacement vinyl siding
- Galvanized roofing nails
- Hammer
- Ruler
Step 1: Separate the Damaged Siding
Working with the bend in the zip tool facing upwards, start at one end of the siding above the damaged area and push the end of the tool under the siding. You will feel it hook the bottom lip of the siding piece.
Once you’ve locked the zip tool in place, pull it down while simultaneously sliding the tool away from the end of the siding piece. Pull as you go along to help the piece separate.
Once finished with the top edge, repeat this process to separate the bottom edge of the siding.
Step 2: Remove Nails
Once you’ve separated the damaged siding, you’ll need to remove the nails to fully detach it from the house. Remove the nails by sliding the pry bar behind the siding and pushing the nails out.
Step 3: Remove the Damaged Section
Cut the damaged section of siding out with the tin snips.
Step 4: Prepare the Replacement Siding
Using a utility knife, cut your replacement siding to fit the space where you’ve just removed the damaged siding, with an inch on each side as overlap. Place the new piece into place by pushing on the bottom edge. This should hook the siding into the lower piece while the top will fit into the siding above it.
Step 5: Place the New Section
Slide the new section of vinyl siding up into place. Push upwards until the lower lip of the piece locks into the siding piece directly below it. You’ll hear it snap into place.
Step 6: Nail the Siding
Drive the galvanized roofing nails through the nailing holes in the flange. Nail each one in the center of each hole, taking extra care to leave just 1/32 of an inch (about the size of a nailhead) of space between the nail head and the siding flange. This is crucial to allow the siding to expand and contract.
Step 7: Lock the Panels
Use the zip tool to lock the panels together. Slide the tool along the bottom edge of the replacement siding, pushing the panels together as you go.
When to Call a Professional
If you have multiple damaged areas that require extensive removal of your vinyl siding, it’s best to have a professional siding contractor do the job. The replaced siding will need to be correctly aligned with the existing siding, which can be tricky if multiple repairs are needed in different areas.
You should also call a professional if you have damage that extends to the underside of the siding. Simply replacing siding over rotted or heavily-mildewed wood will allow the damage to continue, making the repair far more costly down the road. A professional will replace any wood or insulation as needed, along with replacing damaged siding.
More Vinyl Siding Care Tips
Vinyl siding is virtually maintenance-free. Cleaning it and protecting it are all you need to do to keep it looking new and performing like a suit of armor on your home. Here are a few vinyl siding care tips to keep in mind:
Keep It Clean
Keep your vinyl siding clean by giving it an overall cleaning every three months or so. Do this by mixing liquid dish detergent with warm water in a bucket. Clean the siding with a soft-bristled brush soaked in the solution. Then, rinse the siding thoroughly with clean water to remove any soap residue.
If you need to remove mildew or heavy pollen, mix ⅔ cup of powdered laundry detergent, one cup of all-purpose cleaner (like Spic and Span), and two gallons of warm water in a large bucket. Clean the siding with a soft-bristled brush soaked in the solution and rinse well.
Before breaking out your power washer to tackle tough grime on your siding, check with the siding manufacturer. If it’s safe to do so, keep your siding clean by power washing it yearly. Power washing will remove dirt, mildew, and pollen and get rid of any insect nests that may be forming under the ridges of the siding. Make sure to follow the power washer instructions to avoid etching or damaging the vinyl.
Protect from Paint and Chemicals
Cover your siding with tarps any time you’re using deck or porch stains or varnishes, or when painting trims around windows and doors. Attempting to remove paint or stain from siding with harsh chemicals can damage the siding, so prevention is key. If you are using insecticides or weed killers outside your home, avoid spraying near the vinyl siding.
Check for Damage
Once a month, take a walk around your house to check for cracks or holes in your siding. A minor repair taken care of quickly can prevent larger, costlier repairs due to water or insect damage.
Have you had to repair your vinyl siding? How did you do it? Let us know in the comments!


Frequently asked questions
Have a question about this project?