


How to Stain Wood Perfectly Every Time

By Marilyn Syarto
Learning how to stain wood can open up a world of projects for you. You can change the look of furniture, finish cabinets and flooring, update architectural elements like trim and ceiling beams, make heirloom knick-knacks and toys, and tackle outdoor projects like making over a deck or porch.
Our guide helps you get started learning the basics of how to properly stain wood; types of stains and when to use them; and how to prep, apply stain onto, and seal your projects.
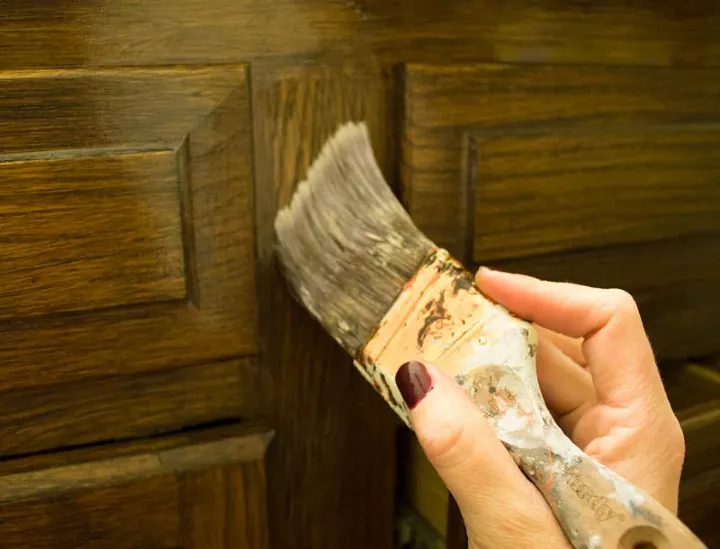
Photo via Jenni Ingram
Types of Wood Stains
We’ll take a look at the three most popular types of wood stains that at-home DIY-ers use. There are other types of stains/dyes that professional or advanced woodworkers may use (for example, many pros use lacquer stains to spray wood cabinets for a durable, smooth finish), but if you’re just starting out staining wood, stick to these easier-to-use products.
DIY Wood Stains
Oil-Based
This is the most popular wood stain and is good for all types of furniture, kitchen and bath cabinets, interior trim, paneling, and doors.
- Pros: Durable, deeply penetrating, goes on evenly, doesn’t absorb moisture, does not raise wood grain which means sanding isn't needed
- Cons: Dries slowly, has some odor
Water-Based
Water-based stain is thinner and easier to work with on small or detailed wood pieces such as headboards and end tables, detailed trim or architectural woodwork, and ceiling beams. Note: Minwax, a wood stain brand, does not recommend using water-based wood stains for large surfaces such as flooring.
- Pros: Environmentally friendly, low odor, a wide choice of colors (including pastels and jewel tones) and tints that highlight the wood grain, easy to work into crevices, dries fast, and easy clean-up
- Cons: Does not penetrate deeply
Gel
A thicker pigment for staining wood, gels are either oil-based or varnish-based stains. Gel stain is ideal for big pieces of furniture because it won’t drip as you are working on the large vertical surfaces.
- Pros: Hides flaws, won’t drip, and no sanding necessary
- Cons: Does not penetrate deeply, is slow to dry, and has a higher odor
How to Prep Wood for Stain
Preparing the surface is critical to the quality and finish of the stain job, regardless of which type of stain you use. Luckily, prepping to stain a piece of wood isn't too difficult, but it makes all the difference in helping the stain apply beautifully and evenly.
Note: This method is for bare wood—not sealed wood that needs stripping before staining.
Tools and Materials Needed:
- Putty knife (optional)
- Putty or wood filler (optional)
- 120-grit sandpaper
- 220-grit sandpaper
- Tack cloths
- Painter’s dust brush
- Synthetic bristle staining brush (optional)
- Pre-stain wood conditioner and brush (optional—get oil-based conditioner for oil-based stain and water-based conditioner for water-based stain)
- Rags
Step 1: Repair the Wood if Needed
Whether it’s furniture or an interior door, there may be some dings and indents that need to be repaired before you stain. Use a putty knife to apply wood putty or filler to fix the dings. Let the putty dry, then sand lightly (with fine 120- or 220-grit sandpaper) until the ding is now flush with the rest of the surface. Wipe with a tack cloth.
Step 2: Sand Wood
Go over the wood with 120-grit sandpaper, then with 220-grit sandpaper. Sand in the direction of the wood grain. Wipe dust off with a painter’s dust brush between and after sandings. Wipe down the surface with a tack cloth after the final sanding.
Sandpaper’s Effect on Stain Color
Step 3: Condition the Wood
Although this step is optional, using a conditioner will help the wood absorb stain better without blotching. Some softwoods, like pine, and some hardwoods, such as cherry, turn blotchy when stained. The Home Depot highly recommends conditioning these types of wood before staining.
With a brush, apply the pre-stain wood conditioner. Leave on for 10 minutes and then wipe off with a rag.
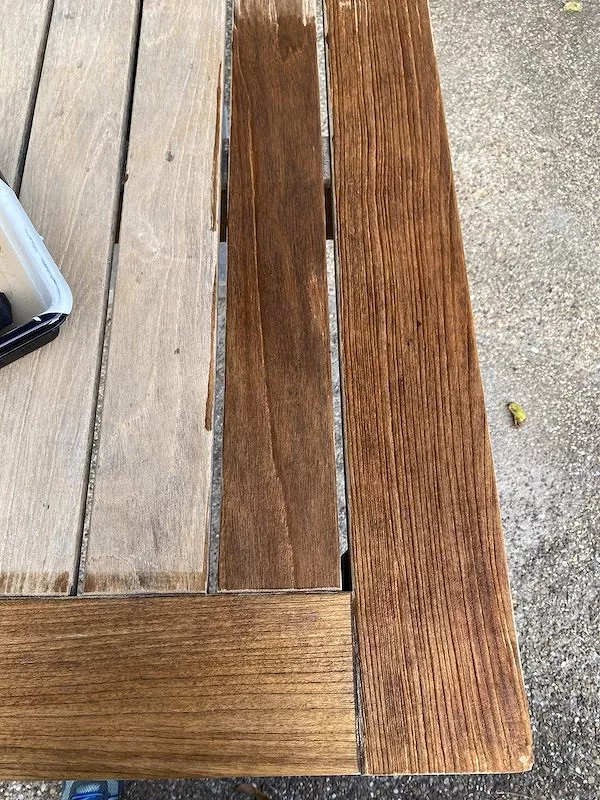
Photo via Andrea
How to Stain Wood With Oil-Based Stain
Use a rag or a brush to apply oil-based stains and don’t shake your oil-based stain cans to mix—doing so will create bubbles in the liquid, which will transfer to the wood.
Tools and Materials Needed:
- Paint stirrer
- Can of stain
- Natural bristle brush (or buy the type of brush the can of stain suggests)
- Lint-free rags
- Protective gloves
Step 1: Stir Can
Make sure you thoroughly stir the stain in the can with a paint stirrer to mix up any pigment that’s settled at the bottom of the can.
Step 2: Brush on Stain
With a natural bristle brush, work the stain into the wood, going in the direction of the wood grain. After you’ve covered the entire surface, leave the stain on for 15 minutes maximum or per the directions on the can. The longer the stain is left on the wood, the darker the finish.
Staining Oak
Step 3: Wipe off Excess Stain
Use a rag to wipe off the excess stain that wasn’t absorbed into the wood, otherwise it’ll dry on top of the wood surface. Wipe by going with the grain of the wood.
Step 4: Let Dry
Let the stained piece dry for four hours or per the directions on the can.
Step 5: Apply a Second Coat
If you would prefer a darker finish, apply a second coat by repeating Steps 2-4.
How to Stain Wood With Water-Based Stain
It’s highly recommended that water-based stain be applied by hand and a rag rather than on a brush. That’s because it’s thinner than oil or gel and it won’t sit long on a brush. You will have much better control applying the stain by hand. Here’s how to do it:
Tools and Materials Needed:
- Gloves
- Paint stirrer
- Can of stain
- Lint-free cloth
- Synthetic bristle brush (optional)
- Protective gloves
Step 1: Stir
Put on gloves and use the stirrer to completely blend the ingredients in the can.
Step 2: Wipe On
Dip the cloth in the can of stain. Wipe it on the wood in the direction of the wood grain. Once rubbed on, give the wood a few minutes to absorb the stain.
Step 3: Wipe off Excess Stain
Take the same rag and wipe off any excess stain that the wood has not absorbed. You don’t want to wipe the stain off with a fresh cloth or else some of the stain you’re trying to keep on the wood will transfer to the clean fabric.
Step 4: Dry and Apply Second Coat (optional)
Let the stain dry per the product’s directions. If you prefer a darker color, repeat Steps 2 and 3 for a second coat.
How to Stain Wood With Gel Stain
Applying gel stain is a bit different than liquid stain. Prep the wood the same way as you would for any other stain. However, do not over-sand with fine-grit sandpaper or you’ll close the grain and the gel won’t be able to become absorbed by the wood, according to General Finishes, makers of gel stain. General Finishes also recommends not using a wood conditioner before applying gel stain. In addition, be sure to work with gel stain in a well-ventilated area.
Tools and Materials Needed:
- Shop towels or any lint-free cloth (don’t use cotton or it will “push” stain around)
- Natural bristle brush, foam brush, or staining pad applicator
- Paint stirrer
- Can of gel stain
- Protective gloves
Step 1: Stir
Thoroughly mix contents in the can using the paint stirrer, making sure there are no solid particles settled on the bottom.
Step 2: Apply
Depending on which type of tool you prefer, apply the gel stain. Use a liberal amount on the brush or cloth. Work quickly, one area at a time, and apply gel with smooth, even strokes. It will dry quickly.
Large Surfaces? Grab a Buddy
Step 3: Wipe off Excess Stain
Using a shop cloth, wipe off excess stain, wiping with the grain of the wood. Use a natural bristle brush to pull the excess stain out of crevices and small detailed areas.
Step 4: Correct Lap Marks
You can correct problem areas and lap marks by rewetting the area with the stain, smoothing it out, and quickly wiping off the excess.
Step 5: Dry
It’s tricky to thoroughly dry gel stains. A lot of it depends on the humidity, weather, and other environmental factors, but it can take up to five days for the stain to dry completely.
Apply a second coat if you wish by following Steps 2-5. However, do not apply more than two coats of gel stain, which could oversaturate the piece and may result in a finish that never fully dries, warns General Finishes.
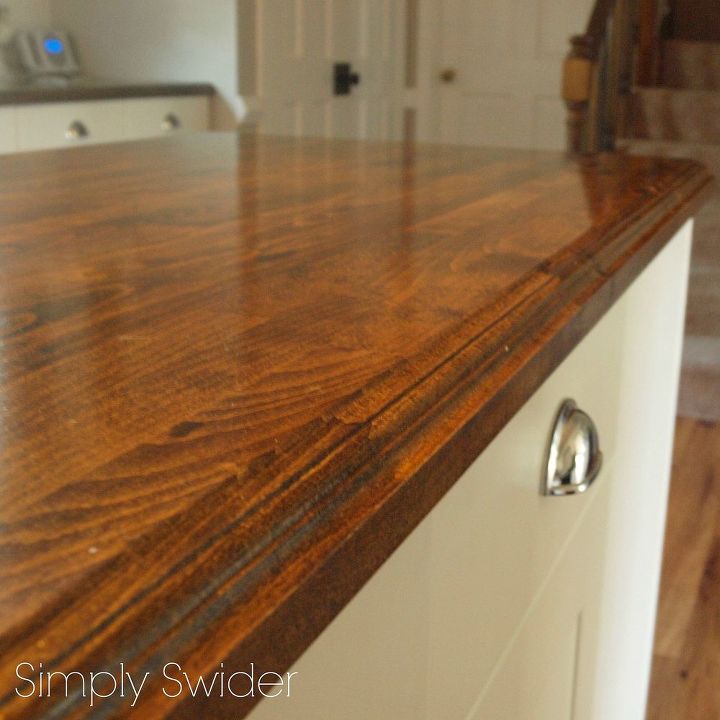
Photo via Simply Swider- Stephanie
How to Seal Wood After Staining
Stain only adds color, it rarely protects the wood surface. For that, you need a clear coat of sealant or a protective finish in your desired sheen.
Tools and Materials Needed:
- Paint stirrer
- Sealant, protective finish, varnish, or topcoat (use the appropriate finish for the type of stain used)
- Natural bristle brush
- 220-grit sandpaper
- Tack cloths
Step 1: Stir the Can
Use a paint stirrer to thoroughly stir the contents of the can. Don’t shake the can, which can cause bubbles that will be transferred to your freshly-stained wood.
Step 2: Apply Sealant
Use the brush to go with the grain of the wood and apply the sealant with short strokes.
Step 3: Use Long Strokes
When you are nearly done applying the sealant, use long and smooth strokes to even out the first coat.
Step 4: Dry
Let the sealant dry for about four hours or per the directions on the can of the product you used. It can take longer in cool weather or in areas with high humidity.
Step 5: Sand
When the finish is no longer tacky, take a piece of 220-grit sandpaper and lightly sand to smooth out the first coat.
Step 6: Wipe off Dust
Take a tack cloth and wipe off the sand dust.
Step 7: Apply Second Coat
Repeat Steps 1-4 with a second coat of sealant.
Share tips, tricks, and photos of your wood stain projects in the comments below. Or, if you were able to use wood stains in an unusual or creative way around your home, we’d love to see the results!
Comments
Join the conversation
-
Wow I really like your in depth instructions. I have learned most of the tips before. But have never used Gel stain because people told me it is a royal pain to work with. I think they were putting on too many coats and not letting it dry completely.
Great tutorial.


Frequently asked questions
Have a question about this project?