


8 Simple Steps to Your Very Own Beautiful Flourishing Garden

Nothing can quite compare to the taste or aesthetic of fresh produce.
Picture this: You’re perusing the local farmers market, eyeing up piles of lettuce, carrots, radishes, potatoes, and flowers, gradually filling up your tote with fresh goods straight from the farm. There’s something about supporting and getting to know your community’s local producers, but what if you were able to grow your own abundance of blooms, fruits, and veggies right at home?
Well, the good news is that you can. Gardening is a commitment, though, and one that requires the right research, tools, crops, tedious care, and patience. If you’re ready to get your hands dirty and stick to it, then keep reading.
Here’s how to start your own garden at home in a few steps.
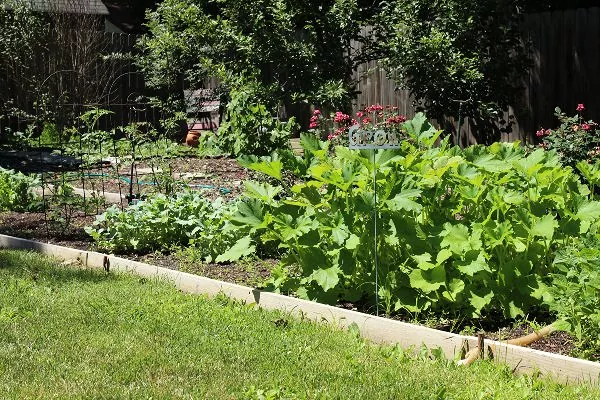
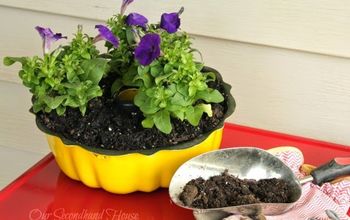
Photo via Holly Bertone | Pink Fortitude
Determine Your Climate Zone and Frost Dates
Before you head to the store and start picking out seeds, there are several things you’ll need to consider. The very first thing the novice gardener should take note of is the climate zone and frost dates for where they live.
Frost Dates
Frost dates are the days of the year when temperatures are 50 percent likely to dip below freezing and frost will show up on the ground.
There are two frost dates that gardeners need to take note of: the first frost date in autumn, and the last frost date in spring. The window of time between these two dates is when it’s safe to plant seeds in the ground and when you should harvest the last of your produce so that your crops aren’t negatively affected by frost.
Delicate plants (like annuals, which are annuals for a reason—they’re too fragile to survive winters) can be damaged when the temperature drops to between 29-30 degrees Fahrenheit.
Most plants will take a blow from a moderate frost, which occurs between 25-28 degrees F, and even the hardiest of plants fall casualty to a severe frost when the temperature drops below 25 degrees F.
Understanding and keeping track of frost dates is necessary if you want to plant produce that will grow and thrive. Still, that 50 percent isn’t a guarantee. Because of changing weather patterns, it’s difficult to know exactly when the first frost date will occur, so assuming it could show up two weeks early—or two weeks later than the predicted last frost date—is a good rule of thumb.
You can find your area’s frost dates by entering your zip code here through the National Oceanic and Atmospheric Administration’s data processing method.
Climate Zones
Frost dates go hand-in-hand with climate zones when it comes to the first steps of garden planning. You may have heard of the United States Department of Agriculture’s hardiness zone method, which divides the country into different regions based on average annual minimum winter temperature. This helps growers consider factors like summer temperatures, humidity, and rainfall in their regions.
Plants often grow best in locations similar to their native climates, which is why it’s important to understand the different types of climate zones when picking out plants for your garden.
Five main climate zones exist:
- Tropical climate zones – hot, humid, high levels of precipitation, and high average temperatures
- Dry climate zones – hot but dry, with very low precipitation
- Temperate zones – identified by warm, wet summers and rainy, mild winters
- Continental zones – identified by warm or cool summers and cold winters with snowstorms
- Polar zones – extremely cold in winter, quite cool in summer
Identify your own climate and climate zone by taking a look at a climate zone map, which can be found online for your particular area or through your local extension service.
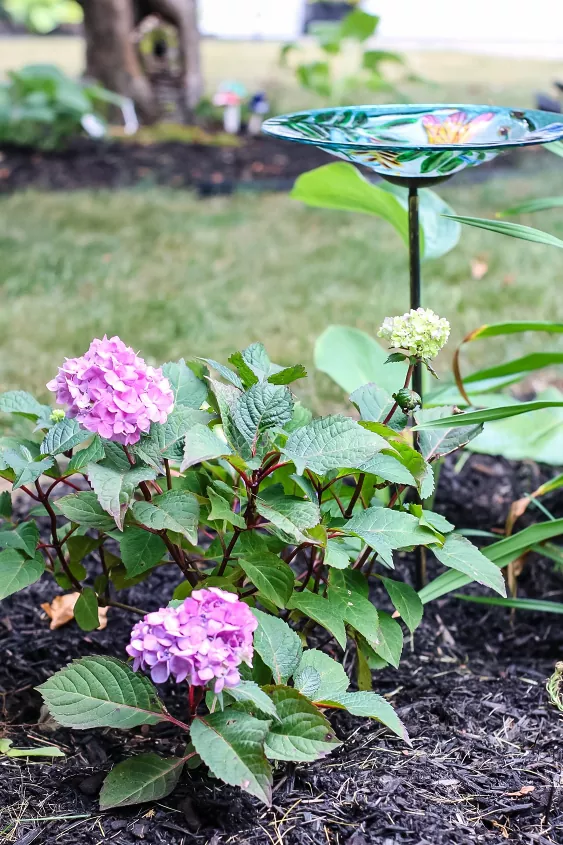
Photo via Jennifer Howard| Cottage On Bunker Hill
Choose Plants for Your Garden
Figuring out the climate zone and frost dates for your region will narrow down the types of plants you’re able to grow, but you’ll likely still be left with an overwhelming amount of options.
Picking and choosing may take some time, but there are some key considerations you’ll want to keep in mind when deciding what to plant in your garden.
Flowers
Planting an array of flowers and greenery is a great way to add some color to your yard, but make sure you understand the ins and outs of the type you’re buying before you start planting them into the ground.
Not all flowers have the same lifespan, growing cycles, or care requirements. Below are some of the bare basics you’ll want to consider when picking blooms to plant in your garden:
Annuals
Just as you might expect from the name, annuals are plants that last for only one year—or one growing season, to be specific. You can purchase seeds and plant them, or transfer plants to your garden further along in the growing process.
Annuals will sprout, flower, seed, and die all in the same year, so next year you’ll have to replant them. With that being said, plants that are classified as annuals are often the “show-stoppers” of the garden—they flower bright and big, and often have a long blooming period.
Some popular examples of annuals include chrysanthemums, dahlias, geraniums, marigolds, pansies, and petunias.
Perennials
For a little bit less of a maintenance commitment, plant some perennials in your garden. These types of plants live for at least three or more growing seasons and grow from bulbs or seeds that are planted in the ground.
They usually aren’t as showy as annuals, since a lot of the growing work is done in the strong roots that keep them coming back year after year. These roots go dormant in the winter, and perennials often have shorter blooming periods than annuals.
Popular examples of perennials include hydrangeas, alliums, lavender, and bearded irises.
Biennials
Many gardeners stagger their planting so that flowers bloom every year, so a mix of annuals, perennials, and biennials can be helpful.
Biennials grow for two seasons, but won’t initially bloom until the second year. These plants usually grow foliage in their first season and then bloom in their second before they die. Popular examples of biennials include hollyhocks, forget-me-nots, and foxgloves.
Vegetables
When it comes to choosing vegetable types to grow in your garden, everyone has their own reasons as to why they plant what they do. Whether you plant to harvest and eat or to sell, here are some questions to ask yourself before heading to your local nursery for seeds:
- What vegetables do I like to eat? Don’t underestimate the importance of this one, because why plant vegetables you don’t like if your garden ends up yielding a bountiful harvest? Think about what vegetables you and your family enjoy eating, and go from there.
- What vegetables are low maintenance and easy to grow? Beginners have luck with varieties of lettuce, carrots, and radishes, which are all relatively low-maintenance vegetables to grow in your garden. On the flip side, it might be a good idea for new gardeners to stay away from cauliflower.
- What vegetables can I grow to preserve or store through the winter? Some vegetables, like cucumbers, are great for preserving. Others, like potatoes, can be harvested and stored all winter. Everyone has their own methods and recipes of preserving produce, but this is something to take into consideration along with what you and your family like to eat.
- What vegetables grow best in my climate? We’ve already discussed climate and hardiness zones above, but do your research on what veggies grow best in your area before planting.
- What vegetables can I grow to sell or save money? Some vegetables sell at higher prices than others for a variety of reasons. Whether you like to eat these veggies yourself and buy them sparingly, or know others who would purchase them from you, these might be good options to grow yourself, and a great way to save some grocery money. Be sure to look into your municipality’s produce-selling laws.
Herbs
Herbs are super-popular for novice and experienced gardeners alike. Herbs are versatile, easy to grow, don’t take up much space, and add a splash of greenery and fragrance in the garden—and a burst of flavor to dishes made at home. Some commonly-grown herbs include basil, mint, cilantro, parsley, and rosemary.
Fruits
The idea of growing your own fruits at home may sound intimidating at first, but as long as you’re familiar with your growing climate and have put some thought into your garden plot, you can grow fruit in your garden.
Common fruits that gardeners grow (climate-depending) include berry bushes like strawberries, blueberries, blackberries, and raspberries; melons, cherries, apples, and peaches.
Pick a Garden Plot
After the “what” it’s time to take care of the “where”. With plants picked out, you can now figure out where exactly in your yard you’ll plant your plot and start preparing the space. A successful, fruitful garden relies on many factors that you, the gardener, can try to manage to the best of your ability.
Considering that the location of your plot is one of the things you can fully control, it’s important to look at the following guidelines for picking a garden plot before breaking ground:
1. Garden Size
The amount of space that you will need to mark off for your garden depends on what plants you decide to grow.
A lot of space isn’t necessary for a bountiful garden, but do the research on how much space your flowers, fruits, and vegetables in question need and go from there when outlining your beds. This may mean picking out plants before determining garden size.
2. Sun Exposure
Sunlight needs also depend on what types of plants you are growing, so plan accordingly. Try to find a spot in your yard that receives about six to eight hours of unfiltered sunlight every day, not too close to the house or any large trees—shadows could impede over your garden, blocking the sun.
3. Soil Health
Wherever you set up your garden, the soil needs to be rich and well-draining. Clay soils are ideal only for certain plants. (We’ll get into how to test your soil in a little bit.)
4. Location
You’ll want to make sure that your new garden is easily accessible for your own sake. When it comes to routine and regular maintenance, tending to a garden that is too far away from a hose or utility shed may become more bothersome than enjoyable.

Photo via Carole
Basic Tools You’ll Need
Garden tools are designed to make your life easier, and the size and complexity of your garden will determine the types of tools you’ll need on hand.
As always, it’s important to do some research on if there are any specific things you’ll need for the types of plants you’re growing, but we can guarantee that every novice gardener should invest in the following tools:
1. Gloves
These are a must for doing almost anything in the yard. Garden gloves are often coated in nitrile for gripping power and will aid in protection from thistles and thorns, so don’t be afraid to get your hands in the soil—you’re covered. Emerit 2 Pairs of Garden Gloves, Amazon
2. Spade Shovel
Even with gloves, you’ll need some extra help to turn the soil. Make sure you test a few different options, as some are heavier and sharper than others. One Shot Steel Garden Shovel, The Home Depot
3. Watering can or hose
A watering can may seem like an old-fashioned knick-knack, but its usefulness should not be underestimated when it comes to providing your plants with a much-needed drink.
Having a hose hooked up nearby is ideal, and other watering tools may be helpful depending on your garden’s needs. Behrens 2-Gallon Steel Watering Can, Amazon; Flexi Hose Lightweight Expandable Garden Hose, Amazon
4. Digging fork, hand trowel, rake, and hoe
These digging tools are designed to work in any size garden. Digging forks come in handy when turning and lifting large amounts of soil. A small trowel is great for working soil in small areas by hand, whereas a rake and hoe often make appearances when covering a larger surface area and pulling weeds. Fiskars Xact Garden HandTrowel, Amazon; Spear & Jackson Neverbend Digging Fork, Amazon; MIYA Bow Rake Stainless Steel, Amazon; DeWit Right Hand Dutch Hand Hoe, Amazon
5. Wheelbarrow
Transporting seeds, large packages of soil, equipment, and harvested produce gets tricky when you only have two hands. Stacking all these things up in a wheelbarrow will save you time, trips, and energy. Wheelbarrow with Steel Handles and Flat Free Tire, The Home Depot
6. Pruning shears
When it comes time to harvest from your garden, pruning shears are essential. Again, find the size and design that fits best for the needs of your crops, but make sure that the blades are quality and sharp enough to tackle even the toughest of tangles. Fiskars PowerArc Shears, Amazon
Test Your Soil
Healthy soil means healthy plants, but what makes for a rich garden bed? The answer lies in a soil’s pH, or how acidic and alkaline the contents are.
pH is measured on a scale of 1 to 14, with 7 being the neutral sweet spot. Anything below 7 is considered acidic, whereas anything over 7 is considered alkaline.
You’ll find that most plants prefer to stay in that neutral range, anywhere between 6.2 and 7.2. All of this and more can be revealed to you with a simple soil test.
You can pick up a pH tester kit from almost any yard supply store. It will include vials, tablets, and a chart to help you interpret the results, as well as amendments to balance your soil’s pH. If you pick up an electronic testing meter instead, simply stick the meter into the soil and the results will show up on the device’s screen.
What you add to your soil depends on the pH test results. To neutralize acidic soil, limestone or garden lime is usually recommended since it’s high in both calcium and magnesium.
To neutralize alkaline soil, look for soil conditioners with sulfur or some sphagnum peat moss—both are effective in balancing out a bed’s pH. Keep in mind, though—this process doesn’t happen overnight. It will take some time for the properties of your soil to change, likely several months.
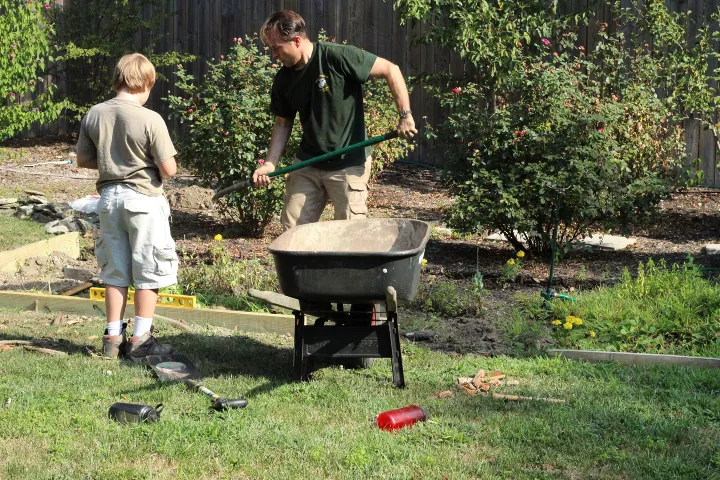
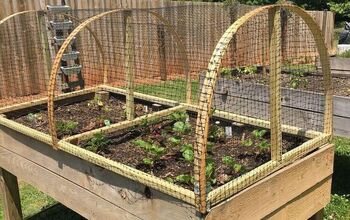
Photo via Holly Bertone | Pink Fortitude
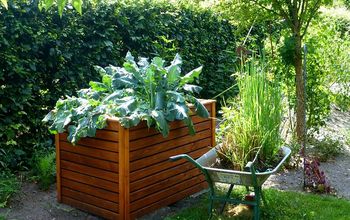
Make a Garden Bed
There are two main types of garden beds that you can implement in your yard—a raised garden bed, and a non-raised one.
A raised bed is framed by wooden edges and is placed on top of the ground and gives the gardener control over the type of soil they’re planting in.
A non-raised bed simply sits at ground level and uses a mix of native and store-bought soil. Both work well, but the type you choose depends on the soil conditions in your yard.
The steps below will help you get started on creating your very own non-raised garden bed:
Tools and Materials
- Wood markers
- Soil test kit
- Soil amendments (if needed)
- Newspaper
- Compost
- Herbicide (optional)
- Hoe, shovel, or rake
- Measuring tool
- Store-bought soil
- Compost
1. Outline Garden Area
Outline the selected area for your plot with markers.
2. Test Your Soil
Using the tips in the above section, test the soil in the area you’re working in and amend the soil accordingly. Be sure to test multiple sections in the space.
3. Remove Existing Vegetation
To remove existing grass or unwanted plants, you can use a smothering method by covering the area with a layer of newspaper and compost to block out the sun and wait until spring.
Or, you can use an herbicide of your choice—just be sure to thoroughly read the directions and use a brand you trust. (We recommend only using an herbicide if you plan to grow non-edibles in the space.)
4. Level Ground
Level out the ground and turn over the soil with a hoe, shovel, or rake. Priming the ground and flattening out the surface creates a blank canvas for your garden. If you can dig down to a depth of eight to 12 inches, that is ideal.
5. Add Soil
Mix store-bought soil and compost into the bed using your hands and a rake or hoe. What you mix into the native soil depends on its needs—garden soil is a good place to start.
For raised beds:
To plot a raised garden bed, follow a somewhat similar process:
First, dig an outline for where the boards will be placed for the garden bed frame. How large you want your raised bed to be is up to you.
Assemble, and then line the bottom of the bed with mesh wire or landscape fabric.
Next, layer in your soil of choice. The Home Depot recommends a mix made from 60 percent topsoil, 30 percent compost, and 10 percent potting mix.
Then, you’re ready to add your seeds and start growing your plants.
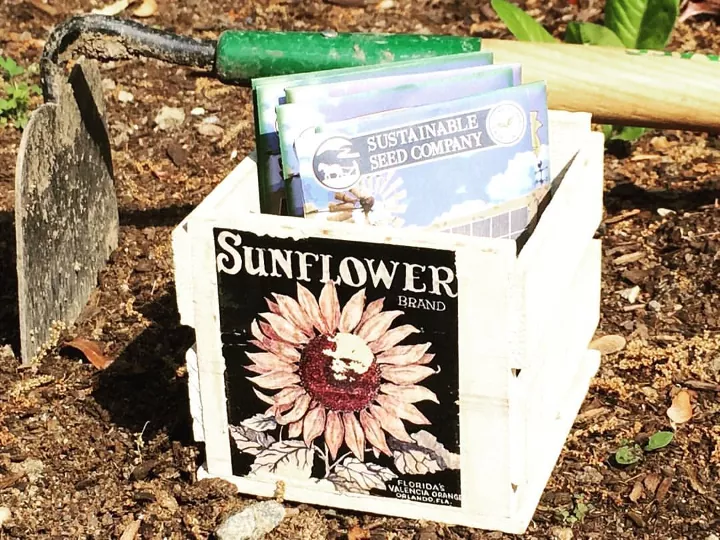
Photo via Holly Bertone | Pink Fortitude
Choose Seeds
It’s important to keep the considerations of your garden in mind when you go seed shopping. Remember—how much space do you have? What vegetables did you decide on and why? The same goes for other plants.
A common mistake for beginners is ending up with more seeds than necessary—with all the varieties out there, it can be tough to say no. So before you head to the store or browse online, make sure you have a concrete list of the types of seeds you want.
Winter is actually a great time to purchase seeds. To get a head start, you can even plant seeds indoors under a grow light over the winter months and then transplant them to your garden come spring. That way, your seeds don’t have to risk frost exposure in the spring or start out in the harsh heat in the summertime.
Lastly, look for popular, disease-resistant varieties. For example, if you’re looking for tomatoes, you might find seed varieties with “VFN” after the name. This means that those particular varieties are resistant to verticillium and fusarium—diseases that commonly harm tomato plants. Other packet codes that you might see include “AB” for early blight, “L” for grey leaf spot, and “R” for common rust.
Sow Your Seeds
After all this preparation, it’s finally time to plant your seeds in the ground. Try to find a day that is mild and without any big storms for the rest of the week. If it’s slightly overcast, that’s good—the sun can quickly dry up your bed.
Here’s how to sow your seeds into your brand new garden:
Tools and Materials
- Watering can or hose
- Gardening gloves
- Rake
- Gardening shovel, hoe, or spade
- Seed packets of choice
- Mulch or compost
1. Prepare the Soil
Unless it recently rained, you’ll want to water the bed so that it’s thoroughly moistened enough for the seeds to absorb the water. Turn and loosen the soil about six to eight inches down across the entire bed, breaking up any clumps that could stunt the growth of roots.
Pro Tip: Soil should crumble when you squeeze it, not ball up. If it keeps its shape, it’s too wet.
Rake the bed so the top surface is smooth.
2. Plant Your Seeds
Pay attention to the directions on the seed packets—if they need light to germinate, just sprinkle them on top of the soil and pat them in. If they need to be covered, lightly spread the soil over them.
You can arrange your seeds in neat rows or clumps. Keep them close, but not on top of one another. Recommendations for planting your specific seeds will likely be on the back of the seed packet itself.
3. Add Mulch and/or Compost
Adding mulch to your garden bed will tidy things up a bit, while also providing a protective layer against weeds. Compost will continue to provide the proper nutrients your plants will need to grow.
Plant Care Tips
The care that your plants need depends on the varieties you’ve chosen, and the process likely won’t be “one-size-fits-all,” so pay close attention and keep an eye on the progress of your plant’s growth.
Below are some general overall tips that you should consider for your newly planted garden:
1. Use a water-soluble fertilizer early on
A few weeks after germinating, feed your sprouts with a fertilizer once a week to keep them looking good and growing strong.
2. Keep things moist
Seedlings need plenty of water, so if you’re not getting any rain, prepare your watering can. Once the plants grow some leaves, you can ease the watering, but still regularly provide an inch or two of water a week.
3. Consider planting flowers in your vegetable garden
Not only does it add a pop of color, but choosing plants like sunflowers can help attract pollinators. The more pollination there is around plants, the greater bounty the plants will yield.
4. Keep pests away by attracting frogs, birds, and toads
By keeping your garden friendly to these animals that feast on bugs, the number of insect pests should decrease. Consider putting up a bird feeder or two, or a bowl of water for the frogs and toads.
5. Harvest when you’re supposed to
If you fall behind, fruits and veggies are likely to fall from the plants, attracting more unwanted insects and animals.
6. Rid your garden of weeds
This seems obvious, but things can get overwhelming quickly if you aren’t on top of weed maintenance. Weed often, and this way if you need to resort to an herbicide—which isn’t recommended when growing fruits and vegetables—it shouldn’t be until late in the growing season.
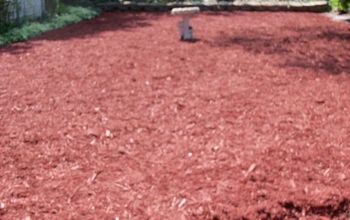
7. Add mulch
A protective layer of mulch will help keep weeds at bay, and will also help the ground retain water. Consider adding a layer of seed-free straw as mulch in your vegetable garden.
Starting your own garden can be a rewarding and fulfilling experience. By following the step-by-step instructions outlined in this guide, you can create a beautiful and thriving garden in no time.
Have you started a garden from scratch? Got tips? We'd love to hear them in the comments below!
Comments
Join the conversation
-
SO much information!! This would be so helpful for anyone trying to start a garden!
-
I plan on starting a garden as soon as the whole yard is cleared of stubborn weeds. Your tutorial gives me the confidence to start that garden soon (or when ever seasonally acceptable) I also like the ground level “beds” with simple dividers.


Frequently asked questions
Have a question about this project?