


How to Caulk Baseboards for the Cleanest Lines Ever

By Brooke Ressell
Trim is one of those incredible design features that is both visually appealing and functional, and this is particularly true when it comes to the lowest pieces of trim found in your home known as baseboards. Not only do baseboards serve as beautiful decorative molding, but they also bridge the gap between your flooring and walls and protect both surfaces from the scratches, dents, dings, and kicks that result from everyday living, moving furniture around, and cleaning.
But just like any of the other DIY projects you take on at home, the key to successfully installing trim and maintaining baseboards on your own is paying close attention to the details. And that’s why mastering the skill of caulking baseboards should be the next item on your to-do list.
Fortunately, learning how to caulk baseboards is much easier than you’d think. We’ll show you how to pick the best caulk and caulk gun for your particular baseboards, how to prep for caulking baseboards, and how to caulk baseboards like a pro.
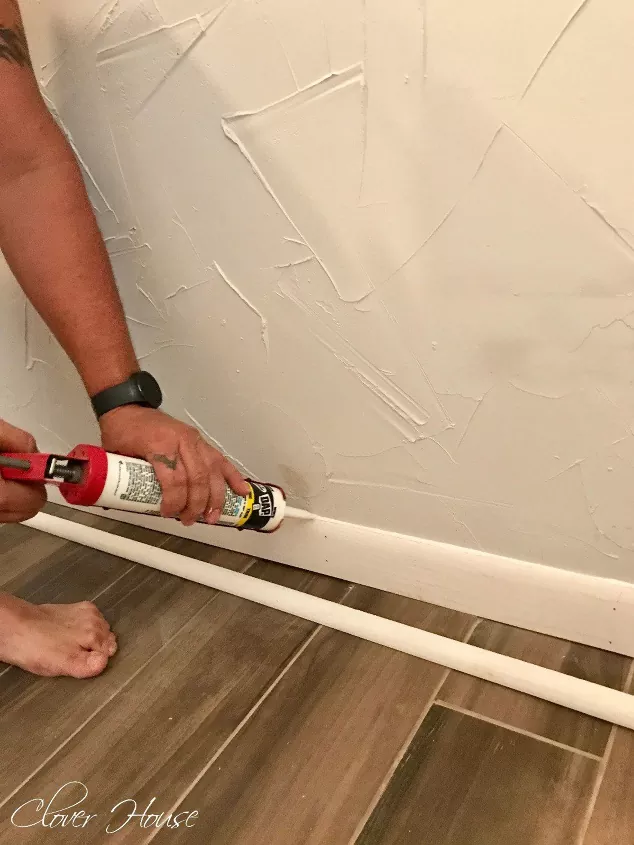
Photo via DeeDee
The Best Caulk and Caulk Gun for Baseboards
Considering the best caulk and caulk gun for your DIY project is something that you should do well before you apply caulking to baseboards.
Caulk
An interior latex caulk, also known as an acrylic latex or painter’s latex caulk, will work well for this type of project—especially if the label says it’s paintable or stainable. Since baseboards are painted or stained, you want to make sure that the caulk you choose can also be painted or stained so that it blends in perfectly with your trim.
Latex caulk comes in many different colors. If your trim is painted or stained a pretty standard color, you may be able to find a matching caulk so that you don’t have to paint or stain it afterward, which, of course, saves you even more time. You can even color-match caulk.
Interior latex caulk is the perfect product for baseboards because:
- It has a quick-dry formula
- It’s low-odor
- It expands to fill in gaps between the trim and the wall
- It cleans up easily
- It is very inexpensive
Caulk Gun
When it comes to choosing the right way to caulk your baseboards, a caulk gun is your best option. Many caulk products are sold in small plastic tubes around five ounces—which can be perfect for a small job like filling in a gap around your sink—but for larger projects, a 10-ounce or larger caulk tube and a caulk gun will make your job much easier.
While any standard caulk gun will work just fine, certain caulk gun features are certainly nice to have while caulking baseboards. Our favorites include dripless model caulk guns with a smooth plunger that gives you more control over the flow of caulk, and power caulk guns, which make the job faster and waste less caulk than basic models.
How to Prep for Caulking Baseboards
Now that you’ve selected the right caulk and caulk gun for the job, you also want to complete some prep work before you start caulking. Doing these steps ahead of time will ensure that your project looks flawless now and for years to come.
Clear Your Space
First, you want to move all furniture away from the walls and to the center of the room or another room entirely. Trying to squeeze behind furniture while caulking is a big hassle, and you also run the risk of getting caulk on your furniture, which is hard (if not impossible) to remove.
Clean Baseboards and Remove Old Caulk
Your baseboards may be covered in things like dust, pet fur, hair, sticky stuff, and spills that you never really noticed before. And all of these substances make it much harder for your caulk to adhere to the baseboards. So take the time to dust or vacuum your baseboards, wipe them down with a slightly damp cloth, then let them air dry. And pay particular attention to any corners where these substances often like to accumulate (a cotton swab will help reach tight corners).
If you have any old caulk that needs to be removed, use a putty knife to dislodge it as you clean.
Fix Up Damage
If you have any nails sticking out from your baseboards, make sure to pull them out or tap them in with a hammer. Fill any holes or dents you see with a wood filler, let dry, then sand down before moving on to the next step.
Tape
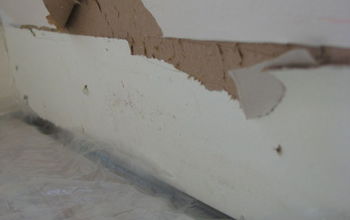
If this is your first time caulking baseboards or you don’t have a very steady hand, laying painter’s tape on the edge of the baseboard closest to the wall and on the walls themselves will help you apply a straight line of caulk as you move along.
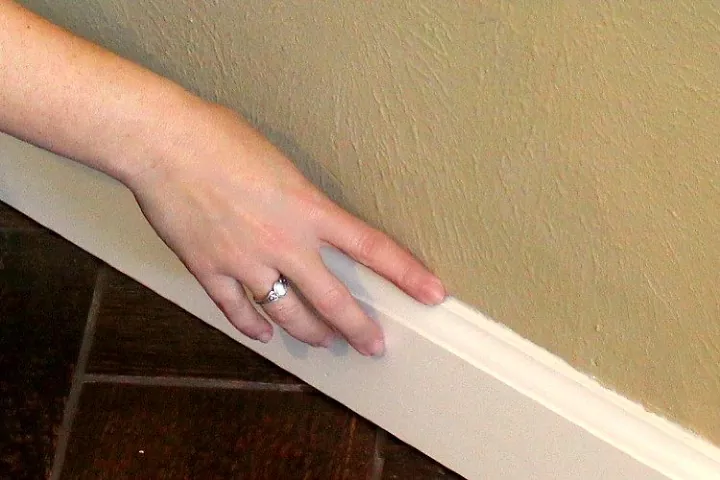
Photo via Meredith Wouters
How to Caulk Baseboards
Your baseboards are prepped and ready for their makeover. Even if you haven’t caulked baseboards before, you’ll be doing it like a pro by closely following these steps.
A heads up: Wear safety glasses while working with caulk and consider wearing knee pads or sliding around on a plastic scooter so you’re not putting so much wear and tear on your knees.
Tools and Materials Needed:
- Latex caulk
- Caulk gun
- Utility knife or scissors
- Wet paper towels
- Safety glasses
- Knee pads or plastic scooter (optional)
- Paint or stain (optional)
Step 1: Cut the Top Off of the Caulk
The tube of latex caulk will come sealed so you’ll need to carefully cut the top of the tube off with a utility knife or scissors before you begin. Be sure to start off with a small cut at a 45-degree angle for maximum control. Insert the sharp wire attached to the caulk gun into the opening, working it around in a circle to expand the hole slightly.
Step 2: Load the Caulk Into the Caulk Gun
Following the directions provided with your caulk gun, load the tube of latex caulk into the caulk gun. You’ll do this by releasing the trigger, pulling the rod all the way back, placing the caulk into the frame of the caulk gun flat end first, then pushing the metal rod into the caulk. This will pierce the tube of caulk and secure it into place.
Step 3: Apply Caulk to Baseboards
Starting at a corner in the room, apply a thin bead of caulk along the line where the baseboard and the wall meet. Continue moving along toward the center of the room.
Stop every few feet and remove excess caulk as you move along. Or, caulk from the corner of a room until you reach the center of the room, remove excess caulk along your line. Then start again at the other corner, moving your way back toward the center, and remove excess caulk again.
Step 4: Wipe Excess Caulk Off
You’ll need to remove excess caulk to make a perfect line. To do this, wet the pad of your finger on a wet paper towel then slide it along the bead of caulk, removing any excess caulk along the way. Then, wipe all the caulk from your finger before moving on. You may need to repeat this process more than once if there is a lot of extra caulk on the baseboards.
Step 5: Let Caulk Dry
Once you’ve caulked all of the baseboards in your room and removed excess caulk in order to make the perfect line, it’s time to let the caulk dry. The dry time will vary by product, so make sure you follow the recommendations provided by the manufacturer. The dry time will typically range from a couple of hours to one day before it is fully cured and ready to paint or stain.
Step 6: Paint or Stain Caulk
Once the caulk is fully cured, you can paint or stain if needed in order to blend it in with the trim and/or wall color. Doing so will give you the seamless look you’re going for. Here is our advice for painting or staining trim.
Step 7: Get Room Back in Order
Once the caulk is cured and/or stain or paint is fully dry, it’s time to get your space back in order. Slowly lift up any painter’s tape and put furniture back in its place.
Have you caulked baseboards and do you have any pointers to share with us? Let us know in the comments below!


Frequently asked questions
Have a question about this project?