


How to Dry Hydrangeas and Decorate With Them

By Erin Lindholm
A lush and leafy shrub that produces clusters of abundant, colorful flowers season after season, there’s much to love about hydrangeas. Even after summer’s peak bloom season has passed, the flowers of these popular perennials make beautiful home decor when properly dried. The key is knowing when to cut hydrangea blooms so that they keep their shape and color.
This guide covers everything you need to know about how to dry hydrangeas, plus we’ll include a little creative inspiration on styling these timeless blooms. With a little know-how, these lovely flowers will bring joy to your home for months to come!
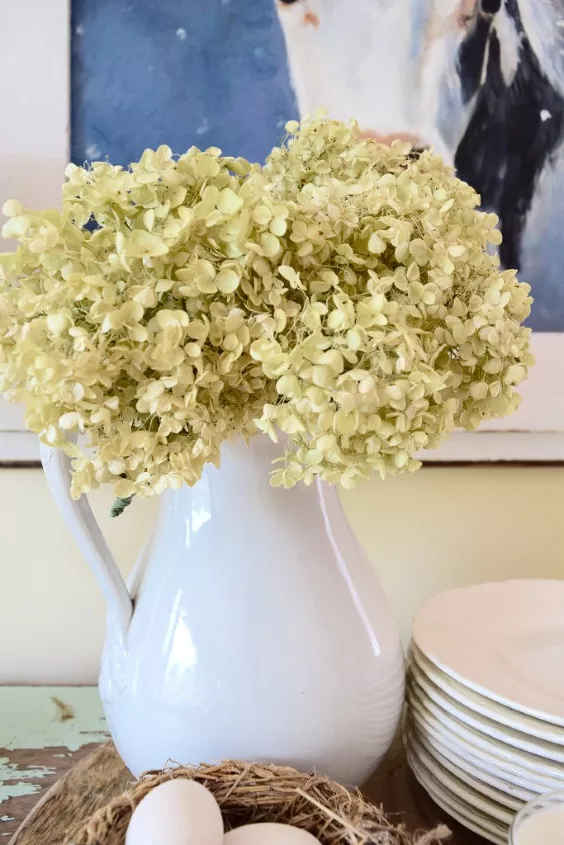
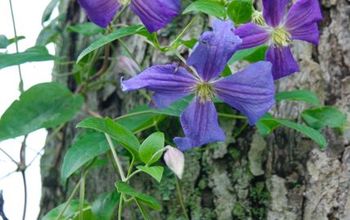
Photo via Karen's Up on The Hill
When to Cut Hydrangeas for Drying
Cutting hydrangeas for drying is all about timing. Peak bloom season for hydrangeas is between July and September, depending on your climate and what type of hydrangea varieties you grow. Trim too early and the blooms will still have too much moisture still in them to dry properly, leaving you with droopy, brown blooms. Trim too late and they’ll have already started dropping petals and wilting.
While fresh-cut hydrangeas add beauty to any flower arrangement, choosing blooms has its own set of considerations. Look for blooms where:
- The whole cluster of flowers has bloomed, including the tiny buds at the center.
- The oldest blooms on the cluster of flowers are still bright and colorful. Or, for hydrangeas that change color as they mature, they will have just started to “turn.”
- The larger outer petals look and feel papery in texture.
- Stems are 12 to 18 inches in length. Having long stems helps to keep the hydrangeas from crowding each other as they’re drying.
Weather and Dry Time Matters
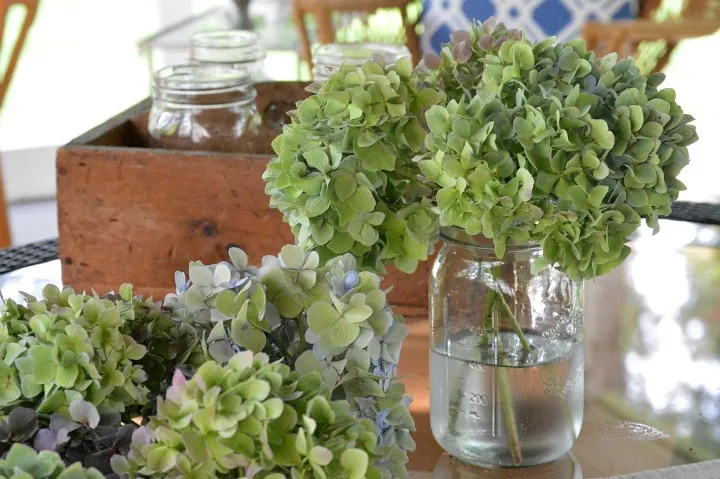
Photo via My Family Thyme
How to Dry Hydrangeas in a Vase
While there are other methods for drying hydrangeas (see more below), one of the easiest involves placing the trimmed blooms into several inches of water in a pitcher, vase, or another vessel to dry out over a couple of weeks. Although it may sound counterintuitive to put hydrangeas in water to dry them out, the water actually slows down the drying process, keeping the flower’s thick stalk from drooping and providing more color in the dried blooms.
Tools and Materials Needed:
- Large pitcher or vase
- Water
- Twine
- Scissors
- Pruning shears
Step 1: Prep Vessel
Fill a large pitcher or vase with two to three inches of water.
Step 2: Prep Hydrangeas
Remove all leaves. With scissors or pruning shears, trim the base of the stem another inch or so at an angle. The fresh cut will let in more water.
Step 3: Arrange Hydrangeas in Vase
Place cut stems in the water, making sure the flowers are not crowding each other—to dry properly, hydrangea blooms need “space” so the air can circulate freely.
Step 4: Pick a Location to Dry
Place the blooms somewhere in your home where they won’t be disturbed for a few weeks. In a cool spot out of direct sunlight and away from any direct drafts is ideal. You still want decent airflow, though!
Step 5: Test for Dryness
Typically, your hydrangeas will be ready in two to three weeks. At this point, all water should have been absorbed or evaporated. When the flower is fully dried, the stem should snap easily and the petals will feel papery. If unsure they’re fully dried, let them sit for another week or two before starting any decor projects—don’t worry, you can’t over-dry your hydrangeas!
How to Dry Hydrangeas by Hanging Them
Like many other flowers, hydrangeas can also be dried while hanging upside down, individually or in a bunch, depending on how you’d like to display them when they’re dried. Secure a rubber band or knot a length of twine around the stem(s) and hang upside down to dry in a cool, dry, well-ventilated room or storage space out of direct sunlight. It should take about two weeks for the blooms to fully dry.
How to Dry Hydrangeas with Silica
You know those small packets that come in shoeboxes with the instructions “do not eat”? The sand-like compound inside those packets, called silica, has quick-drying properties that dedicated DIY-ers use to dry flowers with incredible results. If you’re wondering how to dry hydrangeas and keep color so vibrant the flowers look like they were just freshly cut, you may want to try this technique.
The process to dry hydrangeas with silica requires a little more effort and dedication than the natural options described above. Also keep in mind that by using this method, you’ll just dry the head of the flower, not the stem.
Tools and Materials Needed:
- Pruning shears or clean, sharp scissors
- Flower-drying silica gel crystals
- Large container with lid
- Spoon
Step 1: Trim Hydrangea Stem
Use clean shears or scissors to cut the stem of the hydrangea. You want to leave about ½-inch of stem left below the base of the bloom.
Step 2: Fill Container with Silica
Fill your container with silica to about an inch high. Tap the container on a surface to make sure the crystals lay flat.
Step 3: Place Hydrangea In
Carefully set the hydrangea on top of the layer of silica with the cut stem side facing up.
Step 4: Add More Silica
Add more silica to the container, filling in around the petals of the plant, doing your best to keep the hydrangea’s shape. Use a spoon to help fill the crevices around the blooms.
Step 5: Seal Lid and Wait
Once the hydrangea and what’s left of the stem are completely covered with silica, seal the lid. Wait four days—no more, no less—before opening the container and gently pouring out the silica and now-dried hydrangea over a newspaper. Shake any crystals out of the petal's nooks and crannies, and it’s now ready for display!

Photo via Danya @avintageflarefarmhouse
Tips for Styling Dried Hydrangeas
Dried flowers are having their moment, and we’re here for it. Now that you know how to preserve and dry hydrangeas, here are some tips for decorating with them.
Keep the Stems Long
There’s something striking about how two or three long-stemmed, dried hydrangeas look in a glass vase—there's elegance in simplicity. Add a few decorative wicker balls to the vase for a little something extra.
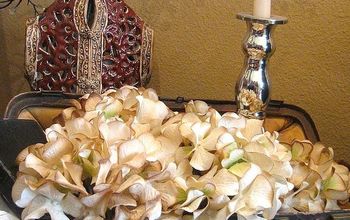
Pile Them On
We love the look of a rustic or vintage container—a wicker basket, an old milk pail, a vintage crate, or metal box—that looks like it’s practically overflowing with dried hydrangeas. Cut the stems short and arrange them carefully in a container.
Give Them Some Holiday Sparkle
The season for drying hydrangeas just about perfectly coincides with the ramp-up of the fall and winter holidays. Give your dried hydrangea arrangement a little extra festive sparkle by spraying your dried flower arrangement with silver or gold glitter spray. ’Tis the season, after all.
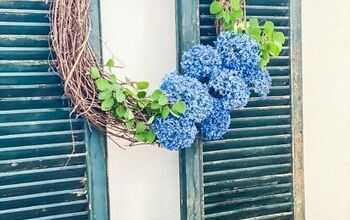
Make a Dried Floral Wreath
Naturally, dried hydrangeas are going to be more delicate and brittle than fresh flowers. So if a stunning floral wreath is what you’re after, it’s essential to start the project with fresh flowers, which can then dry in place.
Have you dried hydrangeas before? Give us your best tips and tricks in the comments below!


Frequently asked questions
Have a question about this project?
Are you going to use glue?