


A Complete Guide on How to Lay Sod Yourself

By Stacey Kelleher
A lush, green yard is the perfect way to highlight your home. If you're working with dirt, or your lawn is sparse or filled with weeds, a lackluster yard can detract from your home’s curb appeal. Sod is a quick and affordable way to get beautiful green grass in as little as a day.
Keep reading to learn what sod is, how to lay down sod, and how to care for it to ensure that it stays vibrant and healthy for years to come. Laying sod yourself is probably much easier than you might expect!
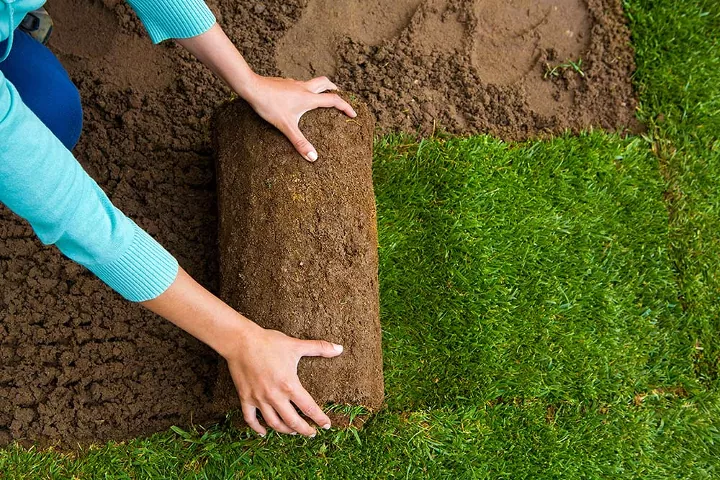
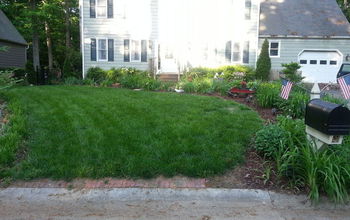
Photo via Kathy&Steve @ TBD•TGG•OhMeOhMy
What is Sod?
Sod is grass that has been pre-grown in ideal conditions for around 14-18 months. It’s grown on a farm like fruits, vegetables, and other agricultural goods.
When it’s time to transport sod from the sod farm to its new home, it is harvested in long sections using a lawn cutter and rolled up with the soil side out. That layer of soil contains the roots so the sod can continue growing in its new location.
Benefits of Laying Sod
Lawn sod, or turfgrass, is ideal for homeowners who want a quick fix and don’t have the time or inclination to give young grass grown from seed the attention that it needs to thrive. It is also an immediate update for anyone looking to sell their home quickly.
Pre-grown turfgrass also takes the guesswork out of choosing the right seed and variety of grass. When you work with a sod farm, their experts will recommend the best grass for your climate and ground conditions. And because professionally-grown sod has been maintained in ideal conditions for at least a year, you know the grass is hardy and healthy.
When to Install Sod
You have plenty of time to plant sod during the year, though certain months are better than others depending upon where you live. In warmer climates, you can successfully install sod year-round. In cooler climates, it’s best to install sod in early spring or early-mid fall.
Laying Sod in the Fall
Fall is ideal for laying sod because while the temperatures have dropped a bit from the scorching highs of summer, the soil is still warm enough to encourage root growth. The fall months also tend to see a good amount of precipitation and there is sufficient time for sod to root and establish before it reaches the dormancy stage of the cold winter months.
Laying Sod in the Spring
Spring is also a good time of year to install sod, provided the risk of a freeze has passed. In some climates, spring can still bring occasional hot temperatures (75 degrees Fahrenheit and up). Be sure to keep new sod extra moist to ensure good root health in the event of warmer weather. Warm days and cool nights of spring create the ideal growing conditions for bluegrass and other popular cool-season grasses.
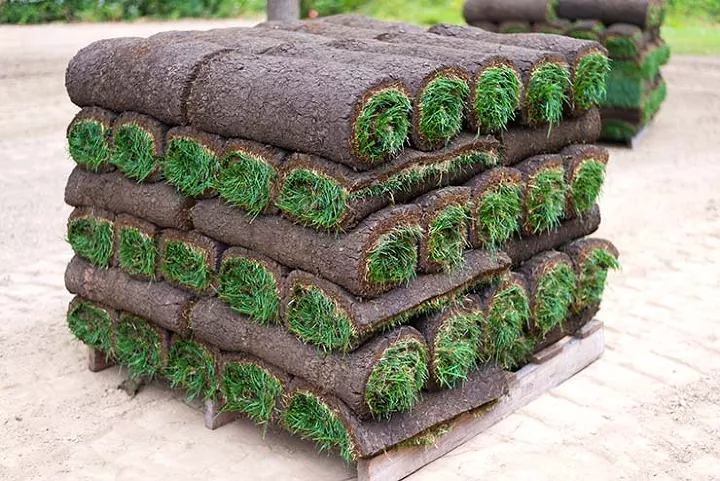
Photo via Kathy&Steve @ TBD•TGG•OhMeOhMy
How to Buy Sod
If you’ve decided to go for the instant gratification of sod over seeding, you’ll need to purchase the right type and amount of sod for your space. You have to work quickly with sod, so be sure to plan accordingly when buying your bundles. It should be delivered within 24 hours of being cut and installed the same day it’s delivered. Here are some more important to-do’s in preparation for your lawn refresh.
Test Your Soil
Just like repotting a plant, you want to give your sod the healthiest environment possible to survive and thrive. Test your soil well in advance (you can get pH soil tests at your local home and garden store, online, or at your nearest Cooperative Extension Service) and ensure it’s the best pH for sod or turf grasses. Most do best in well-aerated soil that is a bit on the acidic side (between 6 and 7.5). If your soil is too basic, you can add lime, wood ashes, or dolomite limestone to bring it to the ideal pH.
Measure the Space
First, measure the area you are going to sod to determine how much you will need. Order approximately five percent more than the measured area. That excess sod can be trimmed and used to fill in around curves and other irregular spaces.
Bring a Diagram
Where to Buy Sod
Many local lawn and garden centers sell sod or turfgrass, usually by the pallet. Check with your preferred retailer to find out if and what types of grass varieties are available.
You can also purchase sod directly from a sod or turf farm if you have one in your area. Because these businesses specialize in sod, they’re likely to offer a wider selection than garden centers. Another huge bonus is that sod farms often offer delivery and installation services as well. And because sod farming is all they do, they'll have the expertise to recommend the best grass for your soil and climate, and offer guidance on caring for your newly-installed sod.
Consider Sod Plugs
In some cases, seeding or sodding your yard is not a viable option. Maybe you only want to fill in a small space with grass and don’t require an entire pallet of sod. Or maybe the type of grass you want isn’t grown at your local turf farms. In these scenarios, you can try something called a sod plug or grass plug, which is a single, individual turf plant grown in a tray like any other type of plant. They are small in size at just 1.5-3 square inches per plug. When planted 9-12 inches apart, although it looks kind of silly at first, they eventually spread and fill in the area with the desired grass over time.
Choose the Right Sod For Your Soil
Choosing the right turfgrass for your soil is one of the keys to success if you’re looking to create a lush, green yard. For home lawns, experts primarily recommend these two types of grass:
Tall Fescue Grass
Tall fescue grass is low maintenance and highly adaptable to different climates and conditions. It tolerates full sun and shadier spots and once it has established deep root growth, it’s fairly tolerant of drought conditions. A few top characteristics for this grass are that it grows in clumps and spreads through vertical shoots called “tillers”, which helps keep it easy to maintain and out of your garden beds.
Kentucky Bluegrass
When people envision the perfect green lawn, they often think of Kentucky bluegrass. When healthy and well-cared for, Kentucky bluegrass offers a dense and durable lawn that can survive the winter and return to its original splendor spring after spring.
Kentucky bluegrass requires a bit more care than tall fescue, but the results are well worth the effort. Bluegrass varieties are good for northern climates that experience the change of seasons.
Keep in mind, these are just two types of turfgrasses. It’s always a good idea to speak with someone at your local sod farm or garden center to determine the best sod for your project.
How to Prep for Sod
Now that you know how to choose and order the right sod for your project, it’s time to prep the ground so you’re ready when your turfgrass is delivered.
Remove Old Grass
You want a clean slate for the new grass to take root. There are few ways to remove old grass:
Shovel
You can use a shovel (and some elbow grease) to manually dig out the existing grass and root systems. This may work for small areas, but if you’re replacing an entire lawn, it’ll be pretty physically demanding.
Tiller
A tiller is a tool that rips up sections of grass and churns it back into the soil and the tool can come with manual, electrical, or gasoline operation. Tillers loosen up the top six to eight inches of soil, returning grass deep into the soil where it eventually decomposes. This decomposition is beneficial because that organic material makes the soil healthier by increasing aeration and water retention.
Sod Cutter
A sod cutter is a good option to remove existing grass quickly and efficiently. Sod cutters slice grass just below the roots for easy removal—just like at the sod farm! Cutters make it easy to remove the old grass in larger sections for disposal. Most people don’t own a sod cutter, but you can rent one by the day at most home and garden centers.
Chemicals
Herbicides kill the existing grass so you can remove it. This process takes time to work, so if you’re in a hurry, this probably isn’t the best option. There are also concerns about the impact of these products on the environment, so chemical-free methods are generally preferred.
Treat the Soil
Once you have removed the old grass, it’s time to prepare the soil. Start by removing any rocks, twigs, and other debris. Then, rake the soil to ensure it’s loose and as level as possible with no major hills or dips.
We recommend fertilizing the soil and adding any other additives to help the sod establish. Choose a starter fertilizer specifically formulated to encourage new grass to quickly develop a strong root system in its new home.
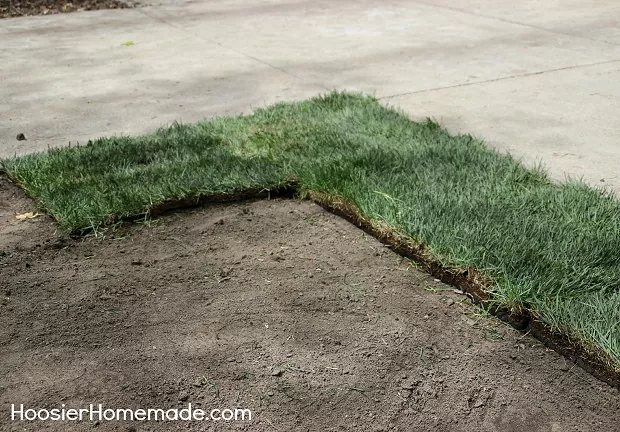
Photo via Hoosier Homemade
How to Install Sod
Now it’s time for the fun part! You get to watch your yard transform before your very eyes. This is a step-by-step method for laying new sod, including all of the tools and materials needed to complete the project.
Tools and Materials Needed
- Garden hose and/or sprinkler
- Rake
- Sod
- Utility knife
- Wheelbarrow
- Lawn edger
- Lawn roller (for large spaces)
Step 1: Dampen the Soil
Use a sprinkler or garden hose to dampen the soil in the project area. You don’t want to saturate the dirt, but rather lightly moisten the top layer. Any areas with pooled water should be leveled out before installing the sod.
Step 2: Rake Out any Footprints
If you’ve left behind any footprints during the watering process, rake them out and re-level the ground.
Step 3: Place the First Section of Sod
Take the first roll of sod and begin unrolling and laying it against a straight edge, like a patio or driveway. Work in sections, laying the sod rolls one at a time, end to end. Avoid walking on the sod while you’re working. As you lay the sod, gently pat it into place to remove air pockets between the sod and the soil. If you reach an edge of your yard before the sod roll runs out, cut it with a utility knife.
Step 4: Stagger Sod Edges
The goal is to lay sod in a brick-wall pattern throughout the project space so that the edges don't line up with each other. To do this, you want to start the next section of sod about halfway down the line of the first one that you started, and so on. Use your thumbs to seal the seams tightly without any overlapping, cutting the roll with the utility knife as needed. A wheelbarrow is helpful for transporting rolls of sod to your work area.
Step 5: Cut Around Curves and Other Items
If you have trees, shrubs, gardens, or any curved areas, you’ll need to shape the sod sections to fit around them. A lawn edger works to trim sod around long, curved spaces while a utility knife can be used to carve openings in sod for trees, sprinkler systems, and other immovable objects.
Step 6: Tidy Up the Edges
Once all of the sod has been installed, go back and clean up any messy or overhanging edges with your utility knife.
Step 7: Roll the Sod
Go over the entire area with a lawn roller to help create that vital connection between the sod and soil for quick and successful establishment.
Step 8: Water the New Sod
Water the newly-installed sod immediately and daily for the first week until it takes root and bonds with the underlying soil. That soil should be moist, but never muddy. After the first week, reduce watering to every other day.
Water your new lawn just twice during the third week, and going forward aim to provide sod with around an inch of water per week, factoring in irrigation and rainfall.
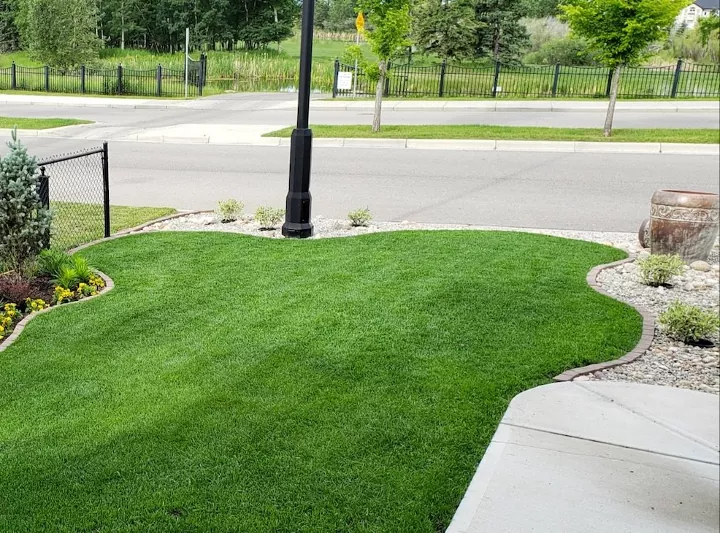
Photo via Home with Marieza
How to Care For Sod
Now that you have given your space an instant makeover, you probably want to know how to protect your investment. Here are some crucial care tips for newly-installed sod grass.
Water
After sod is installed, it develops two root systems as it grows. The shallow root system grows in the first two weeks, and watering is especially important during that first week after installation. Those short roots should never be allowed to dry out, which could risk the grass from establishing its deeper roots.
It can take anywhere between two to six weeks for sod to establish a deep root system after installation. Once the deeper root system begins growing, increase the amount of time between waterings to encourage the roots to go deeper in search of water. Follow the watering schedule we provided above to ensure that your sod is nourished but not drenched.
Traffic
As tempting as it might be to utilize your fluffy new grass, do your best to avoid walking on new sod for the first weeks. That includes pets too! Frequent or heavy traffic can interfere with root growth and leave your lawn looking a bit lackluster after all that hard work.
Mowing
Wait at least 10 days after installing new sod to mow it. A good rule of thumb is to wait for the grass to be approximately three inches tall before mowing. Use a walk-behind lawn mower with a grass catcher if possible—a riding mower is too heavy for the newly-installed grass and the sod is too immature to withstand grass clippings left behind.
Fertilizer
Wait for four weeks of growth before fertilizing your new lawn with a starter fertilizer. This will replenish those nutrients that might have been washed away during the initial heavy watering schedule.
Diseases
Because new sod requires a lot of watering, it is vulnerable to fungus that thrives in wet environments. Sod damaged by fungus will appear yellow-brown and form an irregular pattern (compared to grass that has died from underwatering, which forms a more uniform pattern across the entire piece of sod).
If you notice activity that looks like fungus, first cut back on watering. You can treat the area with a topical fungicide, carefully following the product instructions. Keep the treatments up every two weeks until the fungus has stopped spreading. Most commercial fungicides can be hooked up to your hose to reach the affected area and the grass surrounding it.
Pests
Unfortunately, it is not uncommon for new sod to arrive infested with pests—particularly sod webworms. These pests like to hang out in warm-season turfgrasses mostly in the southern United States. Left untreated, they can severely damage your sod. Adult sod webworms are brown and look similar to moths. They fly in a zig-zag pattern close to the grass and their eggs are whitish in color and can be found on the upper surface of blades of grass.
Fortunately, there is a simple solution to get rid of these pests! Add an ounce of liquid dish detergent to one gallon of water and pour the solution over a one-square-yard area where you notice the infestation. This will kill any developing caterpillars. For more invasive infestations, you can use a commercial insecticide designed to kill these pests.
If you want to create a beautiful lawn or replace areas of sparse or weed-ridden grass, sod offers immediate results. While there are plenty of landscapers and sod farms available to install your turfgrass, it’s actually fairly easy to do on your own. With high-quality turfgrass and the right garden tools, you can refresh your yard in just one weekend.
Do you have any tips for keeping sod lush and healthy? Share them below!


Frequently asked questions
Have a question about this project?