


DIY Kitchen Backsplash, How-To Tile on Your Own!

Do you have an outdated kitchen backsplash or maybe no backsplash at all? Either way are you ready for an update but don’t want to spend an arm and a leg? I was in the same boat! Here I will link all of the supplies and break down the cost of how you can tile your own backsplash. I will also explain my process for tiling the backsplash in my kitchen. I am no pro by any means, but it really was so simple to do and I saved so much money doing it on my own. I watched lots of YouTube videos to better prepare me, these were life savers!!
Here is what you will need with a cost breakdown…
- Tile of you choice, I used a subway ($103.16)
- Table Saw ($139.32)
- Tile Adhesive/Mastic ($8.62)
- Trowel ($3.77) – I bought my trowel from a local hardware store for $3.77. The linked trowel is the best I could find at Lowes/Home Depot as just a reference for what to look for! There are cheaper options out there than what I linked!
- Spacers ($4.31)
- Bright White Grout and Oyster Gray Grout ($32.36)
- Grout bag ($6.99)
- Sponge ($1.61)
- Gloves ($1.61) – Cheap and disposable from the dollar store 🙂
- Silicone Caulk ($5.38)
- Sharpie
- Measuring Tape
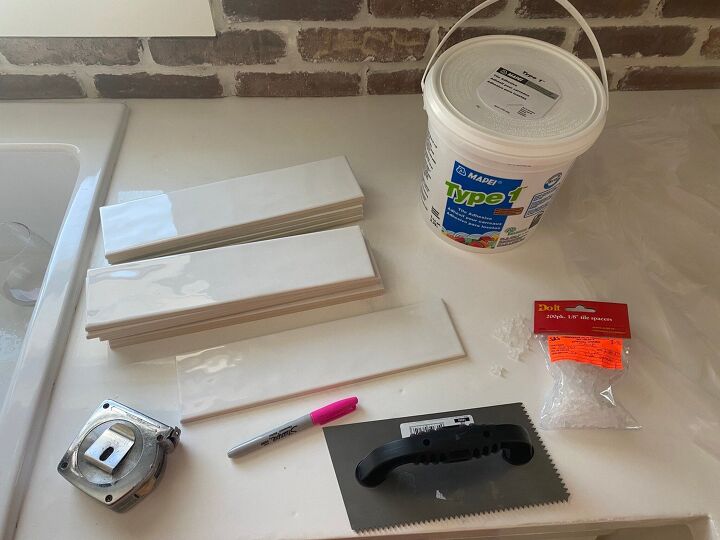
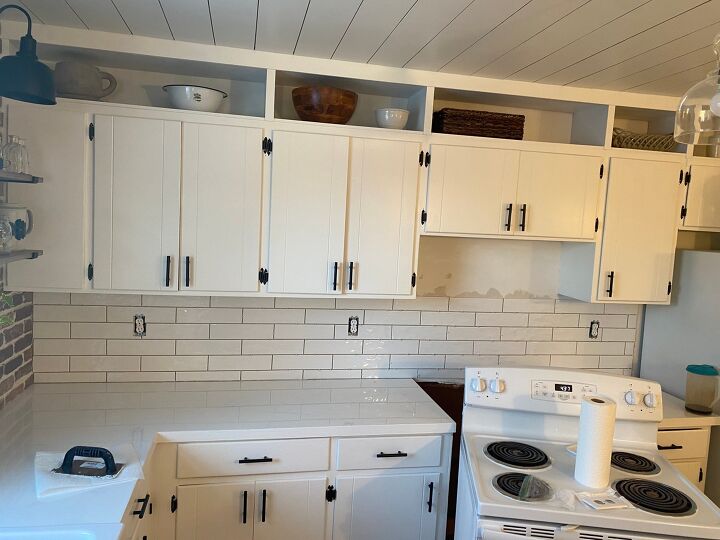
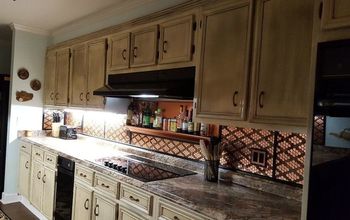
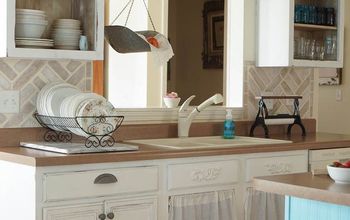
That’s a total of only $307.13!! Plus a lot of the supplies you will be able to re-use for other projects! For example, the tile saw I also used to cut brick for a brick accent wall. The caulk I’ve used for my sink and also many other areas during my bathroom reno. Hiring this job out just isn’t worth it. Plus every time I look at my backsplash I am so proud. It is so rewarding doing these projects on your own! Ok rant over, let’s get into the process of tiling! But first, here’s what my backsplash looked like before!
First you wanna decide on your pattern! I went with just a staggered/traditional look but here are some options I had laid out while brainstorming!
Before you get started you want to clean off you counters. I also laid garbage bags out across them for better protection. Next you want to set a time frame to plan around. This whole process took me 2 days. The first day I placed all of my full tile pieces up. The second day I made all of my cuts to finish the tile part, then grouted.
Again I am no pro! I watched lots of YouTube videos and learned from there so I would suggest doing the same, but I will explain my process! I started in the left hand corner of my backsplash area. I used my trowel to spread the tile adhesive on the wall. I started by placing 3-4 tiles horizontally down. I found it was easier to work from the bottom up. I then had prepared a few tiles by cutting them in half using my tile saw. I placed another 3-4 tiles on the second row. After getting a few pieces on the wall, you still have time to work with them. So, I then pressed my tile spacer between the tiles and evened/leveled the pieces out. I repeated this process in sections until I got to a tricky cut like shown below.
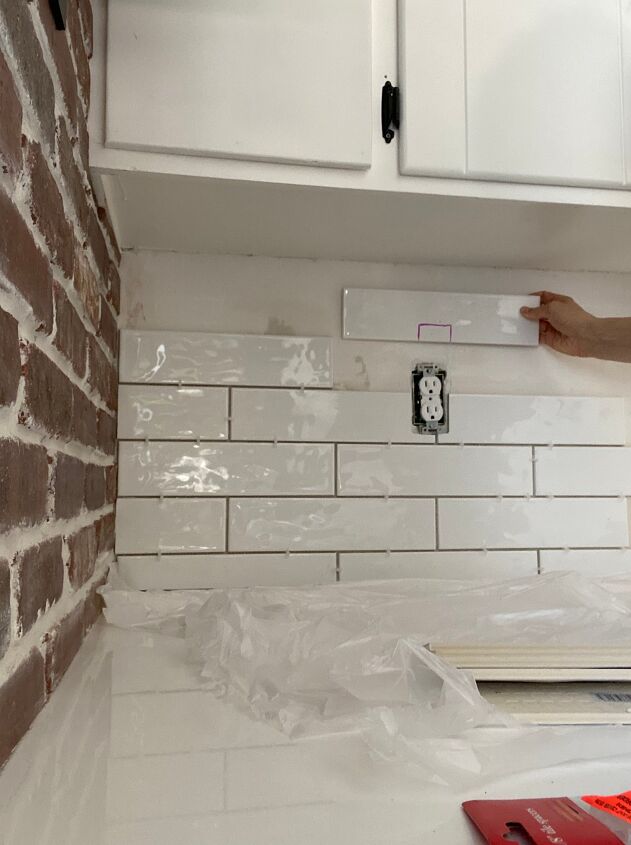
When I came across an outlet, I used a sharpie to outline the cut. Sharpie easily will wipe off subway tile. I then cut that area out with the tile saw. Always cut less, you can always trim more. You want to make sure your outlet cover is going to fully hide your cuts. I needed to unscrew my outlet and fit the tile behind the outlet. Make sure to turn your power off before messing with any of the outlets! The outlets really are the hardest part, just take your time. Do not rush this part!
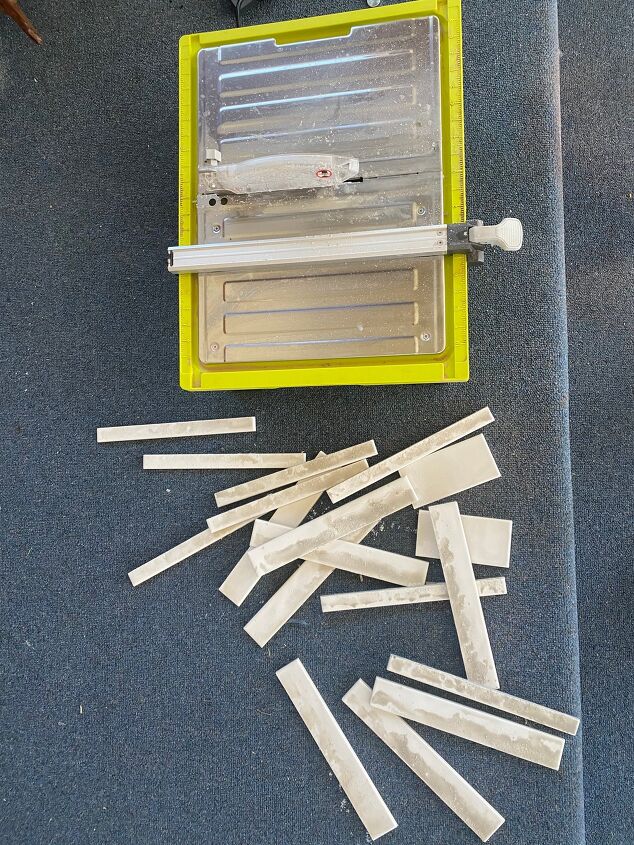
Continue on by applying tile adhesive with your trowel, then a few rows at a time of tile, then your tile spacers to even and level everything out. When I got to my top row I needed to trim my tile horizontally here is picture of a bunch of my cuts!
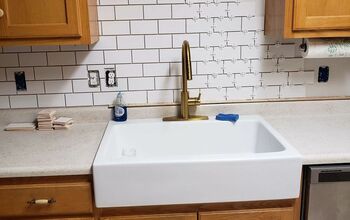
Here is a progress shot below!
Once you’re done tiling it’s time to grout! Grouting was the easy part. I did a very light grey grout. I mixed 3 parts bright white with 1 part oyster gray in a red solo cup. Add water to your grout and stir with a plastic fork until you get a frosty consistency, then let is sit for 15min to firm up a bit. Then give it one more good mix before putting it into your grout bag. Then its just like piping a cake. Squeeze your grout into the spaces of your tile. I overfilled them a little bit because you are going to go back with your gloved finger and smooth out the grout lines. Then go over your grout again with your wet sponge to smooth it all out again. You want to grout all of the spaces in between your tile and between the tile and upper cabinets. You do not want to grout the gap between your tile and counter. This is where you will apply silicone caulk. Tape your tile and counter to prep then apply your caulk and remove that tape immediately after caulking. Allow the grout and caulk to dry, then put your outlets covers back on and TA DAA! You did it!
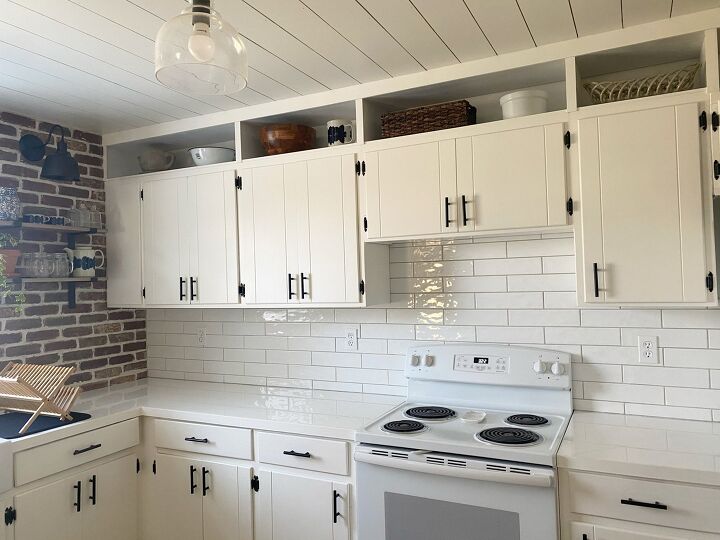
I am so happy that I took the time to learn how to do this on my own. It really was so simple and I think it turned out pretty darn well for my first time! I hope this helped and inspired you to try tiling on your own as well! Follow me on Instagram for more DIYs and be sure to tag me if you decide to tackle a tile job on your own! I can’t wait to see!!


Frequently asked questions
Have a question about this project?