


How to DIY Backsplash Tile in One Day

Have you ever had a professional come out to provide a quote for tile work? If your experience is anything like mine, you may have been surprised at how much a project like this costs. I promise, this is a DIY project that every beginner can tackle with the right tips and tricks. Save money on labor so you can splurge on the tile you really want, and read on to learn step by step how you can DIY backsplash tile yourself in ONE day.
I had a quote to have backsplash done about 6 months ago, and the quote was thousands of dollars for a small kitchen area. No thank you!
I took my time researching and ultimately made the decision to DIY my tile backsplash. I kept my eyes open for inspiration for months. I loved the clean and classic look of Subway tile, and almost went that route. I’m so glad I kept looking!
I noticed a pattern in the kitchen backsplashes I was pinning on Pinterest, but didn’t know what to call the look I liked. After some research, I discovered the subway tile look alike is called Zellige.
I polled my Instagram friends (one of my favorite ways to make a decision) to determine how to layout my tile. I decided to go with 1/2 offset. The 1/2 offset is a simpler pattern with only 2 alternating rows instead of three, that will hopefully simplify installation.
Ok, layout chosen, now how was I going to attach the tiles to the wall? I had seen Lindsay at Frills and Drills rave about the convenience and efficiency of using a double sided adhesive tile mat instead of thin set mortar. If an experienced DIY’er with 804,000 followers has used it more than once with results she’s happy with, it must be the real deal.
With traditional thin set mortar, you have to wait at least 16 hours to let it “set” before you can grout, making tiling at least a 2 day process. With the adhesive tile mat, you can grout immediately! Which can dramatically decrease the timeline of your tiling project.
The only potential drawback is price. Thin set mortar costs about $5, whereas the double sided adhesive mat runs about $30 from Lowe’s. Let’s see if the efficiency makes up for the cost difference, stay tuned!
When it comes to grout, you have tons of color options. I learned some helpful tips from Cara at Never Skip Brunch. A white or light colored grout creates a clean look that can make a space feel bigger. However, it will obviously get dirtier easier and provides little contrast between tiles.
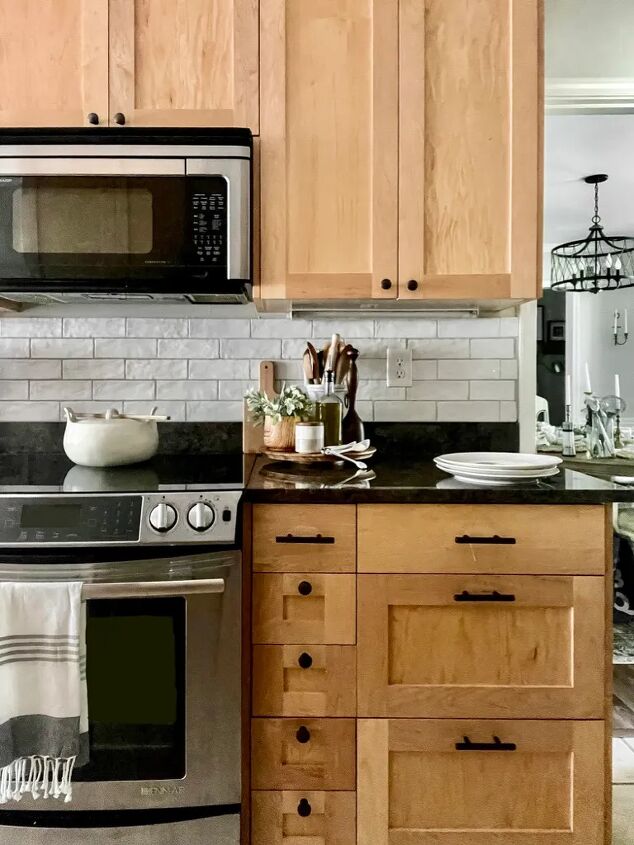
The darker the grout, the smaller it can make a space feel and looks more modern. So if you have a large kitchen, dark or black grout can be a great way to add contrast. However, my kitchen is small with only two walls. I wanted a little definition between tiles, but overall wanted a clean look. I chose Warm Gray to make the space feel bigger, but keep it warm and blend nicely with the Agreeable Gray walls.
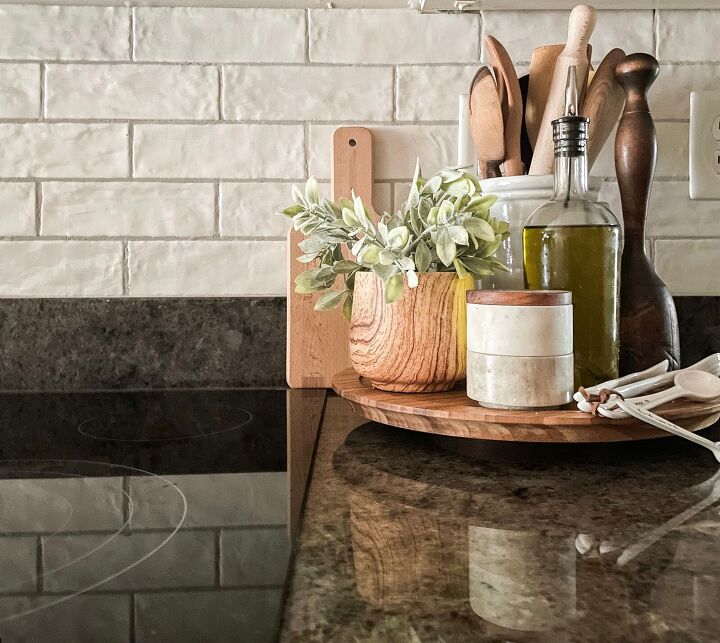
Ok, so now that all of the decisions have been made, its time to carryout my vision. You can find the complete supply list with product links on EmilyRoneHome.com.
Grand total: $615 and one Saturday (Don’t forget, time is money too!)
STEP 1: Measure your space
Decide where you plan to backsplash and determine the square footage of the area. Typically, backsplash is installed on the walls between the countertops and cabinets. However, you may have additional spaces you want to tile based on your kitchen. For example, the space above my kitchen sink is bare and windowless. I had to decide if I wanted to keep the backsplash in one horizontal row under the cabinets, or take the tile all the way up to the ceiling in the space above the sink.
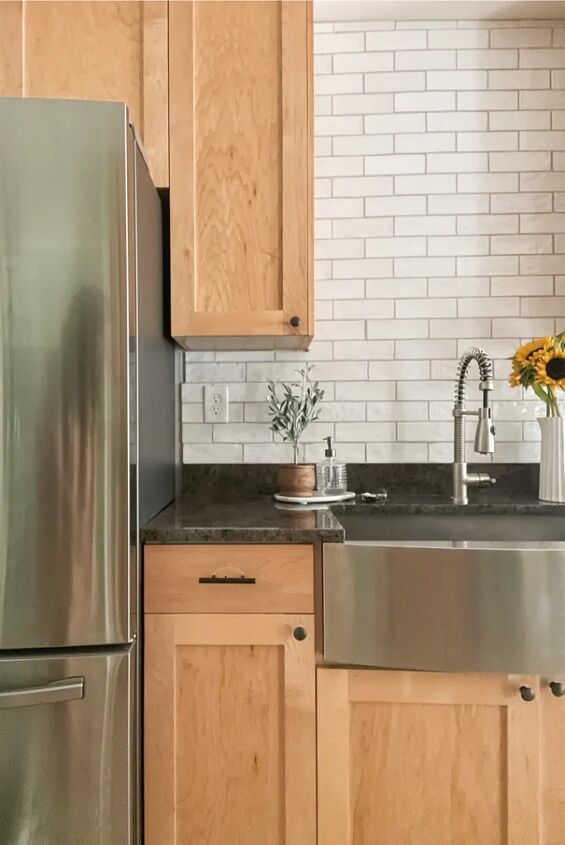
Let’s take it all the way up! To calculate area, measure the distance from the countertops to the cabinets, then the length of the walls the backsplash will cover. Multiply these two numbers to get the total square footage. In my case, I also measured the area above the sink. It’s recommended to add an additional 10% to the number to account for broken tiles or bad cuts, the last thing you want is to run out of tile mid project.
STEP 2: Clean and Prep walls
This should be an obvious step during almost any DIY project. You want to make sure you are starting with a clean surface to ensure proper tile adhesion. I used 1/2 vinegar 1/2 water and a rag to wipe down all the walls to remove dirt, grime and grease. To prep, remove all electrical outlet and switch plate covers. Collect plates and screws together in a baggie so you don’t lose them.
STEP 3: Apply Double Sided Adhesive Tile Mat
The adhesive tile mat I used covers 15 square feet per roll. I didn’t notice this detail, and only bought one roll. So keep this in mind to avoid another run to the hardware store mid project!
Once you unroll the mat, take some time to read and familiarize yourself with the directions. They recommend applying the mat similar to how you would install wallpaper (which meant nothing to me since I’ve never wallpapered), but basically, start at the top (i.e. under the cabinet), and roll down to the countertop.
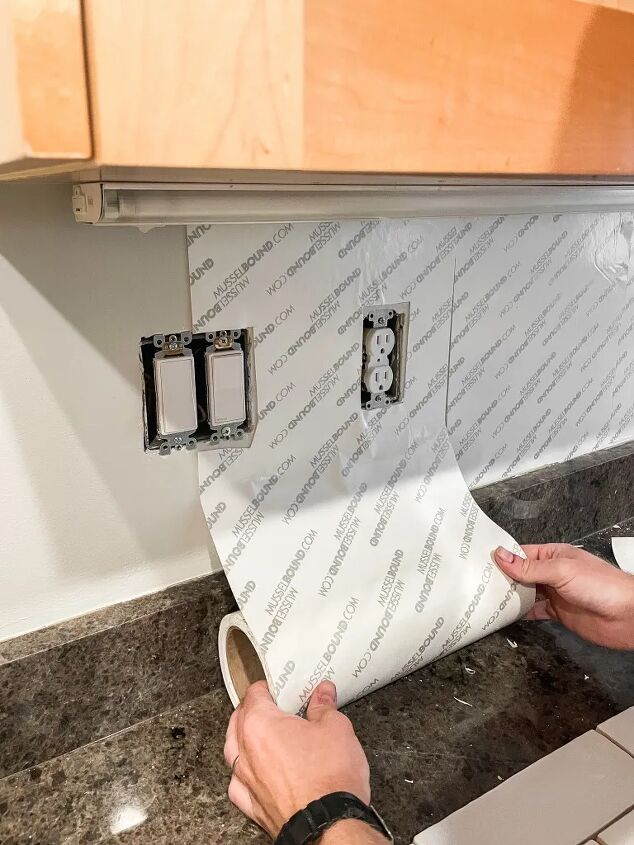
Continue to apply the mat in this manner until all your space is covered. We used a box cutter to easily cut the mat as needed at the bottom, and around power outlets and light switches. The mat is so thin, they say it’s ok if you have areas that overlap. Be mindful to use your hands to make sure the mat is flush on the wall without air bubbles.
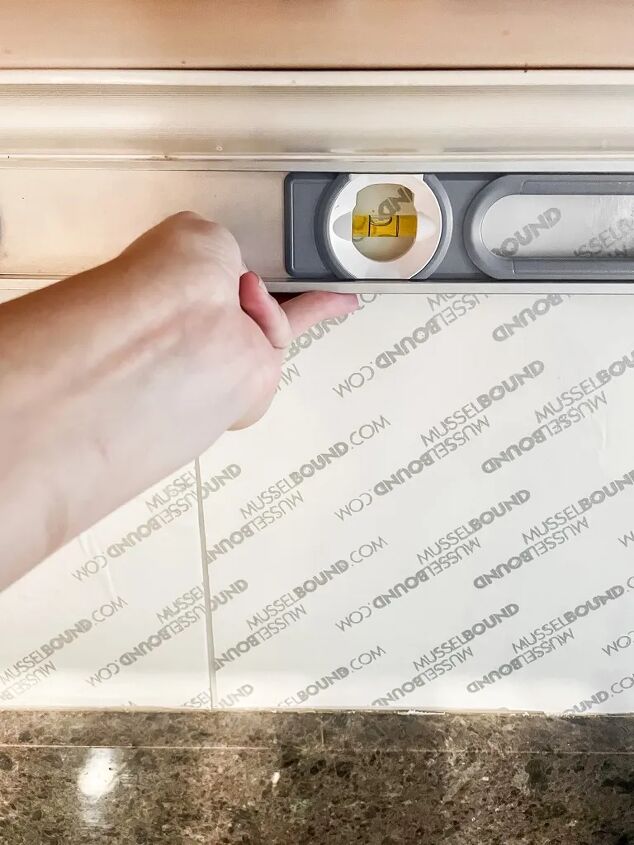
STEP 4: Lay the tile
Now for the fun part, time to adhere the tile to the wall! This step is easy once you get in a groove. Use a level to see if your cabinets and countertops are level. In our kitchen, the countertops were level but the cabinets were slightly crooked.
I removed the paper from the adhesive mat in sections at a time, one wall at a time to avoid allowing it to dry out or be exposed for too long before tiling.
I started with the row above the countertops since I knew it was level, and worked my way from the right bottom edge to the left. To ensure even spacing, I used toothpicks for spacers. Please don’t waste money buying spacers! The tile mat also came with a few spacers. I found that for my subway shaped rectangular tile, 2 toothpicks on the short edge, and four toothpicks along the long edge worked well to ensure even spacing.
After the first row of tile was on the wall, I started on the right again with row #2 above the first row. I was able to install 75% of the tile without making a single cut! If I came up to an outlet, I laid tile as close as I could get, then skipped the tile(s) that would need to be cut and continued with the row, keeping a gap. This allowed me to stay in the groove, and made spaces that needed cut tiles obvious.
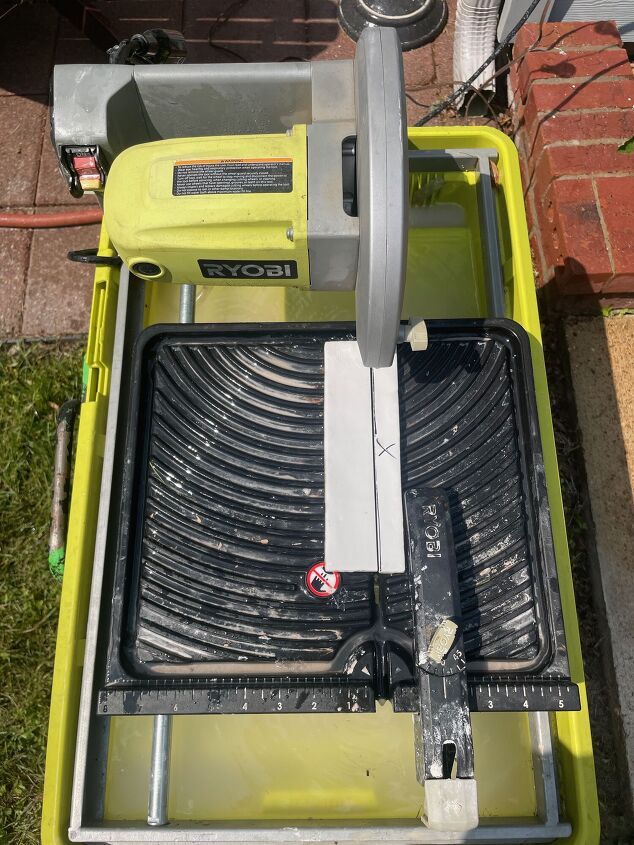
STEP 5: Make cuts
Once you have laid as much tile as possible without making cuts, it’s time to get your hands wet and use that tile saw. Go one blank space at a time, and either measure (my husband’s strategy), or eyeball (my strategy) where cuts need to be made. I drew lines on the tile with a sharpie to mark the cut lines, and an “X” on the part of the tile that would not be used. It may also be helpful to write locations on the back to help remember where that tile goes on the wall.
It’s important to note that the tile must be completely dry to stick it to the mat. We did this quickly by marking 5-6 tiles, cutting, then throwing them on a baking sheet and into the oven for ~5 mins. Once the tile dried and cooled, it was ready to be installed on the wall. You could also use a hair dryer to dry the tiles.
STEP 6: Grout
This may be the best part of using a tile mat vs. traditional mortar or mastic. You can grout immediately- I repeat, you can grout immediately! This turns your weekend tile project into a ONE day tile project.
We chose this grout in a 10 lb bag, but if I could do it again I would probably try this instead. Not because the grout we used was hard to mix (just follow the directions on the bag), but it was impossible to wipe off. The bag says to wait 15-30 mins after application to remove, but we spent over 2 hours wiping, chiseling, and scraping the grout off the tile. Not fun.
We mixed the grout in a 5 gallon bucket, pouring 1 quart of water in first then the whole bag of grout per directions on the bag. To mix, we used the metal attachment on our drill to ensure a good and even mix. I’d recommend doing this step outside, it gets dusty.
I would also recommend wearing gloves to save the integrity of your hands. The grout dried mine out badly. To apply the grout, use a rubber grout float. It’s hard to describe the grouting movement process in words, but I would scoop a generous amount of the grout onto the float, and alternate between the vertical and horizontal crevices. I made an “X” pattern with the float. After pushing the grout into the spaces, use the float to wipe off excess grout from the tile surfaces and move on to your next section.
Once you have covered all of the tiled space, take a minute to closely inspect your work. I used my finger to push grout into any of the spaces near edges or areas that had small gaps.
Here’s where I would change out technique. I would immediately start to wipe off the grout with a wet sponge, instead of waiting the 15-30 mins as recommended. Use clean water and a sponge you wring out regularly to wipe the tile clean and ensure sharp, clean grout lines. This is the step that took us hours.
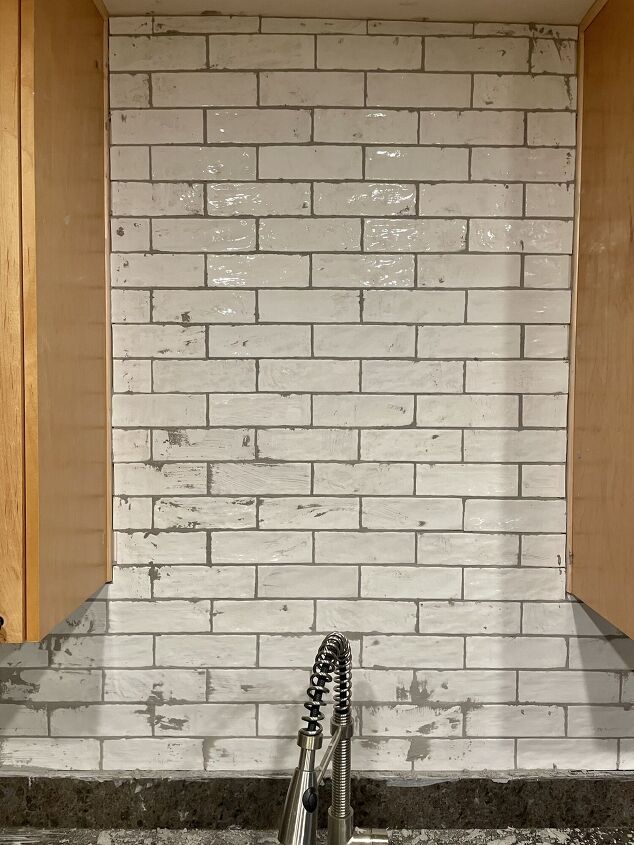
STEP 7: Finishing Touches
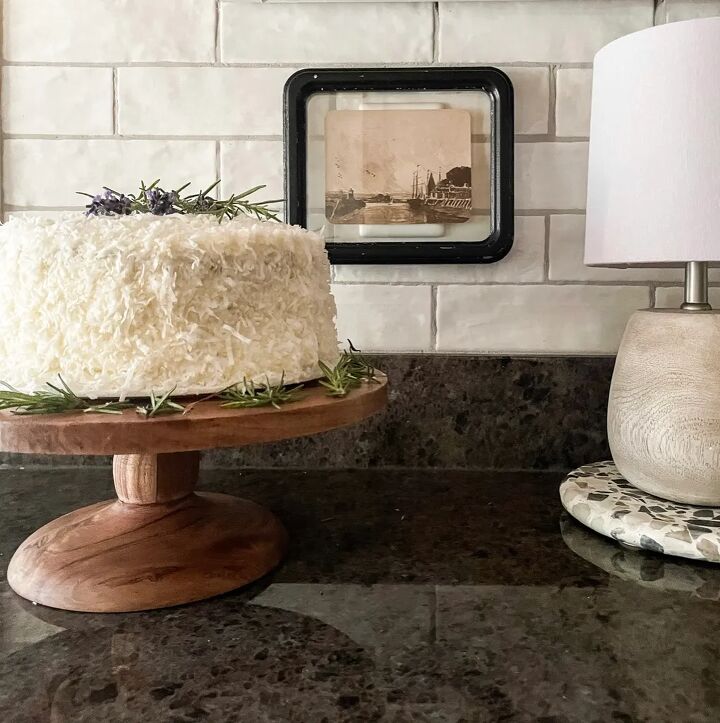
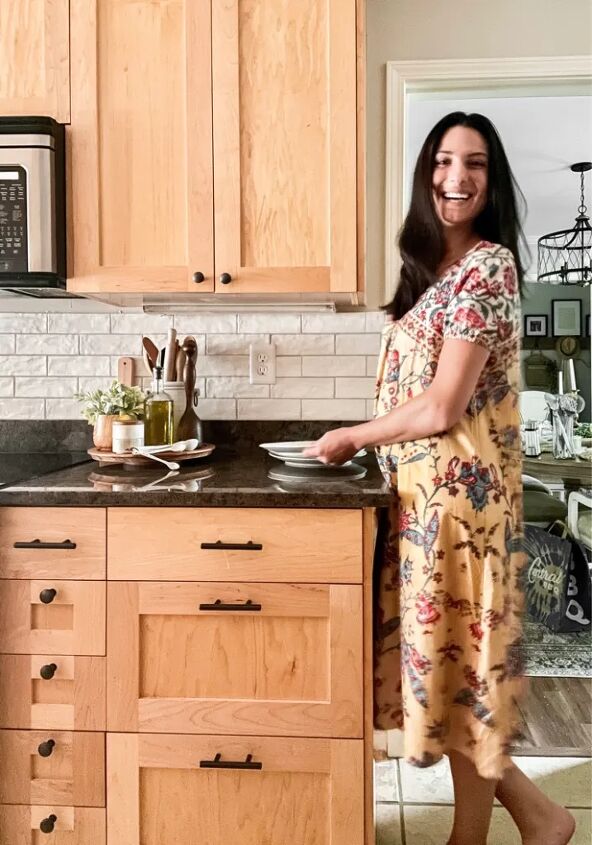
We completed steps 1-6 all in ONE day! By the time the grout was cleaned off, we were ready to call it a day. The next morning, we were so excited to admire our DIY backsplash. I had read that a Magic Eraser is good for removing any haze left behind by grout, so I did one more round of cleaning the tile with the Magic Eraser to remove any lingering haze.
It’s also recommended to caulk the seams between your countertops and tile using something waterproof and recommended for kitchen use. I ran a thin bead of caulk on all of our seams.
Next, my husband installed outlet extenders to make sure the outlet and switchplate covers could be screwed back on over the tile. Make sure and get longer screws too!
And last but not least, admire your DIY backsplash. These before & after’s are pretty great. And don't forget to check out Emily Rone Home for more details on this project, and other home DIY projects!
Comments
Join the conversation
-
Yes I am definitely trying this. I already have my backsplash tile, when I saw this. I am excited to try it. The other thing I was surprised you went vertically instead of horizontal, did the instructions say why? I will be following what you did. I’m getting excited to get started.
-
It looks so good!!


Frequently asked questions
Have a question about this project?