


Install a Tile Backsplash in the Kitchen
Do you have a full tile backsplash in your kitchen? Ours is only four inches high and I get food splatters on my wall behind the stove! To solve the problem, we’re going to install a full tile backsplash in the kitchen!
We’ll show you step-by-step how to tile a backsplash! We hope it inspires you to take on a tile project of your own!
For more DIY ideas from An Organized Season, click HERE!
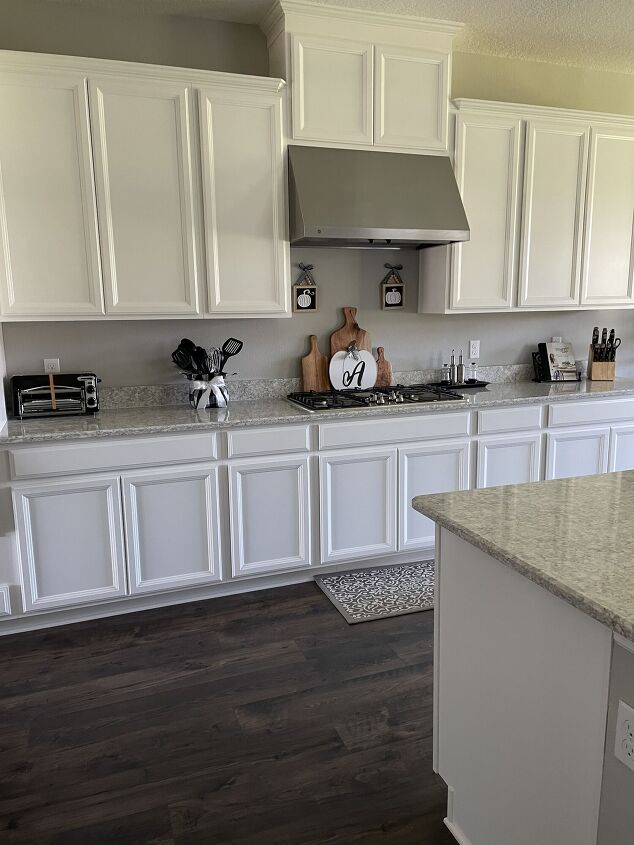
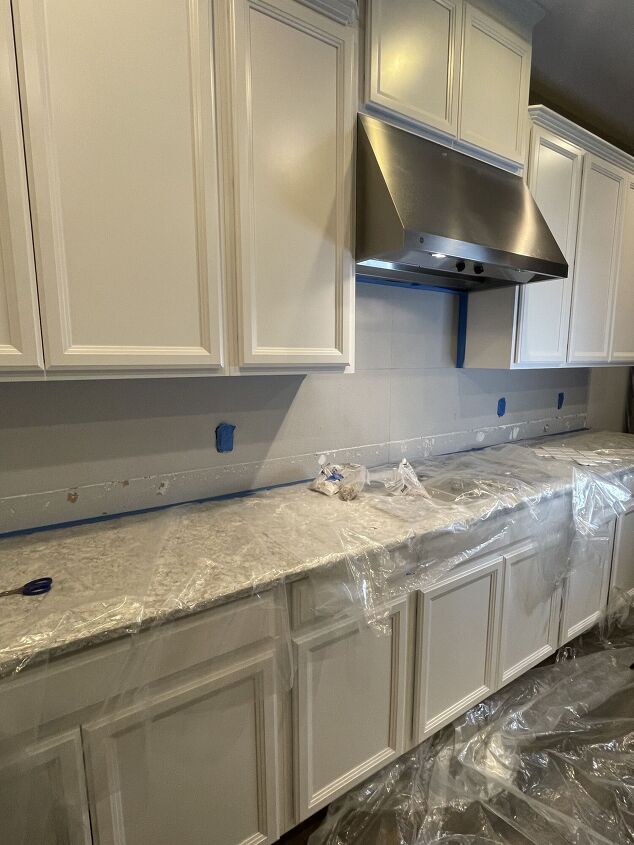
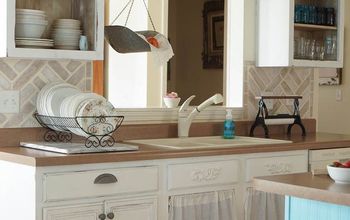
Here is a picture of the kitchen last Fall. You can see, that we only have a four-inch backsplash!
Get ready friends, because that’s about to change!
Time to get this DIY started!
GATHER
Gather the following items to do this project:
- Tile approved for use on a wall
- Thinset Mortar for wall tile (recommended for tile you are installing)
- grout (recommended for tile you are installing)
- safety glasses
- caulk gun
- caulk
- painters tape
- notched trowel (choose one with correct notch size recommended for tile you are installing)
- tile float
- putty knife
- wet saw (rent one if you do not have one)
- wet saw blade (rated for cutting tile you chose)
- measuring tape
- tile sponges
- buckets
- level
- drill and mortar mixer( known as egg beater mixer)
- spacers (appropriate size for recommended gap between your tiles)
- utility knife
- heat gun or hair dryer
- grease/wax pencil (for marking tiles)
PREP
CHOOSE TILE
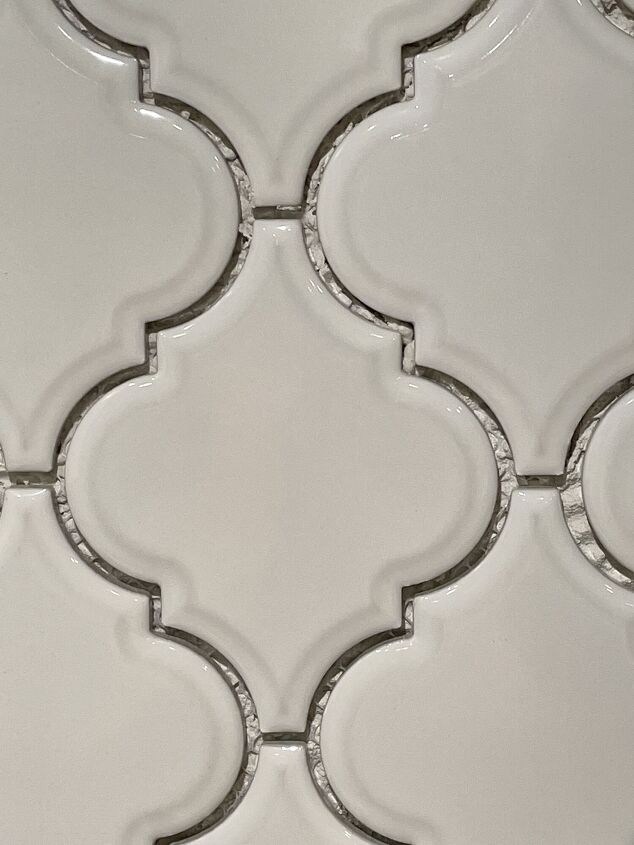
Tile comes and all shapes and sizes, quality, and prices. Look around at Tile Shops, Lowes, Home Depot and other sources to find the tile to give you the look you want within the budget you set.
Make sure the tile is suited for wall installation and as a backsplash. We purchased samples from several sources before deciding. It is best to bring samples home to see that they look right for your kitchen.
CHOOSE THE COLOR OF GROUT
Once you pick your tile, choose grout that can be used with your tile. The tile manufacturer will list options and suggestions. Choose the color and texture of grout (sanded or unsanded) that you want.
MEASURE
Measure the entire area where backsplash will be installed. You will need the width times height to get the area in square footage. You will probably have to measure multiple areas and add all those together.
Then check how much square footage a sheet of your tile covers and divide it into the total square footage to get number of sheets needed. Best practice is to buy 10 percent extra in case of damaged tile or mistakes.
REMOVE OLD BACKSPLASH
We had a quartz four inch backsplash attached by silicon caulk to the wall and caulked seams.
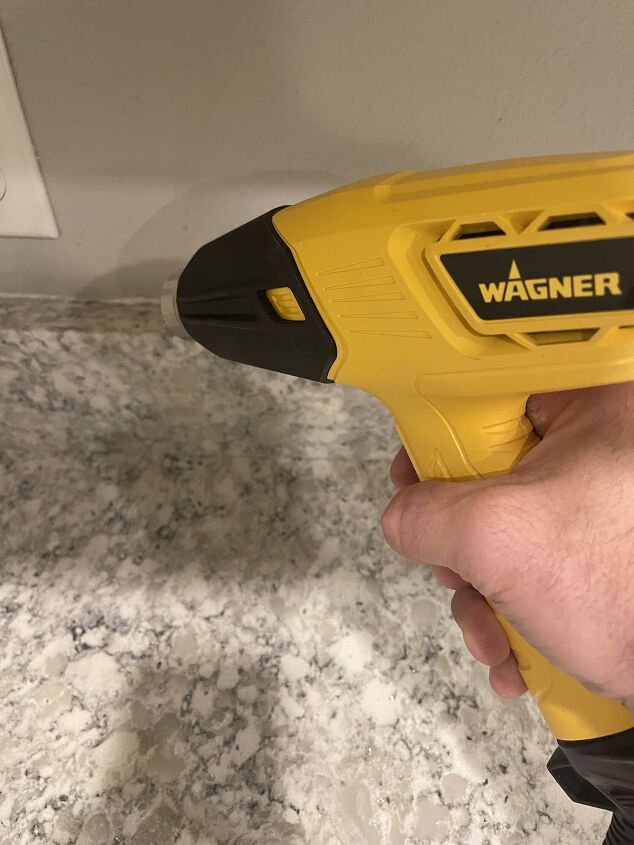
First, I used my heat gun to loosen and soften the caulk seams. You could also use a hair dryer on high for this if you do not have a heat gun.
Then, score the caulk seams with an utility knife.
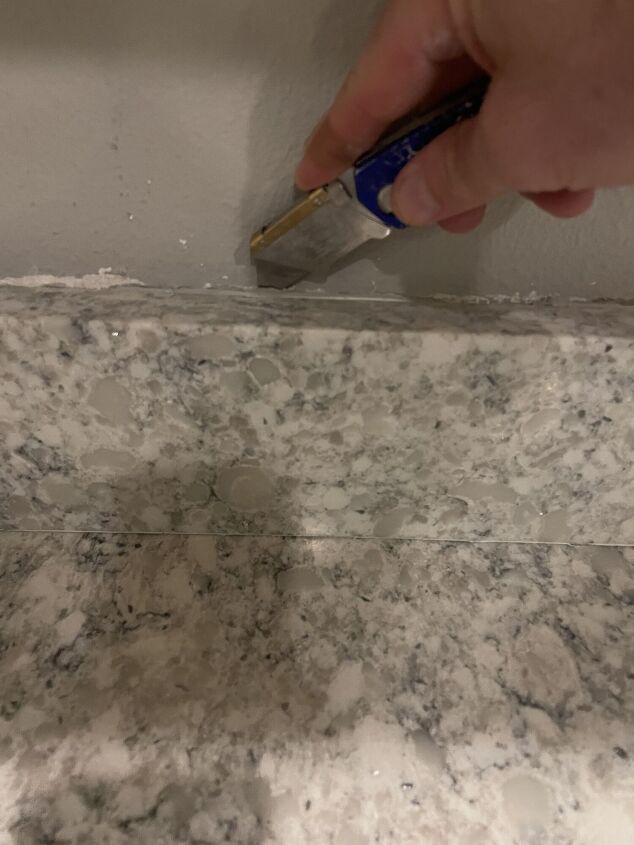
Next, use a putty knife to pierce the caulk and detach it from the wall. I found there were also random blobs of caulk here and there behind the backsplash helping to adhere to the wall. You can use the putty knife to detach those too.

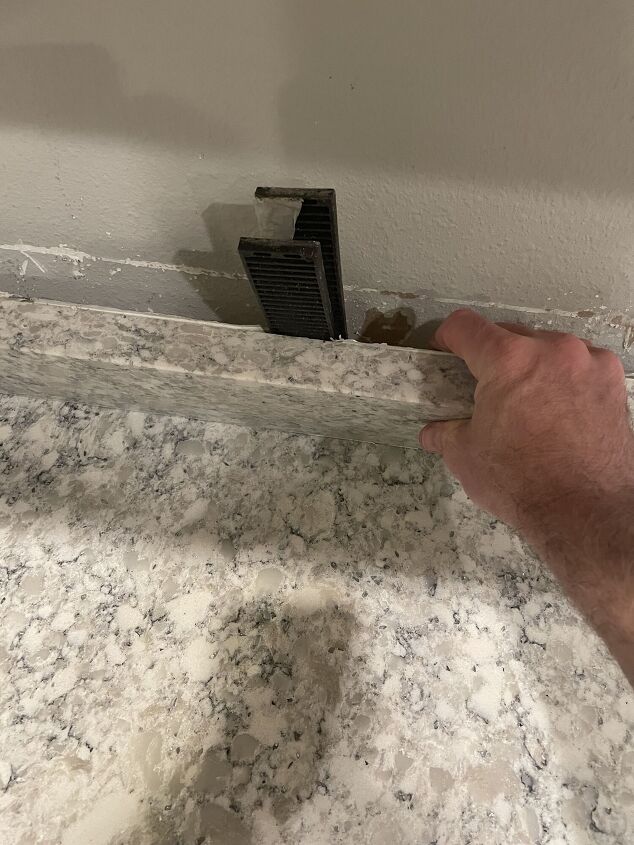
Next, use shims to slowly and gently force the old backsplash to detach from the wall. Once the top caulk seam gives way, just score the bottom caulk seam holding the quartz backsplash to the counter to remove this section. Be patient and careful not to scratch the counter or smash your fingers. Quartz is heavy.
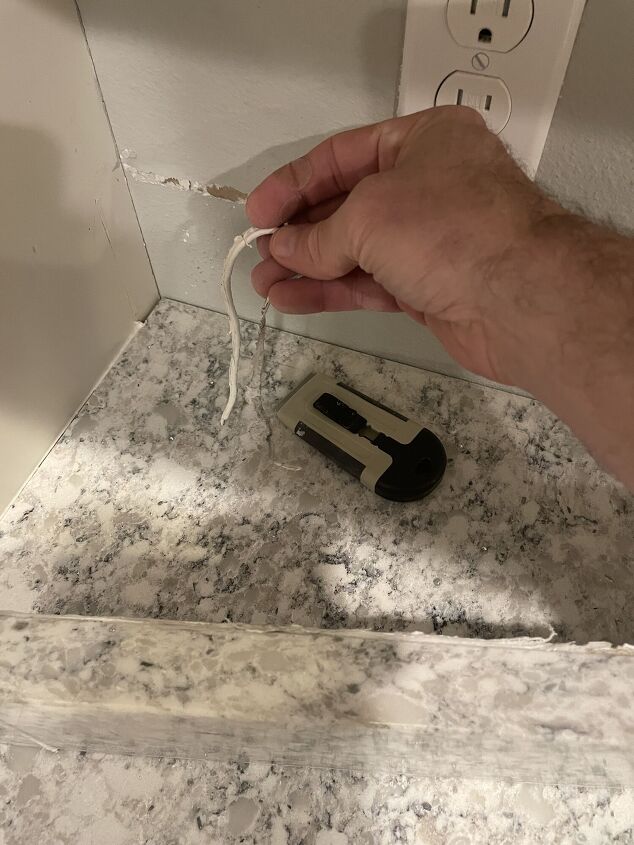
Use a utility knife or razor blade scraper to carefully remove any remaining caulk from the wall and counter top surface.
PREPARE WORKSPACE
- If your wall is smooth drywall, lightly sand to aid bonding of thinset to the wall
- Clean surfaces of dust and dirt
- Remove everything from the counters
- Shut off power to electrical outlets
- Remove outlet cover plates and store
- Tape outlets with painters tape to keep thinset and grout out
- Cover countertop with plastic and tape in place with painter’s tape
- Cover all cabinet edge and appliance edges with painter’s tape
- Place plastic on the floor in the work area also to keep thinset and grout off
- Bring all your tools, trowel, putty knives, float, spacers, etc to the work area
DETERMINE LAYOUT
Decide how you are going to lay the tile in each area.
Are you going to start from one side and tile left to right, right to left or from the center of the area out??
It is up to you and depends a lot on how complex your tile pattern is.
We decided to start from the center and centering the first tile sheet.
Tip: I would also recommend making a horizontal line across the wall at the approximate height or your first row of tile to keep the first row of tile level.
INSTALL TILE
MIX MORTAR
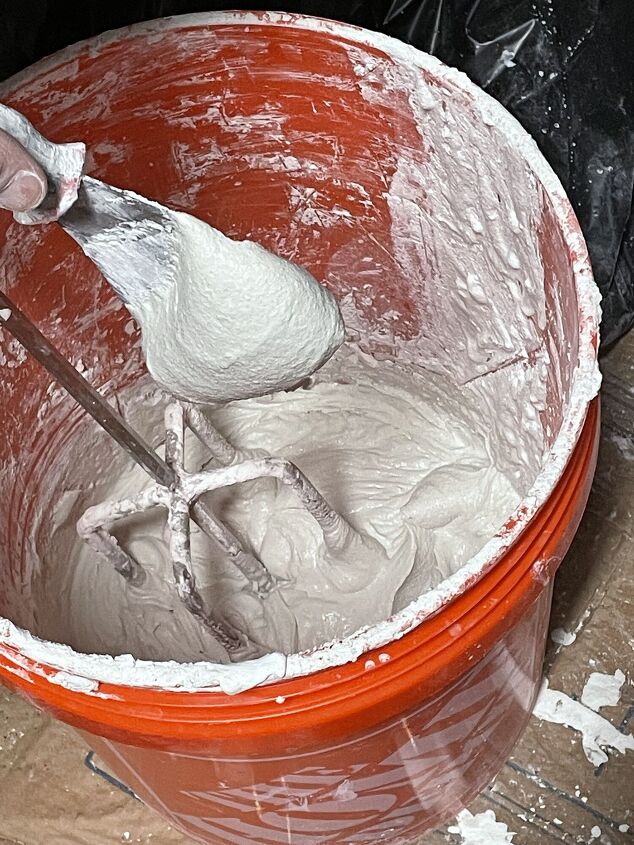
- Read the manufacturers instructions for your thinset.
- Add the correct ratio of thinset powder to water to a plastic bucket.
- Use a drill and a mortar mixer(sometimes called an egg beater mixer) to mix up your mortar to proper consistency per instructions.
- Use a putty knife to check consistency recommended by mortar manufacturer. Ours was a lot like toothpaste when mixed properly.
APPLY MORTAR
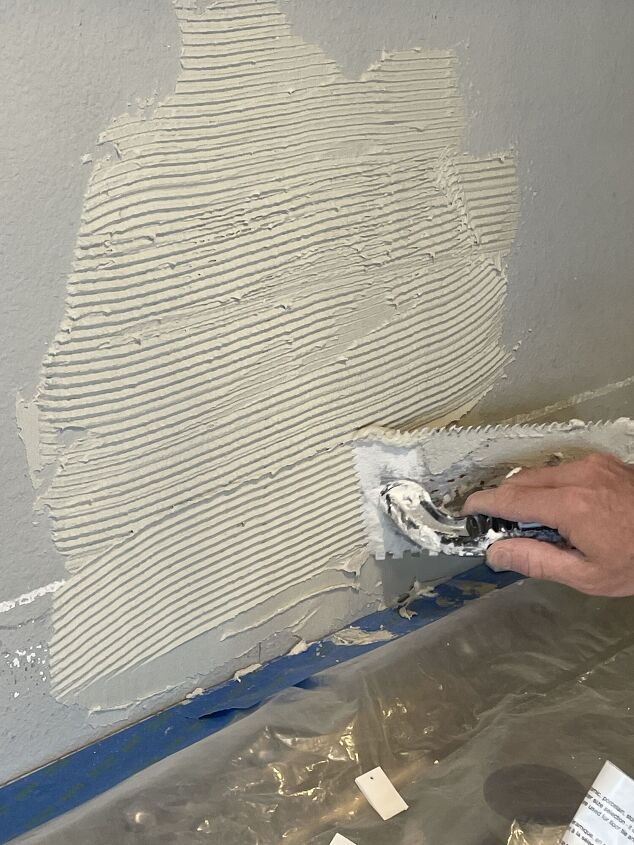
- Use a large putty knife or you can use your trowel to apply a small amount of thinset to the wall.
- Most trowels have a smooth side or you can use putty knife to spread out the thinset.
- Cover an area at least larger than your first sheet of tile. Once you get going you can prepare a larger area for more than one sheet.
- Use the notch side of the trowel and hold it at 45 degree angle and scrape the area to make grooves. This should result in just the right amount of mortar needed. Avoid making double grooves or lumps. When installing the tile this causes mortar to squish out between tiles. Excess mortar would need to be removed before grouting.
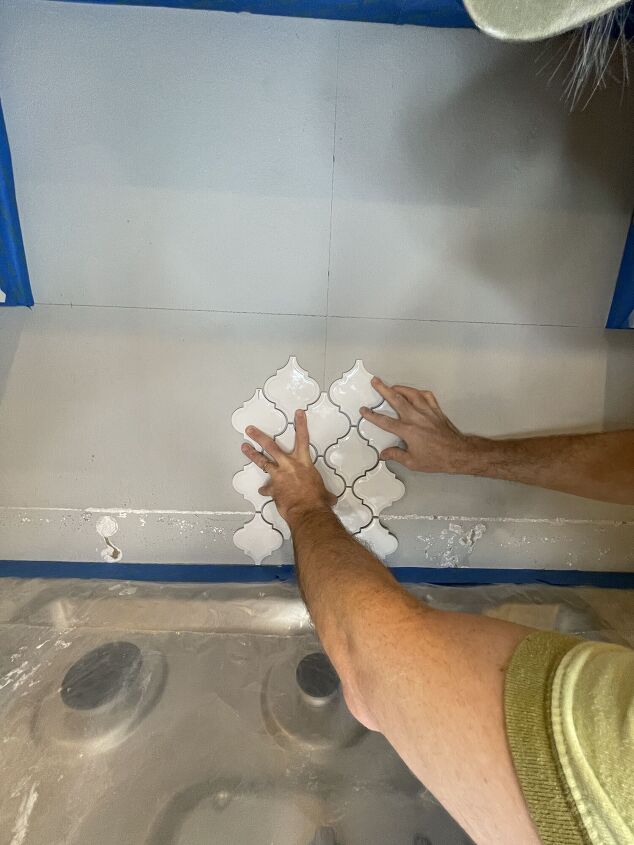
INSTALL THE FIRST ROW OF TILE
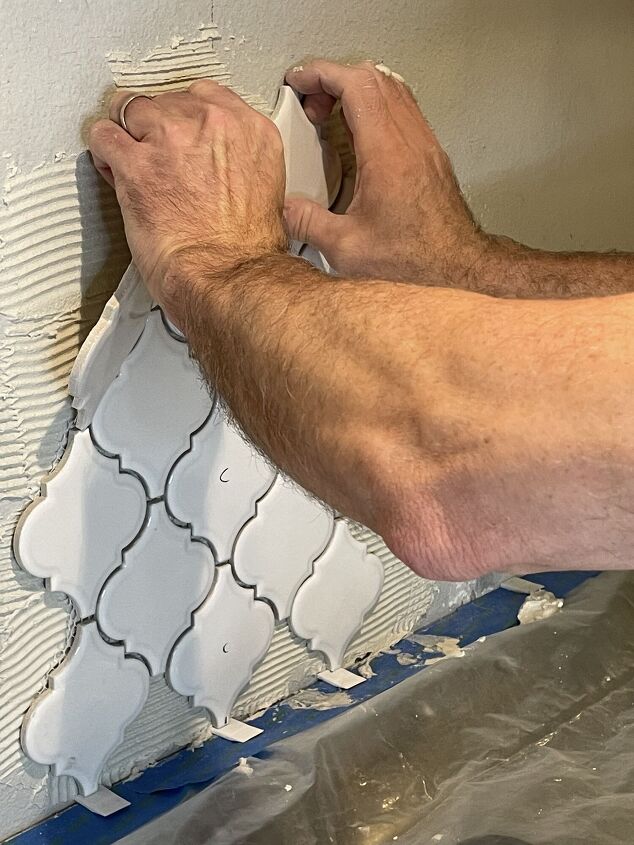
- Grab your first tile sheet and some tile spacers
- Align your first tile with any guide marks on the wall you made and your counter top.
- Press firmly into the thinset mortar and gently shift the tiles to make it straight and level
- Use a tile float to help firmly and evenly press tiles against wall
USING TILE SPACERS

- Use tile spacers to maintain the recommended gap required by your tile manufacturer between tiles and between tiles and counter top.
- Make sure you purchase plenty. We used hundreds.
- Use wedge type spacers between bottom tiles and counter and x type spacers to correct any gaps between tiles
- Do not butt tile up against counter top or cabinet without an expansion gap or you will get cracked tile later.
HOW TO CUT INDIVIDUAL TILES
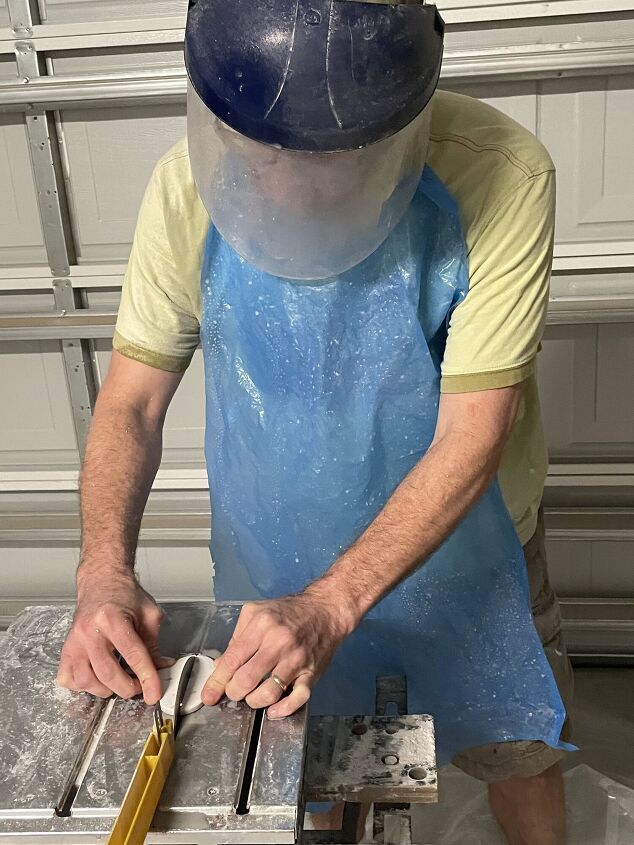
Now the fun part which is cutting tile sheets or individual tiles to complete the pattern on the edges of your area or fitting around outlets and light switches.
- We used a wet saw to cut tile sheets and individual tiles to fit
- Make sure the tile saw blade is rated for your type tile.
- Make some practice cuts on your tile saw
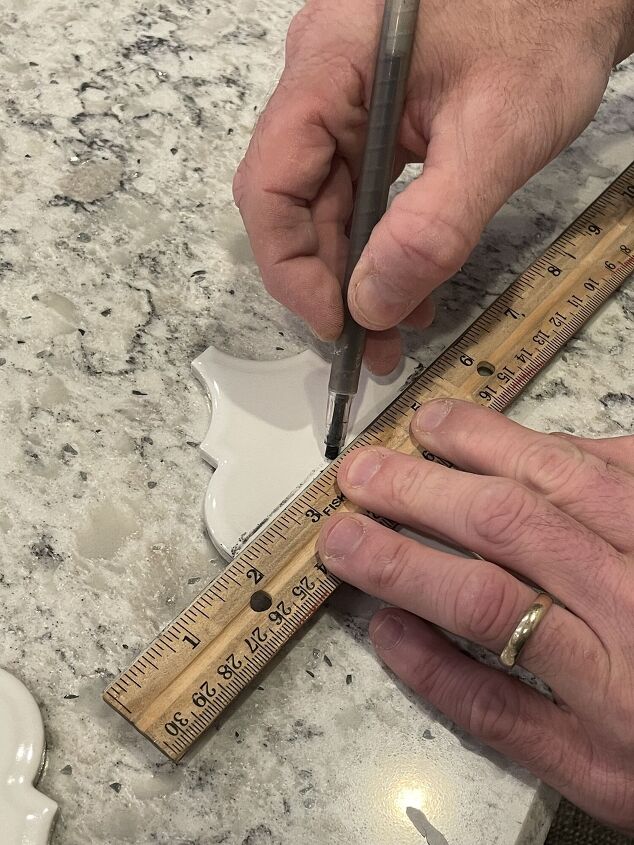
- Use a grease/wax pencil and ruler to measure and mark lines on tile to cut
- Wet saws are messy so make sure to have a clear area and spread plastic
- Use proper protective eyewear(safety glasses or face shield) to protect against shards of tile while cutting
HOW TO DEAL WITH OUTLETS
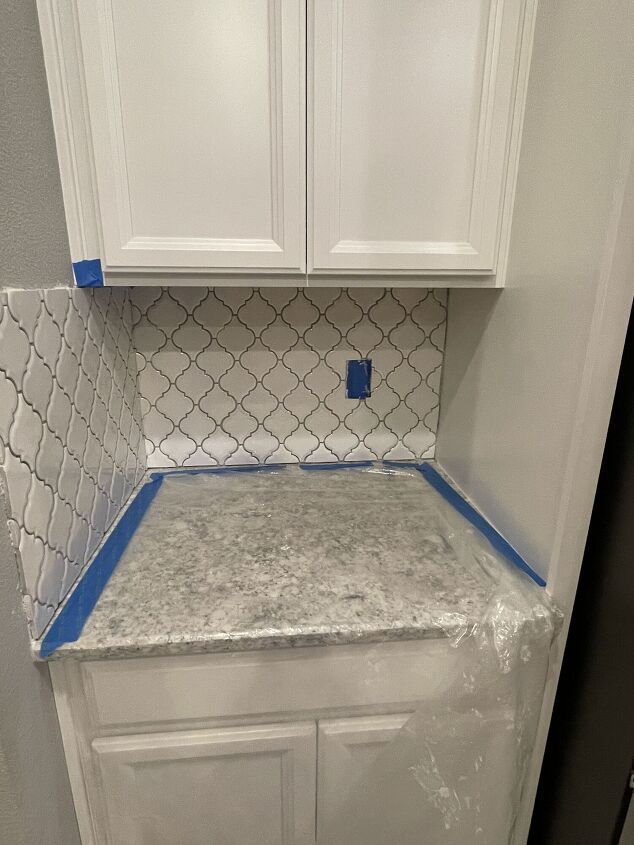
- Continue the above steps to apply tile sheets to your backsplash
- If you run into electrical outlets or switches, apply tile right up to them but not covering them
- Dry fit the next sheet before putting thinset on the wall, noting all tiles in the sheet that would cover up a part of the outlet. Mark them with a grease pencil
- Cut the mesh of the sheet and remove those tiles your marked
- Mortar and apply the altered tile sheet
- Measure, mark, and custom cut the tiles you removed to fit around the outlet
- Back butter the tiles by spreading just enough thinset mortar on back of each tile
- Press into place and apply spacers
HOW TO FINISH ENDS
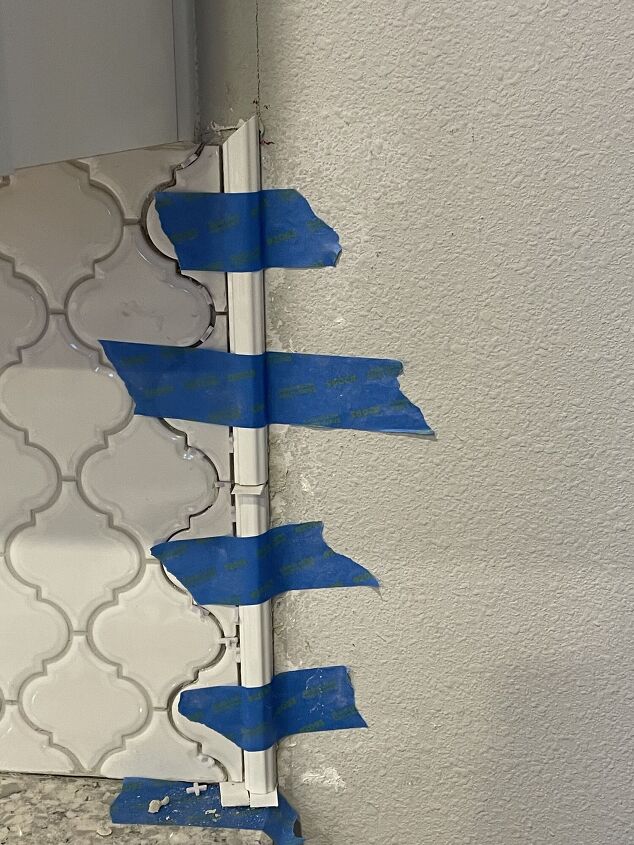
Repeating all the steps above you will eventually come to the edges of your backsplash.
We finished our edges with tile liner pieces.
- Install your tile liners before you custom cut your final regular tiles
- Make sure to align your liner tiles straight and spaced properly
- Back butter the tile liners and install
- To secure them temporarily we used painter’s tape
- With the liner edges in place, custom cut and install your last regular tiles
LET MORTAR DRY
- Make a quick inspection of all the gaps between your tile to find and remove excess thinset that has squished out. It is easier to remove now before it completely dries.
- Let the Thinset mortar dry at least 24 hours
- Carefully remove all tile spacers from the tile gaps
- Examine all the gaps between tile again to remove any dried thinset excess you missed.
- Use something like a small screwdriver or hard plastic to carefully clear the excess before grouting
GROUT
CLEAN TILE
- Clean the tile with a damp cloth til it is free of thinset and dust
- Let dry
PREPARE GROUT
- Read the manufacturer’s instructions for your grout to apply the proper ratio of grout and water to a bucket.
- Mix in a different bucket from your mortar
- Mix to the recommended consistency using a drill and egg beater mixer as you did the thinset mortar
APPLY GROUT
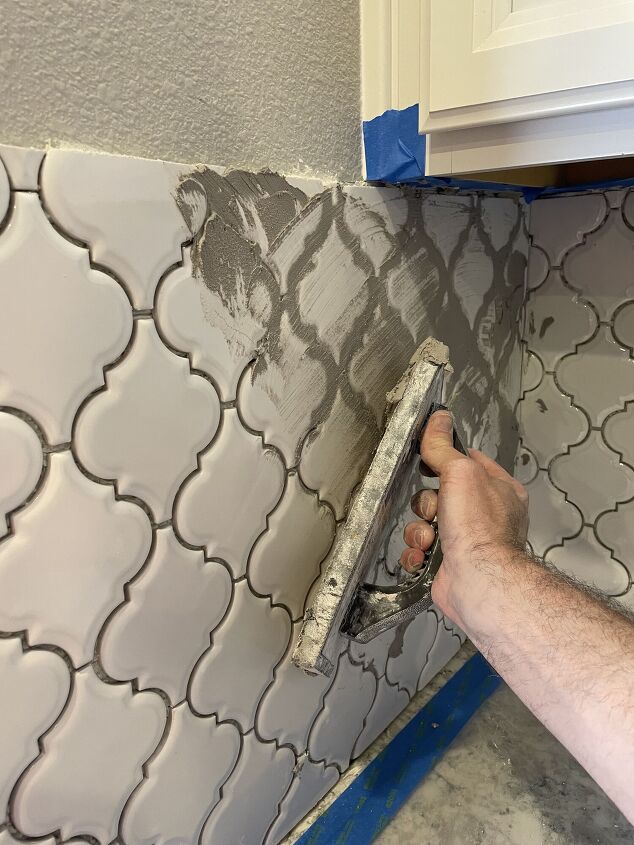
- Read the grout instructions for recommended setup time and how much area to cover before having to clean off the excess
- IMPORTANT: Do not grout the gaps between tile and counter top and cabinet edges. Those must be caulked. These surfaces may expand and contract which could cause grout to crack.
- Use a tile float to scoop a small amount of grout onto the surface of your tile
- Hold the float tilted at a slight angle and push and pull grout across the surface in a diagonal motion forcing grout into the gaps
- Continue this motion to move the excess grout to a new area
- Apply more grout as needed until the area is covered
- Let setup for the recommended time per instructions
REMOVE EXCESS GROUT

- Get a bucket of clean water and tile sponges
- Dip sponge in water and squeeze out most of the water til it is damp but not dripping wet.
- In a diagonal motion wipe the sponge across the tile to remove excess grout from the gaps and surface of the tile
- Rotate or flip the sponge over to a clean section for each diagonal wipe
- Soak and rinse the sponge squeezing out most the water before continuing to clean excess grout
- Repeat until the area is mostly clean of excess
CLEAN TILE
- Once the grout has setup for awhile return is a slightly damp sponge and wipe any remaining grout haze
- Let grout dry at least 24 hours
CAULK
Gaps between tile backsplash and the counter top or cabinet edges must be caulked to handle expansion and contraction of these surfaces. Grout would crack.
CHOOSE THE CORRECT CAULK

- Choose a caulk recommended for use for your type tile
- We chose caulk from same manufacturer of our grout because it came in the same color as the grout
CHOOSE CAULK GUN AND APPLY CAULK
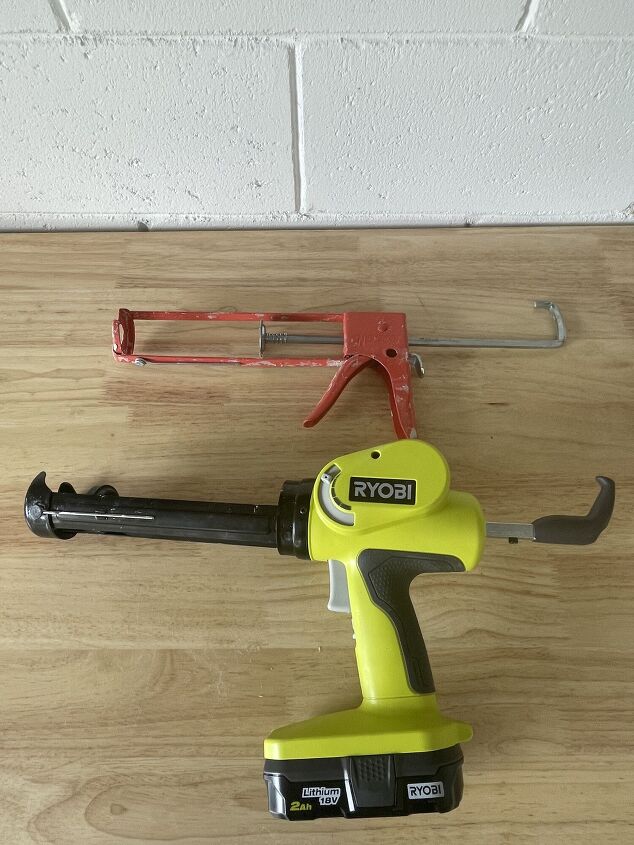
- A consistent bead of caulk looks good and is easily cleaned up to look nice
- Rich chose this Ryobi battery powered caulk gun(bottom of the photo above) because it made it easy to caulk long smooth beads
- Use your caulk gun of choice and apply caulk to gaps between countertops and cabinets
SMOOTH CAULK
- We purchased a kit with different tools to smooth caulk to a consistent bead
- The kit contains a hard plastic tool to clean out old caulk
- Several tools are included allowing you to choose the thickness of the beads
- Choose the tool for the gap size of your tile and follow the instructions to make your caulk look nice
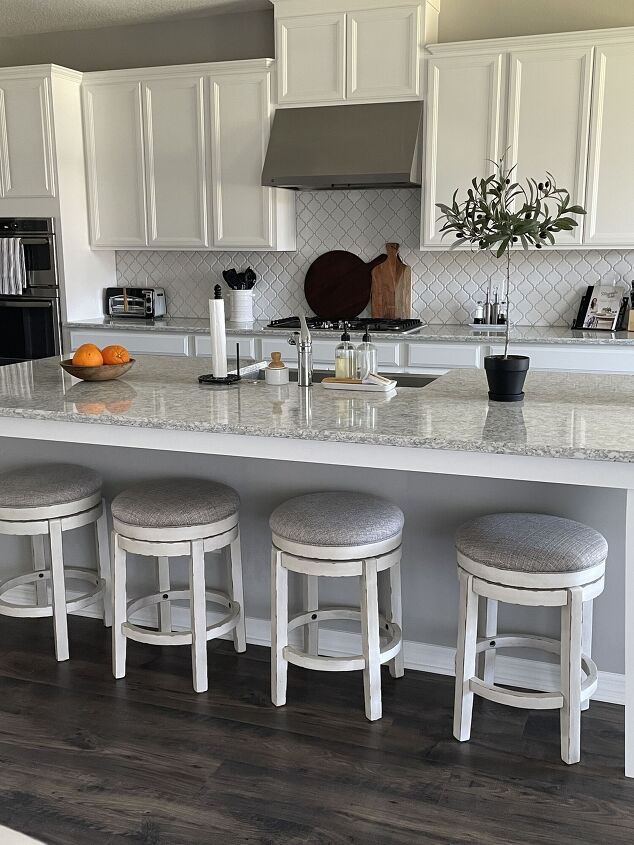
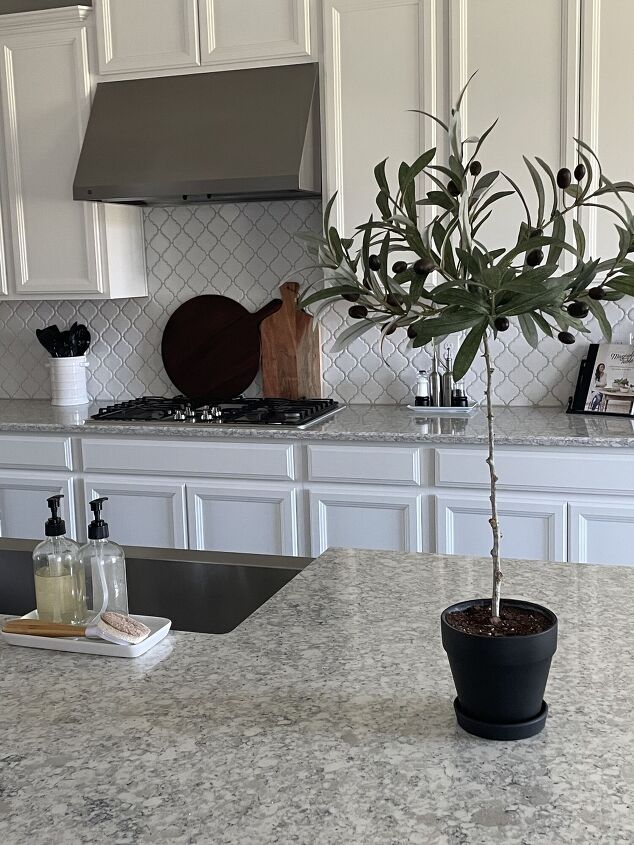
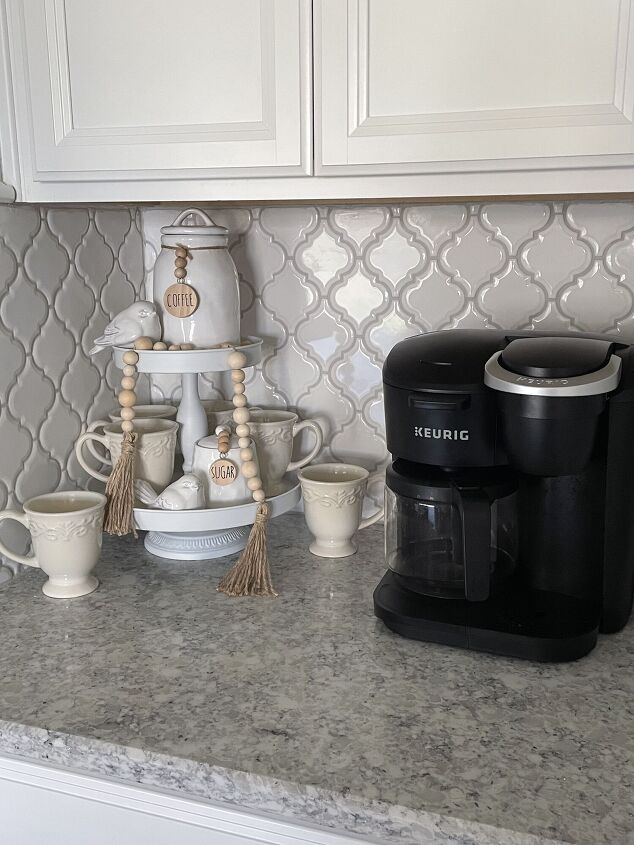
THE FINISHED BACKSPLASH
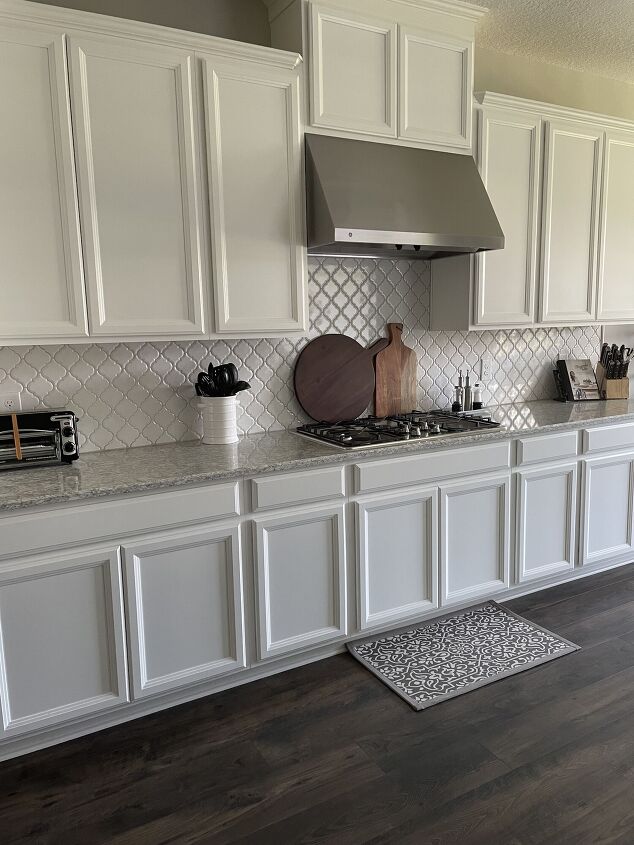
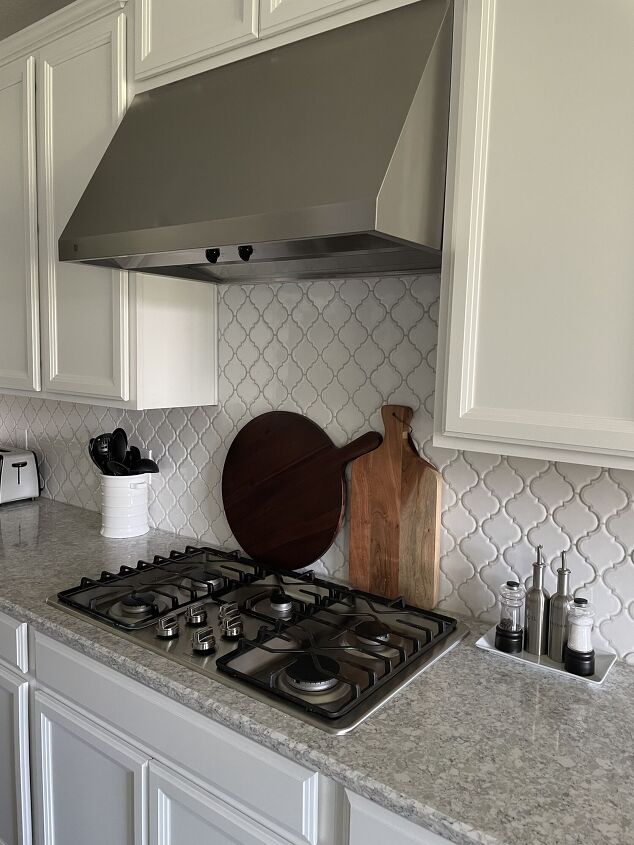
Do you feel confident to install a tile backsplash in your kitchen?
Let us know if you’ve already done this or would like to try it in the comments below!
If you are interested in learning more about home organization, seasonal decor, and more DIY projects, from simple crafts to full room makeovers visit our blog AnOrganizedSeason.com
Blessings, Donna and Rich

Comments
Join the conversation
-
Looks great. Lots of good tips and instructions. Everyone has a bit different technique but in the end it looks amazing. Great job and share
-
Thanks so much! Glad you found it informative! Donna and Rich


Frequently asked questions
Have a question about this project?