


Building and Styling Our Corner Kitchen Breakfast Nook
3 Materials
$500
2 Weeks
Medium
When we decided to renovate our little cottage, one of the most important things to me was that we create a space in the kitchen that was cozy and comfortable for all of our family to hang out in and share a meal. We knew from working with our contractor that the size of the kitchen wasn’t conducive to installing a big island, even though that’s still on my bucket list for down the road. Instead of putting a big table in the space, which would take up a majority of the room, we decided to utilize a neglected corner to turn it into a cheery breakfast nook. I’m so pleased with the way this project turned out and it’s now a central part of our home. Here are the steps we took to create it.
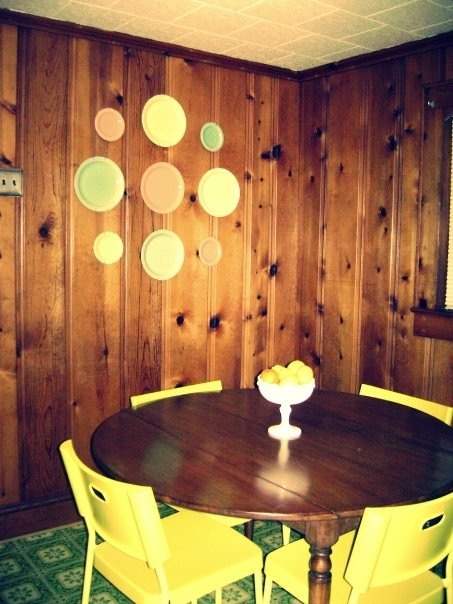
To appreciate the brightness that this breakfast nook brings, it’s important to see the “before” picture. Before we started our project, the kitchen was covered entirely in knotty pine paneling. While I appreciate the craftsmanship of knotty pine and though many people thought we were crazy for removing it, I just needed the space to be a little brighter. The cottage gets tons of sun throughout the day, but its surrounded by some pretty substantial shade trees, and the kitchen can stay pretty dark. To remedy that, I removed all of the window coverings, including the mini-blinds in the kitchen, and installed new windows to let as much sunshine in as possible. We then removed the knotty pine and painted the walls a happy, bright yellow.
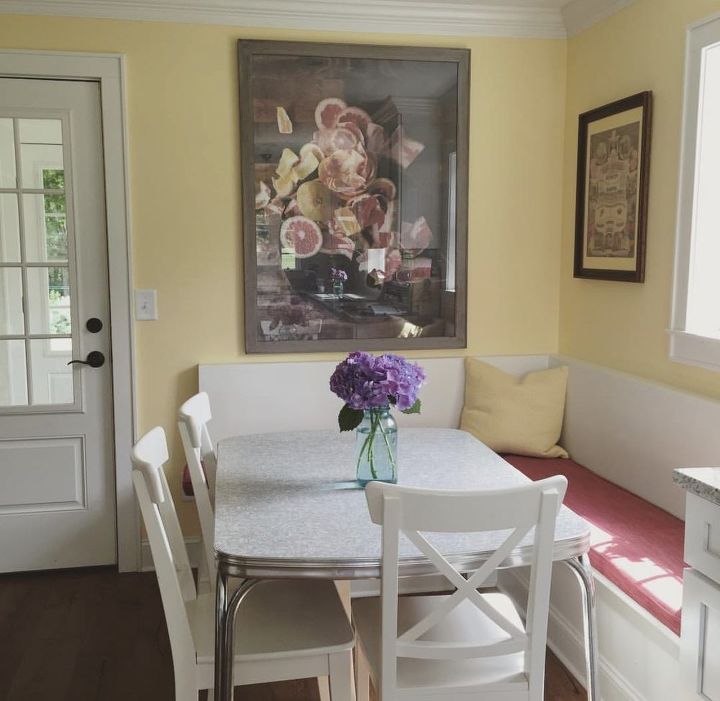
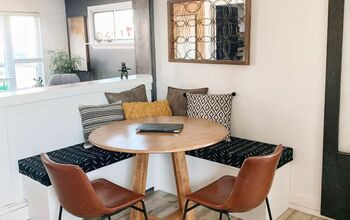
Previously, this corner of the kitchen was used just for our tiny, round breakfast table. Before we moved in, the refrigerator was actually installed here. However, when the ice maker broke, the unit began to leak and it created a spot on the vinyl flooring. We moved the fridge to the other side of the kitchen and just put a table down instead. It was a good-sized space, though, and I felt like we weren’t using it to its full capacity or potential. I worked with our contractor to build two benches on either side of the back left corner. In hindsight, I would have asked him to build storage into the underside of the benches where we could stow extra pots, pans, dishtowels and more.
Though our kitchen is much bigger and spacious now, it still lacks a ton of storage, so that would have been a great way to conceal some clutter. Instead, we just opted for regular benches. We also considered adding beadboard to the back of the bench, but I thought that might be uncomfortable to recline against. So, we installed the backs at a slight angle to accommodate comfortable seating.
Then, I picked out a deep red fabric from our local craft store. I wanted to make sure it was a fabric that would wash up easily, as we have two little kids who love to use this space to make as big of a mess as possible. I opted for a thick tweed-like material that has cleaned up well over the years. I worked with a local seamstress to create cushions from the fabric, designed to fit the exact dimensions of the benches. Instead of one oblong cushion, we decided to do two separate ones so the lines would be cleaner.
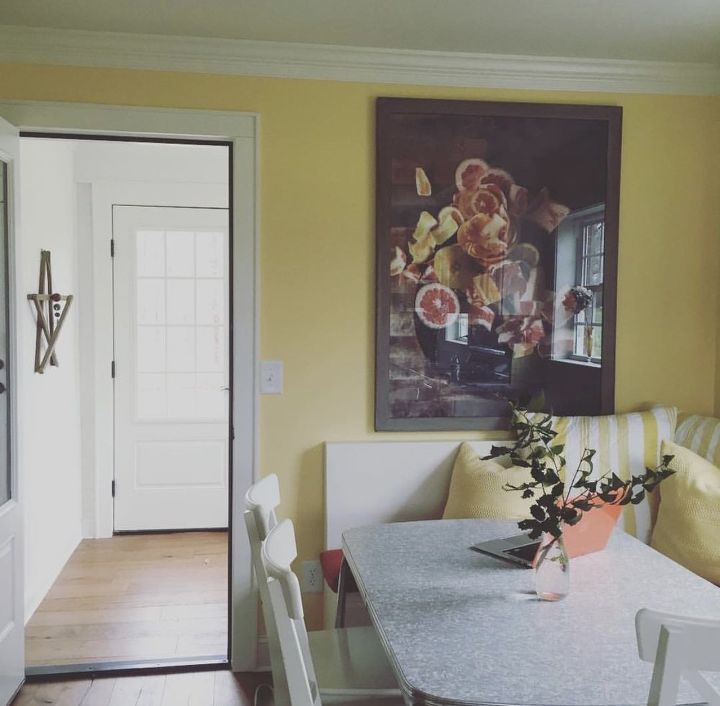
I chose the red fabric to pull out the red in the oversized piece of botanical art we have hanging over the space. This was one of the most important design elements of our breakfast nook, and one of my biggest home investments to date. The image is from an online photographer and was out of stock when I found it. I emailed to request a copy and they were able to fulfill my request. The biggest hurdle then was finding a frame big enough to accompany it! I ended up having to get it custom framed, then purchased a piece of specialty glass from our local glass and mirror shop to fit it.
Overall, it ended up costing a little more than I’d anticipated, but I am thrilled with the end result and I know it will be a cherished heirloom piece.
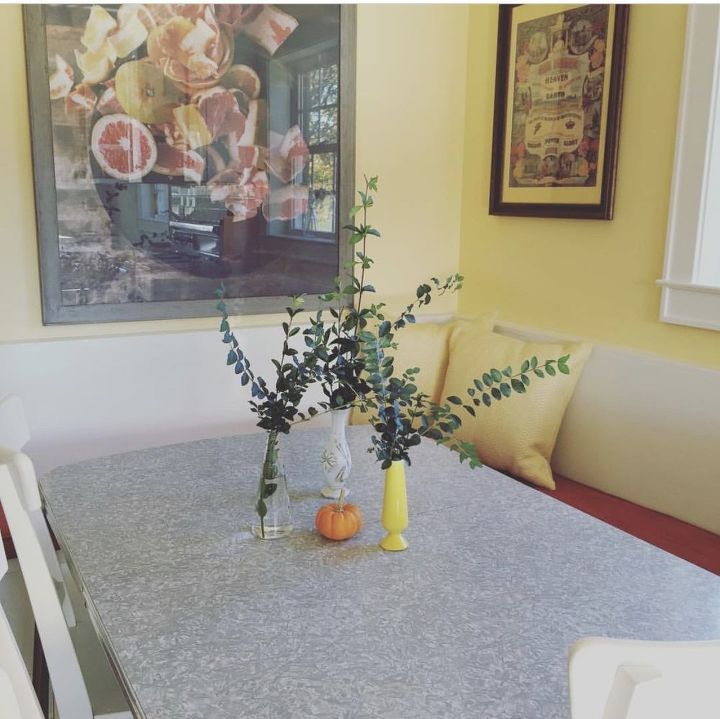
As you can see, we enjoy decorating this little space for the seasons. The table is an antique handed down by my husband’s great-grandfather. It’s an old diner-style table with stainless steel legs and a laminate gray top. It’s not much and it’s definitely not that big, but it fits our simple and rustic style just fine and it, too, has held up to wear, tear and stains over the years. We enjoy gathering around this table every morning, noon and night to share a meal and relax!
Resources for this project:


Any price and availability information displayed on [relevant Amazon Site(s), as applicable] at the time of purchase will apply to the purchase of this product.
Hometalk may collect a small share of sales from the links on this page.More info

Want more details about this and other DIY projects? Check out my blog post!
Comments
Join the conversation
2 comments
-
Yes... Once I build mu own house... Still saving for the huge project next year..
-
I like that OLD table with the metal legs. Takes me back......some of them use to have a drawer in the middle on the edge.......meant for your silverware. Memories!


Frequently asked questions
Have a question about this project?