


How to Add an Easy Breakfast Counter to Your Kitchen!
$30
2 Days
Medium
When we remodeled our kitchen we added a window on an east facing wall just to get a little bit more natural light in it. But with our layout we wanted and where it was located I needed to make it fit into the room better.
Tada! A breakfast counter!
You can get the full DIY on my website CrazyDiyMom.
The best part about this is the wildlife we get to see while we're enjoying a quick breakfast or a morning cup of coffee. We have a lot of deer, turkey, rabbits, squirrels and plenty of birds to watch out this window - I love it!
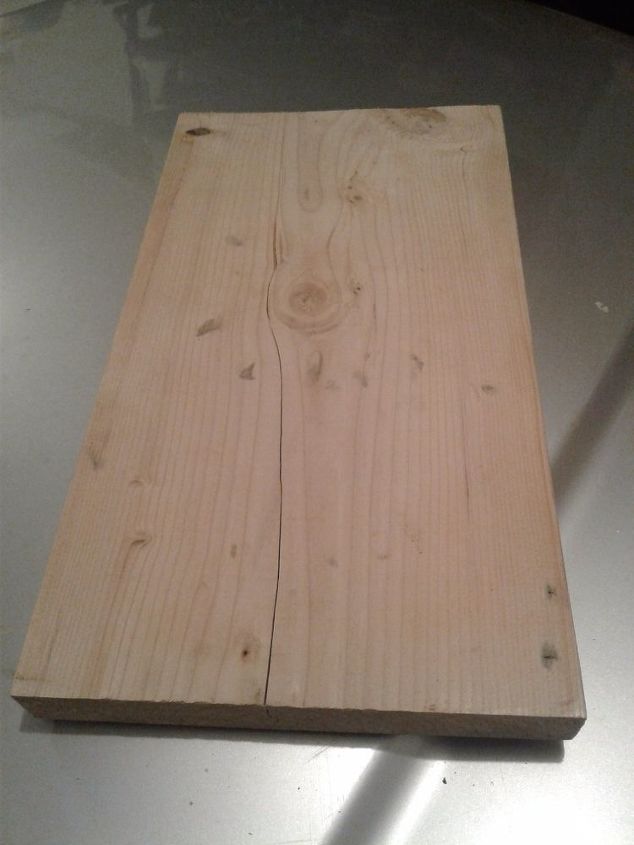
I started with a 1"x8"x10' pine board. You can use any type of wood or width you perefer. I liked pine because of the neat wood grain of the wood. I cut it to the size I wanted. Yours will vary completely depending on your window size, your open area and how you want it to look. My window was 32" wide, plus the 4" total for the window trim and I also added 5" to each side to come past the window, so my board was cut to 46" long. I sanded the board and took out the real sharp corners just to give it a more rounded look.
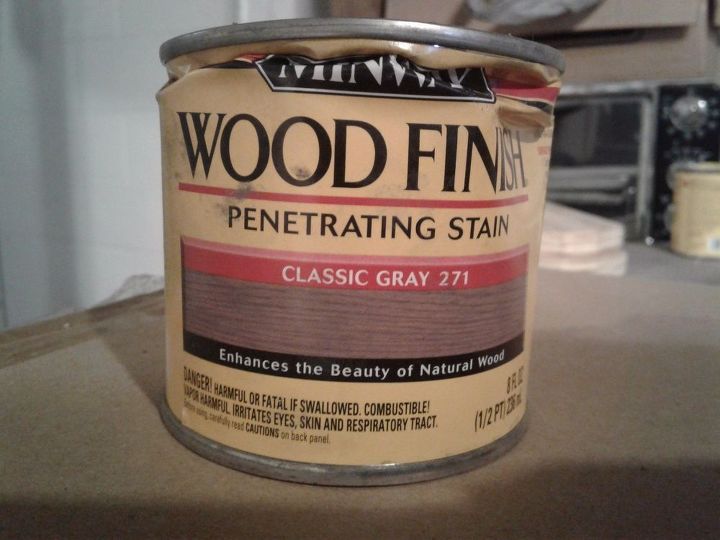
Once my board was sanded I started to stain it. I used this classic gray color because of the white/gray theme in my kitchen and the color came out perfectly - I love it. I applied about 3 coats of stain to each side letting it dry about an hour or two in between each coat.
Once you have your final coat, apply your choice of sealer to the wood.
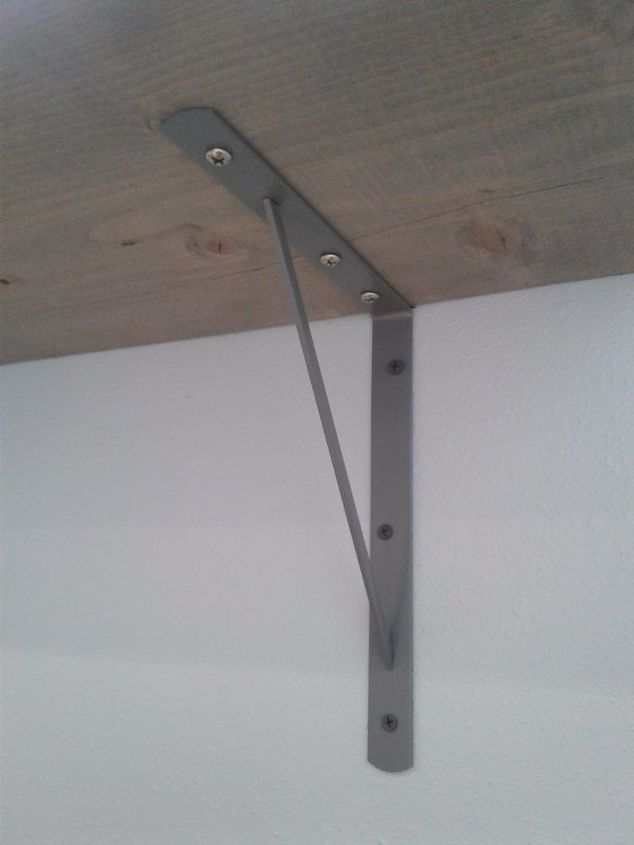
Now you need to locate and mark the studs in your wall so you can attach your brackets. I chose gray brackets because they blended in perfectly. Make sure for a project like this you use the sturdier brackets, usually located in the lumber department of your hardware store and not the brackets that are by the shelving - they are not strong enough to support the weight.
Now here is where you may need another person for help. Decide where exactly you want your counter to go and make little marks on your wall if you need to. Make sure you have your level handy to make sure your counter is level and straight with your window. I attached my breakfast counter so that the top of the counter was about 1" below my window trim.
Mark out the holes from your bracket onto the wall and then predrill those holes. Once you have your holes predrilled, attach your brackets to the wall with long screws. We used 3" screws to attach ours.
When you have your brackets attached, attach your counter top to your bracket. Make sure these screws are shorter so that you don't drill through the top of your counter.
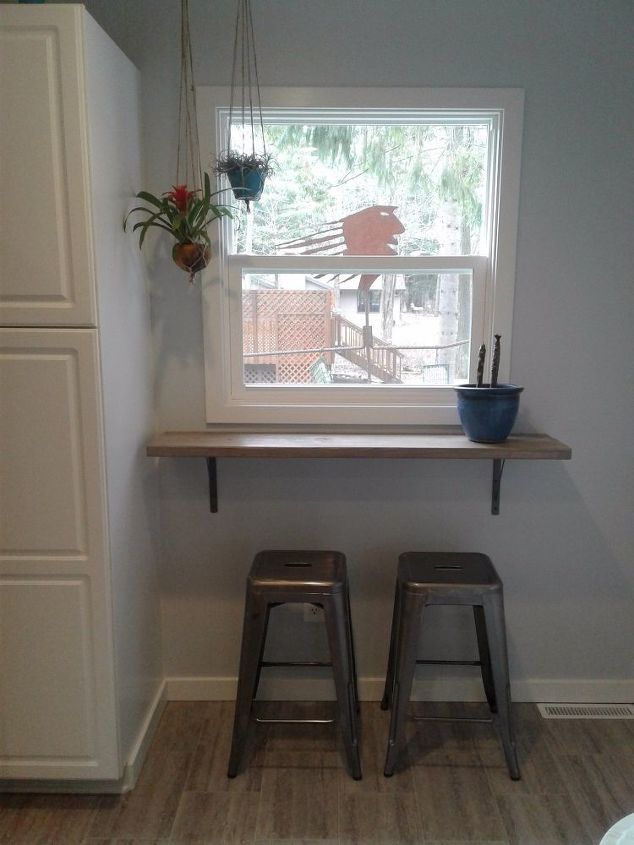
Then add some plants, stools and coffee and enjoy your new little kitchen spot.
The little guy outside my window is a metal art that my neighbor had given me when he moved and couldn't take it with him. We added a bunch of bird feeders to it so we could easily see the birds while we're sitting at the counter.
Want more great DIY's like this? visit CrazyDiyMom.com

Want more details about this and other DIY projects? Check out my blog post!
Comments
Join the conversation
1 comment
-
very useful and handy
partoclinic


Frequently asked questions
Have a question about this project?